
Durango 4WD V8-5.9L VIN Z (1998)
27.
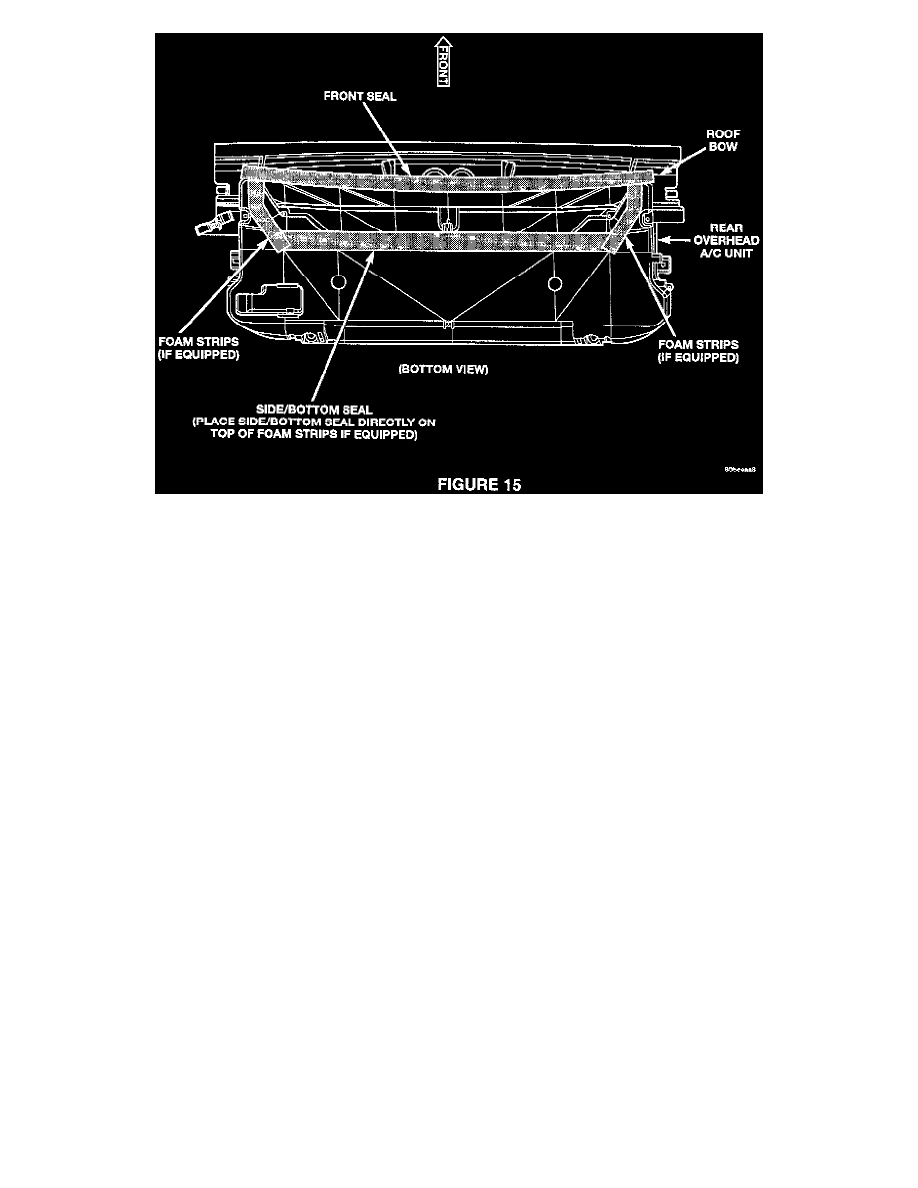
Clean the surface where the seals will be attached (Figure 15) with isopropyl alcohol.
28.
Apply the side/bottom seal by peeling a portion of the adhesive protective strip from the end of the seal p/n 55056018AA. Then, apply the end of
the seal to the area shown in Figure 15 and continue by peeling and applying the remainder of the foam seal.
NOTE:
ON SOME MODELS, A SMALL STRIP OF FOAM TAPE MAY BE PRESENT ON THE BOTTOM OF THE REAR A/C UNIT (FIGURE 15).
APPLY THE FOAM TAPE ON TOP OF THE EXISTING FOAM STRIPS IF EQUIPPED.
29.
Apply the front seal by peeling a portion of the adhesive protective strip from the end of the seal p/n 55056017AA. Then, apply the end of the seal
to the roof bow approximately one inch outside of the position of the side/bottom seal as shown in Figure 15 and continue by peeling and applying
the remainder of the foam seal to the roof bow.
30.
Push the headliner back into place and install the rear air conditioner outlet bezel.
31.
Connect the wire harness connector to the rear blower motor switch.
32.
Tuck the wiring harness for the rear blower motor switch back through the rear blower motor switch mounting hole in the headliner.
33.
Gently press the rear blower motor switch into the mounting hole in the headliner until the switch snaps into place.
34.
Position upper B-Pillar trim onto vehicle and press the trim inward to engage the spring clip retainers. Then, install the B-Pillar trim to the other
side of the vehicle.
35.
Install the front seat belt turning loop. Tighten the turning loop bolts to 39 N.m (29 ft. lbs.). Then, install the front seat belt turning loop to the
other side of the vehicle.
36.
Install the turning loop cover. Then, install the turning loop cover to the other side of the vehicle.
37.
If the vehicle is equipped with an overhead console, perform Steps 38 through 43. Proceed to Step 44 if the vehicle is not equipped with an
overhead console.
38.
Position the overhead console near the mounting location on the headliner.
39.
Reconnect the roof wire harness connector to the overhead console wire harness connector.
40.
Align the locating pin on the rear of the overhead console housing with the receptacle in the rear of the overhead console bracket.