
Durango 4WD V8-5.9L VIN Z (1998)
Expansion Valve: Service and Repair
FRONT
WARNING: REVIEW THE WARNINGS AND CAUTIONS BEFORE PERFORMING THE FOLLOWING OPERATION.
REMOVAL
1. Disconnect and isolate the battery negative cable.
2. Recover the refrigerant from the refrigerant system. See Refrigerant Recovery in the Service Procedures.
3. Remove the rear liquid line from the engine compartment. See Liquid Line in the Replacement for the procedures.
4. Remove the electronic cycling clutch switch from the outboard side of the expansion valve. See Electronic Cycling Clutch Switch in the
Replacement for the procedures.
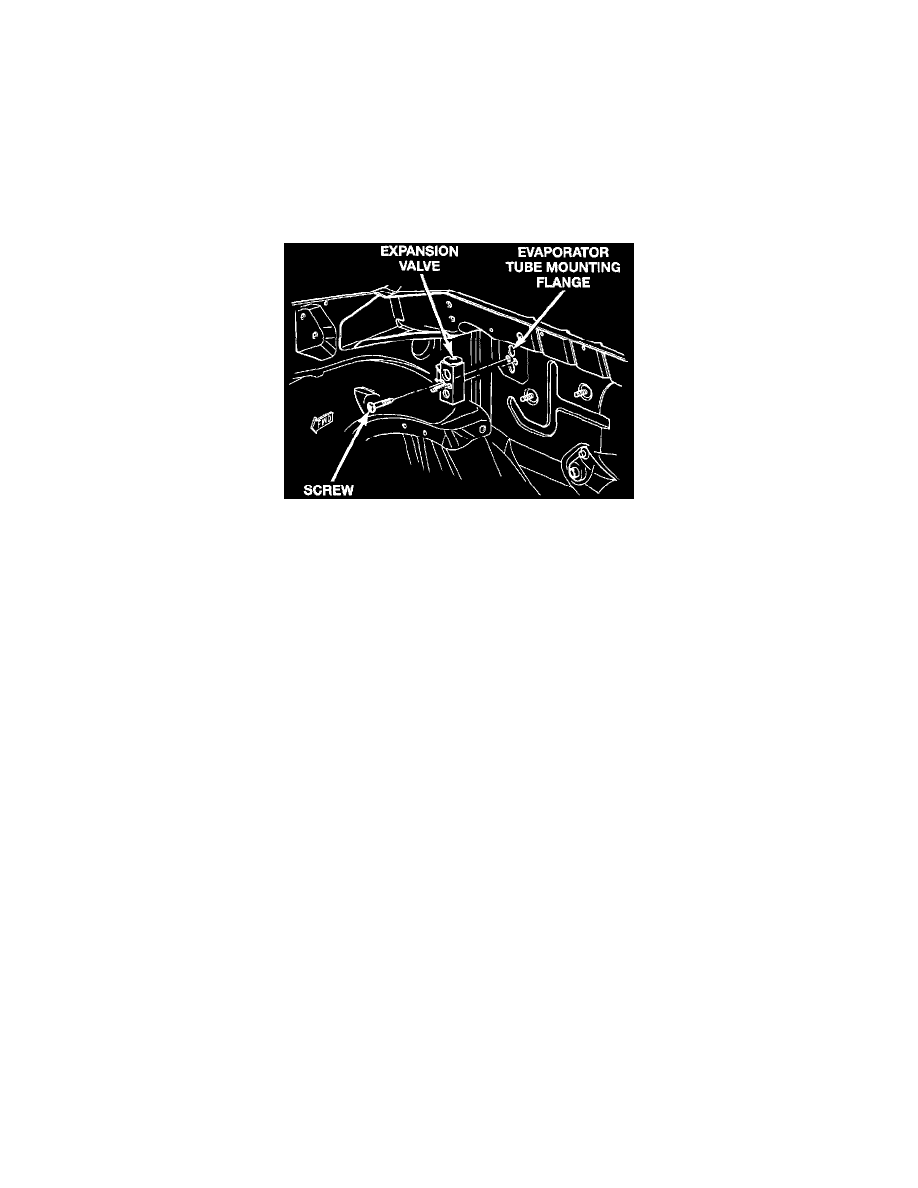
Expansion Valve Remove/Install
5. Remove the two screws that secure the expansion valve to the evaporator tube mounting flange.
6. Remove the expansion valve from the evaporator tube mounting flange. Install plugs in, or tape over all of the opened refrigerant line fittings.
INSTALLATION
1. Remove the tape or plugs from the evaporator tubes and the evaporator tube mounting flange side of the expansion valve. Install the expansion
valve to the evaporator tube mounting flange and secure with two screws. Tighten the mounting screws to 11.4 N.m (100 in. lbs.).
2. Reinstall the electronic cycling clutch switch to the outboard side of the expansion valve. See Electronic Cycling Clutch Switch in the
Replacement for the procedures.
3. Reinstall the rear liquid line to the engine compartment. See Liquid Line in the Replacement for the procedures.
4. Connect the battery negative cable.
5. Evacuate the refrigerant system. See Refrigerant System Evacuate in the Service Procedures.
6. Charge the refrigerant system. See Refrigerant System Charge in the Service Procedures.
REAR
WARNING: REVIEW THE WARNINGS AND CAUTIONS BEFORE PERFORMING THE FOLLOWING OPERATION.