
Durango 4WD V8-5.9L VIN Z (1998)
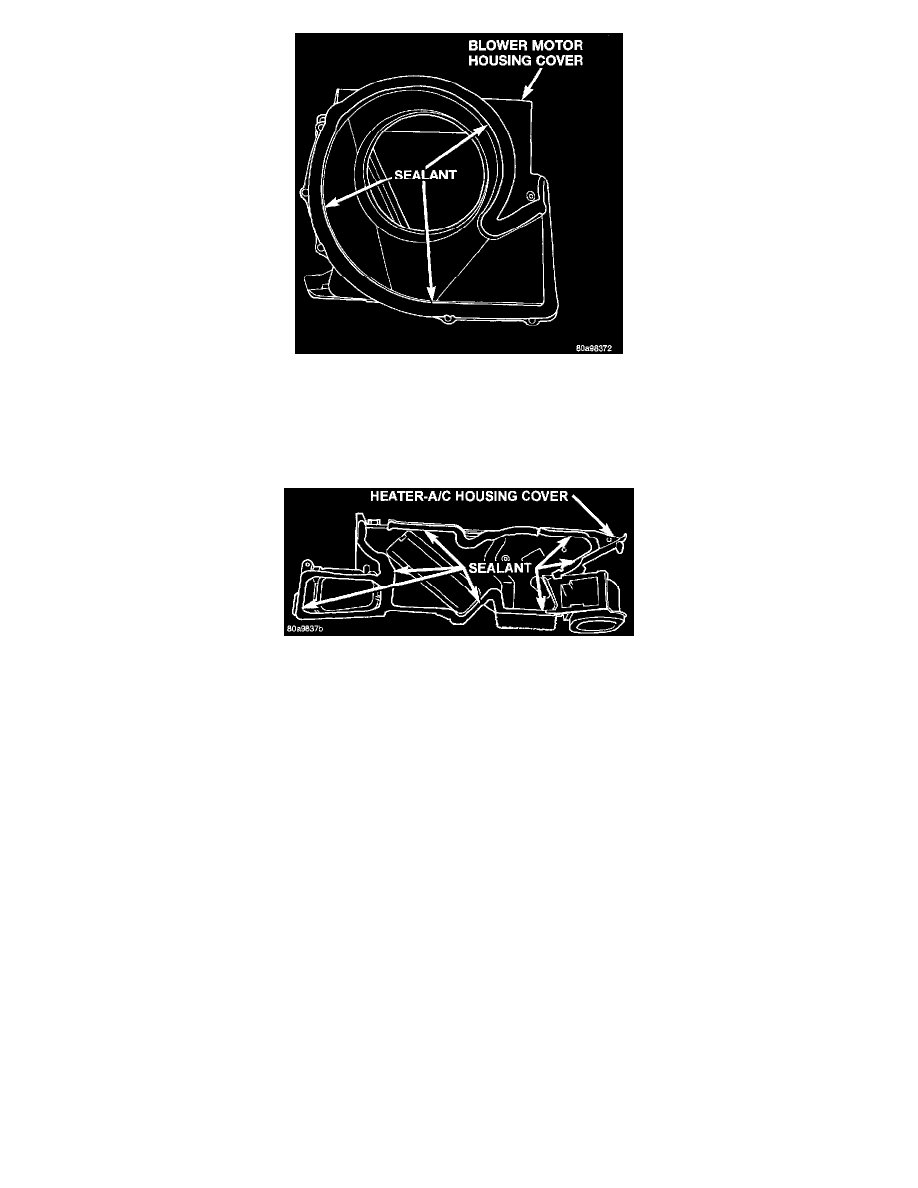
Blower Motor Housing Cover Sealant
1. Before installing the blower motor housing cover, be certain that the cover sealant is in place and in good condition.
2. Position the blower motor housing cover to the heater-A/C housing.
3. Install the six screws that secure the blower motor housing cover to the heater-A/C housing. Tighten the screws to 2.2 Nm (20 in. lbs.).
4. If the vehicle is so equipped, reinstall the recirculation air door actuator.
Heater A/C Housing Cover Sealant
5. Before installing the heater-A/C housing cover, be certain that the cover sealant is in place and in good condition.
6. Position the heater-A/C housing cover on the heater-A/C housing. Be certain that the pivots for the floor-defrost, the panel-defrost, the blend-air,
and the recirculation air (if the vehicle is so equipped) doors are properly positioned.
7. Reinstall the push nut that secures the heater- A/C housing cover to the heater-A/C housing post.
8. Install the thirteen screws that secure the perimeter of the housing cover to the heater-A/C housing. Tighten the screws to 2.2 Nm (20 in.lbs.).
9. Snap the panel-defrost door lever onto the panel-defrost door pivot shaft.
10. Install the blend-air door lever to the blend air door pivot shaft and secure it to the shaft with the nut.
11. Install the vacuum harness retainer into the hole near the left end of the heater-A/C housing cover.
12. Route the vacuum harness through the molded clips on the heater-A/C housing cover.
13. Turn the heater-A/C housing over on the work bench, with the heater-A/C housing cover facing down.
14. Install the two screws that secure the heater- A/C housing cover to the lower housing near the floor outlet. Tighten the screws to 2.2 Nm (20 in.
lbs.).
15. Position the floor duct to the bottom of the heater-A/C housing and secure with four screws. Tighten the screws to 2.2 Nm (20 in. lbs.).
16. Plug in the vacuum harness connector to the panel-defrost door actuator.
17. If the vehicle is so equipped, plug in the two vacuum harness connectors to the recirculation air door actuator.
18. Install the two screws that secure the heater- A/C housing cover to the top of the blower motor housing cover. Tighten the screws to 2.2 Nm (20
in. lbs.).
19. Reinstall the heater-A/C housing in the vehicle.