
Durango 4WD V8-5.9L VIN Z (1998)
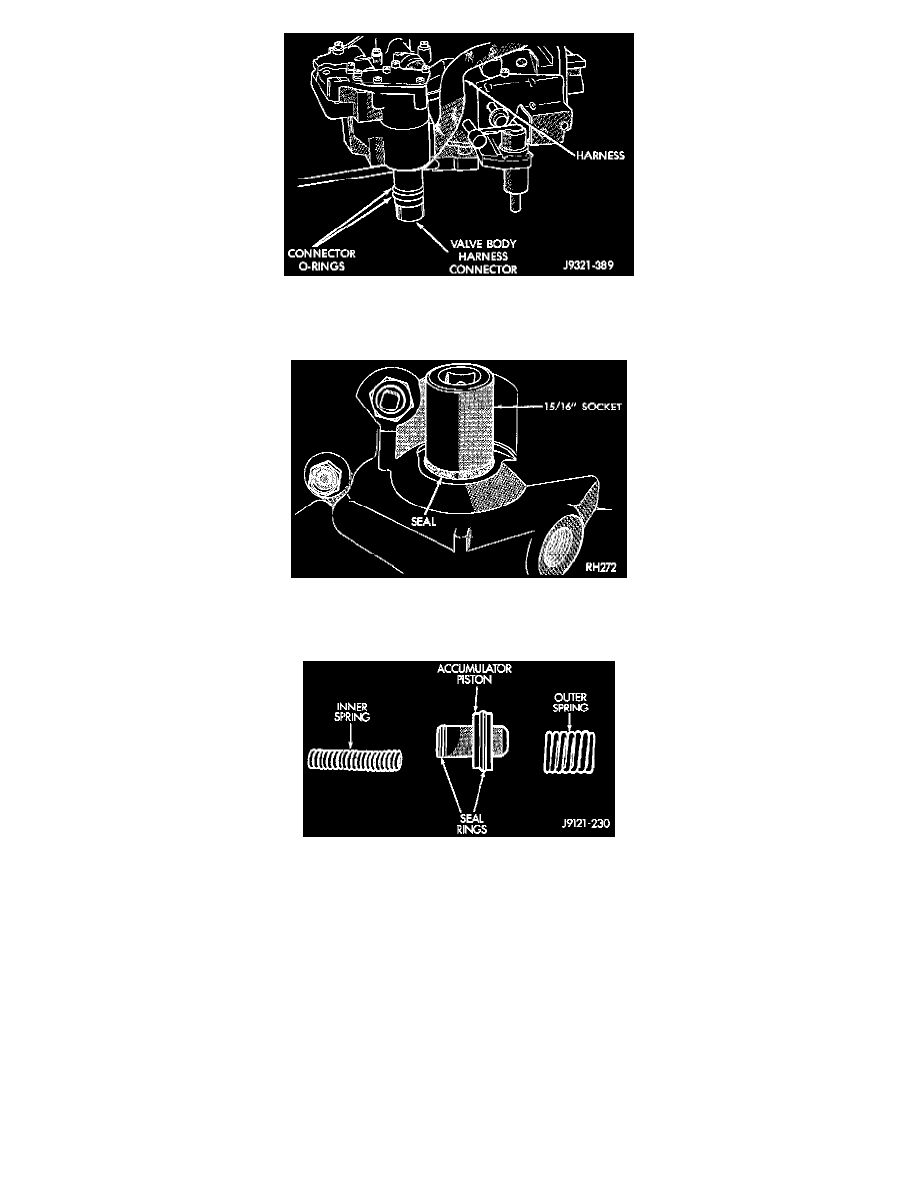
Valve Body Harness Connector O-Ring Seal
1. Check condition of O-ring seals on valve body harness connector. Replace seals on connector body if cut or worn.
Manual Lever Shaft Seal
2. Check condition of manual lever shaft seal in transmission case. Replace seal if lip is cut or worn. Install new seal with 15/16 deep well socket.
Accumulator Piston Components
3. Check condition of seals on accumulator piston. Install new piston seals, if necessary.
4. Place valve body manual lever in low (1 position) so ball on park lock rod will be easier to install in sprag.
5. Lubricate shaft of manual lever with petroleum jelly. This will ease inserting shaft through seal in case.
6. Lubricate seal rings on valve body harness connector with petroleum jelly.
7. Position valve body in case and work end of park lock rod into and through pawl sprag. Turn propeller shaft to align sprag and park lock teeth if
necessary. The rod will click as it enters pawl. Move rod to check engagement.
CAUTION: It is possible for the park rod to displace into a cavity just above the pawl sprag during installation. Make sure the rod is actually
engaged in the pawl and has not displaced into this cavity.
8. Install accumulator springs and piston into case. Then swing valve body over piston and outer spring to hold it in place.
9. Align accumulator piston and outer spring, manual lever shaft and electrical connector in case.
10. Then seat valve body in case and install one or two bolts to hold valve body in place.
11. Tighten valve body bolts alternately and evenly to 11 Nm (100 inch lbs.) torque.
12. Install new fluid filter on valve body. Tighten filter screws to 4 Nm (35 inch lbs.) torque.