
Durango 4WD V8-5.9L VIN Z (1998)
Valve Body: Service and Repair
Assembly
Assembly Precaution
CAUTION: Do not force valves or plugs into place during reassembly. If the valve body bores, valves and plugs are free of distortion or burrs, the
valve body components should all slide into place easily. In addition, do not overtighten the transfer plate and valve body screws during reassembly.
Overtightening can distort the housings resulting in valve sticking, cross leakage and unsatisfactory operation. Tighten valve body screws to
recommended torque only.
NOTE: Follow assembly steps in order shown for proper valve body assembly.
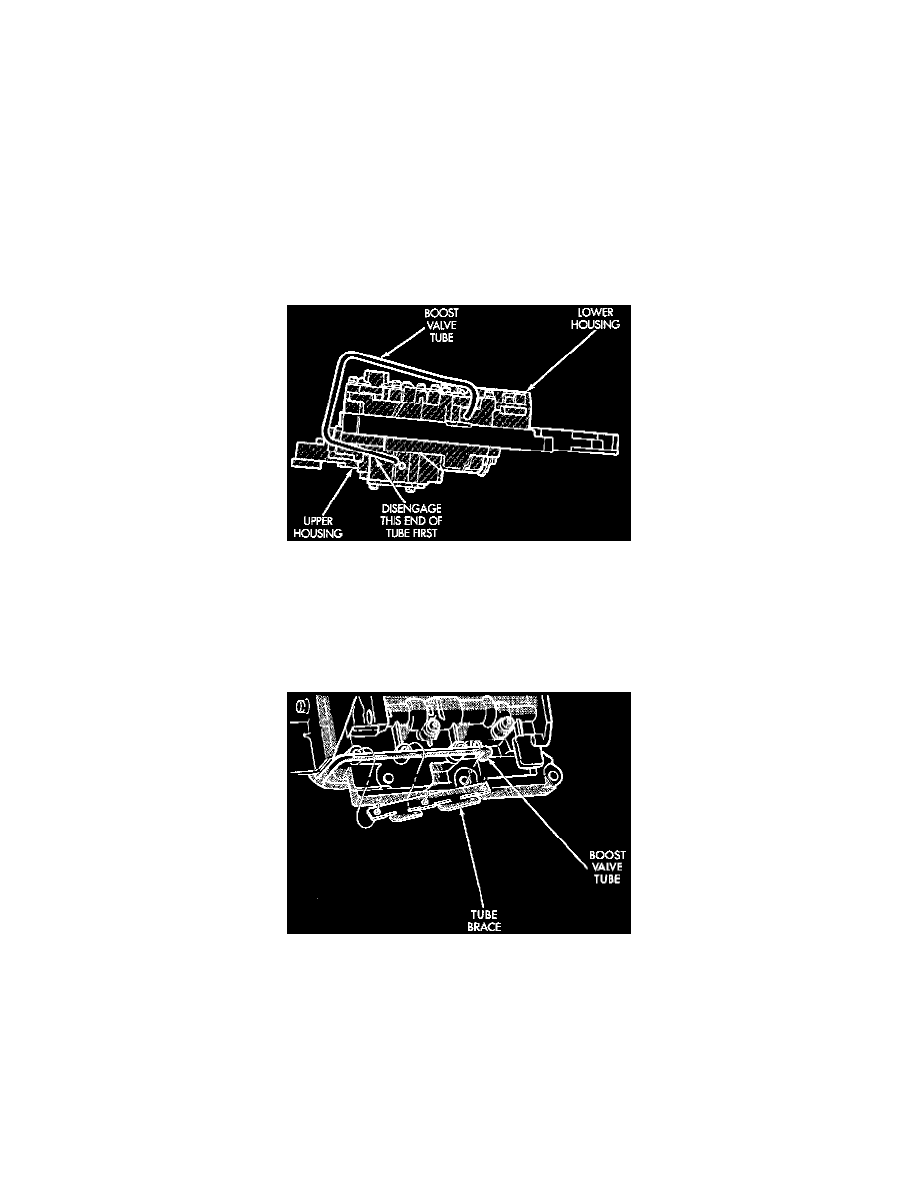
Boost Valve and Brace Assembly
Boost Valve Tube
1. Position valve body assembly so lower housing is facing upward.
2. Lubricate tube ends and housing ports with transmission fluid or petroleum jelly.
3. Start tube in lower housing port first. Then swing tube downward and work opposite end of tube into upper housing port.
4. Insert and seat each end of tube in housings.
Boost Valve Tube And Brace
5. Slide tube brace under tube and into alignment with valve body screw holes.
6. Install and finger tighten three screws that secure tube brace to valve body housings.