
Intrepid V6-2.7L VIN R (2003)
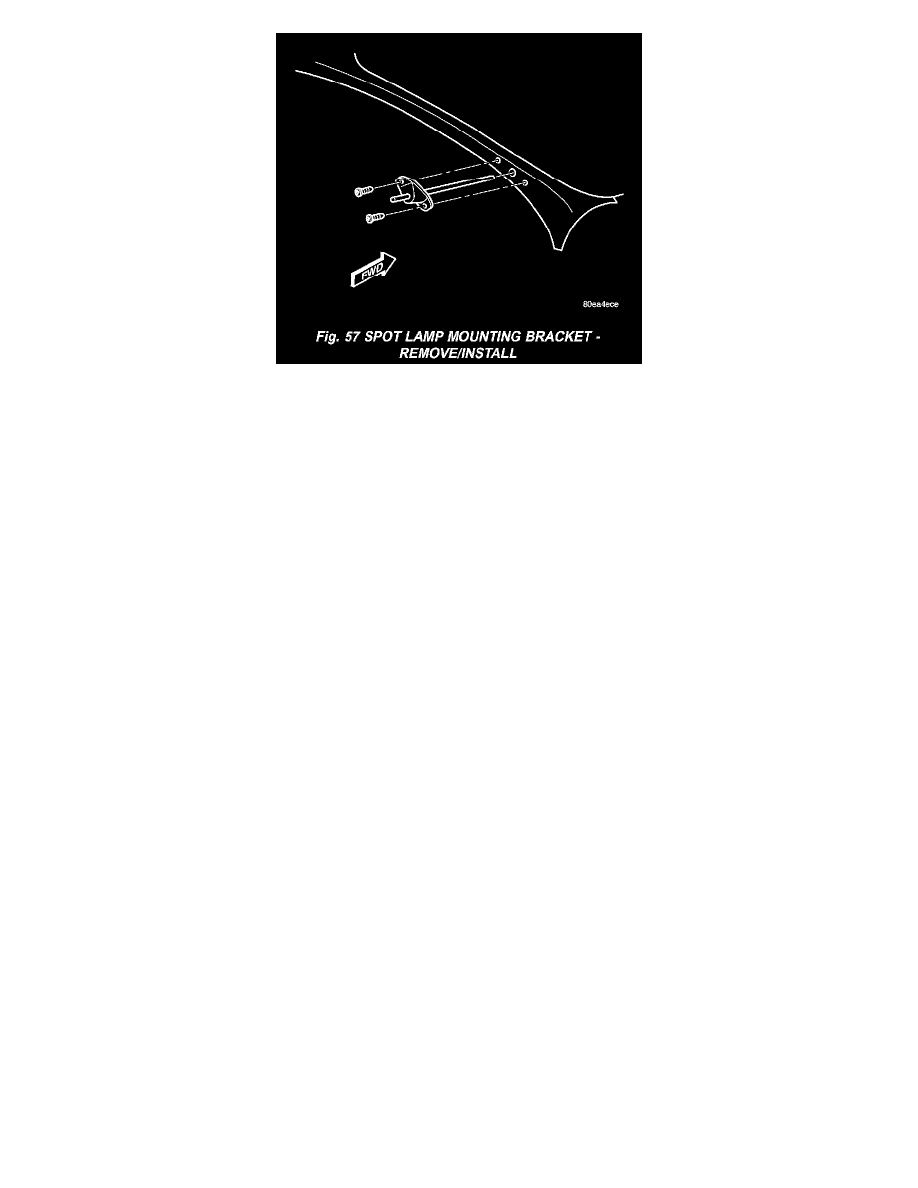
Fig.57 Spot Lamp Mounting Bracket - Remove/Install
12. Remove the screws retaining the spot lamp mounting bracket to the A-pillar (Fig. 57).
13. Remove the spot lamp outer tube and mounting bracket from the A-pillar (Fig. 57).
INSTALLATION
CAUTION: Make sure that fuse F (master spot lamp feed) or either fuse X or Y (left or right spot lamp feed) are removed from the Power
Distribution Center (PDC) before performing service on the spot lamps.
1. Install the spot lamp outer tube and mounting bracket to the A-pillar (Fig. 57).
2. Install the screws retaining the spot lamp mounting bracket to the A-pillar (Fig. 57) and tighten to 33 N.m (29 in. lbs.).
3. Carefully lift the edge of the secondary door seal along the windshield pillar to expose the spot lamp outer tube and apply a small amount of clear
silicone sealer to the base of the outer tube.
4. Carefully install the spot lamp head with the intermediate and inner shafts to the outer tube and mounting bracket until the head assembly bottoms
out on the outer tube (Fig. 56).
5. Tighten the clamp screw at the base of the spot lamp head assembly in small incriments while testing the effort required to rotate the spot lamp
between the stowed and operating positions. Stop tightening the clamp screw when the spot lamp can maintain any desired position (Fig. 55).
6. Position the A-pillar trim to the spot lamp outer tube.
CAUTION: Support the head of the spot lamp while tightening the head assembly clamp screw. Maintain an operating or vertical position.
7. Install the handle to the outer tube.
a. Position the spot lamp handle in the operating (downward close to vertical) position to the outer tube.
b. There are two detent positions to which the handle must line up and engage. Rotate the knob of the handle and the handle base to aid in
engaging each of the detents. Using the wedge nut opening on the handle for visual aid, rotate the handle as necessary while installing, in order
to bring the flat detent on the intermediate shaft into view along the bottom of the opening.
8. Tighten the bolt retaining the handle to the outer tube (Fig. 54) and tighten to 6.5 N.m (58 in. lbs.).
9. Connect the spot lamp electrical connector (Fig.53).
10. Install the instrument panel endcap.
11. Install the A-pillar trim.
12. Install the X or Y fuse, depending on which spot lamp is being serviced.
13. Inspect the operation of the spot lamp to ensure that the range of movement is correct.
-
Using the handle, rotate the spot lamp from the operating position to the stowed position and back. Ensure that the lamp will maintain the
desired position. The stowed position should be just above the windshield and the operating position should be vertical to slightly outboard.
-
Using the knob of the handle, rotate the head of the spot lamp around on its axis. The spot lamp must rotate 360 degrees on its axis.
14. If the spot lamp head does not rotate 360 degrees on its axis, or if excessive effort is required to rotate the lamp head on its axis, perform the
following:
a. Remove the handle and inspect for damage to the inner shaft and the gears in the handle. Repair or replace as necessary.
b. If no damage is present to the inner shaft or the gears in the handle, reinstall the handle and reinspect the operation of the lamp.
c. If the spot lamp head still does not properly rotate 360 degrees on its axis, remove the cover from the end of the spot lamp head assembly and
inspect for damage to the gears in the head assembly. Repair or replace as necessary.