Journey AWD V6-3.5L (2009)

NOTE: Manual temperature system shown. Automatic system similar.
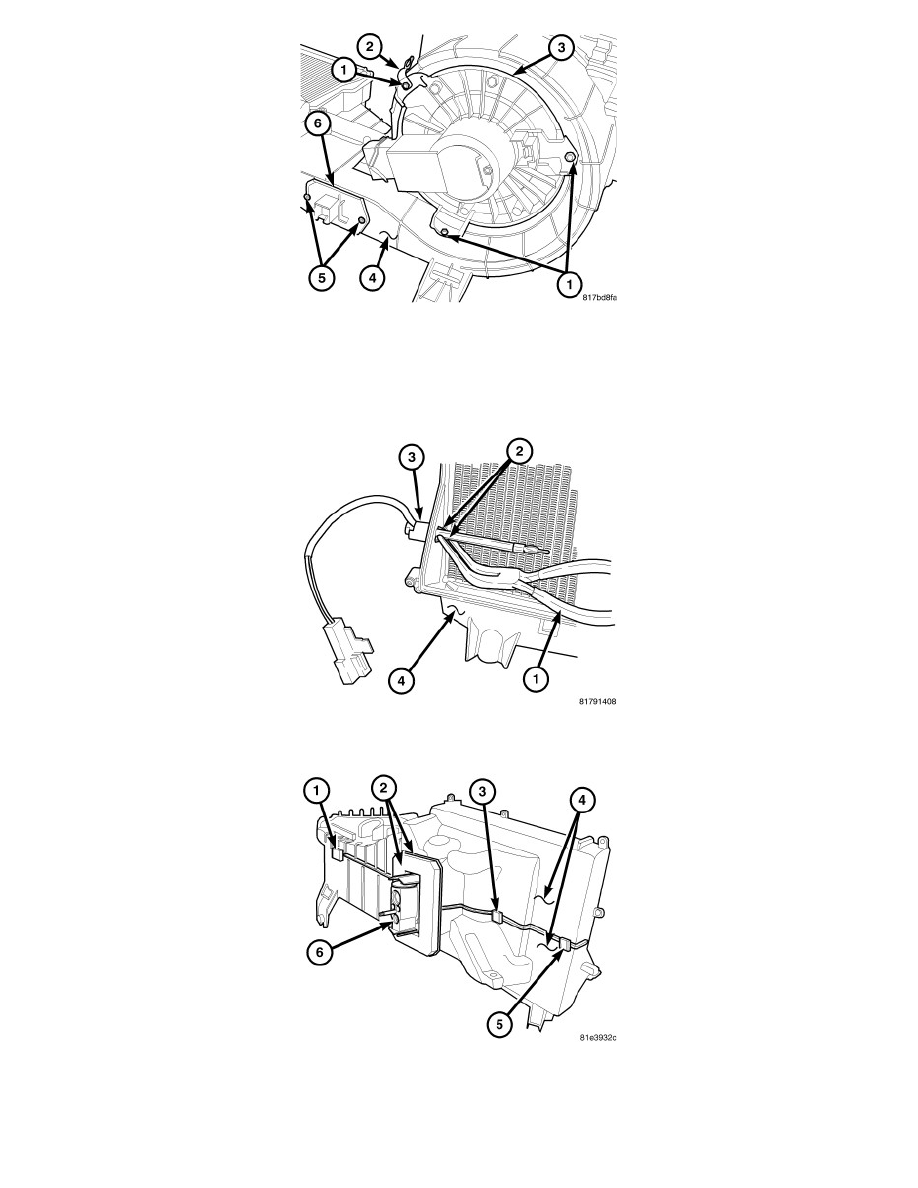
4. Remove the three screws (1) that secure the wire lead bracket (2) and the blower motor (3) to the bottom of the HVAC housing (4) and remove the
blower motor and wire lead bracket.
5. Remove the two screws (5) that secure the blower motor resistor or power module (6) to the bottom of the HVAC housing and remove the resistor
or power module.
6. Using needle nose pliers (1), disengage the two retaining tabs (2) that secure the evaporator temperature sensor (3) to the driver side of the HVAC
housing (4) and remove the sensor.
NOTE: If the foam seal or plastic flange is deformed or damaged, it must be replaced.
7. Remove the two bolts that secure the A/C expansion valve (6 to the A/C evaporator and remove the valve See: Expansion Valve/Service and
Repair/A/C Expansion Valve - Removal.
8. Remove and discard the O-ring seals and install plugs in, or tape over the opened expansion valve and evaporator tube ports.
