
Journey AWD V6-3.5L (2009)
9. Remove the foam seal and plastic flange (2) from the front of the two halves of the HVAC housing (4). Carefully release the four retaining tabs
located at the back of the flange and pull the flange off of the evaporator tubes. If the seal or flange is deformed or damaged, it must be replaced.
10. Remove the nine screws (3) and three metal clips (5) that secure the two halves of the HVAC housing together.
11. Disengage the nine plastic retaining tabs (1) that secure the two halves of the HVAC housing together and separate the housing.
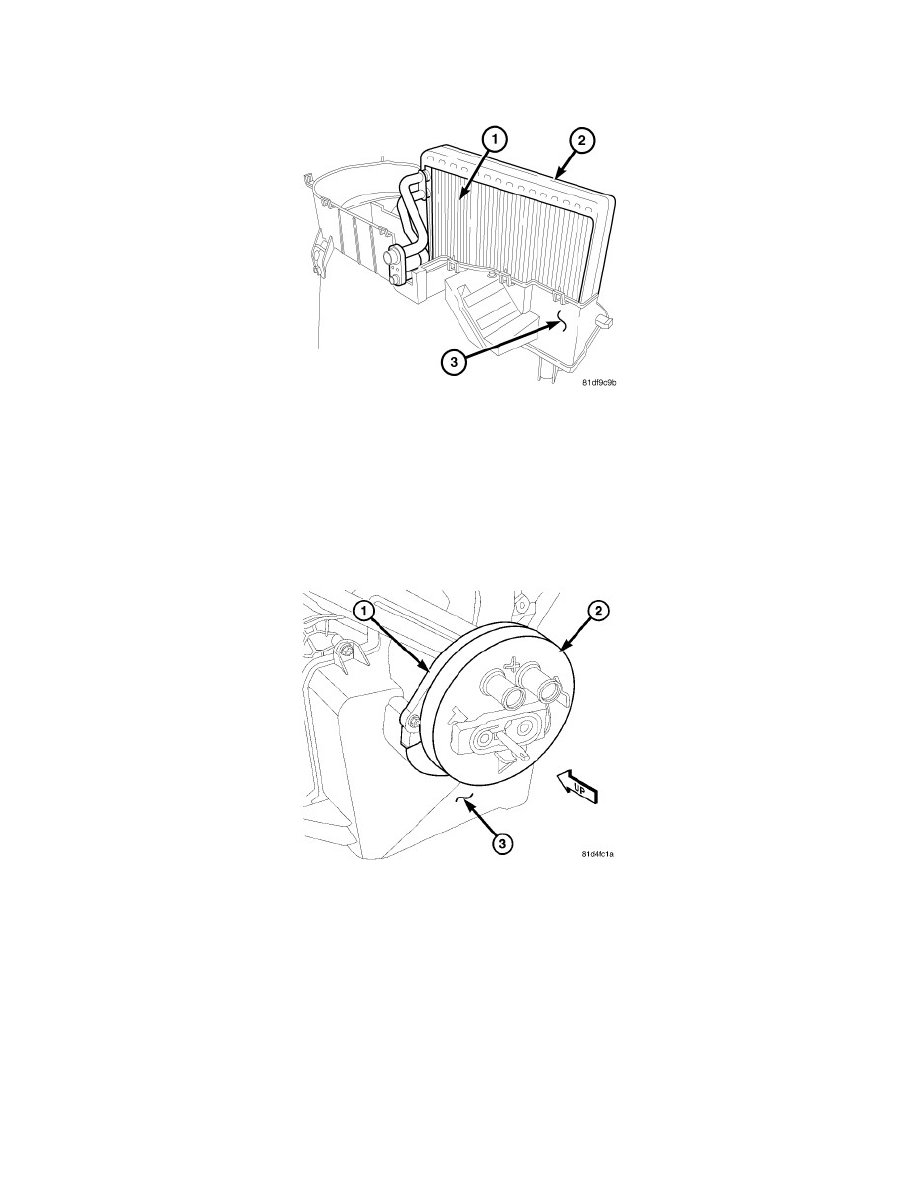
12. Carefully lift the A/C evaporator (1) and the foam insulator (2) out of the lower half of the HVAC housing (3).
Rear HVAC Housing
DISASSEMBLY
NOTE: The rear heater-A/C housing must be removed from the vehicle for service of the mode door actuator and blend door actuator and it
must be disassembled for service of the A/C evaporator and the heater core. The blend-air door and mode-air door are only serviced
with the respective housing.
1. Disconnect and isolate the negative battery cable.
2. Remove the rear heater-A/C housing and place it on a workbench See: Removal and Replacement/Rear HVAC Housing Removal.
3. Remove the rear blower motor resistor or power module (depending on application) or See: Control Module HVAC/Service and Repair/Rear
Blower Motor Power Module - Removal.
4. Remove the rear blower motor .
5. Remove the foam seal (2) from the flange (1) located at the bottom of the rear heater-A/C housing (3). If the foam seal is deformed or damaged, it
must be replaced.