
Nitro 2WD V6-4.0L (2007)
f.
Slide the connector back cover down the wires and snap it into place on the backside of the black TIPM connector (Figure 15).
CAUTION:
Be sure not to kink or fold over any of the wires when
sliding the connector back cover into place.
g. Partially pull out the red terminal lock in the black TIPM connector about 1/4 inch.
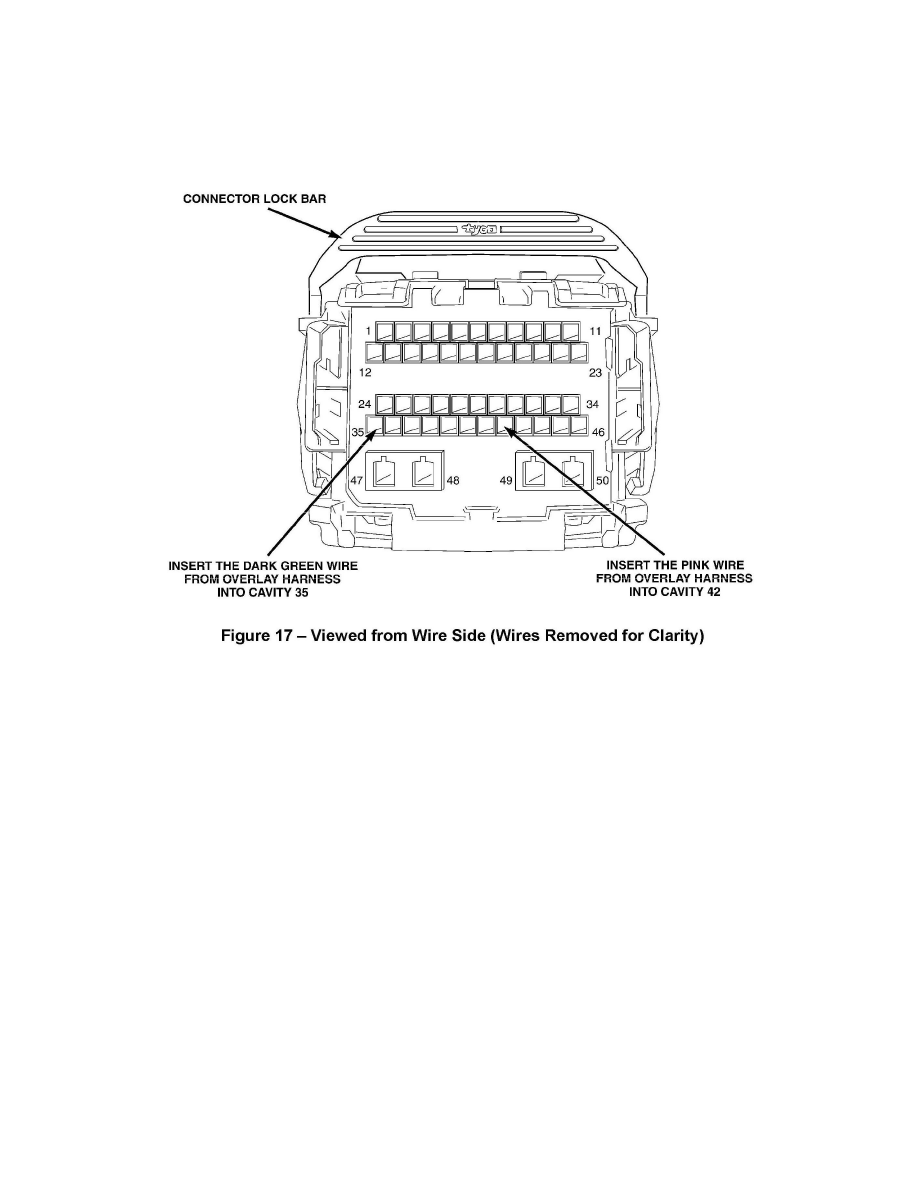
h. Carefully insert the dark green wire from the overlay wiring harness into cavity 35 (Figure 17).
CAUTION:
Do not force the terminal into the connector. It is keyed and
will only install in one direction.
i.
Carefully insert the pink wire from the overlay wiring harness into cavity 42 (Figure 17).
CAUTION:
Do not force the terminal into the connector. It is keyed and will only install in one direction.
j.
Push the red terminal lock into the connector to lock the terminals.
k. Apply electrical tape around the black TIPM connector wiring.
7. Install and lock all removed electrical connectors into the TIPM.
8. Install the TIPM into its mounting bracket.