
RAM 1500 Truck 4WD V8-5.9L VIN Z (2002)
Oil Pan: Service and Repair
OIL PAN
REMOVAL
1. Disconnect the negative cable from the battery.
2. Remove engine oil dipstick.
3. Raise vehicle.
4. Drain engine oil.
5. Remove exhaust pipe.
6. Remove left engine to transmission strut.
7. Loosen the right side engine support bracket cushion thru-bolt nut and raise the engine slightly Remove oil pan by sliding backward and out.
8. Remove the one-piece gasket.
CLEANING
Clean the block and pan gasket surfaces.
Trim or remove excess sealant film in the rear main cap oil pan gasket groove. DO NOT remove the sealant inside the rear main cap slots.
If present, trim excess sealant from inside the engine.
Clean oil pan in solvent and wipe dry with a clean cloth.
Clean oil screen and pipe thoroughly in clean solvent. Inspect condition of screen.
INSPECTION
Inspect oil drain plug and plug hole for stripped or damaged threads. Repair as necessary.
Inspect oil pan mounting flange for bends or distortion. Straighten flange, if necessary.
INSTALLATION
1. Clean the block and pan gasket surfaces.
2. Trim or remove excess sealant film in the rear main cap oil pan gasket groove. DO NOT remove the sealant inside the rear main cap slots.
3. If present, trim excess sealant from inside the engine.
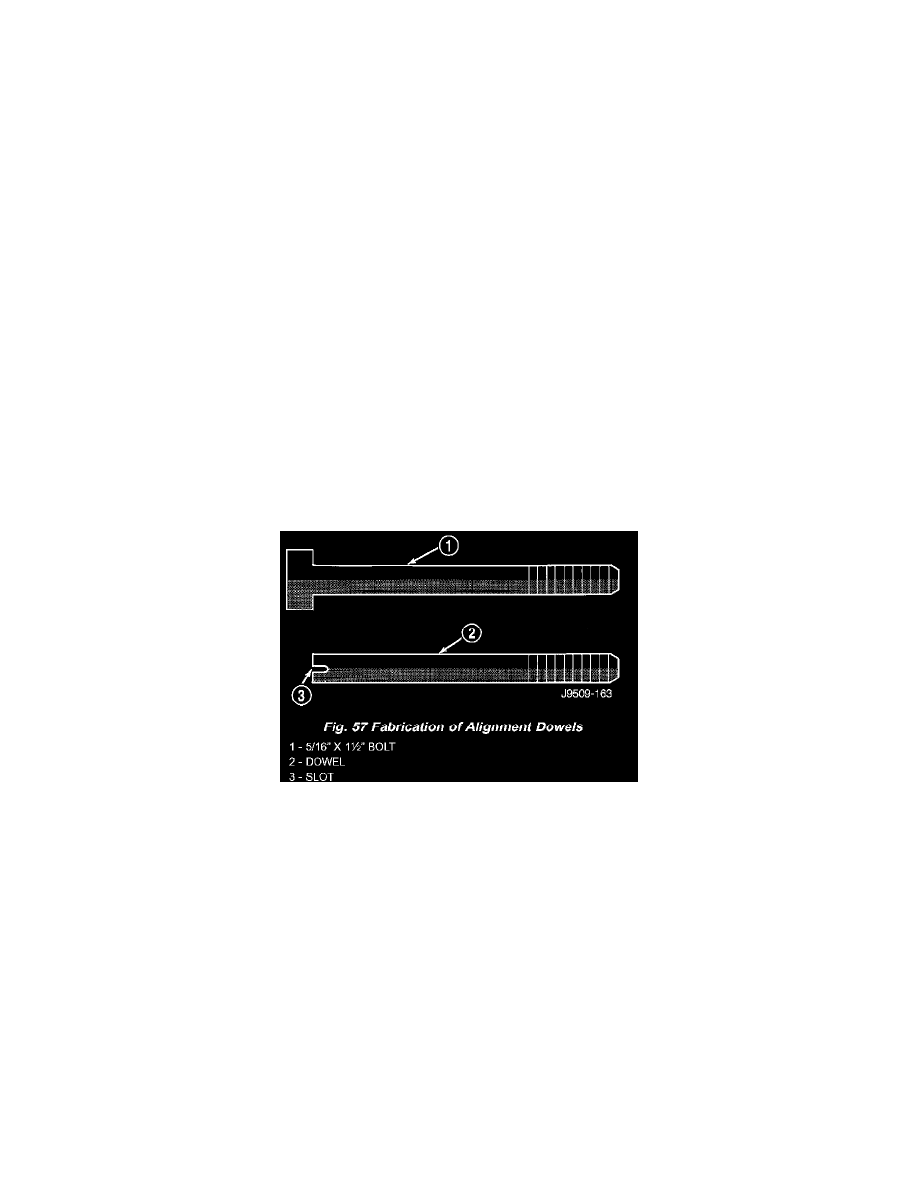
4. Fabricate 4 alignment dowels from 5/16 x 1 1/2 inch bolts. Cut the head off the bolts and cut a slot into the top of the dowel. This will allow easier
installation and removal with a screwdriver (Fig. 57).