
RAM 1500 Truck 4WD V8-5.9L VIN Z (2002)
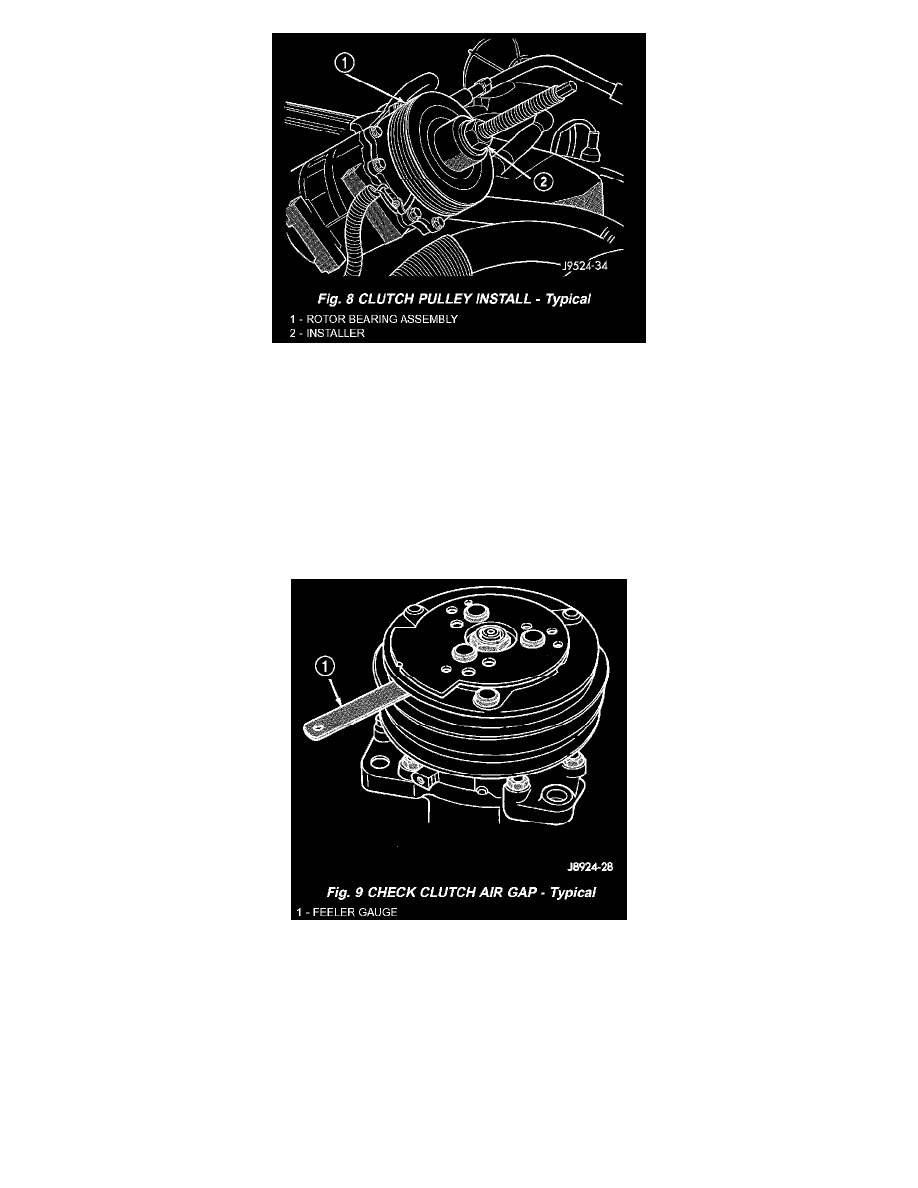
Fig. 8 Clutch Pulley Install - Typical
4. Install the rotor bearing assembly with the installer (Special Tool C-6871 or equivalent). Thread the installer on the shaft, then turn the nut until
the rotor assembly is seated.
5. Install the external front housing snap ring with snap ring pliers. The bevel side of the snap ring must be facing outward. Press the snap ring to
make sure it is properly seated in the groove.
CAUTION: If the snap ring is not fully seated in the groove it will vibrate out, resulting in a clutch failure and severe damage to the front housing
of the compressor.
6. Install the original clutch shims on the compressor shaft.
7. Install the clutch plate. Install the shaft hex nut and tighten to 15 - 20 Nm (11 - 15 ft. lbs.).
Fig. 9 Check Clutch Air Gap - Typical
8. Check the clutch air gap with a feeler gauge. If the air gap does not meet the specification, add or subtract shims as required. The air gap
specification is 0.41 to 0.79 millimeter (0.016 to 0.031 inch).
NOTE: The air gap is determined by the spacer shims. When installing an original, or a new clutch assembly, try the original shims first. When
installing a new clutch onto a compressor that previously did not have a clutch, use a 1.0, 0.50, and 0.13 millimeter (0.040, 0.020, and 0.005
inch) shims from the new clutch hardware package that is provided with the new clutch.
9. To complete the procedure.