
RAM 1500 Truck 4WD V8-5.9L VIN Z (2002)
-
THE DRIVER AIRBAG TRIM COVER MUST NEVER BE PAINTED. REPLACEMENT TRIM COVERS ARE SERVICED IN THE
ORIGINAL COLORS. PAINT MAY CHANGE THE WAY IN WHICH THE MATERIAL OF THE TRIM COVER RESPONDS TO AN
AIRBAG DEPLOYMENT. FAILURE TO OBSERVE THIS WARNING COULD RESULT IN OCCUPANT INJURIES UPON AIRBAG
DEPLOYMENT.
1. Disconnect and isolate the battery negative cable. Wait two minutes for the system capacitor to discharge before further service.
2. Remove the driver airbag from the steering wheel (Refer to RESTRAINTS/ DRIVER AIRBAG - REMOVAL).
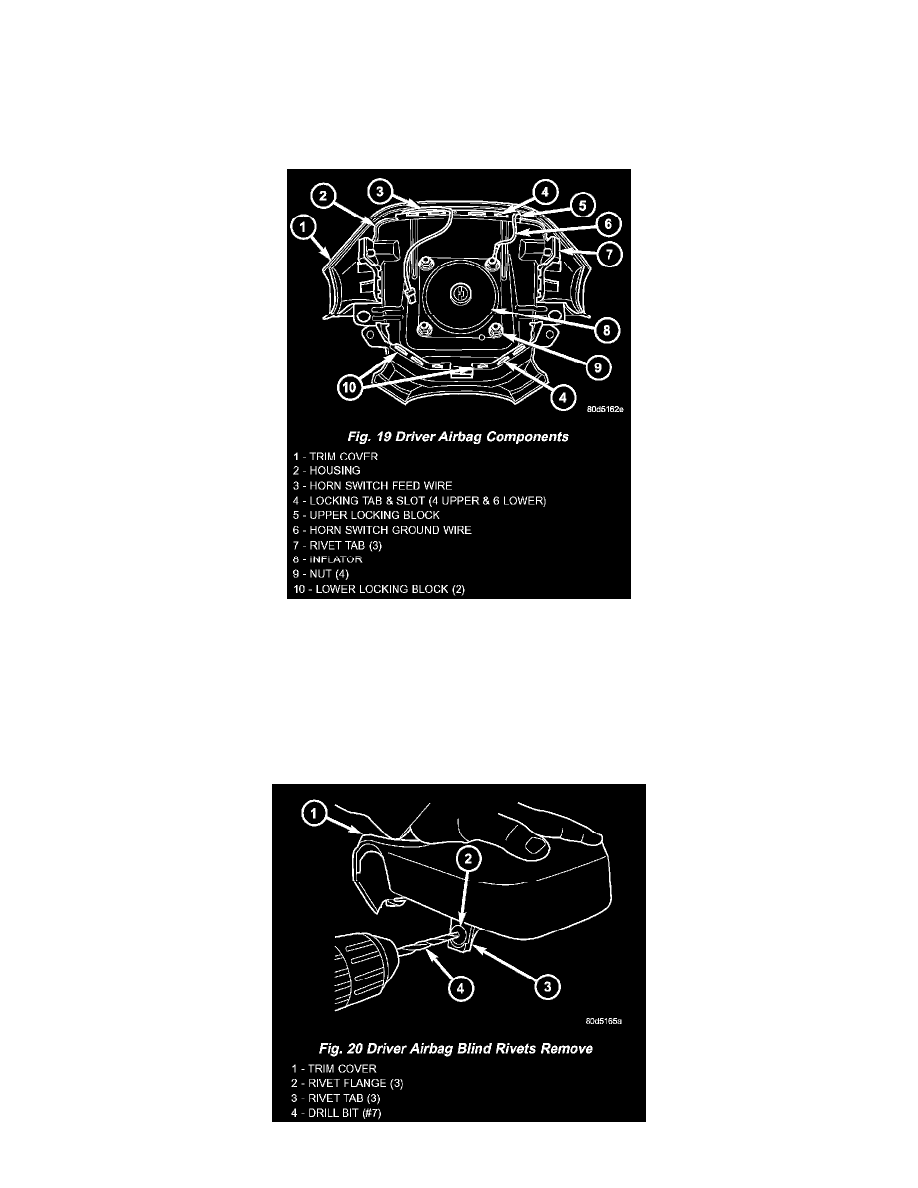
Fig. 19 Driver Airbag Components
3. Place the driver airbag on a suitable work surface with the trim cover facing down.
4. Disengage both horn switch pigtail wires from the routing slots in the upper locking block of the trim cover.
5. Remove the nut and washer that secures the horn switch ground pigtail wire eyelet terminal to the upper left inflator stud on the back of the driver
airbag housing.
6. Remove the horn switch ground pigtail wire eyelet terminal from the upper left inflator stud on the back of the driver airbag housing.
7. Turn the driver airbag unit over on the work surface (trim cover side up) to prevent metal shavings from entering and becoming entrapped in the
folded airbag cushion beneath the trim cover.