Eagle L4-150 2.5L (1983)

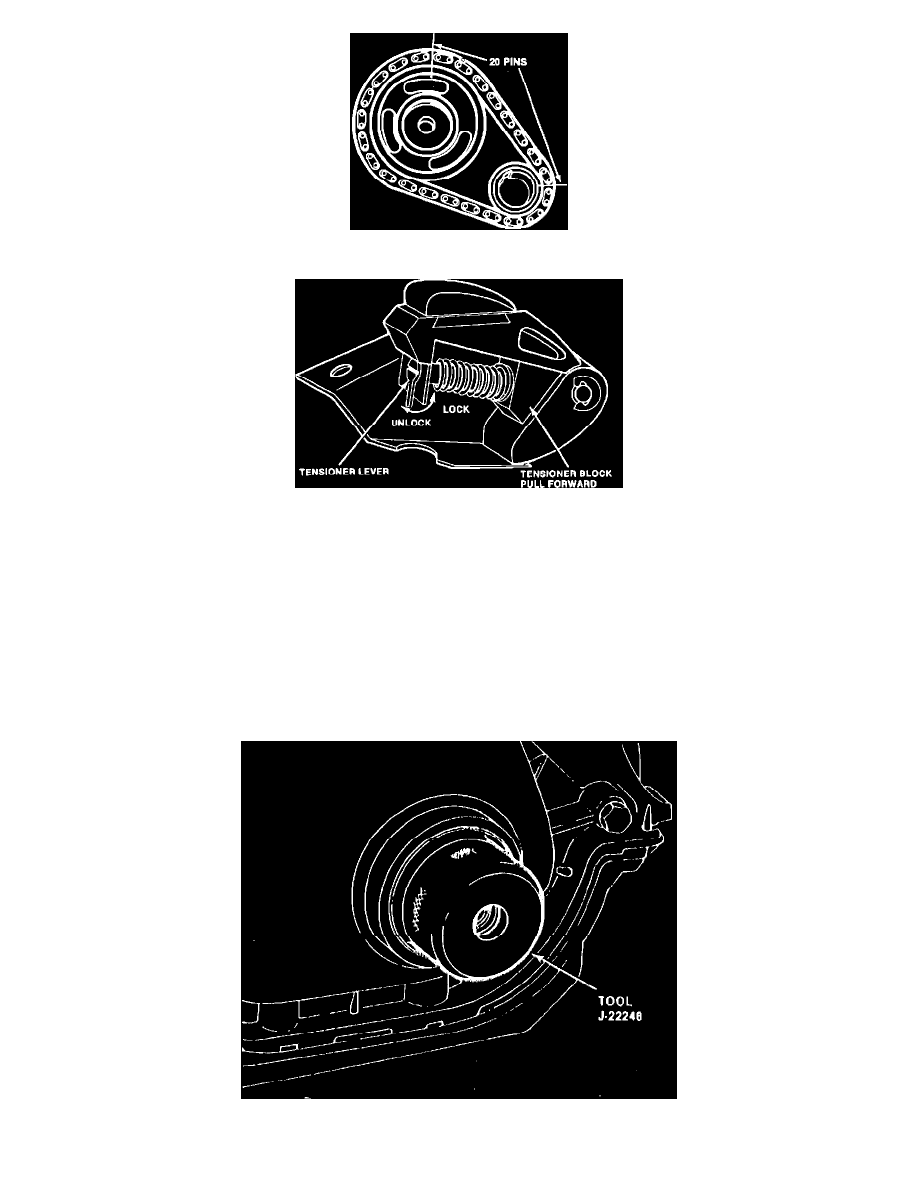
Fig. 8 Timing chain installation check. 4-150
Fig. 9 Position timing chain tensioner in the unlock position. 4-150
INSTALLATION
1. Install crankshaft sprocket, camshaft sprocket and timing chain as an assembly. Ensure crankshaft and camshaft sprocket timing marks are aligned.
2. Install camshaft sprocket retaining bolt and washer. Torque camshaft sprocket retaining bolt to 50 ft. lbs. To verify correct installation of timing
chain, rotate crankshaft to position camshaft sprocket timing mark at one o'clock. The crankshaft sprocket timing mark should now be at the three
o'clock position. There should be 20 timing chain pins between the timing marks of both sprockets.
3. Install timing chain tensioner as follows:
a. Turn tensioner lever to unlock (down) position.
b. Pull tensioner block toward tensioner lever. Hold tensioner block and turn tensioner lever to lock (up) position.
c. Install timing chain tensioner on cylinder block and torque bolts to 14 ft. lbs.
d. Turn timing chain lever to unlock (down) position. Ensure tensioner is released before installing timing chain cover.
4. Install oil slinger.
Fig. 10 Using tool No. J-22248 to align timing case cover. 4-150
