
Talon FWD L4-1997cc 2.0L DOHC Turbo VIN F SMFI (1998)
INSTALLATION SERVICE POINTS
For installation reverse steps in image and note the following:
Step 5 -- Heater Control Assembly Removal
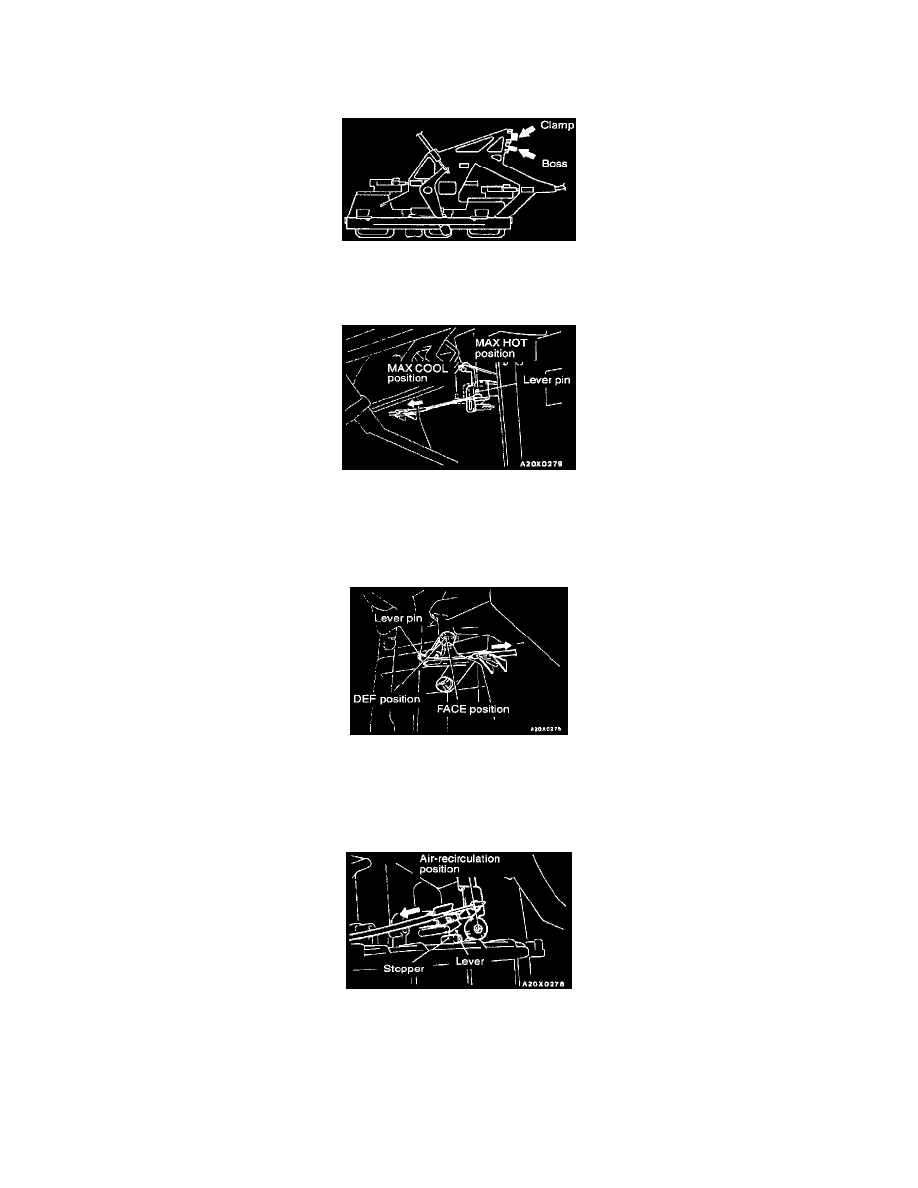
1. Always snap the boss and clamp before installing a new heater control assembly to the instrument panel.
NOTE: The boss and clamp are needed for assembly line at the factory, but not needed for service work.
2. Set the temperature control knob on the heater control assembly to MAX HOT.
3. Set the air mix damper lever at the upper part of the heater unit to the MAX HOT position, and install the cable to the lever pin.
4. Push the outer cable in the direction of the arrow so that there is no looseness, and then secure it with the clip.
5. Set the knob for the air outlet changeover on the heater control assembly to the DEF position.
6. Set the air outlet changeover damper lever of the heater unit to DEF position and install the cable to the lever pin.
7. Push the outer cable in the direction of the arrow so that there is no looseness, and then secure it with the clip.
8. Set the lever for the inside/outside air changeover on the heater control assembly to the air-recirculation position.
9. Set the inside/outside air changeover damper lever of the blower unit to air-recirculation position with the inside/outside air changeover damper
lever touched to the stopper of the blower case and install the cable to the lever pin.
10. Push the outer cable in the direction of the arrow so that there is no looseness, and then secure it with the clip.
INSPECTION