
Vision V6-201 3.3L (1993)
1. Clean all surfaces of cylinder block and cylinder heads.
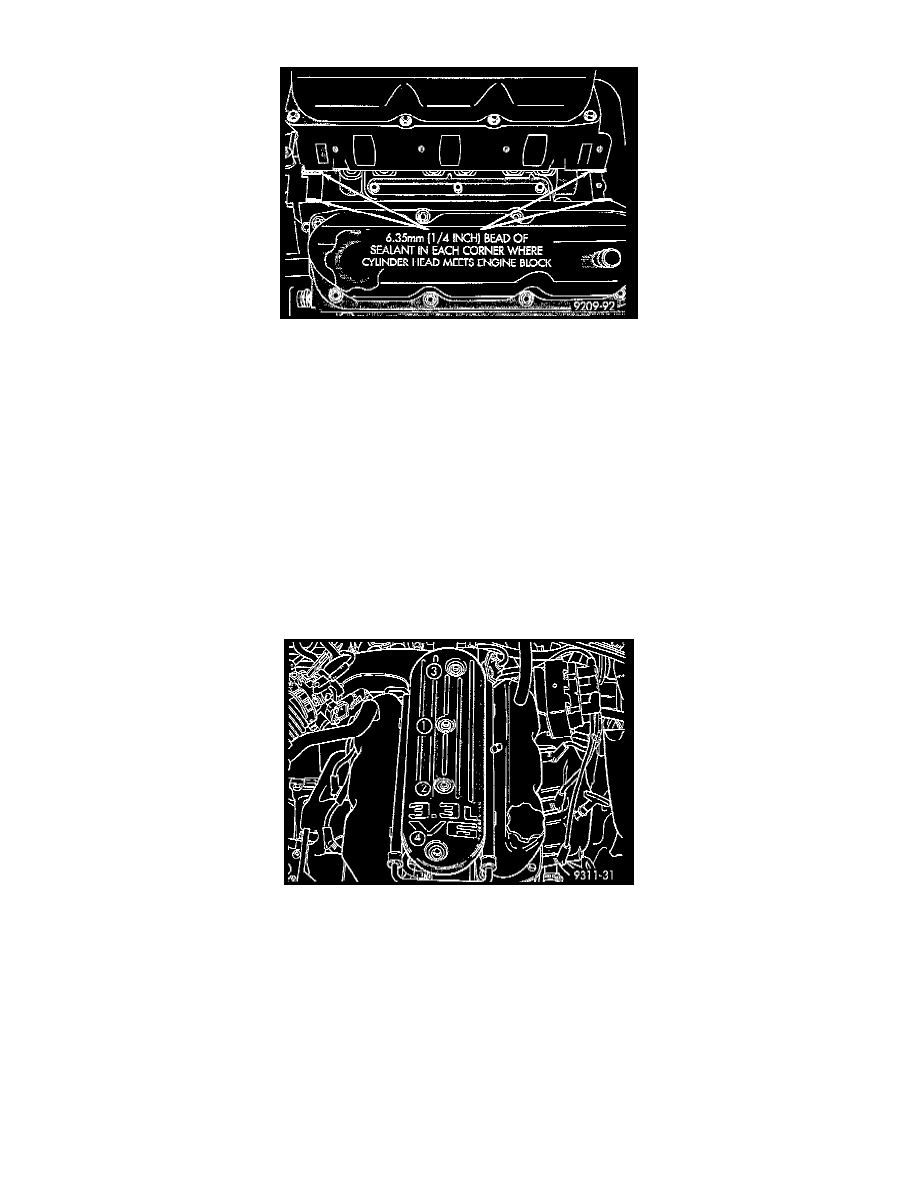
Fig. 23 Intake Manifold Gasket Sealing
2. Place a drop (about 1/4 in. diameter) of Mopar Silicone Rubber Adhesive Sealant or equivalent, onto each of the four manifold to cylinder head
gasket corners Fig. 23.
WARNING: Intake manifold gasket is made of very thin metal and may cause personal injury. Handle with care.
3. Carefully install the intake manifold gasket Fig. 22. Tighten end seal retainer screws to 12 Nm (105 in.lbs.) torque.
4. Install intake manifold and 8 bolts and tighten to 1 Nm (10 in.lbs.) torque. Then tighten bolts to 22 Nm (200 in.lbs.) torque in sequence shown in
Fig. 21. Then tighten again to 22 Nm (200 in.lbs.) torque. After intake manifold is in place, inspect to make sure seals are in place.
5. Apply a light coating of clean engine oil to the 0-ring on the nozzle end of each injector.
6. Insert fuel injector nozzles into openings in intake manifold. Seat the injectors in place. Tighten fuel rail mounting screws to 22 Nm (200 in.lbs.)
torque.
7. Attach electrical connectors to fuel injectors.
8. Connect fuel supply and return tubes to fuel rail. Place clamp over fuel tubes and install retaining screw.
9. Remove cover from intake manifold. Place plenum with new gasket on intake manifold. Loosely install mounting bolts.
10. Place a new gasket on the EGR tube flange. Loosely install EGR tube mounting screws.
Fig. 24 Intake Manifold Plenum Tightening Sequence
11. Tighten Intake Manifold Plenum mounting bolts to 28 Nm (250 in.lbs.) in sequence as shown in Fig. 24.