
Removing-refitting
- Make
- Fiat
- Model
- Bravo /Brava (182) Factory Service Manual
- Year
- 1995–2001
- Section
- Instrument panel (98 range) › Removing-refitting
‹ Prev Automatic transmission gears indicatorNext › Removing-refitting rear courtesy light and replacing bulb
55 Electrical systemRemoving-refitting
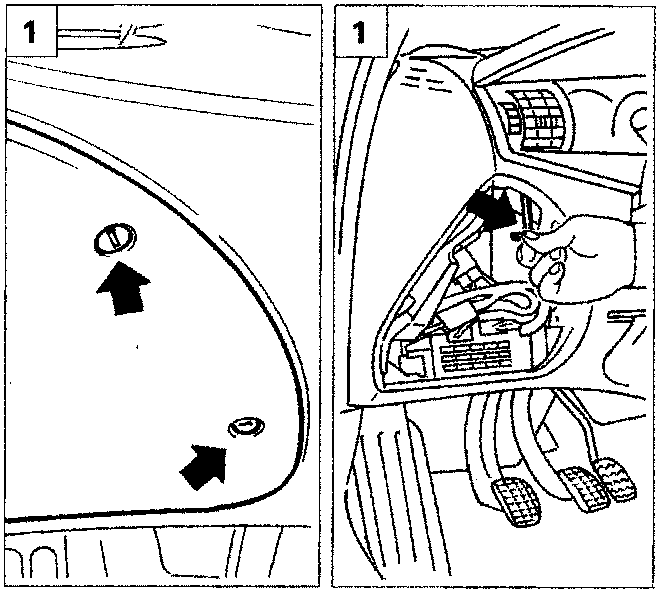
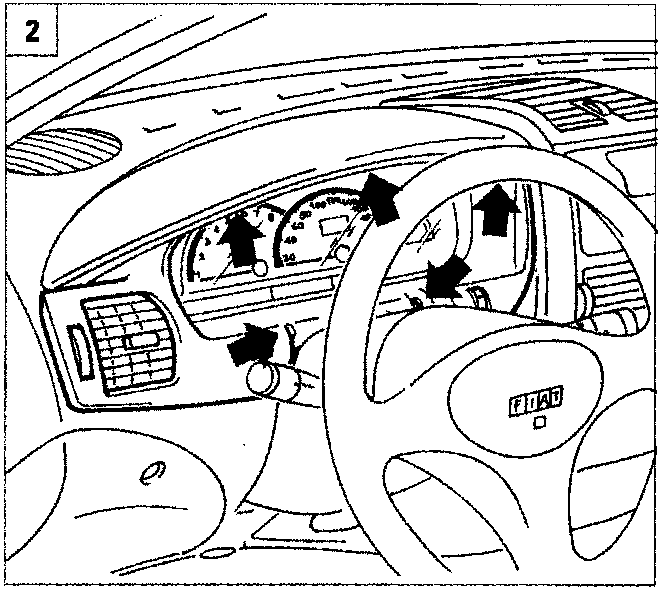
REMOVING-REFITTING
Remove the steering column upper and lower covers and then proceed as described below:
- Remove the protective cover for the junction unit. Undo the outer bolt fixing the instrument panel frame.
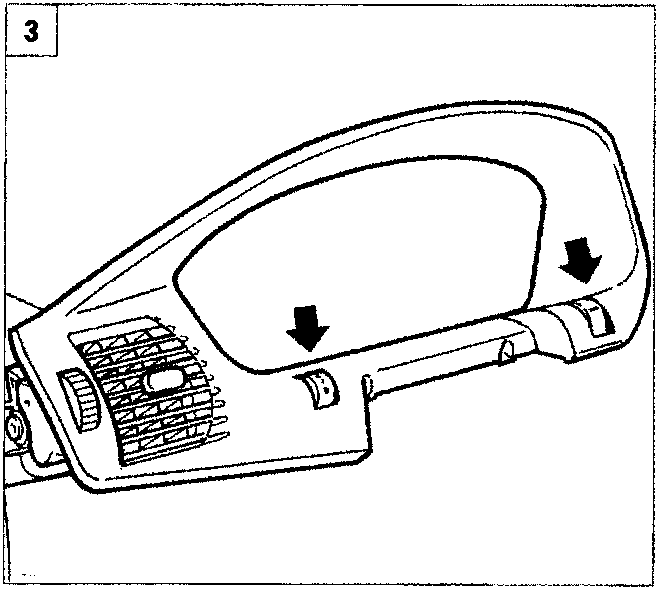
- Undo the outer bolts fixing the instrument panel frame.
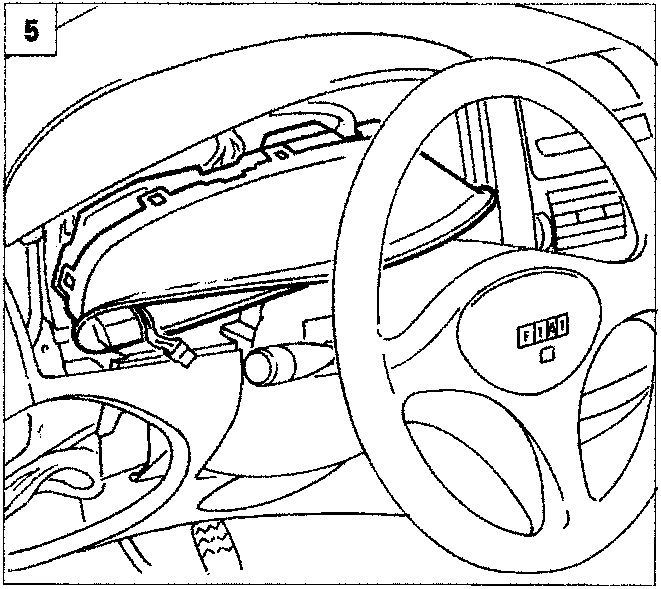
- Extract the frame from the dashboard after having disconnected the connector for the headlamp dimmer (shown by the arrow).
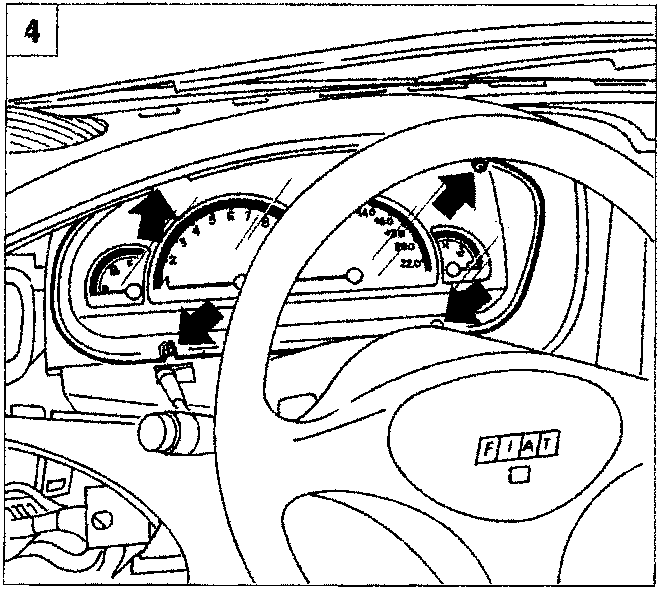
- Undo the bolts fixing the instrument panel to the dashboard.
- Disconnect the two electrical connections for the instrument panel and remove it from the vehicle.
‹ Prev Automatic transmission gears indicatorNext › Removing-refitting rear courtesy light and replacing bulb
Parts & tools for this job For 1995 Fiat Bravo
- TOOLDigital multimeterSearch: automotive digital multimeter
- PARTAssorted fuse kitSearch: car fuse assortment kit
- TOOLWire crimper and connector kitSearch: wire crimper connector kit
Links open Amazon search results in a new tab. As an Amazon Associate I earn from qualifying purchases.