
Crown Victoria V8-4.6L CNG SOHC VIN 9 (1999)
Windshield: Service and Repair
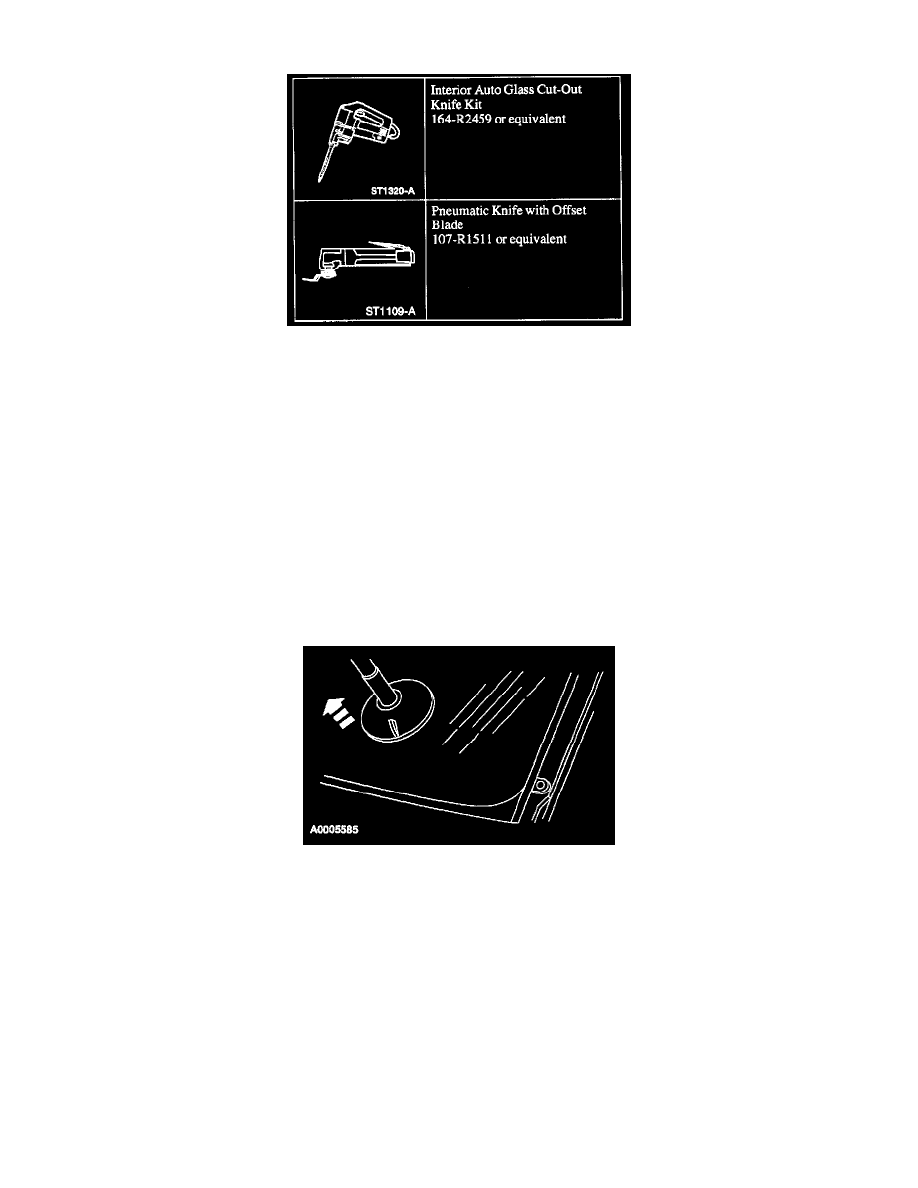
SPECIAL TOOL(S)
REMOVAL
1. Remove the windshield wiper pivot arms.
WARNING: SAFETY GLASSES AND GLOVES MUST BE WORN TO PREVENT INJURY. FAILURE TO FOLLOW THESE
INSTRUCTIONS MAY RESULT IN PERSONAL INJURY.
2. Remove the cowl top vent panel.
3. Remove the visors.
4. Remove the windshield garnish mouldings.
5. Remove the instrument panel upper finish panel.
6. Remove the interior rear view mirror.
7. Partially drop the headliner near the windshield opening and block with suitable material.
8. Using the special tool, cut the adhesive. Refer to manufacturer's instructions when using the tool.
CAUTION: Cover the instrument panel in order to prevent possible damage.
9. Remove the windshield and moulding assembly using a suitable suction tool and place on a stable work surface.
10. Trim any remaining urethane on the pinch weld to within 1.0 and 2.0 mm (0.04 and 0.08 inch) thickness.
NOTE: Clean the area around the existing urethane prior to trimming.
11. Check the pinch weld sealing area for damaged sheet metal, rust or foreign objects which may cause glass breakage. Repair the sheet metal if
necessary.
INSTALLATION
1. Apply Urethane Metal Primer ESB-M2G234-A or equivalent to any exposed or damaged metal on the pinch weld.
NOTE: A minimum of ten minutes is required for the primer surface to dry.
2. Clean the windshield glass with a non-alcohol based window cleaner.
3. Using a wool applicator, wipe the interior glass edge with Urethane Glass Prep WSB-M5B280-C 21 mm (0.8 inch) wide along the top and sides
and 70 mm (2.75 inch) wide along the bottom. Wipe off the glass prep and repeat the glass prep application.