
Crown Victoria V8-4.6L SOHC VIN 6 (1996)
Valve Cover: Service and Repair
RIGHT SIDE
1.
Disconnect battery ground cable, then disconnect positive battery cable at power distribution box.
2.
Remove positive battery cable bracket to cylinder head attaching bolt.
3.
Disconnect High Data Rate (HDR) sensor, A/C compressor clutch and canister purge solenoid electrical connectors, then position aside.
4.
Disconnect purge solenoid vent hose, then position positive battery cable aside.
5.
Disconnect spark plug ignition wires. Do not remove wires.
6.
Remove ignition wire brackets, then position wires aside.
7.
Remove PCV valve and position aside.
8.
Remove camshaft cover attaching bolts, then remove cover.
9.
Reverse procedure to install. Tighten cover to 71-106 in lb.
LEFT SIDE
1.
Disconnect battery ground cable.
2.
Remove air inlet tube.
3.
Relieve fuel pressure, then disconnect fuel lines.
4.
Raise and support vehicle.
5.
Disconnect EVO sensor and oil pressure sending unit electrical connectors, then position electrical harness aside.
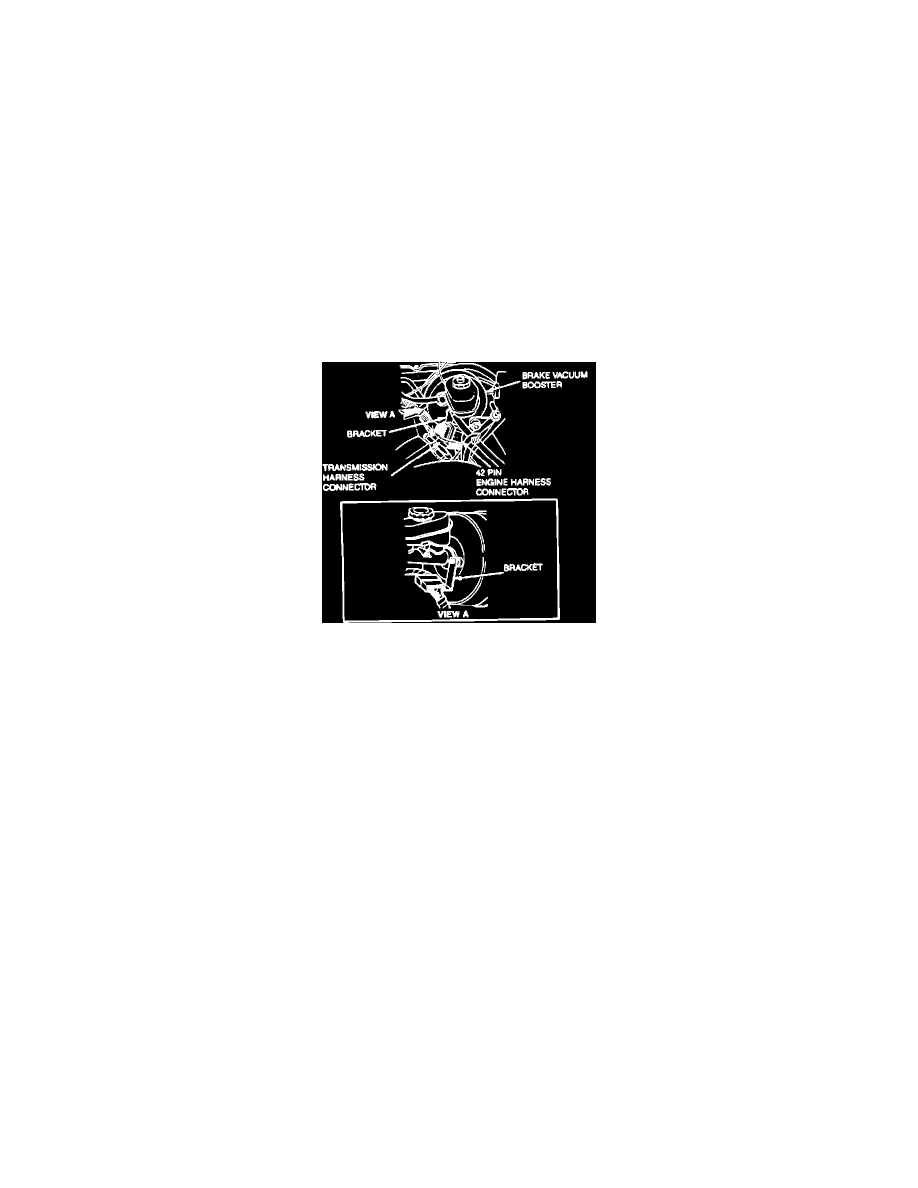
Engine & Transmission Harness Connectors
6.
Lower vehicle, then remove 42-pin electrical harness connector from bracket at brake vacuum booster, then disconnect and position aside.
7.
Remove windshield wiper module.
8.
Disconnect spark plug ignition wires. Do not remove wires.
9.
Remove ignition wire brackets, then position wires aside.
10.
Remove camshaft cover attaching bolts, then remove camshaft cover.
11.
Reverse procedure to install. Tighten cover to 71-106 in lb.