
Crown Victoria V8-4.6L SOHC VIN 6 (1996)
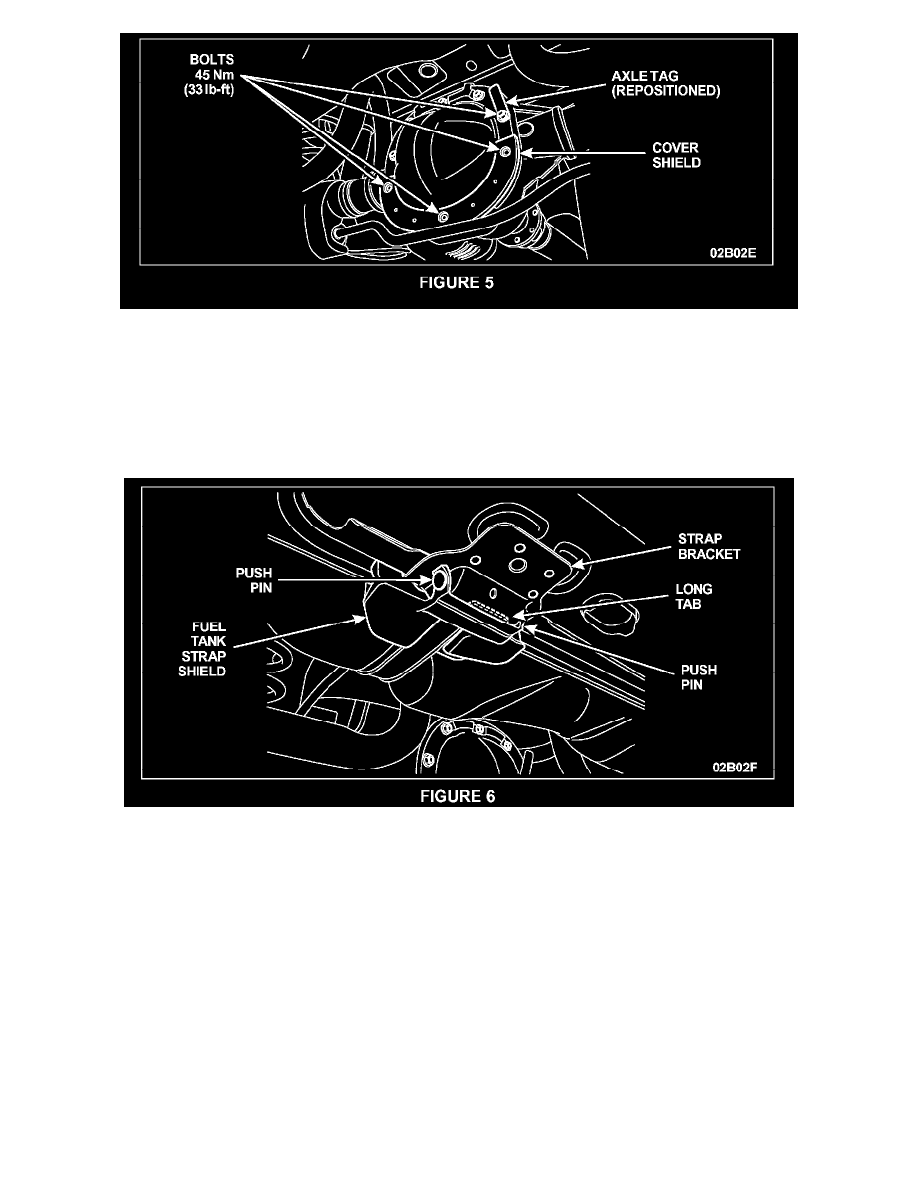
Reposition the axle and/or fluid identification tag as necessary. Hand-tighten the bolt(s) at this time. See Figure 5.
6.
Remove and discard the three (3) differential cover bolts located at the 4, 6 and 8 o'clock positions. Position the differential cover shield and press
into place. The cover should fit snug over the existing bolts. Install the three (3) new bolts. Tighten all loosened or removed bolts to 45 Nm (33
lb-ft). See Figure 5. Be sure to also tighten the axle tag bolt(s) to specification.
17.
CAUTION: The fuel tank strap shields are marked for right and left sides of the vehicle. Be sure to install them in the correct location and so that
they are oriented from the outside toward the center of the vehicle.
NOTE:
Spray the area around the fuel tank and strap brackets with silicone lubricant to assist with shield installation. Use a rubber mallet to lightly tap
the shields into position only if necessary. Install the left and right fuel tank strap shields as follows. See Figure 6.
a)
Insert the shield between the fuel tank and the strap from the outside, pushing it in toward the center of the vehicle.
b)
Position the long tab up into the strap bracket.
c)
Secure the push-pin retainers into the mating holes in the strap bracket to secure the shield.
d)
Visually check to make sure the shield is correctly positioned. Peel the backing off the adhesive strip and, while holding the upper portion
against the fuel tank flange, secure the two halves firmly together.
NOTE
^
For 1992 to 1997 model year vehicles, the service procedure is complete. Lower the vehicle.
^
For 1998 to 2003 model year vehicles, continue with this procedure.