
Crown Victoria V8-4.6L SOHC VIN 6 (1996)
8.
Remove the two (2) evaporative emissions canister retainer bolts from the front edge along the Z-bracket.
9.
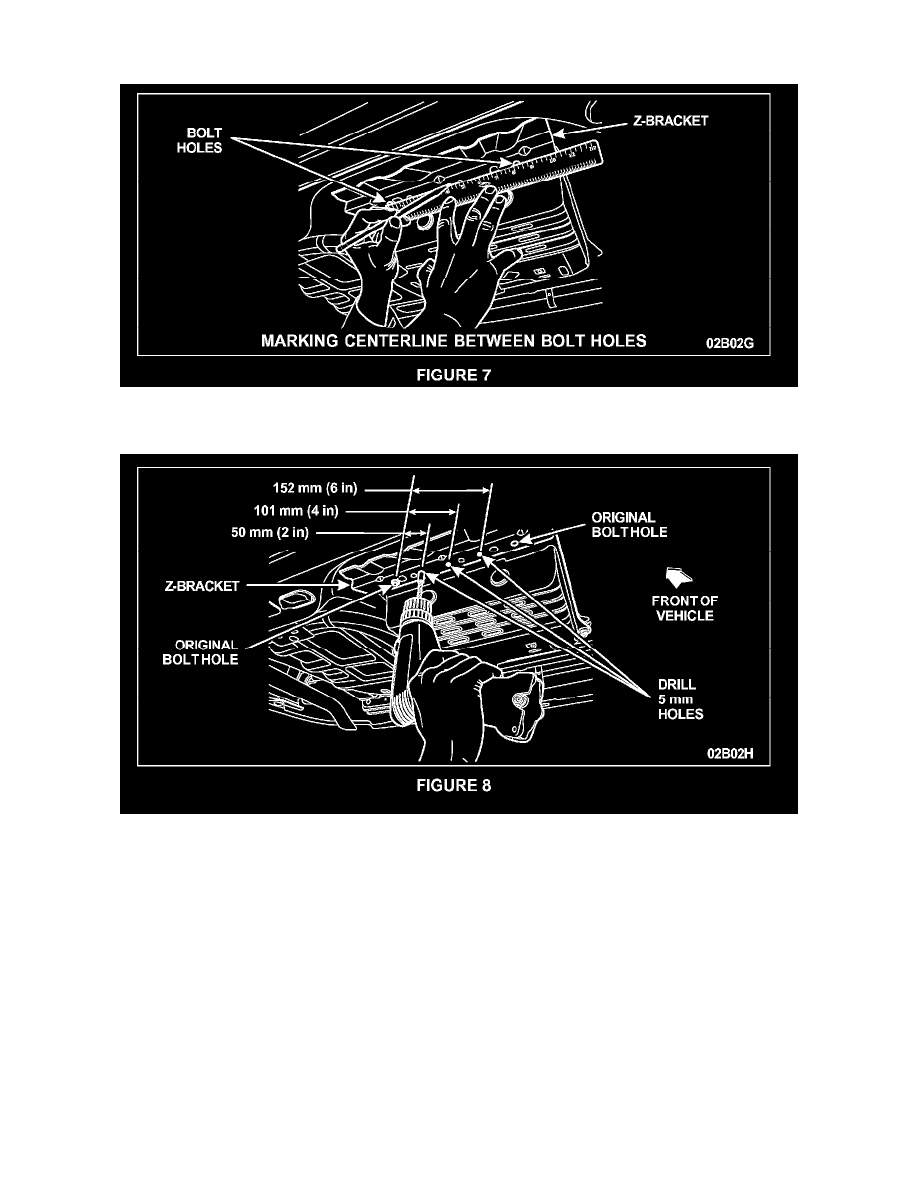
Using a straightedge, draw a line indicating the centerline connecting the (2) two bolt holes. Then, measuring from the edge of either of the two
bolt holes, mark the centerline at 50 mm (2-in), 101 mm (4-in) and at 152 mm (6-in). See Figure 7.
10.
CAUTION: DO NOT drill through the trunk floor when drilling the rivet holes. Place a drill stop or an abundance of tape 12 mm (1/2-inch) from
the tip of the drill bit. Reinstall one of the removed bolts to hold the canister securely, then drill the three, 5 mm (13/64-inch) rivet holes through
the Z-bracket and the evaporative emissions canister mounting flange. See Figure 8.
11.
Remove the one (1) bolt and the two (2) evaporative emissions canister retaining nuts and lower the canister off of the studs and disconnect the
canister purge valve electrical connector. Discard both removed canister bolts.
12.
Remove and discard the two (2) J-nuts from the evaporative emissions canister flange.