E 350 V8-6.0L DSL Turbo (2007)

Parking Brake Control: Service and Repair
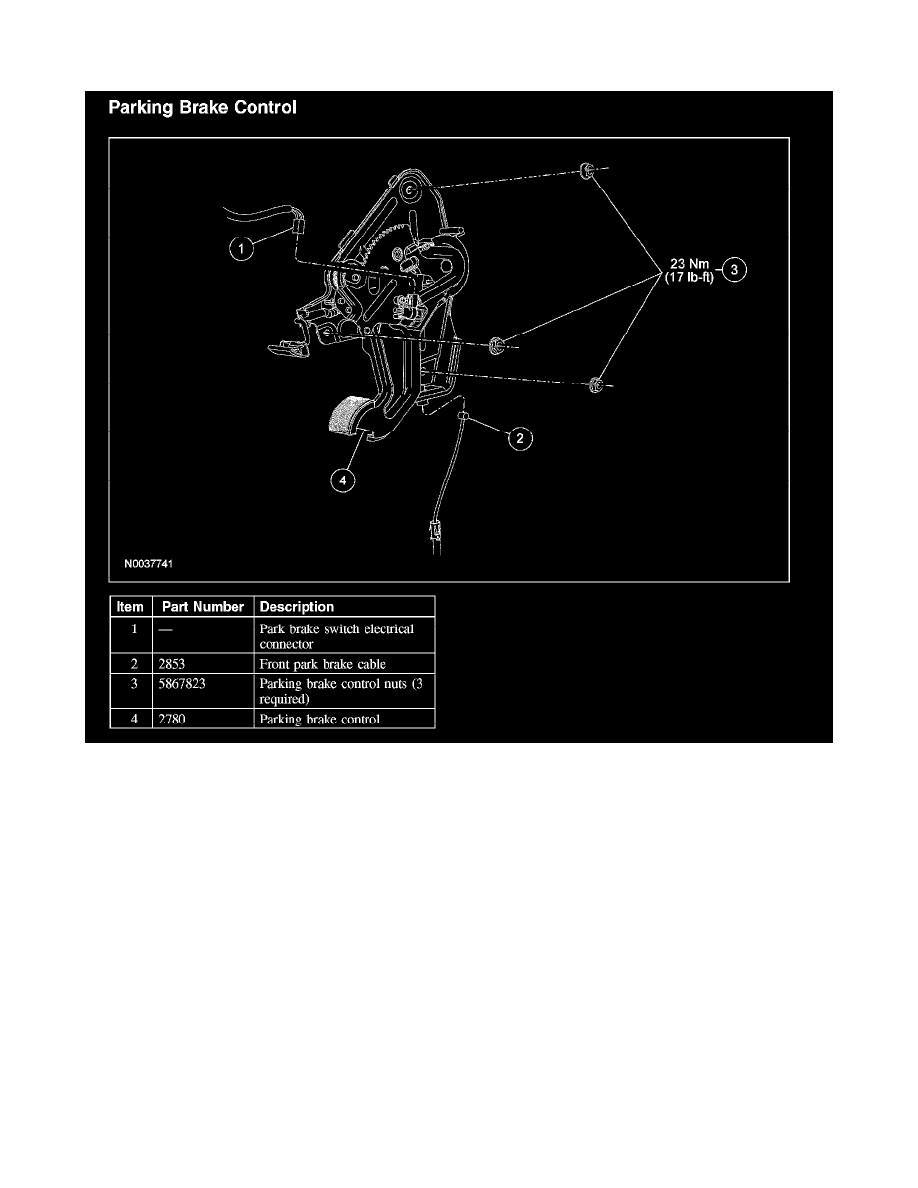
Parking Brake Control
Parking Brake Control
Removal and Installation
All vehicles except E-450
1. Remove the LH cowl side trim panel.
2. Disconnect the electrical connector from the parking brake switch and bracket.
3. Release the parking brake cable tension.
4. NOTE: Make sure the parking brake is fully released.
With the vehicle in NEUTRAL, position it on a hoist. For additional information, refer to Maintenance/Service and Repair.
5. Disconnect the front parking brake cable and conduit from the parking brake lever.
^
Remove the locking pin from the clevis pin and remove the clevis pin.
^
With the aid of an assistant, pull on the clevis end of the cable while a 4 mm (0.16 inch) pin is inserted into the pedal assembly.
All vehicles
6. Remove the 3 parking brake control nuts and separate the parking brake control from the steering column support bracket.
^
To install, tighten to 23 Nm (17 ft. lbs).
7. Remove the cable end retainer from the parking brake control.
8. Disconnect the front parking brake cable and conduit from the parking brake control.
1
Using a box wrench, compress the fingers of the parking brake cable retainer.
2
Pull the front parking brake cable and conduit from the parking brake control.
