
E 450 V8-5.4L (2009)
7. If equipped, loosen the tilt lever/handle and remove.
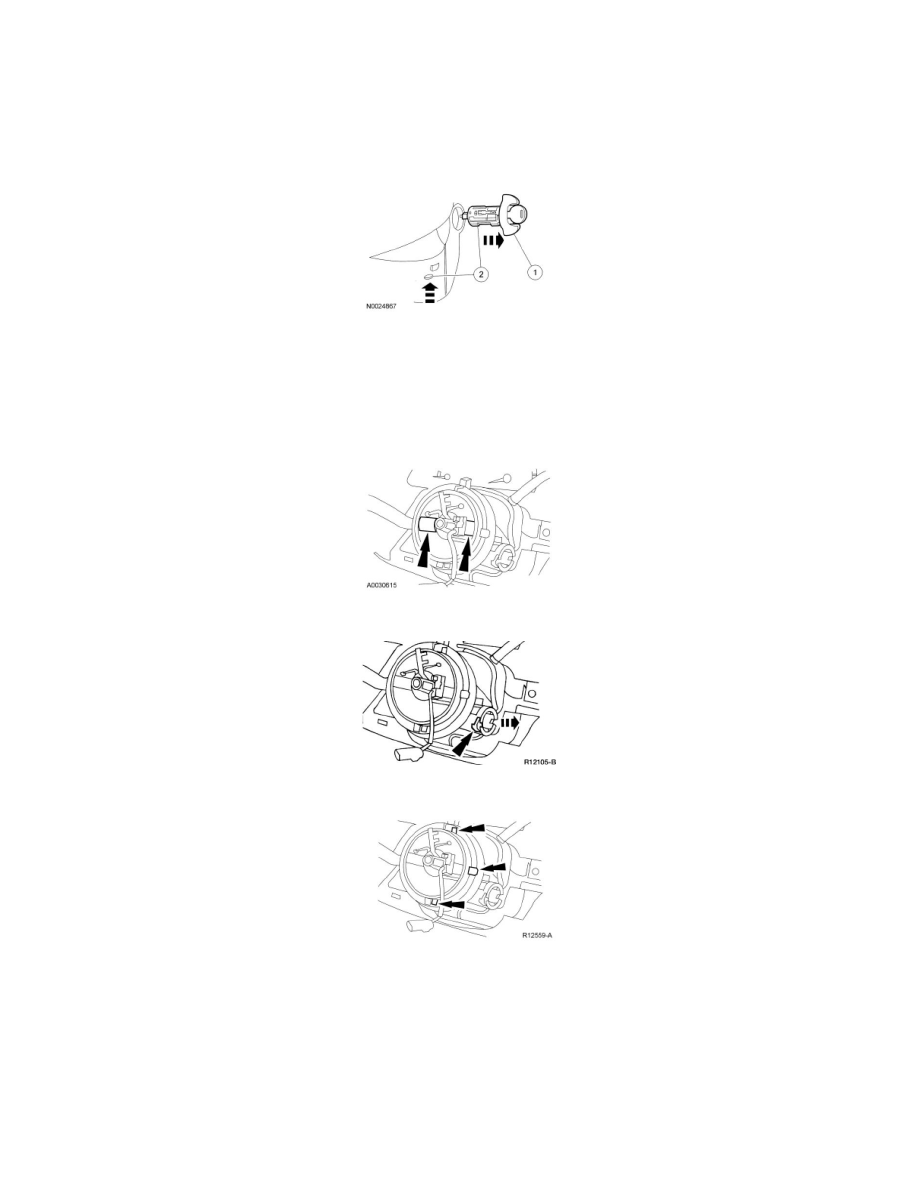
8. Remove the ignition lock cylinder.
1. Turn the lock cylinder to the RUN position.
2. Using a suitable tool, push upward on the lock cylinder release tab through the hole in the lower shroud while pulling outward.
9. Remove the 3 screws and lower steering column shroud.
10. Remove the upper steering column shroud.
11. NOTE: Do not allow the clockspring to turn if it will be reused.
If reusing the clockspring, tape the rotor to the outer housing to prevent it from rotating.
12. If equipped, remove the key-in-ignition warning indicator switch.
13. Release the 3 clockspring retaining clips.
14. Detach the 2 clockspring retaining clips holding the wire to the steering column.
15. Route the wiring through the instrument panel and remove the clockspring.
Installation
Installing a new clockspring
1. NOTE: A new clockspring is supplied in a centralized position and held with a sealing key.
Remove the sealing key from the clockspring, holding the rotor in its centralized position.