
Econoline E250 3/4 Ton V8-4.6L SOHC VIN W (2000)
6. Lower the vehicle.
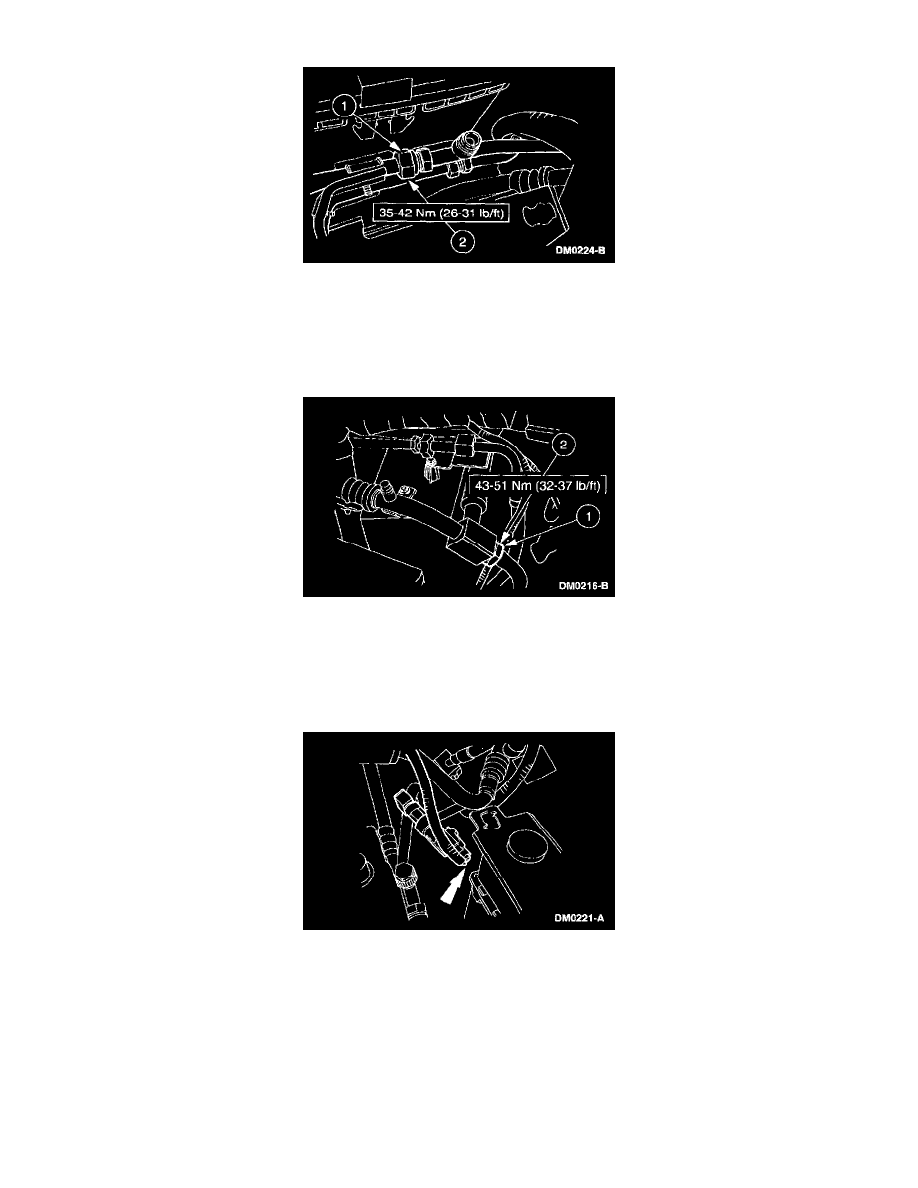
7. Connect the compressor discharge line.
1
Lubricate the new O-ring seals with PAG compressor oil, YN-12c, F7AZ-19589-DA, or equivalent meeting Ford specification
WSH-M1C231-B and install the O-ring seals.
2
Connect the compressor discharge line.
CAUTION: Use a wrench on each side of the fitting to prevent damage to the A/C fitting.
8. Connect the compressor suction line.
1
Lubricate the new O-ring seals with PAG compressor oil, YN-12c, F7AZ-19589-DA, or equivalent meeting Ford specification
WSH-M1C231-B and install the O-ring seals.
2
Connect the compressor suction line.
CAUTION: Use a wrench on each side of the fitting to prevent damage to the A/C fitting.
9. Connect the A/C pressure cut-off switch electrical connector.
10. Install the fan shroud. For additional information, refer to Cooling System.
11. Install the drive belt. For additional information, refer to Drive Belts, Mounts, Brackets and Accessories.
12. Fill the engine cooling system. For additional information, refer to Cooling System.
13. Reconnect the battery ground cable. For additional information, refer to Battery.
14. Evacuate and charge the A/C system.