
Seats
- Make
- Ford
- Model
- Edge Factory Service Manual
- Year
- 2007
- Section
- 501-10 Seating › Diagnosis and testing › Seats
Seats
 |
Fluke 73III Automotive Meter
105-R0057 or equivalent |
 |
Vehicle Communication Module (VCM) and Integrated Diagnostic System (IDS)
Software with appropriate hardware, or equivalent scan tool |
High Speed Controller Area Network (HS-CAN) and Medium Speed Controller Area Network (MS-CAN)
NOTE: The high speed controller area network (HS-CAN) circuits that pass through the passenger seat 12 pin electrical connector are part of the main HS-CAN LOOP. If the front passenger seat-to-floor 12 pin electrical connector is disconnected, a NO START condition will result.
NOTE: The medium speed controller area network (MS-CAN) circuits that pass through the driver and passenger seat harnesses are part of the main MS-CAN LOOP. If the driver seat-to-floor 57 pin electrical connector is disconnected when equipped with memory seats, various MS-CAN modules will not be able to communicate. If the front passenger seat-to-floor 30 pin electrical connector is disconnected when equipped with climate control seats, various MS-CAN modules will not be able to communicate.
This vehicle utilizes 2 communication systems called HS-CAN and MS-CAN. The memory seat and climate controlled seat communicate over the MS-CAN. When diagnosing the memory seat or climate controlled seat, use a Vehicle Communication Module (VCM) and Integrated Diagnostic System (IDS) software with appropriate hardware, or equivalent scan tool with the latest software update with the capability of communicating over the MS-CAN bus.
Principles of Operation
Driver and Passenger Power Seats Without Memory
The driver and front passenger power seat motors are hardwired to the seat control switches on each respective seat. The circuits are normally at ground through the seat control switch. Each individual seat track, recliner (if equipped) and lumbar (if equipped) motor circuit is switched to power when the specific adjustment position is selected.
Power Driver Seat With Memory
The driver power seat is controlled by the driver seat module (DSM), if equipped. The memory driver seat feature allows the driver to program a personalized seat position that can be recalled using the memory switch or a remote keyless entry (RKE) transmitter. There are 2 memory settings possible. The outside rear view mirror positions are also stored and recalled with the power driver seat positions.
The DSM is located underneath the driver seat cushion frame. The DSM does not require calibration to the driver seat track.
The driver seat control switch provides voltage to the DSM when activated. The NEUTRAL position of each driver seat control switch position is a ground state through the seat control switch contacts. A voltage input causes the DSM to power the appropriate motor until the input is removed. Ground is the normal state of the motor circuits through the DSM and is not switched to control the motors. The DSM internally switches the appropriate circuit from ground to power for operating the motors.
As the seat is adjusted, the DSM constantly monitors the motor position sensors to record the current seat position. The DSM will remove power from the motor upon termination of the seat control switch input or if the DSM does not see movement from the motor by monitoring the position sensor.
The DSM communicates diagnostic trouble code (DTC) and other information using the MS-CAN communication bus. It should be noted for diagnostics that because CAN bus communication is more robust and reliable than other methods, it may be possible to have limited module communication with one of the CAN bus circuits disconnected or shorted to ground. Refer to Section 418-00 for information concerning MS-CAN bus communication.
Programming Memory Seat Positions
- A power driver seat position can be stored at any time. The driver must move the seat to the desired position using the driver seat control switch. The driver must then depress the memory SET switch which activates the memory SET switch light emitting diode (LED). Within 5 seconds (before the LED goes out), the driver must select a memory position. Memory 1 is selected by depressing memory switch 1. Memory 2 is selected by depressing memory switch 2.
- If no memory switch input is received within the 5-second time limit, the operation is aborted and the memory SET switch LED is turned OFF. If one of the following inputs is received during the 5-second programming limit, the operation is
aborted and the memory SET switch LED is turned OFF:
- Power driver seat control switch
- Memory SET switch
Recalling a Stored Memory Seat Position
NOTE: A memory recall can be initiated only if the vehicle gear selector is in PARK and the ignition switch is not in START. A memory recall in progress will not be affected by moving the ignition switch to START or by moving the gearshift lever out of PARK.
Once the driver has stored the driver seat position, the driver can recall the setting by depressing the corresponding memory switch or by using a programmed remote entry transmitter.
The driver can recall the desired driver seat position by depressing one of the memory recall switches. Depressing memory switch 1 will initiate a recall of the power driver seat position stored in Memory 1. Depressing memory switch 2 will initiate a recall of the power driver seat position stored in Memory 2.
A remote entry transmitter can be used to recall previously set memory positions. The transmitter that has been assigned with personality 1 is capable of recalling memory position 1 only. Similarly, the personality 2 transmitter can recall only memory position 2.
Memory recall occurs when the unlock switch is depressed on the remote entry transmitter. The second depression of the unlock switch, which unlocks passenger doors, does not initiate a memory recall.
A memory recall in progress does not prohibit the initiation of another memory recall; the most recently requested memory recall will be executed.
Memory positions that have not been programmed will not initiate any motion for the power driver seat or power memory rear view mirrors.
Easy Exit/Easy Entry
The easy exit function moves the seat backwards about 50.8 mm (2 in) when the transmission is in PARK and the ignition key is removed from the ignition switch. The DSM receives a key out command over the MS-CAN communication network and powers the driver seat rearward. This function will not operate if the seat is less than the travel distance to the end of the track or the function has been deactivated. The DSM will also cancel this operation if a valid input command is received, such as the seat control switch or memory recall request.
The DSM will record the current seat position before powering the seat for an easy exit function. This recorded position will be used to return the seat to this position on the easy entry operation. During easy entry operation, the seat is returned to the position previous to the easy exit operation when the transmission is in PARK and the key is inserted into the ignition lock cylinder. Easy entry operation will be cancelled if a valid input command is received by the DSM.
The easy exit/easy entry feature can be activated or deactivated using the message center. Refer to the Owner's Literature.
Heated Seats — Front
Vehicles equipped with front heated seats are equipped with a single-heated seat module to control both front heated seats. The heated seat module is located under the front passenger seat. The electronic automatic temperature control (EATC) module includes both driver and passenger heated seat control buttons and indicators. The heated seat system will function independently of the vehicle's climate control system. A momentary ground signal is transmitted to the heated seat module when a heated seat switch button on the EATC module is depressed and ignition switched voltage is supplied. Upon receiving each control signal to an input circuit, the heated seat module will decrease one setting (the sequence is hi, low, OFF, hi, etc.). When a heated seat is set to hi, both LED indicators above that heated seat's control button will illuminate. When a heated seat is set to low, only one LED indicator above that switch will illuminate. When activated, the heated seat module supplies power to the selected seat's heater circuit. Each seat's cushion heater mat and backrest heater mat is connected in a series circuit to the heated seat module and powered by the output circuit for that seat and ground. The heated seat module monitors inputs from a temperature sensor, located in each seat's cushion heater mat and maintains seat temperature by regulating current flow to the heater circuits. The heated seat module will remain ON until the heated seat switch button is depressed to cycle the heated seat module OFF or the ignition switch is set to OFF.
If a fault is detected by the heated seat module, the module will stop supplying power to that individual left or right seat and switch indicator, that the fault was detected on. The faults detected will be: a heater feed circuit short to battery, ground or open; sensor circuit short to battery or open; heated seat switch stuck closed to ground. To reset the module, cycle the ignition switch OFF and then ON. After the heated seat module has been reset, the module will return to an OFF state. The heated seat module does not report diagnostic trouble codes (DTCs) and does not communicate on any of the controller area networks (CANs).
Heated Seats — Rear
Vehicles equipped with rear heated seats are equipped with a single-heated seat module to control both rear heated seats. The heated seat module is located under the rear 60 percent seat. When the heated seat switch is pressed with the ignition switch in RUN, a momentary ground signal is sent to the heated seat module. The heated seat module then supplies power to the heater circuit. The cushion heater mat and seat backrest heater mat are wired in series and powered by the same output. The heated seat module monitors inputs from a temperature sensor, located in each seat's cushion heater mat and maintains seat temperature by cycling the heater feed output as necessary to maintain the setpoint temperature. The heated seat module also will send voltage to the separate indicator circuit at the heated seat switch to indicate an ON state. The heated seat module will remain on until the heated seat switch is pressed for that circuit that is currently on and receives a second momentary ground signal or the ignition switch is set to OFF.
If a fault is detected by the heated seat module, the module will stop supplying power to that individual left or right seat and switch indicator, that the fault was detected on. The faults detected will be: a heater feed circuit short to battery, ground or open; sensor circuit short to battery or open; heated seat switch stuck closed to ground or heated seat switch low and high inputs shorted together. To reset the module, cycle the ignition switch OFF and then ON. After the heated seat module has been reset, the module will return to an OFF state. The heated seat module does not report diagnostic trouble codes (DTCs) and does not communicate on any of the controller area networks (CANs).
Climate Controlled Seat System
NOTE: When installing a new climate controlled seat module (CCSM), it is necessary to carry out programmable module installation (PMI). Refer to Section 418-01.
Both the driver and front passenger climate controlled seats are independently controlled electronically by the CCSM mounted under the front passenger seat. The climate controlled seat system only operates with the engine running, however, if using a scan tool to command the CCSM, diagnostic testing can be carried out with the ignition switch key on engine off (KOEO). The system receives power on 2 fused circuits from the battery junction box (BJB). If only one of the BJB fuses opens, both seats will remain operational because the power feed circuits are internally connected in the CCSM.
Both climate controlled seats operate independently. If a fault occurs setting a DTC specific to either climate controlled seat, only the affected seat will be disabled by the module and the other will remain operational.
The 4 switches (identified with seat icons) on the dual-zone electronic automatic temperature control (EATC) module activate each seat system setting and illuminate LEDs above each switch to indicate the operating mode, 3 LEDs for high, 2 LEDs for medium or 1 LED for low. The push-buttons with the blue seat icon operate the seat cooling mode and the push-buttons with the red seat icon operate the seat heating mode. The climate controlled seat system is not equipped with auto-mode.
Each driver and front passenger seat cushion is equipped with a thermo-electric device (TED) assembly that includes a seat blower (fan motor, serviced as an assembly with the TED). Similarly, each driver and front passenger seat backrest is also equipped with its own TED assembly with blower. Cabin air is drawn through the blower and distributed to each of the TED modules located in the seat cushion and backrest. The TEDs then heat or cool the air. The air is then directed into the foam pad and manifold where it is distributed along the surface of the cushion and backrest of the seat. Once the system is activated, the CCSM uses a set of flexible algorithms to control the heating/cooling modes and the blower speed dependant on the EATC seat switch settings.
NOTE: Avoid applying power directly to a TED for testing its operation. Doing so may cause damage to the TED or shorten its usable life.
The temperature differences between the individual heated and cooled settings is minimal. For example, it is difficult to distinguish between low cool and medium cool settings. Measuring seat temperature at different settings is possible by monitoring the CCSM PIDs using the scan tool.
The EATC module communicates climate controlled seat commands to the CCSM using the medium speed controller area network (MS-CAN) communication bus. The MS-CAN bus is connected to the data link connector (DLC) for diagnostic use. No direct connection exists between the CCSM and EATC for the climate controlled seat switches. The climate controlled seats can be commanded using the scan tool to verify both module communication on the MS-CAN bus and operation of the CCSM. This method may be useful for isolating a control switch concern. It should also be noted that because CAN bus communication is more robust and reliable than other methods, it may be possible to have limited module communication with one of the CAN bus circuits disconnected or shorted to ground. Refer to Section 418-00 for additional information concerning CAN bus communication.
Heating Characteristics
- In heat mode, the TED circuits of a given seat are wired in parallel internally in the CCSM.
- The climate controlled seat system draws approximately 24 amperes, with both seats heating, until reaching the set point and then the system operates at a reduced amperage to maintain the climate setting.
- In heat mode, the TED can add up to 40°C - 60°C (72°F - 108°F) to the ambient air temperature entering the system.
- There are 3 manual settings based on the LEDs above each seat heat switch button on the EATC. The first setting is high (3 LEDs), the second setting is medium (2 LEDs), the third is low (1 LED) then OFF (no LEDs).
- In the low setting, the climate controlled seat module is set to maintain TED temperature at approximately 46°C (115°F) (not at seat surface).
- In the high setting, the climate controlled seat module is set to maintain TED temperature at 65°C (149°F) (not at seat surface).
- When heating, the CCSM will vary the speed of the fans and the TED duty cycle in order to reach and maintain the temperature determined by the switch setting. Refer to the following table for heating mode temperatures.
| Climate Controlled Seat Heat State | Initial Temperature | Final Temperature |
|---|---|---|
| High | 90°C (194°F) | 65°C (149°F) |
| Med | 80°C (176°F) | 60°C (140°F) |
| Low | 75°C (167°F) | 46°C (115°F) |
Cooling Characteristics
- In cool mode, the TED circuits of a given seat are wired in series internally in the CCSM.
- The climate controlled seat system draws approximately 7 amps when in cool mode on high setting.
- In cool mode, the TED can remove up to 8°C (14°F) from the ambient air temperature entering the system.
- There are 3 manual settings based on the LEDs above each seat cool switch button on the EATC. The first setting is high (3 LEDs), the second setting is medium (2 LEDs) and the third is low (1 LED) then OFF (no LEDs).
- When cooling, the CCSM maintains constant speed of the fans and constant TED supply voltage (duty cycle) in open loop cool mode.
| Climate Controlled Seat Cool State | TED Voltage | TED Supply Duty Cycle |
|---|---|---|
| High | Vbat | 100% |
| Med | Vbat | 75% |
| Low | Vbat | 50% |
The climate controlled seat system is deactivated by one of the following actions:
- Selecting the EATC module setting to manual OFF.
- Turning the vehicle OFF.
If the temperature at one of the TEDs falls below 5°C (41°F), the climate controlled seat module will shut down the TEDs and initiate system recovery mode. If the temperature continues to drop below 2°C (36°F), the climate controlled seat module will shut down the affected seat operation.
Climate Controlled Seat System Recovery Mode
NOTE: The presence of overtemperature faults (DTCs B2729, B2730, B272A and B272B) can be induced by incorrect operation of the climate controlled seat system after an initial HEAT setting has been attained. If a HEAT setting is repeatedly turned OFF and ON in an attempt to increase the seat temperature or repeatedly toggled between HEAT and COOL modes, an overtemperature condition can result and the DTC(s) will be set.
If the temperature at one of the TEDs rises above 110°C (230°F) in the HEAT mode or 65°C (149°F) in the COOL mode for more than 4 seconds, the CCSM will record an overtemperature DTC, remove power from the TEDs and go into recovery mode (blower only) for 30 seconds to cool down the TEDs. The same will occur if a temperature difference of 30°C (54°F) or greater is seen between the backrest and cushion TEDs on either front seat. The CCSM will continue to monitor the TEDs while in recovery mode. If the temperature of the TEDs does not drop to 105°C (221°F) in the HEAT mode or 60°C (140°F) in the COOL mode after 30 seconds, the system will continue to cool the TEDs in recovery mode for up to 5 minutes. If the TEDs cool down at anytime after 30 seconds, but before 5 minutes (checked at 4 second intervals), the system will operate as normal. An overtemperature DTC will still be recorded even if the system recovers and is operating normally. This scenario is more likely to occur during extreme cabin temperatures with significant seat back sun-load. If the system does not recover within 30 seconds in HEAT mode or within 5 minutes in COOL mode, the CCSM will disable that seat (fault mode) and remain off until the ignition is cycled. Also, if the CCSM detects an overtemperature or temperature differential fault twice during the same ignition cycle, it will also shut down. When a fault causes a shut-down the climate controlled seat indicators will turn off for the affected seat and that seat will not be operational until the next key cycle.
Second Row Power-Fold Seat
For the second row power-fold seat to operate, voltage is supplied by the smart power distribution junction box (SPDJB) to the power-fold seat relay, enabling the seats to then be moved by pressing the second row power-fold seat switch. The second row power-fold seat operates only when the vehicle is in PARK and the liftgate glass or liftgate door is open.
The power-fold seat relay will be provided voltage on the coil side from the SPDJB for 30 minutes when the transmission selector is in PARK, and the liftgate, or liftgate glass, is open. The voltage will be disabled 30 minutes after turning the vehicle OFF. If the relay is disabled after 30 minutes, it can be enabled by opening any door, pressing the unlock key on the key fob, pressing any keyless keypad button or turning the ignition key.
The second row power-fold seat actuators release a locking mechanism allowing the seat backrest to fold down onto the seat cushion.
Inspection and Verification
- Verify the customer concern.
- Visually inspect for obvious signs of mechanical and electrical damage.
| Mechanical | Electrical |
|---|---|
|
|
- If an obvious cause for an observed or reported concern is found, correct the cause (if possible) before proceeding to the next step.
- If the concern is with the power seat (non-memory seat) or heated seat and the cause is not visually evident, verify the symptom and GO to Symptom Chart.
-
NOTE: Make sure to use the latest scan tool software release.
If the concern is with the memory seat or climate controlled seat and the cause is not visually evident, connect the scan tool to the data link connector (DLC). -
NOTE: The vehicle communication module (VCM) LED prove out confirms power and ground from the DLC are provided to the VCM.
If the scan tool does not communicate with the VCM:- check the VCM connection to the vehicle.
- check the scan tool connection to the VCM.
- refer to Section 418-00, No Power To The Scan Tool, to diagnose no communication with the scan tool.
- If the scan tool does not communicate with the vehicle:
- verify the ignition key is in the ON position.
- verify the scan tool operation with a known good vehicle.
- refer to Section 418-00 to diagnose no response from the powertrain control module (PCM).
- Carry out the network test.
- If the scan tool responds with no communication for one or more modules, refer to Section 418-00.
- If the network test passes, retrieve and record continuous memory diagnostic trouble codes (DTCs).
- Clear the continuous DTCs and carry out the self-test diagnostics for the driver seat module (DSM) or climate controlled seat module (CCSM).
- If the DTCs retrieved are related to the concern, go to Driver Seat Module (DSM) Diagnostic Trouble Code (DTC) Chart or Climate Controlled Seat Module (CCSM) Diagnostic Trouble Code (DTC) Chart. For all other DTCs, refer to Section 419-10.
- If no DTCs related to the concern are retrieved, GO to Symptom Chart.
Driver Seat Module (DSM) Diagnostic Trouble Code (DTC) Chart
| DTC | Description | Retrieved | Action |
|---|---|---|---|
| B1317 | Battery Voltage High | Continuous | REFER to Section 414-00. |
| B1318 | Battery Voltage Low | Continuous | REFER to Section 414-00. |
| B1342 | ECU is Faulted | On-Demand and Continuous | INSTALL a new driver seat module (DSM). REFER to Section 419-10. REPEAT the self-test. CLEAR the DTCs. |
| B1530 | Memory SET Switch Circuit Short to Ground | On-Demand and Continuous | For MKX, Go To Pinpoint Test M. For Edge, Go To Pinpoint Test O. |
| B1534 | Memory 1 Switch Circuit Short to Ground | On-Demand and Continuous | For MKX, Go To Pinpoint Test M. For Edge, Go To Pinpoint Test O. |
| B1538 | Memory 2 Switch Circuit Short to Ground | On-Demand and Continuous | For MKX, Go To Pinpoint Test M. For Edge, Go To Pinpoint Test O. |
| B1663 | Seat Driver Front Up/Down Motor Stalled | On-Demand | If the motor does not operate, for MKX, Go To Pinpoint Test L, for Edge, Go To Pinpoint Test N. If the motor operates, for MKX, Go To Pinpoint Test M, for Edge, Go To Pinpoint Test O. |
| B1664 | Seat Driver Rear Up/Down Motor Stalled | On-Demand | If the motor does not operate, for MKX, Go To Pinpoint Test L, for Edge, Go To Pinpoint Test N. If the motor operates, for MKX, Go To Pinpoint Test M, for Edge, Go To Pinpoint Test O. |
| B1665 | Seat Driver Forward/Backward Motor Stalled | On-Demand | If the motor does not operate, for MKX, Go To Pinpoint Test L, for Edge, Go To Pinpoint Test N. If the motor operates, for MKX, Go To Pinpoint Test M, for Edge, Go To Pinpoint Test O. |
| B1666 | Seat Driver Recline Motor Stalled | On-Demand | If the motor does not operate, Go To Pinpoint Test L. If the motor operates, Go To Pinpoint Test M. |
| B1667 | Mirror Driver Up/Down Motor Stalled | On-Demand | REFER to Section 501-09. |
| B1668 | Mirror Driver Right/Left Motor Stalled | On-Demand | REFER to Section 501-09. |
| B1669 | Mirror Passenger Up/Down Motor Stalled | On-Demand | REFER to Section 501-09. |
| B1670 | Mirror Passenger Right/Left Motor Stalled | On-Demand | REFER to Section 501-09. |
| B1703 | Seat Driver Recline Forward Switch Circuit Short to Battery | On-Demand and Continuous | Go To Pinpoint Test L. |
| B1707 | Seat Driver Recline Rearward Switch Circuit Short to Battery | On-Demand and Continuous | Go To Pinpoint Test L. |
| B1711 | Seat Driver Front Up Switch Circuit Short to Battery | On-Demand and Continuous | For MKX, Go To Pinpoint Test L. For Edge, Go To Pinpoint Test N. |
| B1715 | Seat Driver Front Down Switch Circuit Short to Battery | On-Demand and Continuous | For MKX, Go To Pinpoint Test L. For Edge, Go To Pinpoint Test N. |
| B1719 | Seat Driver Forward Switch Circuit Short to Battery | On-Demand and Continuous | For MKX, Go To Pinpoint Test L. For Edge, Go To Pinpoint Test N. |
| B1723 | Seat Driver Rearward Switch Circuit Short to Battery | On-Demand and Continuous | For MKX, Go To Pinpoint Test L. For Edge, Go To Pinpoint Test N. |
| B1727 | Seat Driver Rear Up Switch Circuit Short to Battery | On-Demand and Continuous | For MKX, Go To Pinpoint Test L. For Edge, Go To Pinpoint Test N. |
| B1731 | Seat Driver Rear Down Switch Circuit Short to Battery | On-Demand and Continuous | For MKX, Go To Pinpoint Test L. For Edge, Go To Pinpoint Test N. |
| B1952 | Seat Rear Up/Down Position Feedback Circuit Short to Battery | On-Demand and Continuous | For MKX, Go To Pinpoint Test M. For Edge, Go To Pinpoint Test O. |
| B1953 | Seat Rear Up/Down Position Feedback Circuit Short to Ground | On-Demand and Continuous | For MKX, Go To Pinpoint Test M. For Edge, Go To Pinpoint Test O. |
| B1956 | Seat Front Up/Down Position Feedback Circuit Short to Battery | On-Demand and Continuous | For MKX, Go To Pinpoint Test M. For Edge, Go To Pinpoint Test O. |
| B1957 | Seat Front Up/Down Position Feedback Circuit Short to Ground | On-Demand and Continuous | For MKX, Go To Pinpoint Test M. For Edge, Go To Pinpoint Test O. |
| B1960 | Seat Recline Forward/Backward Position Feedback Circuit Short to Battery | On-Demand and Continuous | Go To Pinpoint Test M. |
| B1961 | Seat Recline Forward/Backward Position Feedback Circuit Short to Ground | On-Demand and Continuous | Go To Pinpoint Test M. |
| B1964 | Seat Horizontal Forward/Rearward Position Feedback Circuit Short to Battery | On-Demand and Continuous | For MKX, Go To Pinpoint Test M. For Edge, Go To Pinpoint Test O. |
| B1965 | Seat Horizontal Forward/Rearward Position Feedback Circuit Short to Ground | On-Demand and Continuous | For MKX, Go To Pinpoint Test M. For Edge, Go To Pinpoint Test O. |
| B2084 | Memory SET Indicator Short to Ground | On-Demand and Continuous | Go To Pinpoint Test p |
| B2143 | Non Volatile Memory Failure (EEPROM) | Continuous | REPEAT the self-test. CLEAR the DTCs. If the DTC resets, INSTALL a new DSM. REFER to Section 419-10. |
| B2223 | Mirror Driver Drive Circuit Failure | On-Demand and Continuous | REFER to Section 501-09. |
| B2224 | Mirror Passenger Drive Circuit Failure | On-Demand and Continuous | REFER to Section 501-09. |
| B2312 | Mirror Passenger Horizontal Feedback Potentiometer Circuit Failure | On-Demand and Continuous | REFER to Section 501-09. |
| B2314 | Mirror Passenger Horizontal Feedback Potentiometer Circuit Short to Battery | On-Demand and Continuous | REFER to Section 501-09. |
| B2316 | Mirror Passenger Vertical Feedback Potentiometer Circuit Failure | On-Demand and Continuous | REFER to Section 501-09. |
| B2318 | Mirror Passenger Vertical Feedback Potentiometer Circuit Short to Battery | On-Demand and Continuous | REFER to Section 501-09. |
| B2320 | Mirror Driver Horizontal Feedback Potentiometer Circuit Failure | On-Demand and Continuous | REFER to Section 501-09. |
| B2322 | Mirror Driver Horizontal Feedback Potentiometer Circuit Short to Battery | On-Demand and Continuous | REFER to Section 501-09. |
| B2324 | Mirror Driver Vertical Feedback Potentiometer Circuit Failure | On-Demand and Continuous | REFER to Section 501-09. |
| B2326 | Mirror Driver Vertical Feedback Potentiometer Circuit Short to Battery | On-Demand and Continuous | REFER to Section 501-09. |
| B2477 | Module Configuration Failure | Continuous | CLEAR the DTC. If DTC B2477 is retrieved again, INSTALL a new DSM. REFER to Section 419-10. REPEAT the self-test. |
| U0140 | Lost Communication With Body Control Module (GEM) | On-Demand and Continuous | REFER to Section 418-00 to diagnose the MS-CAN network concern. |
| U0155 | Lost Communication With Instrument Panel Cluster (IC) Control Module | On-Demand and Continuous | REFER to Section 418-00 to diagnose the MS-CAN network concern. |
| U2050 | Application Not Present | Continuous | INSTALL a new DSM and REPEAT the self-test. CLEAR the DTCs. |
Climate Controlled Seat Module (CCSM) Diagnostic Trouble Code (DTC) Chart
| DTC | Description | Retrieved | Action |
|---|---|---|---|
| B103B | Thermoelectric Driver Overcurrent Low | On-Demand and Continuous | Go To Pinpoint Test AG. |
| B103C | Thermoelectric Driver Open Load | On-Demand and Continuous | Go To Pinpoint Test AH. |
| B103D | Blower Driver Overtemperature | On-Demand and Continuous | Go To Pinpoint Test AI. |
| B1111 | Driver Thermoelectric Device Control Overtemperature Fault | On-Demand and Continuous | Go To Pinpoint Test AG. |
| B1113 | Passenger Thermoelectric Device Control Overtemperature Fault | On-Demand and Continuous | Go To Pinpoint Test AJ. |
| B111B | Passenger Thermoelectric Driver Overcurrent Low | On-Demand and Continuous | Go To Pinpoint Test AJ. |
| B111C | Passenger Thermoelectric Driver Open Load | On-Demand and Continuous | Go To Pinpoint Test AK. |
| B111D | Passenger Blower Driver Overtemperature | On-Demand and Continuous | Go To Pinpoint Test AL. |
| B1342 | ECU is Faulted | On-Demand and Continuous | CLEAR the DTC. CARRY OUT the self-test. If the DTC does not clear or is retrieved again, INSTALL a new CCSM and CARRY OUT programmable module installation (PMI). REFER to Climate Controlled Seat Module in this section. |
| B19A1 | Passenger Seat Cushion Blower Speed Short to Battery | On-Demand and Continuous | DEPOWER the supplemental restraint system (SRS). REFER to Section 501-20B. DISCONNECT passenger safety belt buckle pretensioner C3202. DISCONNECT passenger seat side air bag
module C327.
DISCONNECT CCSM C3036c and passenger cushion TED C3328. CONNECT the battery ground cable. With the ignition switch ON, MEASURE the voltage between C3036c-3, circuit VHS23 (BN/BU), harness side and ground. REPAIR the short to voltage as needed. If OK, INSTALL a new CCSM and CARRY OUT programmable module installation (PMI). REFER to Climate Controlled Seat Module in this section. CARRY OUT the self-test. CLEAR the DTC. CONNECT passenger safety belt buckle pretensioner C3202. CONNECT passenger seat side air bag module C327. REPOWER the SRS. REFER to Section 501-20B. |
| B19A2 | Passenger Seat Back Blower Speed Short to Battery | On-Demand and Continuous | DEPOWER the supplemental restraint system (SRS). REFER to Section 501-20B. DISCONNECT passenger safety belt buckle pretensioner C3202. DISCONNECT passenger seat side air bag
module C327.
DISCONNECT CCSM C3036c and passenger backrest TED C3326. CONNECT the battery ground cable. With the ignition switch ON, MEASURE the voltage between C3036c-4, circuit VHS21 (BU/WH), harness side and ground. REPAIR the short to voltage as needed. If OK, INSTALL a new CCSM and CARRY OUT programmable module installation (PMI). REFER to Climate Controlled Seat Module in this section. CARRY OUT the self-test. CLEAR the DTC. CONNECT passenger safety belt buckle pretensioner C3202. CONNECT passenger seat side air bag module C327. REPOWER the SRS. REFER to Section 501-20B. |
| B19A3 | Driver Seat Cushion Blower Speed Short to Battery | On-Demand and Continuous | DEPOWER the supplemental restraint system (SRS). REFER to Section 501-20B. DISCONNECT driver safety belt buckle pretensioner C3201 and passenger safety belt buckle pretensioner
C3202. DISCONNECT driver seat side air bag module C328 and passenger side air bag module C327.
DISCONNECT CCSM C3036c and driver cushion TED C3327. CONNECT the battery ground cable. With the ignition switch ON, MEASURE the voltage between C3036c-11, circuit VHS18 (BN/GN), harness side and ground. REPAIR the short to voltage as needed. If OK, INSTALL a new CCSM and CARRY OUT programmable module installation (PMI). REFER to Climate Controlled Seat Module in this section. CARRY OUT the self-test. CLEAR the DTC. CONNECT driver safety belt buckle pretensioner C3201 and passenger safety belt buckle pretensioner C3202. CONNECT driver seat side air bag module C328 and passenger seat side air bag module C327. REPOWER the SRS. REFER to Section 501-20B. |
| B19A4 | Driver Seat Back Blower Speed Short to Battery | On-Demand and Continuous | DEPOWER the supplemental restraint system (SRS). REFER to Section 501-20B. DISCONNECT driver safety belt buckle pretensioner C3201 and passenger safety belt buckle pretensioner
C3202. DISCONNECT driver seat side air bag module C328 and passenger seat side air bag module C327.
DISCONNECT CCSM C3036c and driver backrest TED C3322. CONNECT the battery ground cable. With the ignition switch ON, MEASURE the voltage between C3036c-12, circuit VHS16 (BU/GN), harness side and ground. REPAIR the short to voltage as needed. If OK, INSTALL a new CCSM and CARRY OUT programmable module installation (PMI). REFER to Climate Controlled Seat Module in this section. CARRY OUT the self-test. CLEAR the DTC. CONNECT driver safety belt buckle pretensioner C3201 and passenger safety belt buckle pretensioner C3202. CONNECT driver seat side air bag module C328 and passenger seat side air bag module C327. REPOWER the SRS. REFER to Section 501-20B. |
| B19A5 | Passenger Seat Cushion Blower Speed Short to Ground | On-Demand and Continuous | DEPOWER the supplemental restraint system (SRS). REFER to Section 501-20B. DISCONNECT passenger safety belt buckle pretensioner C3202. DISCONNECT passenger seat side air bag
module C327.
DISCONNECT CCSM C3036c and passenger cushion TED C3328. CONNECT the battery ground cable. MEASURE the resistance between C3036c-3, circuit VHS23 (BN/BU), harness side and ground. REPAIR the short to voltage as needed. If OK, INSTALL a new CCSM and CARRY OUT programmable module installation (PMI). REFER to Climate Controlled Seat Module in this section. CARRY OUT the self-test. CLEAR the DTC. CONNECT passenger safety belt buckle pretensioner C3202. CONNECT passenger seat side air bag module C327. REPOWER the SRS. REFER to Section 501-20B. |
| B19A6 | Passenger Seat Back Blower Speed Short to Ground | On-Demand and Continuous | DEPOWER the supplemental restraint system (SRS). REFER to Section 501-20B. DISCONNECT passenger safety belt buckle pretensioner C3202. DISCONNECT passenger seat side air bag
module C327.
DISCONNECT CCSM C3036c and passenger backrest TED C3326. CONNECT the battery ground cable. MEASURE the resistance between C3036c-4, circuit VHS21 (BU/WH), harness side and ground. REPAIR the short to voltage as needed. If OK, INSTALL a new CCSM and CARRY OUT programmable module installation (PMI). REFER to Climate Controlled Seat Module in this section. CARRY OUT the self-test. CLEAR the DTC. CONNECT passenger safety belt buckle pretensioner C3202. CONNECT passenger seat side air bag module C327. REPOWER the SRS. REFER to Section 501-20B. |
| B19A7 | Driver Seat Cushion Blower Speed Short to Ground | On-Demand and Continuous | DEPOWER the supplemental restraint system (SRS). REFER to Section 501-20B. DISCONNECT driver safety belt buckle pretensioner C3201 and passenger safety belt buckle pretensioner
C3202. DISCONNECT driver seat side air bag module C328 and passenger seat side air bag module C327.
DISCONNECT CCSM C3036c and driver cushion TED C3327. CONNECT the battery ground cable. MEASURE the resistance between C3036c-11, circuit VHS18 (BN/GN), harness side and ground. REPAIR the short to voltage as needed. If OK, INSTALL a new CCSM and CARRY OUT programmable module installation (PMI). REFER to Climate Controlled Seat Module in this section. CARRY OUT the self-test. CLEAR the DTC. CONNECT driver safety belt buckle pretensioner C3201 and passenger safety belt buckle pretensioner C3202. CONNECT driver seat side air bag module C328 and passenger seat side air bag module C327. REPOWER the SRS. REFER to Section 501-20B. |
| B19A8 | Driver Seat Back Blower Speed Short to Ground | On-Demand and Continuous | DEPOWER the supplemental restraint system (SRS). REFER to Section 501-20B. DISCONNECT driver safety belt buckle pretensioner C3201 and passenger safety belt buckle pretensioner
C3202. DISCONNECT driver seat side air bag module C328 and passenger seat side air bag module C327.
DISCONNECT CCSM C3036c and driver backrest TED C3322. CONNECT the battery ground cable. MEASURE the resistance between C3036c-12, circuit VHS16 (BU/GN), harness side and ground. REPAIR the short to voltage as needed. If OK, INSTALL a new CCSM and CARRY OUT programmable module installation (PMI). REFER to Climate Controlled Seat Module in this section. CARRY OUT the self-test. CLEAR the DTC. CONNECT driver safety belt buckle pretensioner C3201 and passenger safety belt buckle pretensioner C3202. CONNECT driver seat side air bag module C328 and passenger seat side air bag module C327. REPOWER the SRS. REFER to Section 501-20B. |
| B2477 | Module Configuration Failure | On-Demand and Continuous |
NOTE: This DTC indicates programmable module installation (PMI) has not been done on a newly installed module or configuration data has been lost. CARRY OUT PMI on the CCSM. REFER to Section 418-01. REPEAT the self-test and VERIFY successful PMI. CLEAR the DTC. If DTC B2477 is retrieved again, INSTALL a new climate control seat module (CCSM) and CARRY OUT PMI. REFER to Climate Controlled Seat Module in this section. REPEAT the self-test. |
| B2486 | Climate Control Seat Module Voltage Out of Range | On-Demand and Continuous | REFER to Section 414-00 to diagnose the charging system concern. |
| B2729 | Cushion Over-Temp Detected (Driver) | On-Demand and Continuous | Go To Pinpoint Test AM. |
| B272A | Passenger Cushion Over-Temp Detected | On-Demand and Continuous | Go To Pinpoint Test AN. |
| B272B | Passenger Back Over-Temp Detected | On-Demand and Continuous | Go To Pinpoint Test AO. |
| B272C | Driver Differential Temperature Fault | On-Demand and Continuous | If on-demand, Go To Pinpoint Test AP. If continuous only, and the system is operating, CHECK the TED cooling performance on the affected seat and VERIFY the system is operating correctly. REFER to Component Test — Thermo-Electric Device (TED) Cooling Performance in this section. If a concern is found, CHECK the affected seat cushion or backrest for correct installation of the climate controlled seat components (TED, manifold, air ducts and foam pad). CHECK for airflow restrictions (TED inlets and outlets, TED-to-manifold connections, filters and ducts) and REPAIR as needed. If OK, CLEAR the DTCs. REPEAT the self-test. TEST the system for normal operation. The DTC may have been set by extreme cabin temperatures or excessive sun-load on the seat causing the system to enter recovery mode. Occupant size and weight characteristics can also be a factor. If a concern cannot be found or duplicated, RETURN the vehicle to the customer. |
| B272D | Passenger Differential Temperature Fault | On-Demand and Continuous | If on-demand, Go To Pinpoint Test AQ. If continuous only, and the system is operating, CHECK the TED cooling performance on the affected seat and VERIFY the system is operating correctly. REFER to Component Test — Thermo-Electric Device (TED) Cooling Performance in this section. If a concern is found, CHECK the affected seat cushion or backrest for correct installation of the climate controlled seat components (TED, manifold, air ducts and foam pad). CHECK for airflow restrctions (TED inlets and outlets, TED-to-manifold connections, filters and ducts) and REPAIR as needed. If OK, CLEAR the DTCs. REPEAT the self-test. TEST the system for normal operation. The DTC may have been set by extreme cabin temperatures or excessive sun-load on the seat causing the system to enter recovery mode. Occupant size and weight characteristics can also be a factor. If a concern cannot be found or duplicated, RETURN the vehicle to the customer. |
| B2730 | Back Over-Temp Detected (Driver) | On-Demand and Continuous | Go To Pinpoint Test AR. |
| B6050 | No Application Present | — | REFLASH with the latest operational software. REFER to Section 418-01. CLEAR the DTC. CARRY OUT the CCSM self-test. If the DTC does not clear, or is retrieved from the self-test, REFLASH with the latest operational software again. CLEAR the DTC. REPEAT the self-test. If the DTC does not clear, or is again retrieved from the self-test, INSTALL a new CCSM and CARRY OUT programmable module installation (PMI). REFER to Climate Controlled Seat Module in this section. |
Smart Power Distribution Junction Box (SPDJB) Diagnostic Trouble Code (DTC) Chart
| DTC | Description | Retrieved | Action |
|---|---|---|---|
| B2077 | Liftgate Ajar Switch Circuit Failure | On-Demand | REFER to Section 417-02. |
| B2794 | Third Row Power Fold Circuit Failure (applies to second row seat) | On-Demand and Continuous | Go To Pinpoint Test AS. |
Symptom Chart
| Condition | Possible Sources | Action |
|---|---|---|
|
|
|
|
|
|
|
|
|
|
|
|
|
|
|
|
|
|
|
|
|
|
|
|
|
|
|
|
|
|
|
|
|
|
|
|
|
|
|
|
|
|
|
|
|
|
|
|
|
|
|
|
|
|
|
|
|
|
|
|
|
|
|
|
|
|
|
|
|
|
|
|
|
|
|
|
|
|
|
|
|
|
|
|
|
|
|
|
|
|
|
|
|
|
|
|
|
|
|
|
|
|
|
|
|
|
|
|
|
|
|
|
|
|
|
|
|
|
|
|
|
|
|
|
|
|
|
|
|
|
|
|
|
|
|
Pinpoint Tests
CAUTION: Electronic modules are sensitive to electrostatic discharge. If exposed to these charges, damage can result.
Refer to Inspection and Verification, the Diagnostic Trouble Code (DTC) Chart and the Symptom Chart for direction to the appropriate Pinpoint Test.
Pinpoint Test A: The Power Seat is Inoperative — Driver, With Power Recliner
Refer to Wiring Diagrams Cell 120, Power Seats for schematic and connector information.
Normal Operation
The driver seat control switch is powered by battery voltage on circuit SBB60 (GN/RD) and is supplied ground on circuit GD145 (BK/BU). When pressed, the seat control switch supplies that voltage and ground to a power seat track motor or power recliner motor to move the seat or backrest. When pressed in the opposite direction, the seat control switch reverses the polarity to that same power seat track motor or power recliner motor, which moves the seat or backrest in the opposite direction. There are 3 power seat track motors that combine to move the seat cushion horizontally (forward/rearward) and vertically (front up/down and rear up/down). There is an additional motor in the power recliner mechanism to move the seat backrest forward and rearward. If a new seat track motor needs to be installed, it is necessary to install an entire power seat track. The power recline motor is serviced separately.
Possible Causes
An inoperative driver power seat can be caused by:
- a fuse.
- wiring, terminals or connectors.
- a faulty seat control switch.
PINPOINT TEST A: THE POWER SEAT IS INOPERATIVE — DRIVER, WITH POWER RECLINER
NOTE: The air bag warning indicator illuminates when the restraints control module (RCM) fuse is removed and the ignition switch is ON. This is normal operation and does not indicate a supplemental restraint system (SRS) fault.
NOTE: The SRS must be fully operational and free of faults before releasing the vehicle to the customer.
| Test Step | Result / Action to Take |
|---|---|
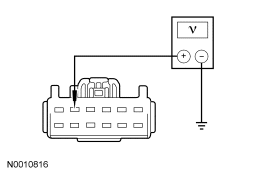
| A1 CHECK CIRCUIT SBB60 (GN/RD) FOR VOLTAGE | |
|
Yes GO to A2. No VERIFY battery junction box (BJB) fuse 60 (30A) is OK. If OK, REPAIR the circuit. TEST the system for normal operation. DISCONNECT the battery ground cable. CONNECT driver safety belt buckle pretensioner C3201. CONNECT driver seat side air bag module C328. REPOWER the SRS. REFER to Section 501-20B. |
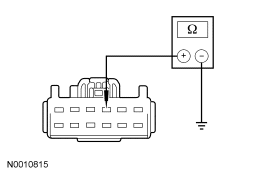
| A2 CHECK CIRCUIT GD145 (BK/BU) FOR AN OPEN | |
|
Yes INSTALL a new seat control switch. REFER to Seat Control Switch — Front in this section. TEST the system for normal operation. DISCONNECT the battery ground cable. CONNECT driver safety belt buckle pretensioner C3201. CONNECT driver seat side air bag module C328. REPOWER the SRS. REFER to Section 501-20B. No REPAIR the circuit. TEST the system for normal operation. DISCONNECT the battery ground cable. CONNECT driver safety belt buckle pretensioner C3201. CONNECT driver seat side air bag module C328. REPOWER the SRS. REFER to Section 501-20B. |
Pinpoint Test B: The Power Seat is Inoperative — Driver, Without Power Recliner
Refer to Wiring Diagrams Cell 120, Power Seats for schematic and connector information.
Normal Operation
The driver seat control switch is powered by battery voltage on circuit SBB60 (GN/RD) and is supplied ground on circuit GD145 (BK/BU). When pressed, the seat control switch supplies that voltage and ground to a power seat track motor to move the seat. When pressed in the opposite direction, the seat control switch reverses the polarity to that same power seat track motor, which moves the seat in the opposite direction. There are 3 power seat track motors that combine to move the seat cushion horizontally (forward/rearward) and vertically (front up/down and rear up/down). If a new seat track motor needs to be installed, it is necessary to install an entire power seat track.
Possible Causes
An inoperative driver power seat can be caused by:
- a fuse.
- wiring, terminals or connectors.
- a faulty seat control switch.
PINPOINT TEST B: THE POWER SEAT IS INOPERATIVE — DRIVER, WITHOUT POWER RECLINER
NOTE: The air bag warning indicator illuminates when the restraints control module (RCM) fuse is removed and the ignition switch is ON. This is normal operation and does not indicate a supplemental restraint system (SRS) fault.
NOTE: The SRS must be fully operational and free of faults before releasing the vehicle to the customer.
| Test Step | Result / Action to Take |
|---|---|
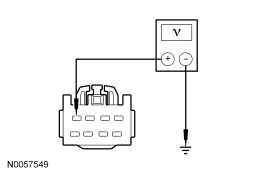
| B1 CHECK CIRCUIT SBB60 (GN/RD) FOR VOLTAGE | |
|
Yes GO to B2. No VERIFY battery junction box (BJB) fuse 60 (30A) is OK. If OK, REPAIR the circuit. TEST the system for normal operation. DISCONNECT the battery ground cable. CONNECT driver safety belt buckle pretensioner C3201. CONNECT driver seat side air bag module C328. REPOWER the SRS. REFER to Section 501-20B. |
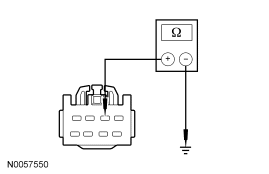
| B2 CHECK CIRCUIT GD145 (BK/BU) FOR AN OPEN | |
|
Yes INSTALL a new seat control switch. REFER to Seat Control Switch — Front in this section. TEST the system for normal operation. DISCONNECT the battery ground cable. CONNECT driver safety belt buckle pretensioner C3201. CONNECT driver seat side air bag module C328. REPOWER the SRS. REFER to Section 501-20B. No REPAIR the circuit. TEST the system for normal operation. DISCONNECT the battery ground cable. CONNECT driver safety belt buckle pretensioner C3201. CONNECT driver seat side air bag module C328. REPOWER the SRS. REFER to Section 501-20B. |
Pinpoint Test C: The Power Seat is Inoperative — Passenger, With Power Recline
Refer to Wiring Diagrams Cell 120, Power Seats for schematic and connector information.
Normal Operation
The passenger seat control switch is powered by battery voltage on circuit SBB61 (GY/RD) and is supplied ground on circuit GD145 (BK/BU). When pressed, the seat control switch supplies that voltage and ground to a power seat track motor or power recliner motor to move the seat or backrest. When pressed in the opposite direction, the seat control switch reverses the polarity to that same power seat track motor or power recliner motor, which moves the seat or backrest in the opposite direction. There are 3 power seat track motors that combine to move the seat cushion horizontally (forward/rearward) and vertically (front up/down and rear up/down). There is an additional motor in the power recliner mechanism to move the seat backrest forward and rearward. If a new seat track motor needs to be installed, it is necessary to install an entire power seat track. The power recline motor is serviced separately.
Possible Causes
An inoperative passenger power seat can be caused by:
- a fuse.
- wiring, terminals or connectors.
- a faulty seat control switch.
PINPOINT TEST C: THE POWER SEAT IS INOPERATIVE — PASSENGER, WITH POWER RECLINE
NOTE: The air bag warning indicator illuminates when the restraints control module (RCM) fuse is removed and the ignition switch is ON. This is normal operation and does not indicate a supplemental restraint system (SRS) fault.
NOTE: The SRS must be fully operational and free of faults before releasing the vehicle to the customer.
| Test Step | Result / Action to Take |
|---|---|
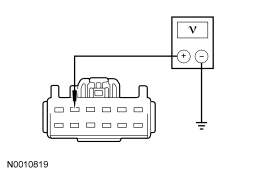
| C1 CHECK CIRCUIT SBB61 (GY/RD) FOR VOLTAGE | |
|
Yes GO to C2. No VERIFY battery junction box (BJB) fuse 61 (30A) is OK. If OK, REPAIR the circuit. TEST the system for normal operation. DISCONNECT the battery ground cable. CONNECT passenger safety belt buckle pretensioner C3202. CONNECT passenger seat side air bag module C327. REPOWER the SRS. REFER to Section 501-20B. |
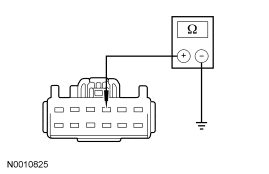
| C2 CHECK CIRCUIT GD145 (BK/BU) FOR AN OPEN | |
|
Yes INSTALL a new passenger seat control switch. REFER to Seat Control Switch — Front in this section. TEST the system for normal operation. DISCONNECT the battery ground cable. CONNECT passenger safety belt buckle pretensioner C3202. CONNECT passenger seat side air bag module C327. REPOWER the SRS. REFER to Section 501-20B. No REPAIR the circuit. TEST the system for normal operation. DISCONNECT the battery ground cable. CONNECT passenger safety belt buckle pretensioner C3202. CONNECT passenger seat side air bag module C327. REPOWER the SRS. REFER to Section 501-20B. |
Pinpoint Test D: The Power Seat is Inoperative — Passenger, Without Power Recline
Refer to Wiring Diagrams Cell 120, Power Seats for schematic and connector information.
Normal Operation
The passenger seat control switch is powered by battery voltage on circuit SBB61 (GY/RD) and is supplied ground on circuit GD145 (BK/BU). When pressed, the seat control switch supplies that voltage and ground to a power seat track motor to move the seat. When pressed in the opposite direction, the seat control switch reverses the polarity to that same power seat track motor, which moves the seat in the opposite direction. There are 3 power seat track motors that combine to move the seat cushion horizontally (forward/rearward) and vertically (front up/down and rear up/down). If a new seat track motor needs to be installed, it is necessary to install an entire power seat track. The power recline motor is serviced separately.
Possible Causes
An inoperative passenger power seat can be caused by:
- a fuse.
- wiring, terminals or connectors.
- a faulty seat control switch.
PINPOINT TEST D: THE POWER SEAT IS INOPERATIVE — PASSENGER, WITHOUT POWER RECLINE
NOTE: The air bag warning indicator illuminates when the restraints control module (RCM) fuse is removed and the ignition switch is ON. This is normal operation and does not indicate a supplemental restraint system (SRS) fault.
NOTE: The SRS must be fully operational and free of faults before releasing the vehicle to the customer.
| Test Step | Result / Action to Take |
|---|---|
| D1 CHECK CIRCUIT SBB61 (GY/RD) FOR VOLTAGE | |
|
Yes GO to D2. No VERIFY battery junction box (BJB) fuse 61 (30A) is OK. If BJB fuse 61 (30A) is OK, REPAIR the circuit. TEST the system for normal operation. DISCONNECT the battery ground cable. CONNECT passenger safety belt buckle pretensioner C3202. CONNECT passenger seat side air bag module C327. REPOWER the SRS. REFER to Section 501-20B. |
| D2 CHECK CIRCUIT GD145 (BK/BU) FOR AN OPEN | |
|
Yes INSTALL a new seat control switch. REFER to Seat Control Switch — Front in this section. TEST the system for normal operation. DISCONNECT the battery ground cable. CONNECT passenger safety belt buckle pretensioner C3202. CONNECT passenger seat side air bag module C327. REPOWER the SRS. REFER to Section 501-20B. No REPAIR the circuit. TEST the system for normal operation. DISCONNECT the battery ground cable. CONNECT passenger safety belt buckle pretensioner C3202. CONNECT passenger seat side air bag module C327. REPOWER the SRS. REFER to Section 501-20B. |
Pinpoint Test E: The Power Seat Moves But is Loose
Normal Operation
The power seat movement should be smooth and the seat cushion should not rock during or after operation.
Possible Causes
A loose power seat can be caused by:
- loose fastening hardware.
- a faulty seat track component.
PINPOINT TEST E: THE POWER SEAT MOVES BUT IS LOOSE
Pinpoint Test F: The Power Seat Moves But is Noisy
Normal Operation
The power seat should move quietly during operation. Some noise is acceptable.
Possible Causes
A noisy power seat can be caused by:
- a misaligned seat track.
- a faulty seat track component.
- an object obstructing seat movement.
PINPOINT TEST F: THE POWER SEAT MOVES BUT IS NOISY
Pinpoint Test G: The Power Seat Does Not Make Full Travel
Normal Operation
The power seat should travel fully horizontal (forward/rearward) and vertical (front up/down and rear up/down).
Possible Causes
A power seat that does not make full travel can be caused by:
- an obstruction.
- a faulty seat track component.
PINPOINT TEST G: THE POWER SEAT DOES NOT MAKE FULL TRAVEL
| Test Step | Result / Action to Take |
|---|---|
| G1 CHECK FOR AN OBSTRUCTION IN THE SEAT TRACK | |
|
Yes REMOVE the obstruction(s) and GREASE the track(s). REPOWER the SRS. REFER to Section 501-20B. TEST the system for normal operation. No IDENTIFY the cause and REPAIR as necessary. REPOWER the SRS. REFER to Section 501-20B. TEST the system for normal operation. |
Pinpoint Test H: The Power Seat Does Not Move Horizontally/Vertically/Recline — Driver
Refer to Wiring Diagrams Cell 120, Power Seats for schematic and connector information.
Normal Operation
The driver seat control switch is powered by battery voltage on circuit SBB60 (GN/RD) and is supplied ground on circuit GD145 (BK/BU). When pressed, the seat control switch supplies that voltage and ground to a power seat track motor or power recliner motor to move the seat or backrest. When pressed in the opposite direction, the seat control switch reverses the polarity to that same power seat track motor or power recliner motor, which moves the seat or backrest in the opposite direction. There are 3 power seat track motors that combine to move the seat cushion horizontally (forward/rearward) and vertically (front up/down and rear up/down). There is an additional motor in the power recliner mechanism to move the seat backrest forward and rearward. If a new seat track motor needs to be installed, it is necessary to install an entire power seat track. The power recline motor is serviced separately.
Possible Causes
A driver power seat that does not move horizontally, vertically or recline can be caused by:
- wiring, terminals or connectors.
- a faulty seat control switch.
- a faulty seat track motor (seat track).
- a faulty power recliner motor.
PINPOINT TEST H: THE POWER SEAT DOES NOT MOVE HORIZONTALLY/VERTICALLY/RECLINE — DRIVER
NOTE: The air bag warning indicator illuminates when the restraints control module (RCM) fuse is removed and the ignition switch is ON. This is normal operation and does not indicate a supplemental restraint system (SRS) fault.
NOTE: The SRS must be fully operational and free of faults before releasing the vehicle to the customer.
| Test Step | Result / Action to Take |
|---|---|
| H1 CHECK THE HORIZONTAL DIRECTION MOTOR FOR CORRECT OPERATION | |
|
Yes GO to H2. No GO to H3. |
| H2 CHECK THE RECLINER MOTOR FOR CORRECT OPERATION | |
|
Yes GO to H6. No GO to H13. |
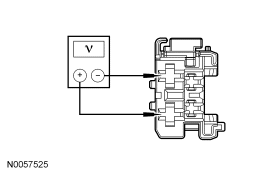
| H3 CHECK VOLTAGE TO THE DRIVER SEAT HORIZONTAL MOTOR | |
|
Yes INSTALL a new seat track assembly. REFER to Seat Track in this section. TEST the system for normal operation. DISCONNECT the battery ground cable. CONNECT driver safety belt buckle pretensioner C3201. CONNECT driver seat side air bag module C328. REPOWER the SRS. REFER to Section 501-20B. No GO to H4. |
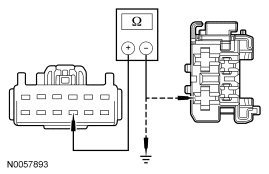
| H4 CHECK CIRCUIT CPS28 (GN) FOR AN OPEN AND SHORT TO GROUND | |
|
Yes GO to H5. No REPAIR the circuit. TEST the system for normal operation. DISCONNECT the battery ground cable. CONNECT driver safety belt buckle pretensioner C3201. CONNECT driver seat side air bag module C328. REPOWER the SRS. REFER to Section 501-20B. |
| H5 CHECK CIRCUIT CPS23 (GN/VT) FOR AN OPEN AND SHORT TO GROUND | |
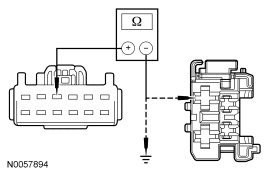
|
Yes INSTALL a new seat control switch. REFER to Seat Control Switch — Front in this section. TEST the system for normal operation. DISCONNECT the battery ground cable. CONNECT driver safety belt buckle pretensioner C3201. CONNECT driver seat side air bag module C328. REPOWER the SRS. REFER to Section 501-20B. No REPAIR the circuit. TEST the system for normal operation. DISCONNECT the battery ground cable. CONNECT driver safety belt buckle pretensioner C3201. CONNECT driver seat side air bag module C328. REPOWER the SRS. REFER to Section 501-20B. |
| H6 DETERMINE THE SEAT TILTING FAILURE | |
|
Yes If only forward tilting operates, GO to H7. If only rear tilting operates, GO to H10. No INSTALL a new seat control switch. REFER to Seat Control Switch — Front in this section. TEST the system for normal operation. DISCONNECT the battery ground cable. CONNECT driver safety belt buckle pretensioner C3201. CONNECT driver seat side air bag module C328. REPOWER the SRS. REFER to Section 501-20B. |
| H7 CHECK VOLTAGE TO THE DRIVER SEAT REAR HEIGHT MOTOR | |
|
Yes INSTALL a new seat track assembly. REFER to Seat Track in this section. TEST the system for normal operation. DISCONNECT the battery ground cable. CONNECT driver safety belt buckle pretensioner C3201. CONNECT driver seat side air bag module C328. REPOWER the SRS. REFER to Section 501-20B. No GO to H8. |
| H8 CHECK CIRCUIT CPS26 (YE/BU) FOR AN OPEN AND SHORT TO GROUND | |
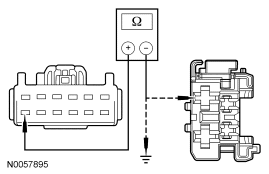
|
Yes GO to H9. No REPAIR the circuit. TEST the system for normal operation. DISCONNECT the battery ground cable. CONNECT driver safety belt buckle pretensioner C3201. CONNECT driver seat side air bag module C328. REPOWER the SRS. REFER to Section 501-20B. |
| H9 CHECK CIRCUIT CPS27 (BU/BN) FOR AN OPEN AND SHORT TO GROUND | |
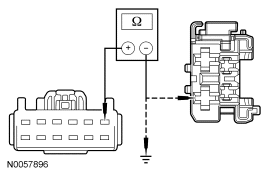
|
Yes INSTALL a new seat control switch. REFER to Seat Control Switch — Front in this section. TEST the system for normal operation. DISCONNECT the battery ground cable. CONNECT driver safety belt buckle pretensioner C3201. CONNECT driver seat side air bag module C328. REPOWER the SRS. REFER to Section 501-20B. No REPAIR the circuit. TEST the system for normal operation. DISCONNECT the battery ground cable. CONNECT driver safety belt buckle pretensioner C3201. CONNECT driver seat side air bag module C328. REPOWER the SRS. REFER to Section 501-20B. |
| H10 CHECK VOLTAGE TO DRIVER SEAT FRONT HEIGHT MOTOR | |
|
Yes INSTALL a new seat track assembly. REFER to Seat Track in this section. TEST the system for normal operation. DISCONNECT the battery ground cable. CONNECT driver safety belt buckle pretensioner C3201. CONNECT driver seat side air bag module C328. REPOWER the SRS. REFER to Section 501-20B. No GO to H11. |
| H11 CHECK CIRCUIT CPS24 (GY) FOR AN OPEN AND SHORT TO GROUND | |
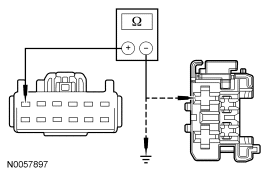
|
Yes GO to H12. No REPAIR the circuit. TEST the system for normal operation. DISCONNECT the battery ground cable. CONNECT driver safety belt buckle pretensioner C3201. CONNECT driver seat side air bag module C328. REPOWER the SRS. REFER to Section 501-20B. |
| H12 CHECK CIRCUIT CPS25 (WH/VT) FOR AN OPEN | |
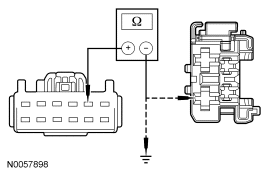
|
Yes INSTALL a new seat control switch. REFER to Seat Control Switch — Front in this section. TEST the system for normal operation. DISCONNECT the battery ground cable. CONNECT driver safety belt buckle pretensioner C3201. CONNECT driver seat side air bag module C328. REPOWER the SRS. REFER to Section 501-20B. No REPAIR the circuit. TEST the system for normal operation. DISCONNECT the battery ground cable. CONNECT driver safety belt buckle pretensioner C3201. CONNECT driver seat side air bag module C328. REPOWER the SRS. REFER to Section 501-20B. |
| H13 CHECK VOLTAGE TO THE DRIVER SEAT RECLINER MOTOR | |
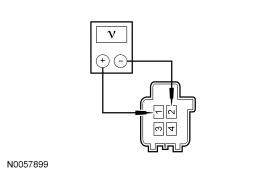
|
Yes INSTALL a new recliner motor. REFER to Seat Recliner Motor in this section. TEST the system for normal operation. DISCONNECT the battery ground cable. CONNECT driver safety belt buckle pretensioner C3201. CONNECT driver seat side air bag module C328. REPOWER the SRS. REFER to Section 501-20B. No GO to H14. |
| H14 CHECK CIRCUIT CPS29 (WH/BN) FOR AN OPEN AND SHORT TO GROUND | |
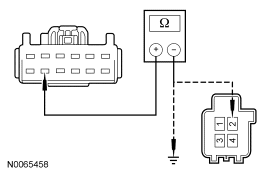
|
Yes GO to H15. No REPAIR the circuit. TEST the system for normal operation. DISCONNECT the battery ground cable. CONNECT driver safety belt buckle pretensioner C3201. CONNECT driver seat side air bag module C328. REPOWER the SRS. REFER to Section 501-20B. |
| H15 CHECK CIRCUIT CPS30 (VT/BN) FOR AN OPEN AND A SHORT TO GROUND | |
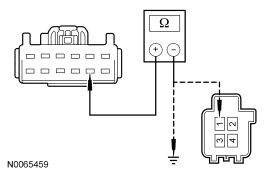
|
Yes INSTALL a new seat control switch. REFER to Seat Control Switch — Front in this section. TEST the system for normal operation. DISCONNECT the battery ground cable. CONNECT driver safety belt buckle pretensioner C3201. CONNECT driver seat side air bag module C328. REPOWER the SRS. REFER to Section 501-20B. No REPAIR the circuit. TEST the system for normal operation. DISCONNECT the battery ground cable. CONNECT driver safety belt buckle pretensioner C3201. CONNECT driver seat side air bag module C328. REPOWER the SRS. REFER to Section 501-20B. |
Pinpoint Test I: The Power Seat Does Not Move Horizontally/Vertically — Driver
Refer to Wiring Diagrams Cell 120, Power Seats for schematic and connector information.
Normal Operation
The driver seat control switch is powered by battery voltage on circuit SBB60 (GN/RD) and is supplied ground on circuit GD145 (BK/BU). When pressed, the seat control switch supplies that voltage and ground to a power seat track motor to move the seat. When pressed in the opposite direction, the seat control switch reverses the polarity to that same power seat track motor, which moves the seat in the opposite direction. There are 3 power seat track motors that combine to move the seat cushion horizontally (forward/rearward) and vertically (front up/down and rear up/down). If a new seat track motor needs to be installed, it is necessary to install an entire power seat track.
Possible Causes
A driver power seat that does not move horizontally and/or vertically can be caused by:
- wiring, terminals or connectors.
- a faulty seat control switch.
- a faulty seat track motor (seat track).
PINPOINT TEST I: THE POWER SEAT DOES NOT MOVE HORIZONTALLY/VERTICALLY — DRIVER
NOTE: The air bag warning indicator illuminates when the restraints control module (RCM) fuse is removed and the ignition switch is ON. This is normal operation and does not indicate a supplemental restraint system (SRS) fault.
NOTE: The SRS must be fully operational and free of faults before releasing the vehicle to the customer.
| Test Step | Result / Action to Take |
|---|---|
| I1 CHECK THE HORIZONTAL MOTOR FOR CORRECT OPERATION | |
|
Yes GO to I5. No GO to I2. |
| I2 CHECK VOLTAGE TO THE DRIVER SEAT HORIZONTAL MOTOR | |
|
Yes INSTALL a new seat track assembly. REFER to Seat Track in this section. TEST the system for normal operation. DISCONNECT the battery ground cable. CONNECT driver safety belt buckle pretensioner C3201. CONNECT driver seat side air bag module C328. REPOWER the SRS. REFER to Section 501-20B. No GO to I3. |
| I3 CHECK CIRCUIT CPS28 (GN) FOR AN OPEN AND SHORT TO GROUND | |
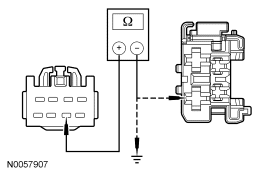
|
Yes GO to I4. No REPAIR the circuit. TEST the system for normal operation. DISCONNECT the battery ground cable. CONNECT driver safety belt buckle pretensioner C3201. CONNECT driver seat side air bag module C328. REPOWER the SRS. REFER to Section 501-20B. |
| I4 CHECK CIRCUIT CPS23 (GN/VT) FOR AN OPEN AND SHORT TO GROUND | |
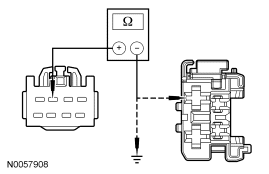
|
Yes INSTALL a new seat control switch. REFER to Seat Control Switch — Front in this section. TEST the system for normal operation. DISCONNECT the battery ground cable. CONNECT driver safety belt buckle pretensioner C3201. CONNECT driver seat side air bag module C328. REPOWER the SRS. REFER to Section 501-20B. No REPAIR the circuit. TEST the system for normal operation. DISCONNECT the battery ground cable. CONNECT driver safety belt buckle pretensioner C3201. CONNECT driver seat side air bag module C328. REPOWER the SRS. REFER to Section 501-20B. |
| I5 DETERMINE SEAT TILTING FAILURE | |
|
Yes If only forward tilting operates, GO to I6. If only rear tilting operates, GO to I9. No INSTALL a new seat control switch. REFER to Seat Control Switch — Front in this section. TEST the system for normal operation. DISCONNECT the battery ground cable. CONNECT driver safety belt buckle pretensioner C3201. CONNECT driver seat side air bag module C328. REPOWER the SRS. REFER to Section 501-20B. |
| I6 CHECK VOLTAGE TO THE DRIVER SEAT REAR HEIGHT MOTOR | |
|
Yes INSTALL a new seat track assembly. REFER to Seat Track in this section. TEST the system for normal operation. DISCONNECT the battery ground cable. CONNECT driver safety belt buckle pretensioner C3201. CONNECT driver seat side air bag module C328. REPOWER the SRS. REFER to Section 501-20B. No GO to I7. |
| I7 CHECK CIRCUIT CPS26 (YE/BU) FOR AN OPEN AND SHORT TO GROUND | |
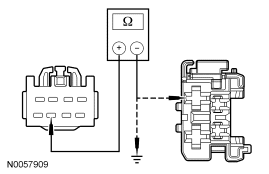
|
Yes GO to I8. No REPAIR the circuit. TEST the system for normal operation. DISCONNECT the battery ground cable. CONNECT driver safety belt buckle pretensioner C3201. CONNECT driver seat side air bag module C328. REPOWER the SRS. REFER to Section 501-20B. |
| I8 CHECK CIRCUIT CPS27 (BU/BN) FOR AN OPEN AND SHORT TO GROUND | |
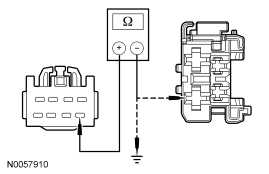
|
Yes INSTALL a new seat control switch. REFER to Seat Control Switch — Front in this section. TEST the system for normal operation. DISCONNECT the battery ground cable. CONNECT driver safety belt buckle pretensioner C3201. CONNECT driver seat side air bag module C328. REPOWER the SRS. REFER to Section 501-20B. No REPAIR the circuit. TEST the system for normal operation. DISCONNECT the battery ground cable. CONNECT driver safety belt buckle pretensioner C3201. CONNECT driver seat side air bag module C328. REPOWER the SRS. REFER to Section 501-20B. |
| I9 CHECK VOLTAGE TO THE DRIVER SEAT FRONT HEIGHT MOTOR | |
|
Yes INSTALL a new seat track assembly. REFER to Seat Track in this section. TEST the system for normal operation. DISCONNECT the battery ground cable. CONNECT driver safety belt buckle pretensioner C3201. CONNECT driver seat side air bag module C328. REPOWER the SRS. REFER to Section 501-20B. No GO to I10. |
| I10 CHECK CIRCUIT CPS24 (GY) FOR AN OPEN AND SHORT TO GROUND | |
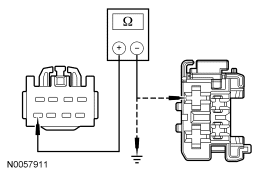
|
Yes GO to I11. No REPAIR the circuit. TEST the system for normal operation. DISCONNECT the battery ground cable. CONNECT driver safety belt buckle pretensioner C3201. CONNECT driver seat side air bag module C328. REPOWER the SRS. REFER to Section 501-20B. |
| I11 CHECK CIRCUIT CPS25 (WH/VT) FOR AN OPEN | |
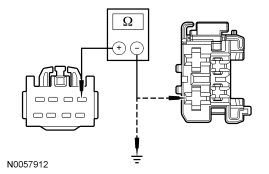
|
Yes INSTALL a new seat control switch. REFER to Seat Control Switch — Front in this section. TEST the system for normal operation. DISCONNECT the battery ground cable. CONNECT driver safety belt buckle pretensioner C3201. CONNECT driver seat side air bag module C328. REPOWER the SRS. REFER to Section 501-20B. No REPAIR the circuit. TEST the system for normal operation. DISCONNECT the battery ground cable. CONNECT driver safety belt buckle pretensioner C3201. CONNECT driver seat side air bag module C328. REPOWER the SRS. REFER to Section 501-20B. |
Pinpoint Test J: The Power Seat Does Not Move Horizontally/Vertically/Recline — Passenger
Refer to Wiring Diagrams Cell 120, Power Seats for schematic and connector information.
Normal Operation
The passenger seat control switch is powered by battery voltage on circuit SBB61 (GY/RD) and is supplied ground on circuit GD145 (BK/BU). When pressed, the seat control switch supplies that voltage and ground to a power seat track motor or power recliner motor to move the seat or backrest. When pressed in the opposite direction, the seat control switch reverses the polarity to that same power seat track motor or power recliner motor, which moves the seat or backrest in the opposite direction. There are 3 power seat track motors that combine to move the seat cushion horizontally (forward/rearward) and vertically (front up/down and rear up/down). There is an additional motor in the power recliner mechanism to move the seat backrest forward and rearward. If a new seat track motor needs to be installed, it is necessary to install an entire power seat track. The power recline motor is serviced separately.
Possible Causes
A passenger power seat that does not move horizontally, vertically or recline can be caused by:
- wiring, terminals or connectors.
- a faulty seat control switch.
- a faulty seat track motor (seat track).
- a faulty power recliner motor.
PINPOINT TEST J: THE POWER SEAT DOES NOT MOVE HORIZONTALLY/VERTICALLY/RECLINE — PASSENGER
NOTE: The air bag warning indicator illuminates when the restraints control module (RCM) fuse is removed and the ignition switch is ON. This is normal operation and does not indicate a supplemental restraint system (SRS) fault.
NOTE: The SRS must be fully operational and free of faults before releasing the vehicle to the customer.
| Test Step | Result / Action to Take |
|---|---|
| J1 CHECK THE HORIZONTAL DIRECTION MOTOR FOR CORRECT OPERATION | |
|
Yes GO to J2. No GO to J3. |
| J2 CHECK THE RECLINER MOTOR FOR CORRECT OPERATION | |
|
Yes GO to J6. No GO to J13. |
| J3 CHECK THE VOLTAGE TO THE PASSENGER SEAT HORIZONTAL MOTOR | |
|
Yes INSTALL a new seat track assembly. REFER to Seat Track in this section. TEST the system for normal operation. DISCONNECT the battery ground cable. CONNECT passenger safety belt buckle pretensioner C3202. CONNECT passenger seat side air bag module C327. REPOWER the SRS. REFER to Section 501-20B. No GO to J4. |
| J4 CHECK CIRCUIT CPS38 (GN/BU) FOR AN OPEN AND SHORT TO GROUND | |
|
Yes GO to J5. No REPAIR the circuit. TEST the system for normal operation. DISCONNECT the battery ground cable. CONNECT passenger safety belt buckle pretensioner C3202. CONNECT passenger seat side air bag module C327. REPOWER the SRS. REFER to Section 501-20B. |
| J5 CHECK CIRCUIT CPS33 (WH) FOR AN OPEN AND SHORT TO GROUND | |
|
Yes INSTALL a new seat control switch. REFER to Seat Control Switch — Front in this section. TEST the system for normal operation. DISCONNECT the battery ground cable. CONNECT passenger safety belt buckle pretensioner C3202. CONNECT passenger seat side air bag module C327. REPOWER the SRS. REFER to Section 501-20B. No REPAIR the circuit. TEST the system for normal operation. DISCONNECT the battery ground cable. CONNECT passenger safety belt buckle pretensioner C3202. CONNECT passenger seat side air bag module C327. REPOWER the SRS. REFER to Section 501-20B. |
| J6 DETERMINE THE SEAT TILTING FAILURE | |
|
Yes If only forward tilting operates, GO to J7. If only rear tilting operates, GO to J10. No INSTALL a new seat control switch. REFER to Seat Control Switch — Front in this section. TEST the system for normal operation. DISCONNECT the battery ground cable. CONNECT passenger safety belt buckle pretensioner C3202. CONNECT passenger seat side air bag module C327. REPOWER the SRS. REFER to Section 501-20B. |
| J7 CHECK VOLTAGE TO THE PASSENGER SEAT REAR HEIGHT MOTOR | |
|
Yes INSTALL a new seat track assembly. REFER to Seat Track in this section. TEST the system for normal operation. DISCONNECT the battery ground cable. CONNECT passenger safety belt buckle pretensioner C3202. CONNECT passenger seat side air bag module C327. REPOWER the SRS. REFER to Section 501-20B. No GO to J8. |
| J8 CHECK CIRCUIT CPS36 (YE/GY) FOR AN OPEN AND SHORT TO GROUND | |
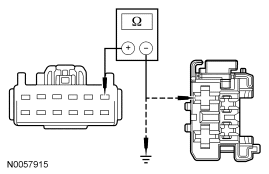
|
Yes GO to J9. No REPAIR the circuit. TEST the system for normal operation. DISCONNECT the battery ground cable. CONNECT passenger safety belt buckle pretensioner C3202. CONNECT passenger seat side air bag module C327. REPOWER the SRS. REFER to Section 501-20B. |
| J9 CHECK CIRCUIT CPS37 (WH/BU) FOR AN OPEN AND SHORT TO GROUND | |
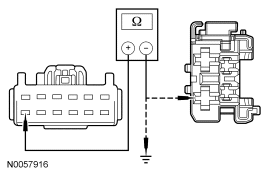
|
Yes INSTALL a new seat control switch. REFER to Seat Control Switch — Front in this section. TEST the system for normal operation. DISCONNECT the battery ground cable. CONNECT passenger safety belt buckle pretensioner C3202. CONNECT passenger seat side air bag module C327. REPOWER the SRS. REFER to Section 501-20B. No REPAIR the circuit. TEST the system for normal operation. DISCONNECT the battery ground cable. CONNECT passenger safety belt buckle pretensioner C3202. CONNECT passenger seat side air bag module C327. REPOWER the SRS. REFER to Section 501-20B. |
| J10 CHECK VOLTAGE TO PASSENGER SEAT FRONT HEIGHT MOTOR | |
|
Yes INSTALL a new seat track assembly. REFER to Seat Track in this section. TEST the system for normal operation. DISCONNECT the battery ground cable. CONNECT passenger safety belt buckle pretensioner C3202. CONNECT passenger seat side air bag module C327. REPOWER the SRS. REFER to Section 501-20B. No GO to J11. |
| J11 CHECK CIRCUIT CPS34 (GY/BU) FOR AN OPEN AND SHORT TO GROUND | |
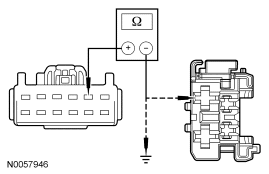
|
Yes GO to J12. No REPAIR the circuit. TEST the system for normal operation. DISCONNECT the battery ground cable. CONNECT passenger safety belt buckle pretensioner C3202. CONNECT passenger seat side air bag module C327. REPOWER the SRS. REFER to Section 501-20B. |
| J12 CHECK CIRCUIT CPS35 (VT/GN) FOR AN OPEN AND SHORT TO GROUND | |
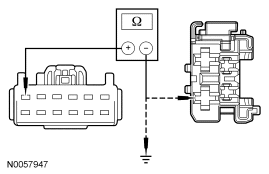
|
Yes INSTALL a new seat control switch. REFER to Seat Control Switch — Front in this section. TEST the system for normal operation. DISCONNECT the battery ground cable. CONNECT passenger safety belt buckle pretensioner C3202. CONNECT passenger seat side air bag module C327. REPOWER the SRS. REFER to Section 501-20B. No REPAIR the circuit. TEST the system for normal operation. DISCONNECT the battery ground cable. CONNECT passenger safety belt buckle pretensioner C3202. CONNECT passenger seat side air bag module C327. REPOWER the SRS. REFER to Section 501-20B. |
| J13 CHECK VOLTAGE TO THE PASSENGER SEAT RECLINER MOTOR | |
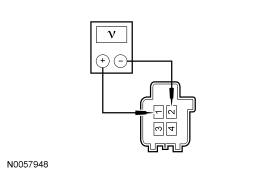
|
Yes INSTALL a new seat recliner motor. REFER to Seat Recliner Motor in this section. TEST the system for normal operation. DISCONNECT the battery ground cable. CONNECT passenger safety belt buckle pretensioner C3202. CONNECT passenger seat side air bag module C327. REPOWER the SRS. REFER to Section 501-20B. No GO to J14. |
| J14 CHECK CIRCUIT CPS39 (GY/YE) FOR AN OPEN AND SHORT TO GROUND | |
|
Yes GO to J15. No REPAIR the circuit. TEST the system for normal operation. DISCONNECT the battery ground cable. CONNECT passenger safety belt buckle pretensioner C3202. CONNECT passenger seat side air bag module C327. REPOWER the SRS. REFER to Section 501-20B. |
| J15 CHECK CIRCUIT CPS40 (VT/GY) FOR AN OPEN | |
|
Yes INSTALL a new seat control switch. REFER to Seat Control Switch — Front in this section. TEST the system for normal operation. DISCONNECT the battery ground cable. CONNECT passenger safety belt buckle pretensioner C3202. CONNECT passenger seat side air bag module C327. REPOWER the SRS. REFER to Section 501-20B. No REPAIR the circuit. TEST the system for normal operation. DISCONNECT the battery ground cable. CONNECT passenger safety belt buckle pretensioner C3202. CONNECT passenger seat side air bag module C327. REPOWER the SRS. REFER to Section 501-20B. |
Pinpoint Test K: The Power Seat Does Not Move Horizontally/Vertically — Passenger
Refer to Wiring Diagrams Cell 120, Power Seats for schematic and connector information.
Normal Operation
The passenger seat control switch is powered by battery voltage on circuit SBB61 (GY/RD) and is supplied ground on circuit GD145 (BK/BU). When pressed, the seat control switch supplies that voltage and ground to a power seat track motor. When pressed in the opposite direction, the seat control switch reverses the polarity to that same power seat track motor, which moves the seat in the opposite direction. There are 3 power seat track motors that combine to move the seat cushion horizontally (forward/rearward) and vertically (front up/down and rear up/down). If a new seat track motor needs to be installed, it is necessary to install an entire power seat track.
Possible Causes
A passenger power seat that does not move horizontally and/or vertically can be caused by:
- wiring, terminals or connectors.
- a faulty seat control switch.
- a faulty seat track motor (seat track).
PINPOINT TEST K: THE POWER SEAT DOES NOT MOVE HORIZONTALLY/VERTICALLY — PASSENGER
NOTE: The air bag warning indicator illuminates when the restraints control module (RCM) fuse is removed and the ignition switch is ON. This is normal operation and does not indicate a supplemental restraint system (SRS) fault.
NOTE: The SRS must be fully operational and free of faults before releasing the vehicle to the customer.
| Test Step | Result / Action to Take |
|---|---|
| K1 CHECK THE HORIZONTAL DIRECTION MOTOR FOR CORRECT OPERATION | |
|
Yes GO to K5. No GO to K2. |
| K2 CHECK VOLTAGE TO THE PASSENGER SEAT HORIZONTAL MOTOR | |
|
Yes INSTALL a new seat track assembly. REFER to Seat Track in this section. TEST the system for normal operation. DISCONNECT the battery ground cable. CONNECT passenger safety belt buckle pretensioner C3202. CONNECT passenger seat side air bag module C327. REPOWER the SRS. REFER to Section 501-20B. No GO to K3. |
| K3 CHECK CIRCUIT CPS38 (GN/BU) FOR AN OPEN AND SHORT TO GROUND | |
|
Yes GO to K4. No REPAIR the circuit. TEST the system for normal operation. DISCONNECT the battery ground cable. CONNECT passenger safety belt buckle pretensioner C3202. CONNECT passenger seat side air bag module C327. REPOWER the SRS. REFER to Section 501-20B. |
| K4 CHECK CIRCUIT CPS33 (WH) FOR AN OPEN AND SHORT TO GROUND | |
|
Yes INSTALL a new seat control switch. REFER to Seat Control Switch — Front in this section. TEST the system for normal operation. DISCONNECT the battery ground cable. CONNECT passenger safety belt buckle pretensioner C3202. CONNECT passenger seat side air bag module C327. REPOWER the SRS. REFER to Section 501-20B. No REPAIR the circuit. TEST the system for normal operation. DISCONNECT the battery ground cable. CONNECT passenger safety belt buckle pretensioner C3202. CONNECT passenger seat side air bag module C327. REPOWER the SRS. REFER to Section 501-20B. |
| K5 DETERMINE SEAT TILTING FAILURE | |
|
Yes If only forward tilting operates, GO to K6. If only rear tilting operates, GO to K9. No INSTALL a new seat control switch. REFER to Seat Control Switch — Front in this section. TEST the system for normal operation. DISCONNECT the battery ground cable. CONNECT passenger safety belt buckle pretensioner C3202. CONNECT passenger seat side air bag module C327. REPOWER the SRS. REFER to Section 501-20B. |
| K6 CHECK VOLTAGE TO THE PASSENGER SEAT REAR HEIGHT MOTOR | |
|
Yes INSTALL a new seat track assembly. REFER to Seat Track in this section. TEST the system for normal operation. DISCONNECT the battery ground cable. CONNECT passenger safety belt buckle pretensioner C3202. CONNECT passenger seat side air bag module C327. REPOWER the SRS. REFER to Section 501-20B. No GO to K7. |
| K7 CHECK CIRCUIT CPS36 (YE/GY) FOR AN OPEN AND SHORT TO GROUND | |
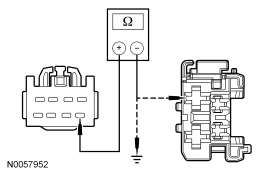
|
Yes GO to K8. No REPAIR the circuit. TEST the system for normal operation. DISCONNECT the battery ground cable. CONNECT passenger safety belt buckle pretensioner C3202. CONNECT passenger seat side air bag module C327. REPOWER the SRS. REFER to Section 501-20B. |
| K8 CHECK CIRCUIT CPS37 (WH/BU) FOR AN OPEN AND SHORT TO GROUND | |
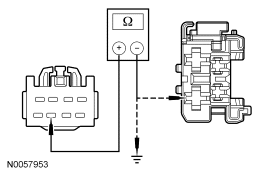
|
Yes INSTALL a new seat control switch. REFER to Seat Control Switch — Front in this section. TEST the system for normal operation. DISCONNECT the battery ground cable. CONNECT passenger safety belt buckle pretensioner C3202. CONNECT passenger seat side air bag module C327. REPOWER the SRS. REFER to Section 501-20B. No REPAIR the circuit. TEST the system for normal operation. DISCONNECT the battery ground cable. CONNECT passenger safety belt buckle pretensioner C3202. CONNECT passenger seat side air bag module C327. REPOWER the SRS. REFER to Section 501-20B. |
| K9 CHECK THE VOLTAGE TO THE PASSENGER SEAT FRONT HEIGHT MOTOR | |
|
Yes INSTALL a new seat track assembly. REFER to Seat Track in this section. TEST the system for normal operation. DISCONNECT the battery ground cable. CONNECT passenger safety belt buckle pretensioner C3202. CONNECT passenger seat side air bag module C327. REPOWER the SRS. REFER to Section 501-20B. No GO to K10. |
| K10 CHECK CIRCUIT CPS34 (GY/BU) FOR AN OPEN AND SHORT TO GROUND | |
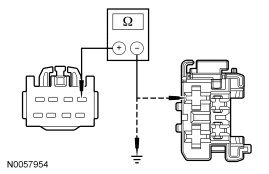
|
Yes GO to K11. No REPAIR the circuit. TEST the system for normal operation. DISCONNECT the battery ground cable. CONNECT passenger safety belt buckle pretensioner C3202. CONNECT passenger seat side air bag module C327. REPOWER the SRS. REFER to Section 501-20B. |
| K11 CHECK CIRCUIT CPS35 (VT/GN) FOR AN OPEN | |
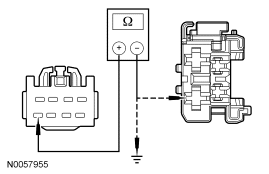
|
Yes INSTALL a new seat control switch. REFER to Seat Control Switch — Front in this section. TEST the system for normal operation. DISCONNECT the battery ground cable. CONNECT passenger safety belt buckle pretensioner C3202. CONNECT passenger seat side air bag module C327. REPOWER the SRS. REFER to Section 501-20B. No REPAIR the circuit. TEST the system for normal operation. DISCONNECT the battery ground cable. CONNECT passenger safety belt buckle pretensioner C3202. CONNECT passenger seat side air bag module C327. REPOWER the SRS. REFER to Section 501-20B. |
Pinpoint Test L: The Memory Seat is Inoperative/Does Not Operate Correctly — Does Not Operate Horizontally/Vertically/Recline, MKX
Refer to Wiring Diagrams Cell 123, Memory Seats for schematic and connector information.
Refer to Wiring Diagrams Cell 149, Component Testing for schematic and connector information.
Normal Operation
The driver seat control switch is powered by battery voltage on circuit SBP12 (GN/RD) and is supplied ground on circuit GD133 (BK). When pressed, the seat control switch supplies the voltage and ground to the applicable driver seat module (DSM) inputs. The DSM then supplies voltage and ground to the appropriate power seat track motor or power recline motor, based on the inputs received from the seat control switch. When pressed in the opposite direction, the seat control switch reverses the polarity to the DSM inputs, and the DSM likewise reverses polarity of the appropriate power seat track motor or power recliner motor circuits causing the seat or backrest to move in the opposite direction. There are 3 power seat track motors that combine to move the seat horizontally (forward/rearward) and vertically (front up/down and rear up/down). The seat backrest power recliner uses a single motor to move the seat backrest forward and rearward.
Battery voltage is supplied to DSM circuit SBB60 (GN/RD) and SBP12 (GN/RD). Ground is supplied to DSM circuit GD145 (BK/BU).
Each motor in the memory power seat track and power recliner contains a Hall-effect position sensor. The DSM supplies a signal feed circuit to each position sensor and a shared reference signal return circuit. Each position sensor sends a signal voltage back to the DSM used to monitor the position of the power seat and seat backrest. The DSM uses this information to return the seat to a stored pre-programmed position when pressing the memory SET switch or a remote entry transmitter. Refer to Principles of Operation in this section or the Owner's Literature for information on programming the DSM for storing memory seat positions.
The following pinpoint test diagnoses a memory seat that does not operate in one or more directions when using the seat control switch. If the memory seat moves in all directions using the seat control switch, Go To Pinpoint Test M.
Possible Causes
An inoperative memory seat can be caused by:
- a fuse.
- wiring, terminals or connectors.
- a faulty seat control switch.
- missing status information (CAN communication bus message):
- ignition switch status.
- gear selector position.
- a faulty memory power seat track.
- a faulty memory power recliner motor.
- a faulty DSM.
PINPOINT TEST L: THE MEMORY SEAT IS INOPERATIVE/DOES NOT OPERATE CORRECTLY — DOES NOT OPERATE HORIZONTALLY/VERTICALLY/RECLINE, MKX
NOTE: The air bag warning indicator illuminates when the restraints control module (RCM) fuse is removed and the ignition switch is ON. This is normal operation and does not indicate a supplemental restraint system (SRS) fault.
NOTE: The SRS must be fully operational and free of faults before releasing the vehicle to the customer.
NOTE: Verify good battery condition before diagnosing the memory seat system. Poor battery condition may interfere with memory seat operation, even if vehicle starting is possible.
| Test Step | Result / Action to Take | |||||||||||||||||||||||||||
|---|---|---|---|---|---|---|---|---|---|---|---|---|---|---|---|---|---|---|---|---|---|---|---|---|---|---|---|---|
| L1 CHECK IGNITION SWITCH STATUS, TRANSMISSION GEAR SELECTOR STATUS AND RETRIEVE DTCs | ||||||||||||||||||||||||||||
|
Yes If DTCs B1663, B1664, B1665 and B1666 are all retrieved, GO to L10. If DTC B1663, GO to L20 . If DTC B1664, GO to L23 . If DTC B1665, GO to L26 . If DTC B1666, GO to L29 . If DTC B1703, GO to L3 . If DTC B1707, GO to L3 . If DTC B1711, GO to L3 . If DTC B1715, GO to L3 . If DTC B1719, GO to L3 . If DTC B1723, GO to L3 . If DTC B1727, GO to L3 . If DTC B1731, GO to L3 . If DTC B1342, INSTALL a new DSM. REFER to Section 419-10. REPEAT the self-test. CLEAR the DTCs. For any other DSM DTCs, REFER to the Driver Seat Module (DSM) Diagnostic Trouble Code (DTC) Chart. No To diagnose an ignition switch status concern, REFER to Section 413-09. To diagnose a transmission gear selector (PRNDL) status concern, REFER to Section 307-01. Otherwise, GO to L2. | |||||||||||||||||||||||||||
| L2 MONITOR THE DSM PIDs AND CHECK FOR CORRECT MEMORY SEAT SWITCH INPUTS | ||||||||||||||||||||||||||||
|
Yes GO to L9. No VERIFY smart power distribution junction box (SPDJB) fuse 12 (7.5A) is OK. If SPDJB fuse 12 (7.5A) fails while operating the seat control switch, DISCONNECT driver seat control switch C3016 and GO to L7 . If SPDJB fuse 12 (7.5A) is OK, GO to L3 . | |||||||||||||||||||||||||||
| L3 CHECK THE SEAT CONTROL SWITCH | ||||||||||||||||||||||||||||
|
Yes GO to L4. No INSTALL a new seat control switch. REFER to Seat Control Switch — Front in this section. REPEAT the self-test. CLEAR the DTCs. DISCONNECT the battery ground cable. CONNECT driver safety belt buckle pretensioner C3201. CONNECT driver seat side air bag module C328. REPOWER the SRS. REFER to Section 501-20B. | |||||||||||||||||||||||||||
| L4 CHECK CIRCUIT SBP12 (GN/RD) FOR VOLTAGE TO THE SEAT CONTROL SWITCH | ||||||||||||||||||||||||||||
|
Yes GO to L5. No VERIFY SPDJB fuse 12 (7.5A) is OK, If OK, REPAIR the circuit. REPEAT the self-test. CLEAR the DTCs. DISCONNECT the battery ground cable. CONNECT driver safety belt buckle pretensioner C3201. CONNECT driver seat side air bag module C328. REPOWER the SRS. REFER to Section 501-20B. | |||||||||||||||||||||||||||
| L5 CHECK CIRCUIT GD133 (BK) FOR AN OPEN | ||||||||||||||||||||||||||||
|
Yes GO to L6. No REPAIR the circuit. REPEAT the self-test. CLEAR the DTCs. DISCONNECT the battery ground cable. CONNECT driver safety belt buckle pretensioner C3201. CONNECT driver seat side air bag module C328. REPOWER the SRS. REFER to Section 501-20B. | |||||||||||||||||||||||||||
| L6 CHECK SEAT CONTROL SWITCH TO DRIVER SEAT MODULE CIRCUITS FOR A SHORT TO POWER | ||||||||||||||||||||||||||||
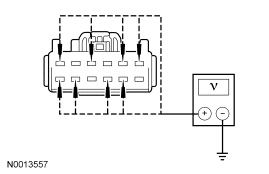
|
Yes REPAIR the affected circuit. REPEAT the self-test. CLEAR the DTCs. DISCONNECT the battery ground cable. CONNECT driver safety belt buckle pretensioner C3201. CONNECT driver seat side air bag module C328. REPOWER the SRS. REFER to Section 501-20B. No GO to L7. | |||||||||||||||||||||||||||
| L7 CHECK SEAT CONTROL SWITCH TO DSM CIRCUITS FOR A SHORT TO GROUND | ||||||||||||||||||||||||||||
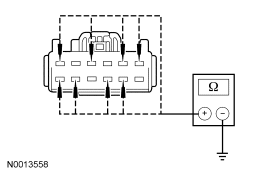
|
Yes REPAIR the affected circuit. REPEAT the self-test. CLEAR the DTCs. DISCONNECT the battery ground cable. CONNECT driver safety belt buckle pretensioner C3201. CONNECT driver seat side air bag module C328. REPOWER the SRS. REFER to Section 501-20B. No GO to L8. | |||||||||||||||||||||||||||
| L8 CHECK SEAT CONTROL SWITCH TO DSM CIRCUITS FOR AN OPEN | ||||||||||||||||||||||||||||
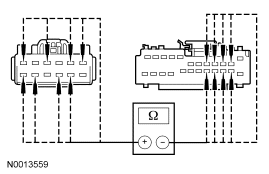
|
Yes INSTALL a new DSM. REFER to Section 419-10. REPEAT the self-test. CLEAR the DTCs. DISCONNECT the battery ground cable. CONNECT driver safety belt buckle pretensioner C3201. CONNECT driver seat side air bag module C328. REPOWER the SRS. REFER to Section 501-20B. No REPAIR the affected circuit. REPEAT the self-test. CLEAR the DTCs. DISCONNECT the battery ground cable. CONNECT driver safety belt buckle pretensioner C3201. CONNECT driver seat side air bag module C328. REPOWER the SRS. REFER to Section 501-20B. | |||||||||||||||||||||||||||
| L9 CHECK THE DSM FOR CORRECT OUTPUTS USING A SCAN TOOL AND DSM ACTIVE COMMANDS | ||||||||||||||||||||||||||||
|
Yes INSTALL a new DSM. REFER to Section 419-10. REPEAT the self-test. CLEAR the DTCs. DISCONNECT the battery ground cable. CONNECT driver safety belt buckle pretensioner C3201. CONNECT driver seat side air bag module C328. REPOWER the SRS. REFER to Section 501-20B. No If no seat movement, GO to L10 . If no front vertical seat movement, GO to L20 . If no rear vertical seat movement, GO to L23 . If no horizontal seat movement, GO to L26 . If no recline seat movement, GO to L29 . | |||||||||||||||||||||||||||
| L10 CHECK DSM CIRCUIT SBB60 (GN/RD) FOR VOLTAGE | ||||||||||||||||||||||||||||
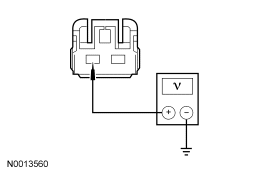
|
Yes GO to L11. No VERIFY power distribution box (PDB) fuse 60 (30A) is OK. If OK, REPAIR the circuit. REPEAT the self-test. CLEAR the DTCs. DISCONNECT the battery ground cable. CONNECT driver safety belt buckle pretensioner C3201. CONNECT driver seat side air bag module C328. REPOWER the SRS. REFER to Section 501-20B. | |||||||||||||||||||||||||||
| L11 CHECK CIRCUITS GD145 (BK/BU) AND GD133 (BK) FOR AN OPEN | ||||||||||||||||||||||||||||
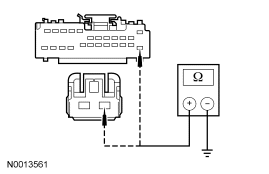
|
Yes GO to L12. No REPAIR the affected circuit. REPEAT the self-test. CLEAR the DTCs. DISCONNECT the battery ground cable. CONNECT driver safety belt buckle pretensioner C3201. CONNECT driver seat side air bag module C328. REPOWER the SRS. REFER to Section 501-20B. | |||||||||||||||||||||||||||
| L12 CHECK CIRCUITS CPS03 (VT/GY) AND CPS02 (GY/YE) FOR A SHORT TO GROUND | ||||||||||||||||||||||||||||
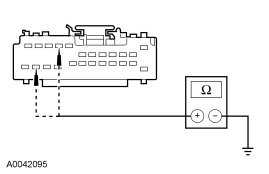
|
Yes GO to L14. No GO to L13. | |||||||||||||||||||||||||||
| L13 CHECK FRONT HEIGHT POWER SEAT MOTOR CIRCUITS CPS03 (VT/GY) AND CPS02 (GY/YE) FOR A SHORT TO GROUND | ||||||||||||||||||||||||||||
|
Yes INSTALL a new seat track assembly. REFER to Seat Track in this section. REPEAT the self-test. CLEAR the DTCs. DISCONNECT the battery ground cable. CONNECT driver safety belt buckle pretensioner C3201. CONNECT driver seat side air bag module C328. REPOWER the SRS. REFER to Section 501-20B. No REPAIR the affected circuit. REPEAT the self-test. CLEAR the DTCs. DISCONNECT the battery ground cable. CONNECT driver safety belt buckle pretensioner C3201. CONNECT driver seat side air bag module C328. REPOWER the SRS. REFER to Section 501-20B. | |||||||||||||||||||||||||||
| L14 CHECK CIRCUITS CPS05 (BU/WH) AND CPS04 (YE/OG) FOR A SHORT TO GROUND | ||||||||||||||||||||||||||||
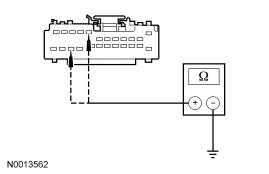
|
Yes GO to L16. No GO to L15. | |||||||||||||||||||||||||||
| L15 CHECK THE REAR HEIGHT POWER SEAT MOTOR CIRCUITS CPS05 (BU/WH) AND CPS04 (YE/OG) FOR A SHORT TO GROUND | ||||||||||||||||||||||||||||
|
Yes INSTALL a new seat track assembly. REFER to Seat Track in this section. REPEAT the self-test. CLEAR the DTCs. DISCONNECT the battery ground cable. CONNECT driver safety belt buckle pretensioner C3201. CONNECT driver seat side air bag module C328. REPOWER the SRS. REFER to Section 501-20B. No REPAIR the affected circuit. REPEAT the self-test. CLEAR the DTCs. DISCONNECT the battery ground cable. CONNECT driver safety belt buckle pretensioner C3201. CONNECT driver seat side air bag module C328. REPOWER the SRS. REFER to Section 501-20B. | |||||||||||||||||||||||||||
| L16 CHECK CIRCUITS CPS06 (GN/WH) AND CPS01 (GN/BU) FOR A SHORT TO GROUND | ||||||||||||||||||||||||||||
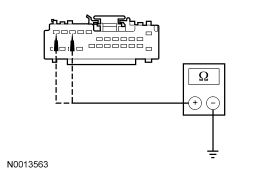
|
Yes GO to L18. No GO to L17. | |||||||||||||||||||||||||||
| L17 CHECK THE HORIZONTAL POWER SEAT MOTOR CIRCUITS CPS06 (GN/WH) AND CPS01 (GN/BU) FOR A SHORT TO GROUND | ||||||||||||||||||||||||||||
|
Yes INSTALL a new seat track assembly. REFER to Seat Track in this section. REPEAT the self-test. CLEAR the DTCs. DISCONNECT the battery ground cable. CONNECT driver safety belt buckle pretensioner C3201. CONNECT driver seat side air bag module C328. REPOWER the SRS. REFER to Section 501-20B. No REPAIR the affected circuit. REPEAT the self-test. CLEAR the DTCs. DISCONNECT the battery ground cable. CONNECT driver safety belt buckle pretensioner C3201. CONNECT driver seat side air bag module C328. REPOWER the SRS. REFER to Section 501-20B. | |||||||||||||||||||||||||||
| L18 CHECK CIRCUITS CPS07 (GY/BN) AND CPS08 (VT/OG) FOR A SHORT TO GROUND | ||||||||||||||||||||||||||||
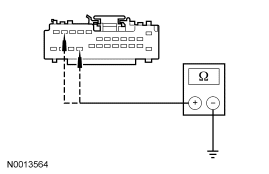
|
Yes INSTALL a new DSM. REFER to Section 419-10. REPEAT the self-test. CLEAR the DTCs. DISCONNECT the battery ground cable. CONNECT driver safety belt buckle pretensioner C3201. CONNECT driver seat side air bag module C328. REPOWER the SRS. REFER to Section 501-20B. No GO to L19. | |||||||||||||||||||||||||||
| L19 CHECK THE DRIVER POWER SEAT RECLINER MOTOR CIRCUITS CPS07 (GY/BN) AND CPS08 (VT/OG) FOR A SHORT TO GROUND | ||||||||||||||||||||||||||||
|
Yes INSTALL a new seat recliner motor. REFER to Seat Recliner Motor in this section. REPEAT the self-test. CLEAR the DTCs. DISCONNECT the battery ground cable. CONNECT driver safety belt buckle pretensioner C3201. CONNECT driver seat side air bag module C328. REPOWER the SRS. REFER to Section 501-20B. No REPAIR the affected circuit. REPEAT the self-test. CLEAR the DTCs. DISCONNECT the battery ground cable. CONNECT driver safety belt buckle pretensioner C3201. CONNECT driver seat side air bag module C328. REPOWER the SRS. REFER to Section 501-20B. | |||||||||||||||||||||||||||
| L20 CHECK THE FRONT HEIGHT POWER SEAT MOTOR FOR CORRECT OPERATION | ||||||||||||||||||||||||||||
|
Yes INSTALL a new seat track assembly. REFER to Seat Track in this section. REPEAT the self-test. CLEAR the DTCs. DISCONNECT the battery ground cable. CONNECT driver safety belt buckle pretensioner C3201. CONNECT driver seat side air bag module C328. REPOWER the SRS. REFER to Section 501-20B. No GO to L21. | |||||||||||||||||||||||||||
| L21 CHECK CIRCUITS CPS03 (VT/GY) AND CPS02 (GY/YE) FOR A SHORT TO POWER | ||||||||||||||||||||||||||||
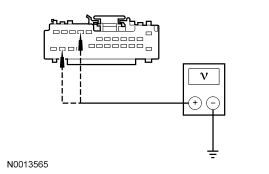
|
Yes REPAIR the affected circuit. REPEAT the self-test. CLEAR the DTCs. DISCONNECT the battery ground cable. CONNECT driver safety belt buckle pretensioner C3201. CONNECT driver seat side air bag module C328. REPOWER the SRS. REFER to Section 501-20B. No GO to L22. | |||||||||||||||||||||||||||
| L22 CHECK CIRCUITS CPS03 (VT/GY) AND CPS02 (GY/YE) FOR AN OPEN | ||||||||||||||||||||||||||||
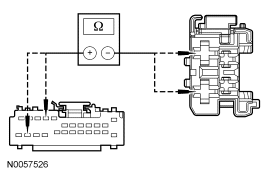
|
Yes INSTALL a new DSM. REFER to Section 419-10. REPEAT the self-test. CLEAR the DTCs. DISCONNECT the battery ground cable. CONNECT driver safety belt buckle pretensioner C3201. CONNECT driver seat side air bag module C328. REPOWER the SRS. REFER to Section 501-20B. No REPAIR the affected circuit. REPEAT the self-test. CLEAR the DTCs. DISCONNECT the battery ground cable. CONNECT driver safety belt buckle pretensioner C3201. CONNECT driver seat side air bag module C328. REPOWER the SRS. REFER to Section 501-20B. | |||||||||||||||||||||||||||
| L23 CHECK THE REAR HEIGHT MOTOR FOR CORRECT OPERATION | ||||||||||||||||||||||||||||
|
Yes INSTALL a new seat track assembly. REFER to Seat Track in this section. REPEAT the self-test. CLEAR the DTCs. DISCONNECT the battery ground cable. CONNECT driver safety belt buckle pretensioner C3201. CONNECT driver seat side air bag module C328. REPOWER the SRS. REFER to Section 501-20B. No GO to L24. | |||||||||||||||||||||||||||
| L24 CHECK CIRCUITS CPS05 (BU/WH) AND CPS04 (YE/OG) FOR A SHORT TO POWER | ||||||||||||||||||||||||||||
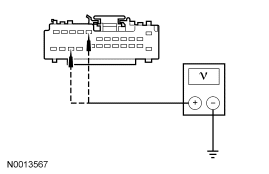
|
Yes REPAIR the affected circuit. REPEAT the self-test. CLEAR the DTCs. DISCONNECT the battery ground cable. CONNECT driver safety belt buckle pretensioner C3201. CONNECT driver seat side air bag module C328. REPOWER the SRS. REFER to Section 501-20B. No GO to L25. | |||||||||||||||||||||||||||
| L25 CHECK CIRCUITS CPS05 (BU/WH) AND CPS04 (YE/OG) FOR AN OPEN | ||||||||||||||||||||||||||||
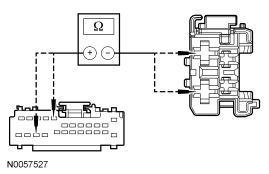
|
Yes INSTALL a new DSM. REFER to Section 419-10. REPEAT the self-test. CLEAR the DTCs. DISCONNECT the battery ground cable. CONNECT driver safety belt buckle pretensioner C3201. CONNECT driver seat side air bag module C328. REPOWER the SRS. REFER to Section 501-20B. No REPAIR the affected circuit. REPEAT the self-test. CLEAR the DTCs. DISCONNECT the battery ground cable. CONNECT driver safety belt buckle pretensioner C3201. CONNECT driver seat side air bag module C328. REPOWER the SRS. REFER to Section 501-20B. | |||||||||||||||||||||||||||
| L26 CHECK THE HORIZONTAL MOTOR FOR CORRECT OPERATION | ||||||||||||||||||||||||||||
|
Yes INSTALL a new seat track assembly. REFER to Seat Track in this section. REPEAT the self-test. CLEAR the DTCs. DISCONNECT the battery ground cable. CONNECT driver safety belt buckle pretensioner C3201. CONNECT driver seat side air bag module C328. REPOWER the SRS. REFER to Section 501-20B. No GO to L27. | |||||||||||||||||||||||||||
| L27 CHECK CIRCUITS CPS01 (GN/BU) AND CPS06 (GN/WH) FOR A SHORT TO POWER | ||||||||||||||||||||||||||||
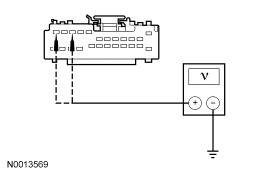
|
Yes REPAIR the affected circuit. REPEAT the self-test. CLEAR the DTCs. DISCONNECT the battery ground cable. CONNECT driver safety belt buckle pretensioner C3201. CONNECT driver seat side air bag module C328. REPOWER the SRS. REFER to Section 501-20B. No GO to L28. | |||||||||||||||||||||||||||
| L28 CHECK CIRCUITS CPS01 (GN/BU) AND CPS06 (GN/WH) FOR AN OPEN | ||||||||||||||||||||||||||||
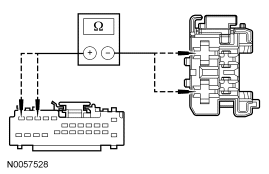
|
Yes INSTALL a new DSM. REFER to Section 419-10. REPEAT the self-test. CLEAR the DTCs. DISCONNECT the battery ground cable. CONNECT driver safety belt buckle pretensioner C3201. CONNECT driver seat side air bag module C328. REPOWER the SRS. REFER to Section 501-20B. No REPAIR the affected circuit. REPEAT the self-test. CLEAR the DTCs. DISCONNECT the battery ground cable. CONNECT driver safety belt buckle pretensioner C3201. CONNECT driver seat side air bag module C328. REPOWER the SRS. REFER to Section 501-20B. | |||||||||||||||||||||||||||
| L29 CHECK THE DRIVER SEAT POWER RECLINER MOTOR FOR CORRECT OPERATION | ||||||||||||||||||||||||||||
|
Yes INSTALL a new seat recliner motor. REFER to Seat Recliner Motor in this section. REPEAT the self-test. CLEAR the DTCs. DISCONNECT the battery ground cable. CONNECT driver safety belt buckle pretensioner C3201. CONNECT driver seat side air bag module C328. REPOWER the SRS. REFER to Section 501-20B. No GO to L30. | |||||||||||||||||||||||||||
| L30 CHECK CIRCUITS CPS07 (GY/BN) AND CPS08 (VT/OG) FOR A SHORT TO POWER | ||||||||||||||||||||||||||||
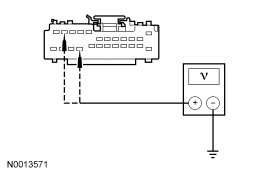
|
Yes REPAIR the affected circuit. REPEAT the self-test. CLEAR the DTCs. DISCONNECT the battery ground cable. CONNECT driver safety belt buckle pretensioner C3201. CONNECT driver seat side air bag module C328. REPOWER the SRS. REFER to Section 501-20B. No GO to L31. | |||||||||||||||||||||||||||
| L31 CHECK CIRCUITS CPS07 (GY/BN) AND CPS08 (VT/OG) FOR AN OPEN | ||||||||||||||||||||||||||||
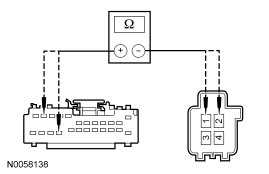
|
Yes INSTALL a new DSM. REFER to Section 419-10. REPEAT the self-test. CLEAR the DTCs. DISCONNECT the battery ground cable. CONNECT driver safety belt buckle pretensioner C3201. CONNECT driver seat side air bag module C328. REPOWER the SRS. REFER to Section 501-20B. No REPAIR the affected circuit. REPEAT the self-test. CLEAR the DTCs. DISCONNECT the battery ground cable. CONNECT driver safety belt buckle pretensioner C3201. CONNECT driver seat side air bag module C328. REPOWER the SRS. REFER to Section 501-20B. |
Pinpoint Test M: The Memory Seat Does Not Operate Correctly — Does Not Operate Using the Memory SET Switch, MKX
Refer to Wiring Diagrams Cell 123, Memory Seats for schematic and connector information.
Normal Operation
The driver seat control switch is powered by battery voltage on circuit SBP12 (GN/RD) and is supplied ground on circuit GD133 (BK). When pressed, the seat control switch supplies the voltage and ground to the applicable driver seat module (DSM) inputs. The DSM then supplies voltage and ground to the appropriate power seat track motor or power recline motor, based on the inputs received from the seat control switch. When pressed in the opposite direction, the seat control switch reverses the polarity to the DSM inputs, and the DSM likewise reverses polarity of the appropriate power seat track motor or power recliner motor circuits causing the seat or backrest to move in the opposite direction. There are 3 power seat track motors that combine to move the seat horizontally (forward/rearward) and vertically (front up/down and rear up/down). The seat backrest power recliner uses a single motor to move the seat backrest forward and rearward.
Battery voltage is supplied to DSM circuit SBB60 (GN/RD) and SBP12 (GN/RD). Ground is supplied to DSM circuit GD145 (BK/BU).
Each motor in the memory power seat track and power recliner contains a Hall-effect position sensor. The DSM supplies a signal feed circuit to each position sensor and a shared reference signal return circuit. Each position sensor sends a signal voltage back to the DSM used to monitor the position of the power seat and seat backrest. The DSM uses this information to return the seat to a stored pre-programmed position when pressing the memory SET switch or a remote entry transmitter. Refer to Principles of Operation in this section or the Owner's Literature for information on programming the DSM for storing memory seat positions.
The following pinpoint test diagnoses a memory seat that does not operate correctly using the memory SET switch. If the memory seat does not move in all directions using the seat control switch, Go To Pinpoint Test L.
Possible Causes
A memory seat that does not operate correctly can be caused by:
- wiring, terminals or connectors.
- a faulty memory SET switch.
- missing status information (CAN communication bus message):
- ignition switch status.
- gear selector position.
- a faulty remote entry transmitter.
- a faulty memory power seat track.
- a faulty memory recliner motor.
- a faulty DSM.
PINPOINT TEST M: THE MEMORY SEAT DOES NOT OPERATE CORRECTLY — DOES NOT OPERATE USING THE MEMORY SET SWITCH, MKX
NOTE: The air bag warning indicator illuminates when the restraints control module (RCM) fuse is removed and the ignition switch is ON. This is normal operation and does not indicate a supplemental restraint system (SRS) fault.
NOTE: The SRS must be fully operational and free of faults before releasing the vehicle to the customer.
NOTE: Verify good battery condition before diagnosing the memory seat system. Poor battery condition may interfere with memory seat operation, even if vehicle starting is possible.
| Test Step | Result / Action to Take | |||||||||||||||||||||
|---|---|---|---|---|---|---|---|---|---|---|---|---|---|---|---|---|---|---|---|---|---|---|
| M1 CHECK IGNITION SWITCH STATUS, TRANSMISSION GEAR SELECTOR STATUS AND RETRIEVE DTCs | ||||||||||||||||||||||
|
Yes If DTCs B1952, B1956, B1960 and B1964 are all retrieved, GO to M8 . If DTCs B1953, B1957, B1961 and B1965 are all retrieved, GO to M8 . If DTC B1530, GO to M3 . If DTC B1534, GO to M3 . If DTC B1538, GO to M3 . If DTC B1663, GO to M9 . If DTC B1664, GO to M12 . If DTC B1665, GO to M15 . If DTC B1666, GO to M18 . If DTC B1952, GO to M12 . If DTC B1953, GO to M12 . If DTC B1956, GO to M9 . If DTC B1957, GO to M9 . If DTC B1960, GO to M18 . If DTC B1961, GO to M18 . If DTC B1964, GO to M15 . If DTC B1965, GO to M15 . If DTC B1342, INSTALL a new DSM. REFER to Section 419-10. REPEAT the self-test. CLEAR the DTCs. For any other DSM DTCs, REFER to the Driver Seat Module (DSM) Diagnostic Trouble Code (DTC) Chart. DISCONNECT the battery ground cable. CONNECT driver safety belt buckle pretensioner C3201. CONNECT driver seat side air bag module C328. REPOWER the SRS. REFER to Section 501-20B. No To diagnose an ignition switch status concern, REFER to Section 413-09. To diagnose a transmission gear selector (PRNDL) status concern, REFER to Section 307-01. Otherwise, GO to M2. | |||||||||||||||||||||
| M2 MONITOR THE DSM PIDs AND CHECK THE DSM FOR CORRECT MEMORY SET SWITCH INPUTS | ||||||||||||||||||||||
|
Yes GO to M8. No GO to M3. | |||||||||||||||||||||
| M3 CHECK THE MEMORY SET SWITCH | ||||||||||||||||||||||
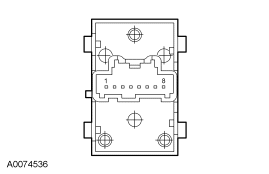
|
Yes GO to M4. No INSTALL a new memory SET switch. REFER to Memory Set Switch in this section. REPEAT the self-test. CLEAR the DTCs. | |||||||||||||||||||||
| M4 CHECK GROUND CIRCUIT GD133 (BK) TO THE MEMORY SET SWITCH | ||||||||||||||||||||||
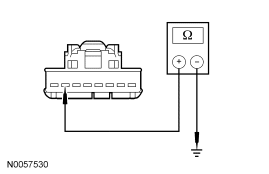
|
Yes GO to M5. No REPAIR the circuit. REPEAT the self-test. CLEAR the DTCs. REPOWER the SRS. REFER to Section 501-20B. | |||||||||||||||||||||
| M5 CHECK CIRCUITS CPS14 (GY/VT), CPS15 (VT/WH) AND CPS16 (YE) FOR A SHORT TO POWER | ||||||||||||||||||||||
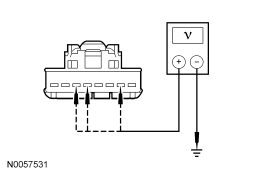
|
Yes REPAIR the affected circuit. REPEAT the self-test. CLEAR the DTCs. DISCONNECT the battery ground cable. CONNECT driver safety belt buckle pretensioner C3201. CONNECT driver seat side air bag module C328. REPOWER the SRS. REFER to Section 501-20B. No GO to M6. | |||||||||||||||||||||
| M6 CHECK CIRCUITS CPS14 (GY/VT), CPS15 (VT/WH) AND CPS16 (YE) FOR A SHORT TO GROUND | ||||||||||||||||||||||
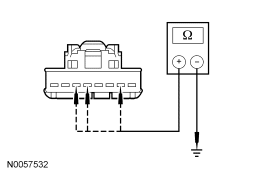
|
Yes GO to M7. No REPAIR the affected circuit. REPEAT the self-test. CLEAR the DTCs. DISCONNECT the battery ground cable. CONNECT driver safety belt buckle pretensioner C3201. CONNECT driver seat side air bag module C328. REPOWER the SRS. REFER to Section 501-20B. | |||||||||||||||||||||
| M7 CHECK CIRCUITS CPS14 (GY/VT), CPS15 (VT/WH) AND CPS16 (YE) FOR AN OPEN | ||||||||||||||||||||||
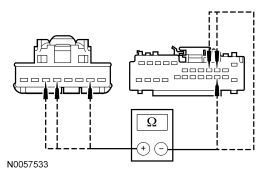
|
Yes INSTALL a new DSM. REFER to Section 419-10. REPEAT the self-test. CLEAR the DTCs. DISCONNECT the battery ground cable. CONNECT driver safety belt buckle pretensioner C3201. CONNECT driver seat side air bag module C328. REPOWER the SRS. REFER to Section 501-20B. No REPAIR the affected circuit. REPEAT the self-test. CLEAR the DTCs. DISCONNECT the battery ground cable. CONNECT driver safety belt buckle pretensioner C3201. CONNECT driver seat side air bag module C328. REPOWER the SRS. REFER to Section 501-20B. | |||||||||||||||||||||
| M8 MONITOR THE DSM PIDs | ||||||||||||||||||||||
|
Yes INSTALL a new DSM. REFER to Section 419-10. REPEAT the self-test. CLEAR the DTCs. DISCONNECT the battery ground cable. CONNECT driver safety belt buckle pretensioner C3201. CONNECT driver seat side air bag module C328. REPOWER the SRS. REFER to Section 501-20B. No If the front height PID indicates not sensed, GO to M9 . If the rear height PID indicates not sensed, GO to M12 . If the horizontal PID indicates not sensed, GO to M15 . If the recline PID indicates not sensed, GO to M18 . | |||||||||||||||||||||
| M9 CHECK CIRCUITS RPS13 (GN/OG) AND VPS10 (BU/GN) FOR A SHORT TO POWER | ||||||||||||||||||||||
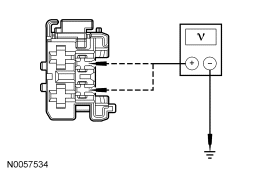
|
Yes REPAIR the affected circuit. REPEAT the self-test. CLEAR the DTCs. DISCONNECT the battery ground cable. CONNECT driver safety belt buckle pretensioner C3201. CONNECT driver seat side air bag module C328. REPOWER the SRS. REFER to Section 501-20B. No GO to M10. | |||||||||||||||||||||
| M10 CHECK CIRCUITS RPS13 (GN/OG) AND VPS10 (BU/GN) FOR A SHORT TO GROUND | ||||||||||||||||||||||
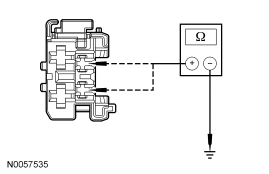
|
Yes GO to M11. No REPAIR the affected circuit. REPEAT the self-test. CLEAR the DTCs. DISCONNECT the battery ground cable. CONNECT driver safety belt buckle pretensioner C3201. CONNECT driver seat side air bag module C328. REPOWER the SRS. REFER to Section 501-20B. | |||||||||||||||||||||
| M11 CHECK CIRCUITS RPS13 (GN/OG) AND VPS10 (BU/GN) FOR AN OPEN | ||||||||||||||||||||||
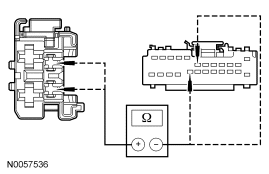
|
Yes INSTALL a new seat track assembly. REFER to Seat Track in this section. REPEAT the self-test. CLEAR the DTCs. DISCONNECT the battery ground cable. CONNECT driver safety belt buckle pretensioner C3201. CONNECT driver seat side air bag module C328. REPOWER the SRS. REFER to Section 501-20B. No REPAIR the affected circuit. REPEAT the self-test. CLEAR the DTCs. DISCONNECT the battery ground cable. CONNECT driver safety belt buckle pretensioner C3201. CONNECT driver seat side air bag module C328. REPOWER the SRS. REFER to Section 501-20B. | |||||||||||||||||||||
| M12 CHECK CIRCUITS RPS13 (GN/OG) AND VPS11 (GN/BN) FOR A SHORT TO POWER | ||||||||||||||||||||||
|
Yes REPAIR the affected circuit. REPEAT the self-test. CLEAR the DTCs. DISCONNECT the battery ground cable. CONNECT driver safety belt buckle pretensioner C3201. CONNECT driver seat side air bag module C328. REPOWER the SRS. REFER to Section 501-20B. No GO to M13. | |||||||||||||||||||||
| M13 CHECK CIRCUITS RPS13 (GN/OG) AND VPS11 (GN/BN) FOR A SHORT TO GROUND | ||||||||||||||||||||||
|
Yes GO to M14. No REPAIR the affected circuit. REPEAT the self-test. CLEAR the DTCs. DISCONNECT the battery ground cable. CONNECT driver safety belt buckle pretensioner C3201. CONNECT driver seat side air bag module C328. REPOWER the SRS. REFER to Section 501-20B. | |||||||||||||||||||||
| M14 CHECK CIRCUITS RPS13 (GN/OG) AND VPS11 (GN/BN) FOR AN OPEN | ||||||||||||||||||||||
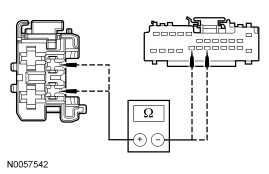
|
Yes INSTALL a new seat track assembly. REFER to Seat Track in this section. REPEAT the self-test. CLEAR the DTCs. DISCONNECT the battery ground cable. CONNECT driver safety belt buckle pretensioner C3201. CONNECT driver seat side air bag module C328. REPOWER the SRS. REFER to Section 501-20B. No REPAIR the circuit(s) in question. REPEAT the self-test. CLEAR the DTCs. DISCONNECT the battery ground cable. CONNECT driver safety belt buckle pretensioner C3201. CONNECT driver seat side air bag module C328. REPOWER the SRS. REFER to Section 501-20B. | |||||||||||||||||||||
| M15 CHECK CIRCUITS RPS13 (GN/OG) AND VPS09 (BN/BU) FOR A SHORT TO POWER | ||||||||||||||||||||||
|
Yes REPAIR the affected circuit. REPEAT the self-test. CLEAR the DTCs. DISCONNECT the battery ground cable. CONNECT driver safety belt buckle pretensioner C3201. CONNECT driver seat side air bag module C328. REPOWER the SRS. REFER to Section 501-20B. No GO to M16. | |||||||||||||||||||||
| M16 CHECK CIRCUITS RPS13 (GN/OG) AND VPS09 (BN/BU) FOR A SHORT TO GROUND | ||||||||||||||||||||||
|
Yes GO to M17. No REPAIR the affected circuit. REPEAT the self-test. CLEAR the DTCs. DISCONNECT the battery ground cable. CONNECT driver safety belt buckle pretensioner C3201. CONNECT driver seat side air bag module C328. REPOWER the SRS. REFER to Section 501-20B. | |||||||||||||||||||||
| M17 CHECK CIRCUITS RPS13 (GN/OG) AND VPS09 (BN/BU) FOR AN OPEN | ||||||||||||||||||||||
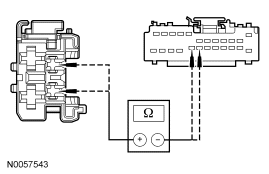
|
Yes INSTALL a new seat track assembly. REFER to Seat Track in this section. REPEAT the self-test. CLEAR the DTCs. DISCONNECT the battery ground cable. CONNECT driver safety belt buckle pretensioner C3201. CONNECT driver seat side air bag module C328. REPOWER the SRS. REFER to Section 501-20B. No REPAIR the affected circuit. REPEAT the self-test. CLEAR the DTCs. DISCONNECT the battery ground cable. CONNECT driver safety belt buckle pretensioner C3201. CONNECT driver seat side air bag module C328. REPOWER the SRS. REFER to Section 501-20B. | |||||||||||||||||||||
| M18 CHECK CIRCUITS RPS13 (GN/OG) AND VPS12 (GY/OG) FOR A SHORT TO POWER | ||||||||||||||||||||||
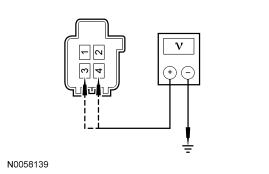
|
Yes REPAIR the affected circuit. REPEAT the self-test. CLEAR the DTCs. DISCONNECT the battery ground cable. CONNECT driver safety belt buckle pretensioner C3201. CONNECT driver seat side air bag module C328. REPOWER the SRS. REFER to Section 501-20B. No GO to M19. | |||||||||||||||||||||
| M19 CHECK CIRCUITS RPS13 (GN/OG) AND VPS12 (GY/OG) FOR A SHORT TO GROUND | ||||||||||||||||||||||
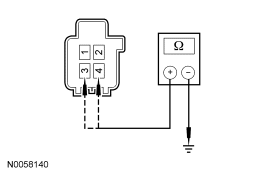
|
Yes GO to M20. No REPAIR the affected circuit. REPEAT the self-test. CLEAR the DTCs. DISCONNECT the battery ground cable. CONNECT driver safety belt buckle pretensioner C3201. CONNECT driver seat side air bag module C328. REPOWER the SRS. REFER to Section 501-20B. | |||||||||||||||||||||
| M20 CHECK CIRCUITS RPS13 (GN/OG) AND VPS12 (GY/OG) FOR AN OPEN | ||||||||||||||||||||||
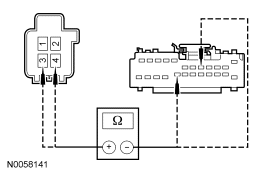
|
Yes INSTALL a new seat recliner motor. REFER to Seat Recliner Motor in this section. REPEAT the self-test. CLEAR the DTCs. DISCONNECT the battery ground cable. CONNECT driver safety belt buckle pretensioner C3201. CONNECT driver seat side air bag module C328. REPOWER the SRS. REFER to Section 501-20B. No REPAIR the affected circuit. REPEAT the self-test. CLEAR the DTCs. DISCONNECT the battery ground cable. CONNECT driver safety belt buckle pretensioner C3201. CONNECT driver seat side air bag module C328. REPOWER the SRS. REFER to Section 501-20B. |
Pinpoint Test N: The Memory Seat is Inoperative/Does Not Operate Correctly — Does Not Operate Horizontally/Vertically/Recline, Edge
Refer to Wiring Diagrams Cell 123, Memory Seats for schematic and connector information.
Refer to Wiring Diagrams Cell 149, Component Testing for schematic and connector information.
Normal Operation
The driver seat control switch is powered by battery voltage on circuit SBP12 (GN/RD) and is supplied ground on circuit GD133 (BK). When pressed, the seat control switch supplies the voltage and ground to the applicable driver seat module (DSM) inputs. The DSM then supplies voltage and ground to the appropriate power seat track motor based on the inputs received from the seat control switch. When pressed in the opposite direction, the seat control switch reverses the polarity to the DSM inputs, and the DSM likewise reverses polarity of the appropriate power seat track motor circuits causing the seat to move in the opposite direction. There are 3 power seat track motors that combine to move the seat horizontally (forward/rearward) and vertically (front up/down and rear up/down).
Battery voltage is also supplied to DSM circuit SBB60 (GN/RD) and is supplied ground to DSM circuit GD145 (BK/BU).
Each motor in the memory power seat track contains a Hall-effect position sensor. The DSM supplies a signal feed circuit to each position sensor and a shared reference signal return circuit. Each position sensor sends a signal voltage back to the DSM used to monitor the position of the power seat. The DSM uses this information to return the seat to a stored pre-programmed position when pressing the memory SET switch or a remote entry transmitter. Refer to Principles of Operation in this section or the Owner's Literature for information on programming the DSM for storing memory seat positions.
The following pinpoint test diagnoses a memory seat that does not operate in one or more directions when using the seat control switch. If the memory seat moves in all directions using the seat control switch, Go To Pinpoint Test O.
Possible Causes
An inoperative memory seat can be caused by:
- a fuse.
- wiring, terminals or connectors.
- a faulty seat control switch.
- missing status information (CAN communication bus message):
- ignition switch status.
- gear selector position.
- a faulty memory power seat track.
- a faulty DSM.
PINPOINT TEST N: THE MEMORY SEAT IS INOPERATIVE/DOES NOT OPERATE CORRECTLY — DOES NOT OPERATE HORIZONTALLY/VERTICALLY, EDGE
NOTE: The air bag warning indicator illuminates when the restraints control module (RCM) fuse is removed and the ignition switch is ON. This is normal operation and does not indicate a supplemental restraint system (SRS) fault.
NOTE: The SRS must be fully operational and free of faults before releasing the vehicle to the customer.
NOTE: Verify good battery condition before diagnosing the memory seat system. Poor battery condition may interfere with memory seat operation, even if vehicle starting is possible.
| Test Step | Result / Action to Take | |||||||||||||||||||||
|---|---|---|---|---|---|---|---|---|---|---|---|---|---|---|---|---|---|---|---|---|---|---|
| N1 CHECK IGNITION SWITCH STATUS, TRANSMISSION GEAR SELECTOR STATUS AND RETRIEVE DTCs | ||||||||||||||||||||||
|
Yes If DTCs B1663, B1664 and B1665 are all retrieved, GO to N10. If DTC B1663, GO to N18 . If DTC B1664, GO to N21 . If DTC B1665, GO to N24 . If DTC B1711, GO to N3 . If DTC B1715, GO to N3 . If DTC B1719, GO to N3 . If DTC B1723, GO to N3 . If DTC B1727, GO to N3 . If DTC B1731, GO to N3 . If DTC B1342, INSTALL a new DSM. REFER to Section 419-10. REPEAT the self-test. CLEAR the DTCs. For any other DSM DTCs, REFER to the Driver Seat Module (DSM) Diagnostic Trouble Code (DTC) Chart. DISCONNECT the battery ground cable. CONNECT driver safety belt buckle pretensioner C3201. CONNECT driver seat side air bag module C328. REPOWER the SRS. REFER to Section 501-20B. No To diagnose an ignition switch status concern, REFER to Section 211-05. To diagnose a transmission gear selector (PRNDL) status concern, REFER to Section 307-01. Otherwise, GO to N2. | |||||||||||||||||||||
| N2 MONITOR THE DSM PIDs AND CHECK FOR CORRECT MEMORY SEAT SWITCH INPUTS | ||||||||||||||||||||||
|
Yes GO to N9. No VERIFY smart power distribution junction box (SPDJB) fuse 12 (7.5A) is OK. If SPDJB fuse 12 (7.5A) fails while operating the seat control switch, DISCONNECT the seat control switch C352 and GO to N7 . If SPDJB fuse 12 (7.5A) is OK, GO to N3 . | |||||||||||||||||||||
| N3 CHECK THE SEAT CONTROL SWITCH | ||||||||||||||||||||||
|
Yes GO to N4. No INSTALL a new seat control switch. REFER to Seat Control Switch — Front in this section. REPEAT the self-test. CLEAR the DTCs. DISCONNECT the battery ground cable. CONNECT driver safety belt buckle pretensioner C3201. CONNECT driver seat side air bag module C328. REPOWER the SRS. REFER to Section 501-20B. | |||||||||||||||||||||
| N4 CHECK CIRCUIT SBP12 (GN/RD) FOR VOLTAGE TO THE SEAT CONTROL SWITCH | ||||||||||||||||||||||
|
Yes GO to N5. No VERIFY SPDJB fuse 12 (7.5A) is OK, If OK, REPAIR the circuit. REPEAT the self-test. CLEAR the DTCs. DISCONNECT the battery ground cable. CONNECT driver safety belt buckle pretensioner C3201. CONNECT driver seat side air bag module C328. REPOWER the SRS. REFER to Section 501-20B. | |||||||||||||||||||||
| N5 CHECK CIRCUIT GD133 (BK) FOR AN OPEN | ||||||||||||||||||||||
|
Yes GO to N6. No REPAIR the circuit. REPEAT the self-test. CLEAR the DTCs. DISCONNECT the battery ground cable. CONNECT driver safety belt buckle pretensioner C3201. CONNECT driver seat side air bag module C328. REPOWER the SRS. REFER to Section 501-20B. | |||||||||||||||||||||
| N6 CHECK SEAT CONTROL SWITCH TO DRIVER SEAT MODULE CIRCUITS FOR A SHORT TO POWER | ||||||||||||||||||||||
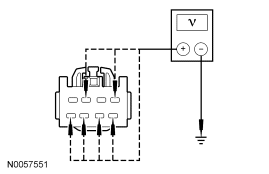
|
Yes REPAIR the affected circuit. REPEAT the self-test. CLEAR the DTCs. DISCONNECT the battery ground cable. CONNECT driver safety belt buckle pretensioner C3201. CONNECT driver seat side air bag module C328. REPOWER the SRS. REFER to Section 501-20B. No GO to N7. | |||||||||||||||||||||
| N7 CHECK SEAT CONTROL SWITCH TO DRIVER SEAT MODULE CIRCUITS FOR A SHORT TO GROUND | ||||||||||||||||||||||
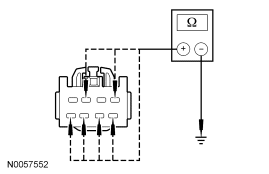
|
Yes REPAIR the affected circuit. REPEAT the self-test. CLEAR the DTCs. DISCONNECT the battery ground cable. CONNECT driver safety belt buckle pretensioner C3201. CONNECT driver seat side air bag module C328. REPOWER the SRS. REFER to Section 501-20B. No GO to N8. | |||||||||||||||||||||
| N8 CHECK SEAT CONTROL SWITCH TO DRIVER SEAT MODULE CIRCUITS FOR AN OPEN | ||||||||||||||||||||||
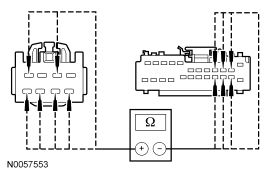
|
Yes INSTALL a new DSM. REFER to Section 419-10. REPEAT the self-test. CLEAR the DTCs. DISCONNECT the battery ground cable. CONNECT driver safety belt buckle pretensioner C3201. CONNECT driver seat side air bag module C328. REPOWER the SRS. REFER to Section 501-20B. No REPAIR the affected circuit. REPEAT the self-test. CLEAR the DTCs. DISCONNECT the battery ground cable. CONNECT driver safety belt buckle pretensioner C3201. CONNECT driver seat side air bag module C328. REPOWER the SRS. REFER to Section 501-20B. | |||||||||||||||||||||
| N9 CHECK THE DSM FOR CORRECT OUTPUTS USING A SCAN TOOL AND DSM ACTIVE COMMANDS | ||||||||||||||||||||||
|
Yes INSTALL a new DSM. REFER to Section 419-10. REPEAT the self-test. CLEAR the DTCs. DISCONNECT the battery ground cable. CONNECT driver safety belt buckle pretensioner C3201. CONNECT driver seat side air bag module C328. REPOWER the SRS. REFER to Section 501-20B. No If no seat movement, GO to N10. If no front vertical seat movement, GO to N18. If no rear vertical seat movement, GO to N21. If no horizontal seat movement, GO to N24. | |||||||||||||||||||||
| N10 CHECK DSM CIRCUIT SBB60 (GN/RD) FOR VOLTAGE | ||||||||||||||||||||||
|
Yes GO to N11. No VERIFY power distribution box (PDB) fuse 60 (30A) is OK. If OK, REPAIR the circuit. REPEAT the self-test. CLEAR the DTCs. DISCONNECT the battery ground cable. CONNECT driver safety belt buckle pretensioner C3201. CONNECT driver seat side air bag module C328. REPOWER the SRS. REFER to Section 501-20B. | |||||||||||||||||||||
| N11 CHECK CIRCUITS GD145 (BK/BU) AND GD133 (BK) FOR AN OPEN | ||||||||||||||||||||||
|
Yes GO to N12. No REPAIR the affected circuit. REPEAT the self-test. CLEAR the DTCs. DISCONNECT the battery ground cable. CONNECT driver safety belt buckle pretensioner C3201. CONNECT driver seat side air bag module C328. REPOWER the SRS. REFER to Section 501-20B. | |||||||||||||||||||||
| N12 CHECK CIRCUITS CPS03 (VT/GY) AND CPS02 (GY/YE) FOR A SHORT TO GROUND | ||||||||||||||||||||||
|
Yes GO to N14. No GO to N13. | |||||||||||||||||||||
| N13 CHECK FRONT HEIGHT POWER SEAT MOTOR CIRCUITS CPS03 (VT/GY) AND CPS02 (GY/YE) FOR A SHORT TO GROUND | ||||||||||||||||||||||
|
Yes INSTALL a new seat track assembly. REFER to Seat Track in this section. REPEAT the self-test. CLEAR the DTCs. DISCONNECT the battery ground cable. CONNECT driver safety belt buckle pretensioner C3201. CONNECT driver seat side air bag module C328. REPOWER the SRS. REFER to Section 501-20B. No REPAIR the affected circuit. REPEAT the self-test. CLEAR the DTCs. DISCONNECT the battery ground cable. CONNECT driver safety belt buckle pretensioner C3201. CONNECT driver seat side air bag module C328. REPOWER the SRS. REFER to Section 501-20B. | |||||||||||||||||||||
| N14 CHECK CIRCUITS CPS05 (BU/WH) AND CPS04 (YE/OG) FOR A SHORT TO GROUND | ||||||||||||||||||||||
|
Yes GO to N16. No GO to N15. | |||||||||||||||||||||
| N15 CHECK THE REAR HEIGHT POWER SEAT MOTOR CIRCUITS CPS05 (BU/WH) AND CPS04 (YE/OG) FOR A SHORT TO GROUND | ||||||||||||||||||||||
|
Yes INSTALL a new seat track assembly. REFER to Seat Track in this section. REPEAT the self-test. CLEAR the DTCs. DISCONNECT the battery ground cable. CONNECT driver safety belt buckle pretensioner C3201. CONNECT driver seat side air bag module C328. REPOWER the SRS. REFER to Section 501-20B. No REPAIR the affected circuit. REPEAT the self-test. CLEAR the DTCs. DISCONNECT the battery ground cable. CONNECT driver safety belt buckle pretensioner C3201. CONNECT driver seat side air bag module C328. REPOWER the SRS. REFER to Section 501-20B. | |||||||||||||||||||||
| N16 CHECK CIRCUITS CPS06 (GN/WH) AND CPS01 (GN/BU) FOR A SHORT TO GROUND | ||||||||||||||||||||||
|
Yes GO to N18. No GO to N17. | |||||||||||||||||||||
| N17 CHECK THE HORIZONTAL POWER SEAT MOTOR CIRCUITS CPS06 (GN/WH) AND CPS01 (GN/BU) FOR A SHORT TO GROUND | ||||||||||||||||||||||
|
Yes INSTALL a new seat track assembly. REFER to Seat Track in this section. REPEAT the self-test. CLEAR the DTCs. DISCONNECT the battery ground cable. CONNECT driver safety belt buckle pretensioner C3201. CONNECT driver seat side air bag module C328. REPOWER the SRS. REFER to Section 501-20B. No REPAIR the affected circuit. REPEAT the self-test. CLEAR the DTCs. DISCONNECT the battery ground cable. CONNECT driver safety belt buckle pretensioner C3201. CONNECT driver seat side air bag module C328. REPOWER the SRS. REFER to Section 501-20B. | |||||||||||||||||||||
| N18 CHECK THE FRONT HEIGHT POWER SEAT MOTOR FOR CORRECT OPERATION | ||||||||||||||||||||||
|
Yes INSTALL a new seat track assembly. REFER to Seat Track in this section. REPEAT the self-test. CLEAR the DTCs. DISCONNECT the battery ground cable. CONNECT driver safety belt buckle pretensioner C3201. CONNECT driver seat side air bag module C328. REPOWER the SRS. REFER to Section 501-20B. No GO to N19. | |||||||||||||||||||||
| N19 CHECK CIRCUITS CPS03 (VT/GY) AND CPS02 (GY/YE) FOR A SHORT TO POWER | ||||||||||||||||||||||
|
Yes REPAIR the affected circuit. REPEAT the self-test. CLEAR the DTCs. DISCONNECT the battery ground cable. CONNECT driver safety belt buckle pretensioner C3201. CONNECT driver seat side air bag module C328. REPOWER the SRS. REFER to Section 501-20B. No GO to N20. | |||||||||||||||||||||
| N20 CHECK CIRCUITS CPS03 (VT/GY) AND CPS02 (GY/YE) FOR AN OPEN | ||||||||||||||||||||||
|
Yes INSTALL a new DSM. REFER to Section 419-10. REPEAT the self-test. CLEAR the DTCs. DISCONNECT the battery ground cable. CONNECT driver safety belt buckle pretensioner C3201. CONNECT driver seat side air bag module C328. REPOWER the SRS. REFER to Section 501-20B. No REPAIR the affected circuit. REPEAT the self-test. CLEAR the DTCs. DISCONNECT the battery ground cable. CONNECT driver safety belt buckle pretensioner C3201. CONNECT driver seat side air bag module C328. REPOWER the SRS. REFER to Section 501-20B. | |||||||||||||||||||||
| N21 CHECK THE REAR HEIGHT MOTOR FOR CORRECT OPERATION | ||||||||||||||||||||||
|
Yes INSTALL a new seat track assembly. REFER to Seat Track in this section. REPEAT the self-test. CLEAR the DTCs. DISCONNECT the battery ground cable. CONNECT driver safety belt buckle pretensioner C3201. CONNECT driver seat side air bag module C328. REPOWER the SRS. REFER to Section 501-20B. No GO to N22. | |||||||||||||||||||||
| N22 CHECK CIRCUITS CPS05 (BU/WH) AND CPS04 (YE/OG) FOR A SHORT TO POWER | ||||||||||||||||||||||
|
Yes REPAIR the affected circuit. REPEAT the self-test. CLEAR the DTCs. DISCONNECT the battery ground cable. CONNECT driver safety belt buckle pretensioner C3201. CONNECT driver seat side air bag module C328. REPOWER the SRS. REFER to Section 501-20B. No GO to N23. | |||||||||||||||||||||
| N23 CHECK CIRCUITS CPS05 (BU/WH) AND CPS04 (YE/OG) FOR AN OPEN | ||||||||||||||||||||||
|
Yes INSTALL a new DSM. REFER to Section 419-10. REPEAT the self-test. CLEAR the DTCs. DISCONNECT the battery ground cable. CONNECT driver safety belt buckle pretensioner C3201. CONNECT driver seat side air bag module C328. REPOWER the SRS. REFER to Section 501-20B. No REPAIR the affected circuit. REPEAT the self-test. CLEAR the DTCs. DISCONNECT the battery ground cable. CONNECT driver safety belt buckle pretensioner C3201. CONNECT driver seat side air bag module C328. REPOWER the SRS. REFER to Section 501-20B. | |||||||||||||||||||||
| N24 CHECK THE HORIZONTAL MOTOR FOR CORRECT OPERATION | ||||||||||||||||||||||
|
Yes INSTALL a new seat track assembly. REFER to Seat Track in this section. REPEAT the self-test. CLEAR the DTCs. DISCONNECT the battery ground cable. CONNECT driver safety belt buckle pretensioner C3201. CONNECT driver seat side air bag module C328. REPOWER the SRS. REFER to Section 501-20B. No GO to N25. | |||||||||||||||||||||
| N25 CHECK CIRCUITS CPS01 (GN/BU) AND CPS06 (GN/WH) FOR A SHORT TO POWER | ||||||||||||||||||||||
|
Yes REPAIR the affected circuit. REPEAT the self-test. CLEAR the DTCs. DISCONNECT the battery ground cable. CONNECT driver safety belt buckle pretensioner C3201. CONNECT driver seat side air bag module C328. REPOWER the SRS. REFER to Section 501-20B. No GO to N26. | |||||||||||||||||||||
| N26 CHECK CIRCUITS CPS01 (GN/BU) AND CPS06 (GN/WH) FOR AN OPEN | ||||||||||||||||||||||
|
Yes INSTALL a new DSM. REFER to Section 419-10. REPEAT the self-test. CLEAR the DTCs. DISCONNECT the battery ground cable. CONNECT driver safety belt buckle pretensioner C3201. CONNECT driver seat side air bag module C328. REPOWER the SRS. REFER to Section 501-20B. No REPAIR the affected circuit. REPEAT the self-test. CLEAR the DTCs. DISCONNECT the battery ground cable. CONNECT driver safety belt buckle pretensioner C3201. CONNECT driver seat side air bag module C328. REPOWER the SRS. REFER to Section 501-20B. |
Pinpoint Test O: The Memory Seat Does Not Operate Correctly — Does Not Operate Using the Memory SET Switch, Edge
Refer to Wiring Diagrams Cell 123, Memory Seats for schematic and connector information.
Normal Operation
The driver seat control switch is powered by battery voltage on circuit SBP12 (GN/RD) and is supplied ground on circuit GD133 (BK). When pressed, the seat control switch supplies the voltage and ground to the applicable driver seat module (DSM) inputs. The DSM then supplies voltage and ground to the appropriate power seat track motor based on the inputs received from the seat control switch. When pressed in the opposite direction, the seat control switch reverses the polarity to the DSM inputs, and the DSM likewise reverses polarity of the appropriate power seat track motor or power recliner motor circuits causing the seat or backrest to move in the opposite direction. There are 3 power seat track motors that combine to move the seat horizontally (forward/rearward) and vertically (front up/down and rear up/down).
Battery voltage is supplied to DSM circuit SBB60 (GN/RD) and SBP12 (GN/RD). Ground is supplied to DSM circuit GD145 (BK/BU).
Each motor in the memory power seat track contains a Hall-effect position sensor. The DSM supplies a signal feed circuit to each position sensor and a shared reference signal return circuit. Each position sensor sends a signal voltage back to the DSM used to monitor the position of the power seat. The DSM uses this information to return the seat to a stored pre-programmed position when pressing the memory SET switch or a remote entry transmitter. Refer to Principles of Operation in this section or the owner's literature for additional information on programming the DSM for storing memory seat positions.
The following pinpoint test diagnoses a memory seat that does not operate correctly using the memory SET switch. If the memory seat does not move in all directions using the seat control switch, Go To Pinpoint Test N.
Possible Causes
A memory seat that does not operate correctly can be caused by:
- wiring, terminals or connectors.
- a faulty memory SET switch.
- missing status information (CAN communication bus message):
- ignition switch status.
- gear selector position.
- a faulty remote entry transmitter.
- a faulty memory power seat track.
- a faulty DSM.
PINPOINT TEST O: THE MEMORY SEAT DOES NOT OPERATE CORRECTLY — DOES NOT OPERATE USING THE MEMORY SET SWITCH, EDGE
NOTE: The air bag warning indicator illuminates when the restraints control module (RCM) fuse is removed and the ignition switch is ON. This is normal operation and does not indicate a supplemental restraint system (SRS) fault.
NOTE: The SRS must be fully operational and free of faults before releasing the vehicle to the customer.
NOTE: Verify good battery condition before diagnosing the memory seat system. Poor battery condition may interfere with memory seat operation, even if vehicle starting is possible.
| Test Step | Result / Action to Take | |||||||||||||||||||||
|---|---|---|---|---|---|---|---|---|---|---|---|---|---|---|---|---|---|---|---|---|---|---|
| O1 CHECK IGNITION SWITCH STATUS, TRANSMISSION GEAR SELECTOR STATUS AND RETRIEVE DTCs | ||||||||||||||||||||||
|
Yes If DTCs B1952, B1956 and B1964 are all retrieved, GO to O8 . If DTCs B1953, B1957 and B1965 are all retrieved, GO to O8 . If DTC B1530, GO to O3 . If DTC B1534, GO to O3 . If DTC B1538, GO to O3 . If DTC B1663, GO to O9 . If DTC B1664, GO to O12 . If DTC B1665, GO to O15 . If DTC B1952, GO to O12 . If DTC B1953, GO to O12 . If DTC B1956, GO to O9 . If DTC B1957, GO to O9 . If DTC B1964, GO to O15 . If DTC B1965, GO to O15 . If DTC B1342, INSTALL a new DSM. REFER to Section 419-10. REPEAT the self-test. CLEAR the DTCs. For any other DSM DTCs, REFER to the Driver Seat Module (DSM) Diagnostic Trouble Code (DTC) Chart. DISCONNECT the battery ground cable. CONNECT driver safety belt buckle pretensioner C3201. CONNECT driver seat side air bag module C328. REPOWER the SRS. REFER to Section 501-20B. No To diagnose an ignition switch status concern, REFER to Section 413-09. To diagnose a transmission gear selector (PRNDL) status concern, REFER to Section 307-01. Otherwise, GO to O2. | |||||||||||||||||||||
| O2 MONITOR THE DSM PIDs AND CHECK THE DSM FOR CORRECT MEMORY SET SWITCH INPUTS | ||||||||||||||||||||||
|
Yes GO to O9. No GO to O3. | |||||||||||||||||||||
| O3 CHECK THE MEMORY SET SWITCH | ||||||||||||||||||||||
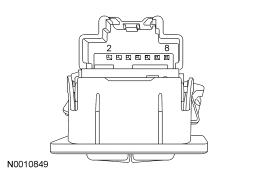
|
Yes GO to O4. No INSTALL a new memory SET switch. REFER to Memory Set Switch in this section. REPEAT the self-test. CLEAR the DTCs. DISCONNECT the battery ground cable. CONNECT driver safety belt buckle pretensioner C3201. CONNECT driver seat side air bag module C328. REPOWER the SRS. REFER to Section 501-20B. | |||||||||||||||||||||
| O4 CHECK GROUND CIRCUIT GD133 (BK) TO THE MEMORY SET SWITCH | ||||||||||||||||||||||
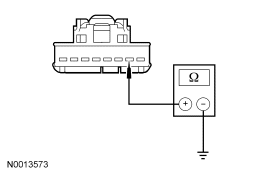
|
Yes GO to O5. No REPAIR the circuit. REPEAT the self-test. CLEAR the DTCs. DISCONNECT the battery ground cable. CONNECT driver safety belt buckle pretensioner C3201. CONNECT driver seat side air bag module C328. REPOWER the SRS. REFER to Section 501-20B. | |||||||||||||||||||||
| O5 CHECK CIRCUITS CPS14 (GY/VT), CPS15 (VT/WH) AND CPS16 (YE) FOR A SHORT TO POWER | ||||||||||||||||||||||
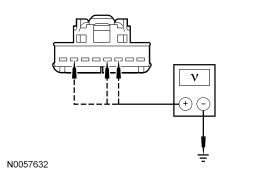
|
Yes REPAIR the affected circuit. REPEAT the self-test. CLEAR the DTCs. DISCONNECT the battery ground cable. CONNECT driver safety belt buckle pretensioner C3201. CONNECT driver seat side air bag module C328. REPOWER the SRS. REFER to Section 501-20B. No GO to O6. | |||||||||||||||||||||
| O6 CHECK CIRCUITS CPS14 (GY/VT), CPS15 (VT/WH) AND CPS16 (YE) FOR A SHORT TO GROUND | ||||||||||||||||||||||
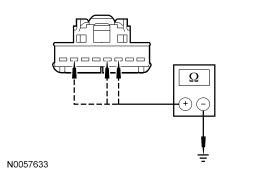
|
Yes GO to O7. No REPAIR the affected circuit. REPEAT the self-test. CLEAR the DTCs. DISCONNECT the battery ground cable. CONNECT driver safety belt buckle pretensioner C3201. CONNECT driver seat side air bag module C328. REPOWER the SRS. REFER to Section 501-20B. | |||||||||||||||||||||
| O7 CHECK CIRCUITS CPS14 (GY/VT), CPS15 (VT/WH) AND CPS16 (YE) FOR AN OPEN | ||||||||||||||||||||||
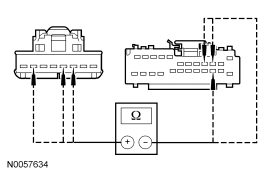
|
Yes INSTALL a new DSM. REFER to Section 419-10. REPEAT the self-test. CLEAR the DTCs. DISCONNECT the battery ground cable. CONNECT driver safety belt buckle pretensioner C3201. CONNECT driver seat side air bag module C328. REPOWER the SRS. REFER to Section 501-20B. No REPAIR the affected circuit. REPEAT the self-test. CLEAR the DTCs. DISCONNECT the battery ground cable. CONNECT driver safety belt buckle pretensioner C3201. CONNECT driver seat side air bag module C328. REPOWER the SRS. REFER to Section 501-20B. | |||||||||||||||||||||
| O8 MONITOR THE DSM PIDs | ||||||||||||||||||||||
|
Yes INSTALL a new DSM. REFER to Section 419-10. REPEAT the self-test. CLEAR the DTCs. DISCONNECT the battery ground cable. CONNECT driver safety belt buckle pretensioner C3201. CONNECT driver seat side air bag module C328. REPOWER the SRS. REFER to Section 501-20B. No If the front height PID indicates not sensed, GO to O9. If the rear height PID indicates not sensed, GO to O12. If the horizontal PID indicates not sensed, GO to O15. | |||||||||||||||||||||
| O9 CHECK CIRCUITS RPS13 (GN/OG) AND VPS10 (BU/GN) FOR A SHORT TO POWER | ||||||||||||||||||||||
|
Yes REPAIR the affected circuit. REPEAT the self-test. CLEAR the DTCs. DISCONNECT the battery ground cable. CONNECT driver safety belt buckle pretensioner C3201. CONNECT driver seat side air bag module C328. REPOWER the SRS. REFER to Section 501-20B. No GO to O10. | |||||||||||||||||||||
| O10 CHECK CIRCUITS RPS13 (GN/OG) AND VPS10 (BU/GN) FOR A SHORT TO GROUND | ||||||||||||||||||||||
|
Yes GO to O11. No REPAIR the affected circuit. REPEAT the self-test. CLEAR the DTCs. DISCONNECT the battery ground cable. CONNECT driver safety belt buckle pretensioner C3201. CONNECT driver seat side air bag module C328. REPOWER the SRS. REFER to Section 501-20B. | |||||||||||||||||||||
| O11 CHECK CIRCUITS RPS13 (GN/OG) AND VPS10 (BU/GN) FOR AN OPEN | ||||||||||||||||||||||
|
Yes INSTALL a new seat track assembly. REFER to Seat Track in this section. REPEAT the self-test. CLEAR the DTCs. DISCONNECT the battery ground cable. CONNECT driver safety belt buckle pretensioner C3201. CONNECT driver seat side air bag module C328. REPOWER the SRS. REFER to Section 501-20B. No REPAIR the affected circuit. REPEAT the self-test. CLEAR the DTCs. DISCONNECT the battery ground cable. CONNECT driver safety belt buckle pretensioner C3201. CONNECT driver seat side air bag module C328. REPOWER the SRS. REFER to Section 501-20B. | |||||||||||||||||||||
| O12 CHECK CIRCUITS RPS13 (GN/OG) AND VPS11 (GN/BN) FOR A SHORT TO POWER | ||||||||||||||||||||||
|
Yes REPAIR the affected circuit. REPEAT the self-test. CLEAR the DTCs. DISCONNECT the battery ground cable. CONNECT driver safety belt buckle pretensioner C3201. CONNECT driver seat side air bag module C328. REPOWER the SRS. REFER to Section 501-20B. No GO to O13. | |||||||||||||||||||||
| O13 CHECK CIRCUITS RPS13 (GN/OG) AND VPS11 (GN/BN) FOR A SHORT TO GROUND | ||||||||||||||||||||||
|
Yes GO to O14. No REPAIR the affected circuit. REPEAT the self-test. CLEAR the DTCs. DISCONNECT the battery ground cable. CONNECT driver safety belt buckle pretensioner C3201. CONNECT driver seat side air bag module C328. REPOWER the SRS. REFER to Section 501-20B. | |||||||||||||||||||||
| O14 CHECK CIRCUITS RPS13 (GN/OG) AND VPS11 (GN/BN) FOR AN OPEN | ||||||||||||||||||||||
|
Yes INSTALL a new seat track assembly. REFER to Seat Track in this section. REPEAT the self-test. CLEAR the DTCs. DISCONNECT the battery ground cable. CONNECT driver safety belt buckle pretensioner C3201. CONNECT driver seat side air bag module C328. REPOWER the SRS. REFER to Section 501-20B. No REPAIR the circuit(s) in question. REPEAT the self-test. CLEAR the DTCs. DISCONNECT the battery ground cable. CONNECT driver safety belt buckle pretensioner C3201. CONNECT driver seat side air bag module C328. REPOWER the SRS. REFER to Section 501-20B. | |||||||||||||||||||||
| O15 CHECK CIRCUITS RPS13 (GN/OG) AND VPS09 (BN/BU) FOR A SHORT TO POWER | ||||||||||||||||||||||
|
Yes REPAIR the affected circuit. REPEAT the self-test. CLEAR the DTCs. DISCONNECT the battery ground cable. CONNECT driver safety belt buckle pretensioner C3201. CONNECT driver seat side air bag module C328. REPOWER the SRS. REFER to Section 501-20B. No GO to O16. | |||||||||||||||||||||
| O16 CHECK CIRCUITS RPS13 (GN/OG) AND VPS09 (BN/BU) FOR A SHORT TO GROUND | ||||||||||||||||||||||
|
Yes GO to O17. No REPAIR the affected circuit. REPEAT the self-test. CLEAR the DTCs. DISCONNECT the battery ground cable. CONNECT driver safety belt buckle pretensioner C3201. CONNECT driver seat side air bag module C328. REPOWER the SRS. REFER to Section 501-20B. | |||||||||||||||||||||
| O17 CHECK CIRCUITS RPS13 (GN/OG) AND VPS09 (BN/BU) FOR AN OPEN | ||||||||||||||||||||||
|
Yes INSTALL a new seat track assembly. REFER to Seat Track in this section. REPEAT the self-test. CLEAR the DTCs. DISCONNECT the battery ground cable. CONNECT driver safety belt buckle pretensioner C3201. CONNECT driver seat side air bag module C328. REPOWER the SRS. REFER to Section 501-20B. No REPAIR the affected circuit. REPEAT the self-test. CLEAR the DTCs. DISCONNECT the battery ground cable. CONNECT driver safety belt buckle pretensioner C3201. CONNECT driver seat side air bag module C328. REPOWER the SRS. REFER to Section 501-20B. |
Pinpoint Test P: The Memory SET Switch Indicator is Inoperative/Always On
Refer to Wiring Diagrams Cell 123, Memory Seats for schematic and connector information.
Normal Operation
The memory SET switch indicator is provided power, for approximately 5 seconds, from the driver seat module (DSM) on circuit CPS55 (YE) after the SET switch has been pressed. Ground is supplied at circuit GD133 (BK). The indicator will turn off after memory switch 1 or memory switch 2 have been pressed or 5 seconds have elapsed.
Possible Causes
A memory SET switch indicator that does not operate correctly can be caused by:
- wiring, terminals or connectors.
- a faulty memory SET switch.
- a faulty DSM.
PINPOINT TEST P: THE MEMORY SET SWITCH INDICATOR IS INOPERATIVE/ALWAYS ON
NOTE: The air bag warning indicator illuminates when the restraints control module (RCM) fuse is removed and the ignition switch is ON. This is normal operation and does not indicate a supplemental restraint system (SRS) fault.
NOTE: The SRS must be fully operational and free of faults before releasing the vehicle to the customer.
NOTE: Verify good battery condition before diagnosing the memory seat system. Poor battery condition may interfere with memory seat operation, even if vehicle starting is possible.
| Test Step | Result / Action to Take |
|---|---|
| P1 RETRIEVE THE DTCs | |
|
Yes If DTC B2084 is present or if the memory SET LED fails to illuminate during the Self Test, GO to P2. No If the memory SET LED is on all the time, GO to P6. |
| P2 CHECK CIRCUIT CPS55 (YE) FOR A SHORT TO GROUND | |
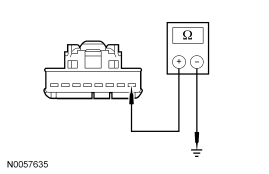
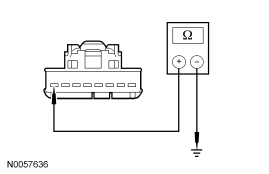
|
Yes GO to P3. No REPAIR the affected circuit. REPEAT the self-test. CLEAR the DTCs. DISCONNECT the battery ground cable. CONNECT driver safety belt buckle pretensioner C3201. CONNECT driver seat side air bag module C328. REPOWER the SRS. REFER to Section 501-20B. |
| P3 CHECK CIRCUIT CPS55 (YE) FOR AN OPEN | |
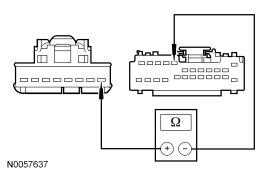
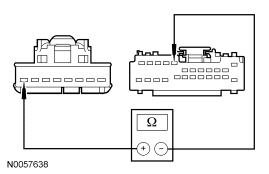
|
Yes GO to P4. No REPAIR the affected circuit. REPEAT the self-test. CLEAR the DTCs. DISCONNECT the battery ground cable. CONNECT driver safety belt buckle pretensioner C3201. CONNECT driver seat side air bag module C328. REPOWER the SRS. REFER to Section 501-20B. |
| P4 CHECK GROUND CIRCUIT GD133 (BK) TO THE MEMORY SET SWITCH | |
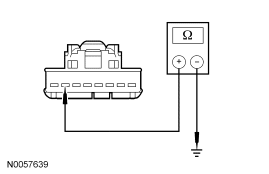
|
Yes GO to P5. No REPAIR the circuit. REPEAT the self-test. CLEAR the DTCs. DISCONNECT the battery ground cable. CONNECT driver safety belt buckle pretensioner C3201. CONNECT driver seat side air bag module C328. REPOWER the SRS. REFER to Section 501-20B. |
| P5 CHECK CIRCUIT CPS55 (YE) FOR POWER | |
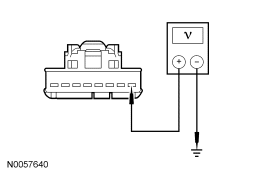
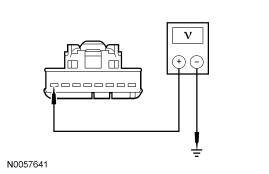
|
Yes INSTALL a new memory SET switch. REFER to Memory Set Switch in this section. REPEAT the self-test. CLEAR the DTCs. DISCONNECT the battery ground cable. CONNECT driver safety belt buckle pretensioner C3201. CONNECT driver seat side air bag module C328. REPOWER the SRS. REFER to Section 501-20B. No INSTALL a new DSM. REFER to Section 419-10. REPEAT the self-test. CLEAR the DTCs. DISCONNECT the battery ground cable. CONNECT driver safety belt buckle pretensioner C3201. CONNECT driver seat side air bag module C328. REPOWER the SRS. REFER to Section 501-20B. |
| P6 CHECK CIRCUIT CPS55 (YE) FOR POWER | |
|
Yes GO to P7. No INSTALL a new memory SET switch. REFER to Memory Set Switch in this section. REPEAT the self-test. CLEAR the DTCs. DISCONNECT the battery ground cable. CONNECT driver safety belt buckle pretensioner C3201. CONNECT driver seat side air bag module C328. REPOWER the SRS. REFER to Section 501-20B. |
| P7 CHECK CIRCUIT CPS55 (YE) FOR SHORT TO POWER | |
|
Yes REPAIR the circuit. REPEAT the self-test. CLEAR the DTCs. DISCONNECT the battery ground cable. CONNECT driver safety belt buckle pretensioner C3201. CONNECT driver seat side air bag module C328. REPOWER the SRS. REFER to Section 501-20B. No INSTALL a new DSM. REFER to Section 419-10. REPEAT the self-test. CLEAR the DTCs. DISCONNECT the battery ground cable. CONNECT driver safety belt buckle pretensioner C3201. CONNECT driver seat side air bag module C328. REPOWER the SRS. REFER to Section 501-20B. |
Pinpoint Test Q: Easy Exit/Easy Entry is Inoperative/Does Not Operate Correctly
Normal Operation
The driver seat module (DSM) receives a key out command and a transmission range selection of park over the MS-CAN communication network and powers the memory driver seat rearward about 2 inches. When the ignition key is inserted, the memory driver seat goes back to its last known position.
Possible Causes
An inoperative/not operating correctly easy exit/easy entry seat can be caused by:
- wiring, terminals or connectors.
- easy exit/easy entry not enabled.
- a faulty key-in-ignition warning switch.
- a faulty smart power distribution junction box (SPDJB).
- a faulty transmission range sensor.
- a faulty instrument cluster module.
- a faulty driver seat module (DSM).
PINPOINT TEST Q: EASY EXIT/EASY ENTRY IS INOPERATIVE/DOES NOT OPERATE CORRECTLY
NOTE: Verify good battery condition before diagnosing the memory seat system. Poor battery condition may interfere with memory seat operation, even if vehicle starting is possible.
NOTE: The transmission gear selector must be in park for the easy entry/exit feature to function.
| Test Step | Result / Action to Take |
|---|---|
| Q1 VERIFY EASY EXIT/EASY ENTRY IS ENABLED | |
|
Yes GO to Q2. No From the message center, located on the instrument cluster, enable easy exit/easy entry feature. REFER to Owner's Literature. TEST the system for normal operation. If the easy exit/easy entry does not operate correctly after enabling, GO to Q2. |
| Q2 CHECK THE DRIVER MEMORY POWER SEAT OPERATION | |
|
Yes GO to Q4. No GO to Q3. |
| Q3 CHECK THE DSM FOR DTCs | |
|
Yes REFER to the Driver Seat Module (DSM) Diagnostic Trouble Code (DTC) Chart. No If no DSM DTCs are retrieved, for Edge vehicles, Go To Pinpoint Test N, for MKX vehicles, Go To Pinpoint Test L. |
| Q4 CHECK THE EASY EXIT OPERATION | |
|
Yes GO to Q7. No GO to Q5. |
| Q5 CHECK THE DRIVER SEAT MODULE (DSM) FOR CORRECT IGNITION SWITCH STATUS INPUT | |
|
Yes GO to Q6. No To diagnose the ignition switch status fault, REFER to Section 413-09. |
| Q6 CHECK THE DRIVER SEAT MODULE (DSM) FOR CORRECT TRANSMISSION RANGE SENSOR INPUTS | |
|
Yes INSTALL a new DSM. REFER to Section 419-10. REPEAT the self-test. CLEAR the DTCs. No To diagnose a transmission range sensor fault, REFER to Section 307-01. |
| Q7 CHECK THE EASY ENTRY OPERATION | |
|
Yes The system is operating correctly at this time. RETEST the system for intermittent operation. If no fault is found, INSTRUCT the customer on the correct operation of the system. No INSTALL a new DSM. REFER to Section 419-10. REPEAT the self-test. CLEAR the DTCs. |
Pinpoint Test R: The Power Lumbar is Inoperative — Driver
Refer to Wiring Diagrams Cell 123, Memory Seats for schematic and connector information.
Normal Operation
The seat control switch is powered by battery voltage on circuit SBP12 (GN/RD) and is supplied ground on circuit GD133 (BK). When the lumbar knob on the seat control switch is pressed, voltage and ground are supplied to the power lumbar motor. When pressing the lumbar knob in the opposite direction, the seat control switch reverses the polarity to the power lumbar motor, which moves the lumbar mechanism in the opposite direction.
Possible Causes
An inoperative power lumbar can be caused by:
- wiring, terminals or connectors.
- a faulty seat control switch.
- a faulty power lumbar motor assembly.
PINPOINT TEST R: THE POWER LUMBAR IS INOPERATIVE — DRIVER
NOTE: The air bag warning indicator illuminates when the restraints control module (RCM) fuse is removed and the ignition switch is ON. This is normal operation and does not indicate a supplemental restraint system (SRS) fault.
NOTE: The SRS must be fully operational and free of faults before releasing the vehicle to the customer.
| Test Step | Result / Action to Take |
|---|---|
| R1 CHECK CIRCUIT SBP12 (GN/RD) FOR AN OPEN | |
|
Yes GO to R2. No VERIFY smart power distribution junction box (SPDJB) fuse 12 (7.5A) is OK. If OK, REPAIR the circuit. TEST the system for normal operation. DISCONNECT the battery ground cable. CONNECT driver safety belt buckle pretensioner C3201. CONNECT driver seat side air bag module C328. REPOWER the SRS. REFER to Section 501-20B. |
| R2 CHECK CIRCUIT GD133 (BK) FOR AN OPEN | |
|
Yes GO to R3. No REPAIR the circuit. TEST the system for normal operation. DISCONNECT the battery ground cable. CONNECT driver safety belt buckle pretensioner C3201. CONNECT driver seat side air bag module C328. REPOWER the SRS. REFER to Section 501-20B. |
| R3 CHECK THE LUMBAR MOTOR | |
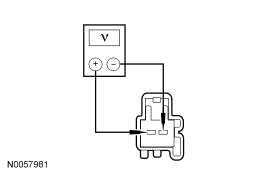
|
Yes INSTALL a new power lumbar assembly. REFER to Lumbar Assembly — Power in this section. TEST the system for normal operation. DISCONNECT the battery ground cable. CONNECT driver safety belt buckle pretensioner C3201. CONNECT driver seat side air bag module C328. REPOWER the SRS. REFER to Section 501-20B. No GO to R4. |
| R4 CHECK CIRCUIT CPS19 (GY/VT) AND CIRCUIT CPS18 (BN/GN) FOR A SHORT TO GROUND | |
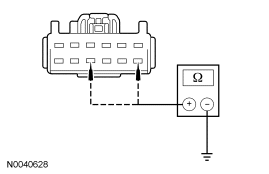
|
Yes GO to R5. No REPAIR the circuit. TEST the system for normal operation. DISCONNECT the battery ground cable. CONNECT driver safety belt buckle pretensioner C3201. CONNECT driver seat side air bag module C328. REPOWER the SRS. REFER to Section 501-20B. |
| R5 CHECK CIRCUIT CPS19 (GY/VT) AND CPS18 (BN/GN) FOR AN OPEN | |
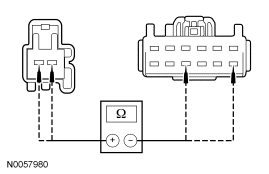
|
Yes INSTALL a new seat control switch. REFER to Seat Control Switch — Front in this section. TEST the system for normal operation. DISCONNECT the battery ground cable. CONNECT driver safety belt buckle pretensioner C3201. CONNECT driver seat side air bag module C328. REPOWER the SRS. REFER to Section 501-20B. No REPAIR the circuit. TEST the system for normal operation. DISCONNECT the battery ground cable. CONNECT driver safety belt buckle pretensioner C3201. CONNECT driver seat side air bag module C328. REPOWER the SRS. REFER to Section 501-20B. |
Pinpoint Test S: The Power Lumbar is Inoperative — Passenger
Refer to Wiring Diagrams Cell 120, Power Seats for schematic and connector information.
Normal Operation
The seat control switch is powered by battery voltage on circuit SBB61 (GY/RD) and is supplied ground on circuit GD145 (BK/BU). When the lumbar knob on the seat control switch is pressed, voltage and ground are supplied to the power lumbar motor. When pressing the lumbar knob in the opposite direction, the seat control switch reverses the polarity to the power lumbar motor, which moves the lumbar mechanism in the opposite direction.
Possible Causes
An inoperative power lumbar can be caused by:
- wiring, terminals or connectors.
- a faulty lumbar control switch.
- a faulty power lumbar motor assembly.
PINPOINT TEST S: THE POWER LUMBAR IS INOPERATIVE — PASSENGER
NOTE: The air bag warning indicator illuminates when the restraints control module (RCM) fuse is removed and the ignition switch is ON. This is normal operation and does not indicate a supplemental restraint system (SRS) fault.
NOTE: The SRS must be fully operational and free of faults before releasing the vehicle to the customer.
| Test Step | Result / Action to Take |
|---|---|
| S1 CHECK CIRCUIT SBB61 (GY/RD) FOR AN OPEN | |
|
Yes GO to S2. No VERIFY battery junction box (BJB) fuse 61 (30A) is OK. If OK, REPAIR the circuit. TEST the system for normal operation. DISCONNECT the battery ground cable. CONNECT passenger safety belt buckle pretensioner C3202. CONNECT passenger seat side air bag module C327. REPOWER the SRS. REFER to Section 501-20B. |
| S2 CHECK CIRCUIT GD145 (BK/BU) FOR AN OPEN | |
|
Yes GO to S3. No REPAIR the circuit. TEST the system for normal operation. DISCONNECT the battery ground cable. CONNECT passenger safety belt buckle pretensioner C3202. CONNECT passenger seat side air bag module C327. REPOWER the SRS. REFER to Section 501-20B. |
| S3 CHECK THE LUMBAR MOTOR | |
|
Yes INSTALL a new power lumbar assembly. REFER to Lumbar Assembly — Power in this section. TEST the system for normal operation. DISCONNECT the battery ground cable. CONNECT passenger safety belt buckle pretensioner C3202. CONNECT passenger seat side air bag module C327. REPOWER the SRS. REFER to Section 501-20B. No GO to S4. |
| S4 CHECK CIRCUIT CPS20 (VT) AND CIRCUIT CPS21 (WH/OG) FOR A SHORT TO GROUND | |
|
Yes GO to S5. No REPAIR the circuit. TEST the system for normal operation. DISCONNECT the battery ground cable. CONNECT passenger safety belt buckle pretensioner C3202. CONNECT passenger seat side air bag module C327. REPOWER the SRS. REFER to Section 501-20B. |
| S5 CHECK CIRCUIT CPS20 (VT) AND CIRCUIT CPS21 (WH/OG) FOR AN OPEN | |
|
Yes INSTALL a new seat control switch. REFER to Seat Control Switch — Front in this section. TEST the system for normal operation. DISCONNECT the battery ground cable. CONNECT passenger safety belt buckle pretensioner C3202. CONNECT passenger seat side air bag module C327. REPOWER the SRS. REFER to Section 501-20B. No REPAIR the circuit. TEST the system for normal operation. DISCONNECT the battery ground cable. CONNECT passenger safety belt buckle pretensioner C3202. CONNECT passenger seat side air bag module C327. REPOWER the SRS. REFER to Section 501-20B. |
Pinpoint Test T: The Heated Seats are Inoperative — Front
Refer to Wiring Diagrams Cell 119, Climate Controlled Seats for schematic and connector information.
Normal Operation
The heated seat module receives ignition voltage feed on circuit CBP35 (YE/GY), battery voltage feed on circuit SBB16 (VT/RD) and is supplied ground on circuit GD133 (BK). When ignition switched power is supplied and the driver or passenger heated seat button on the electronic automatic temperature control (EATC) module is pressed, a momentary ground signal is sent to the heated seat module to command the system ON or OFF. Upon receiving a signal, the heated seat module will decrease one setting (the sequence is hi, lo, OFF, hi, etc.). The heated seat module supplies voltage to the cushion and backrest heater mats, which are connected in series and operate together. A separate ground to the heater mats is provided on the backrest heater mat. Temperature is maintained by the heated seat module using a sensor contained within the cushion heater mat. The heated seat module supplies a reference voltage to the temperature sensor and monitors the return signal from the temperature sensor for controlling current flow to the heater mats. The heated seat module is designed to remain ON, heating the seat and maintaining temperature until switched OFF from the EATC module or the ignition switch is turned OFF.
Possible Causes
An inoperative heated seat can be caused by:
- an open fuse.
- wiring, terminals or connectors.
- a faulty heated seat module.
PINPOINT TEST T: THE HEATED SEATS ARE INOPERATIVE — FRONT
NOTE: The air bag warning indicator illuminates when the restraints control module (RCM) fuse is removed and the ignition switch is ON. This is normal operation and does not indicate a supplemental restraint system (SRS) fault.
NOTE: The SRS must be fully operational and free of faults before releasing the vehicle to the customer.
| Test Step | Result / Action to Take |
|---|---|
| T1 CHECK THE VOLTAGE TO THE HEATED SEAT MODULE | |
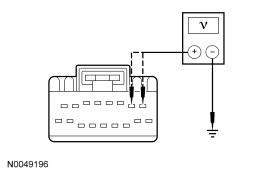
|
Yes GO to T2. No VERIFY battery junction box (BJB) fuse 16 (30A) and smart power distribution junction box (SPDJB) fuse 35 (10A) are OK. If OK, REPAIR the affected circuit. TEST the system for normal operation. DISCONNECT the battery ground cable. CONNECT passenger safety belt buckle pretensioner C3202. CONNECT passenger seat side air bag module C327. REPOWER the SRS. REFER to Section 501-20B. |
| T2 CHECK THE HEATED SEAT MODULE GROUND | |
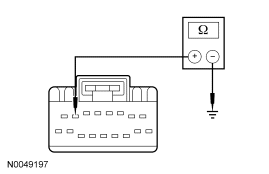
|
Yes GO to T3. No REPAIR the circuit. TEST the system for normal operation. DISCONNECT the battery ground cable. CONNECT passenger safety belt buckle pretensioner C3202. CONNECT passenger seat side air bag module C327. REPOWER the SRS. REFER to Section 501-20B. |
| T3 CHECK THE SENSOR RETURN CIRCUIT FOR SHORT TO VOLTAGE | |
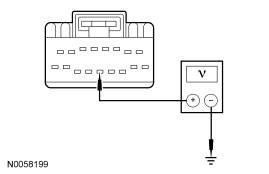
|
Yes REPAIR the circuit. TEST the system for normal operation. DISCONNECT the battery ground cable. CONNECT passenger safety belt buckle pretensioner C3202. CONNECT passenger seat side air bag module C327. REPOWER the SRS. REFER to Section 501-20B. No GO to T4. |
| T4 CHECK THE SENSOR RETURN CIRCUIT FOR SHORT TO GROUND | |
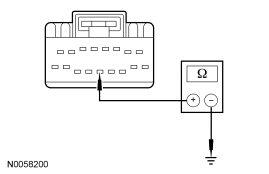
|
Yes GO to T5. No REPAIR the circuit. TEST the system for normal operation. DISCONNECT the battery ground cable. CONNECT passenger safety belt buckle pretensioner C3202. CONNECT passenger seat side air bag module C327. REPOWER the SRS. REFER to Section 501-20B. |
| T5 CHECK THE SENSOR RETURN CIRCUIT FOR AN OPEN | |
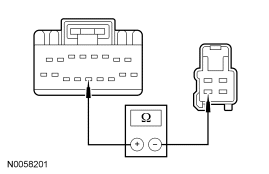
|
Yes GO to T6. No REPAIR the circuit. TEST the system for normal operation. DISCONNECT the battery ground cable. CONNECT passenger safety belt buckle pretensioner C3202. CONNECT passenger seat side air bag module C327. REPOWER the SRS. REFER to Section 501-20B. |
| T6 CHECK THE HEATED SEAT GROUND | |
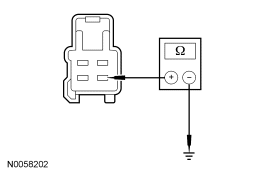
|
Yes INSTALL a new heated seat module. REFER to Heated Seat Module — Front in this section. TEST the system for normal operation. DISCONNECT the battery ground cable. CONNECT passenger safety belt buckle pretensioner C3202. CONNECT passenger seat side air bag module C327. REPOWER the SRS. REFER to Section 501-20B. No REPAIR the circuit. TEST the system for normal operation. DISCONNECT the battery ground cable. CONNECT passenger safety belt buckle pretensioner C3202. CONNECT passenger seat side air bag module C327. CONNECT driver safety belt buckle pretensioner C3201. CONNECT driver seat side air bag module C328. REPOWER the SRS. REFER to Section 501-20B. |
Pinpoint Test U: The Heated Seat is Inoperative/Does Not Operate Correctly — Driver
Refer to Wiring Diagrams Cell 119, Climate Controlled Seats for schematic and connector information.
Normal Operation
The heated seat module receives ignition voltage feed on circuit CBP35 (YE/GY), battery voltage feed on circuit SBB16 (VT/RD) and is supplied ground on circuit GD133 (BK). When ignition switched power is supplied and the driver heated seat button on the electronic automatic temperature control (EATC) module is pressed, a momentary ground signal is sent to the heated seat module on circuit CHS29 (WH/BU) to command the system ON or OFF. Upon receiving a signal, the heated seat module will decrease one setting (the sequence is hi, lo, OFF, hi, etc.). The heated seat module supplies voltage to the cushion and backrest heater mats on circuit CHS02 (YE/BU). Ground to the heater mats is provided on circuit GD145 (BK/BU). The cushion and backrest heater mats are connected in series and operate together. Temperature is maintained by the heated seat module using a sensor contained within the cushion heater mat. The heated seat module supplies a reference voltage to the temperature sensor on circuit RHS05 (YE/VT) and monitors the signal from the temperature sensor on circuit VHS26 (VT) for controlling current flow to the heater mats. The heated seat module is designed to remain ON, heating the seat and maintaining temperature until switched OFF from the EATC module or the ignition switch is turned OFF.
Possible Causes
An inoperative driver heated seat can be caused by:
- an open fuse.
- faulty wiring, terminals or connectors.
- a faulty heater mat.
- a faulty heated seat module.
- a faulty EATC module.
PINPOINT TEST U: THE HEATED SEAT IS INOPERATIVE/DOES NOT OPERATE CORRECTLY — DRIVER
NOTE: The air bag warning indicator illuminates when the restraints control module (RCM) fuse is removed and the ignition switch is ON. This is normal operation and does not indicate a supplemental restraint system (SRS) fault.
NOTE: The SRS must be fully operational and free of faults before releasing the vehicle to the customer.
| Test Step | Result / Action to Take | ||||||||
|---|---|---|---|---|---|---|---|---|---|
| U1 CHECK CIRCUIT SBB16 (VT/RD) FOR VOLTAGE TO THE HEATED SEAT MODULE | |||||||||
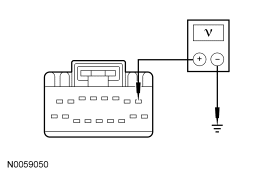
|
Yes GO to U2. No VERIFY battery junction box (BJB) fuse 16 (30A) is OK. If OK, REPAIR the circuit. TEST the system for normal operation. DISCONNECT the battery ground cable. CONNECT passenger safety belt buckle pretensioner C3202. CONNECT passenger seat side air bag module C327. CONNECT driver safety belt buckle pretensioner C3201. CONNECT driver seat side air bag module C328. REPOWER the SRS. REFER to Section 501-20B. | ||||||||
| U2 CHECK CIRCUIT CHS02 (YE/BU) FOR AN OPEN OR SHORT TO GROUND | |||||||||
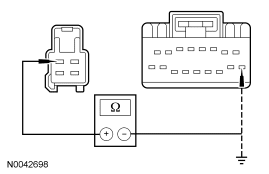
|
Yes GO to U3. No REPAIR the circuit. TEST the system for normal operation. DISCONNECT the battery ground cable. CONNECT passenger safety belt buckle pretensioner C3202. CONNECT passenger seat side air bag module C327. CONNECT driver safety belt buckle pretensioner C3201. CONNECT driver seat side air bag module C328. REPOWER the SRS. REFER to Section 501-20B. | ||||||||
| U3 CHECK CIRCUIT VHS26 (VT) FOR AN OPEN OR SHORT TO GROUND | |||||||||
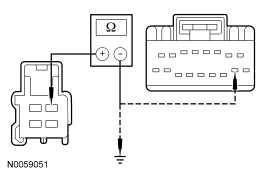
|
Yes GO to U4. No REPAIR the circuit. TEST the system for normal operation. DISCONNECT the battery ground cable. CONNECT passenger safety belt buckle pretensioner C3202. CONNECT passenger seat side air bag module C327. CONNECT driver safety belt buckle pretensioner C3201. CONNECT driver seat side air bag module C328. REPOWER the SRS. REFER to Section 501-20B. | ||||||||
| U4 CHECK CIRCUIT RHS05 (YE/VT) FOR AN OPEN OR SHORT TO GROUND | |||||||||
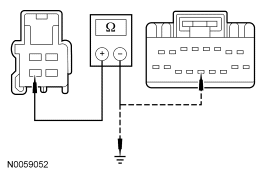
|
Yes GO to U5. No REPAIR the circuit. TEST the system for normal operation. DISCONNECT the battery ground cable. CONNECT passenger safety belt buckle pretensioner C3202. CONNECT passenger seat side air bag module C327. CONNECT driver safety belt buckle pretensioner C3201. CONNECT driver seat side air bag module C328. REPOWER the SRS. REFER to Section 501-20B. | ||||||||
| U5 CHECK CIRCUITS CHS02 (YE/BU), VHS26 (VT) AND RHS05 (YE/VT) FOR SHORT TO VOLTAGE | |||||||||
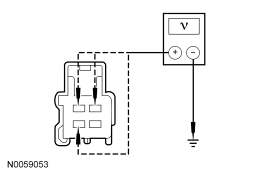
|
Yes GO to U6. No REPAIR the affected circuit. TEST the system for normal operation. DISCONNECT the battery ground cable. CONNECT passenger safety belt buckle pretensioner C3202. CONNECT passenger seat side air bag module C327. CONNECT driver safety belt buckle pretensioner C3201. CONNECT driver seat side air bag module C328. REPOWER the SRS. REFER to Section 501-20B. | ||||||||
| U6 CHECK CIRCUIT GD145 (BK/BU) FOR AN OPEN | |||||||||
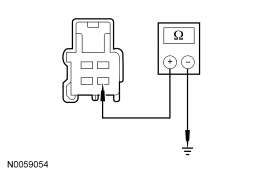
|
Yes GO to U7. No REPAIR the circuit. TEST the system for normal operation. DISCONNECT the battery ground cable. CONNECT passenger safety belt buckle pretensioner C3202. CONNECT passenger seat side air bag module C327. CONNECT driver safety belt buckle pretensioner C3201. CONNECT driver seat side air bag module C328. REPOWER the SRS. REFER to Section 501-20B. | ||||||||
| U7 CHECK CUSHION AND BACKREST HEATER MAT AND SENSOR FOR SHORT TO VOLTAGE | |||||||||
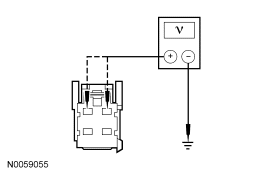
|
Yes GO to U8. No REPAIR the circuit. INSTALL a new affected cushion or backrest heater mat. TEST the system for normal operation. DISCONNECT the battery ground cable. CONNECT passenger safety belt buckle pretensioner C3202. CONNECT passenger seat side air bag module C327. CONNECT driver safety belt buckle pretensioner C3201. CONNECT driver seat side air bag module C328. REPOWER the SRS. REFER to Section 501-20B. | ||||||||
| U8 CHECK CUSHION HEATED SEAT MAT FOR AN OPEN OR SHORT TO GROUND | |||||||||
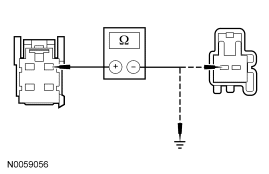
|
Yes GO to U9. No INSTALL a new cushion heater mat. TEST the system for normal operation. DISCONNECT the battery ground cable. CONNECT passenger safety belt buckle pretensioner C3202. CONNECT passenger seat side air bag module C327. CONNECT driver safety belt buckle pretensioner C3201. CONNECT driver seat side air bag module C328. REPOWER the SRS. REFER to Section 501-20B. | ||||||||
| U9 CHECK BACKREST HEATED SEAT MAT FOR AN OPEN OR SHORT TO GROUND | |||||||||
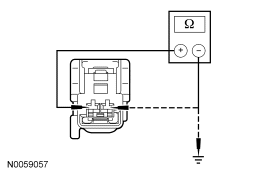
|
Yes GO to U10. No INSTALL a new cushion heater mat. TEST the system for normal operation. DISCONNECT the battery ground cable. CONNECT passenger safety belt buckle pretensioner C3202. CONNECT passenger seat side air bag module C327. CONNECT driver safety belt buckle pretensioner C3201. CONNECT driver seat side air bag module C328. REPOWER the SRS. REFER to Section 501-20B. | ||||||||
| U10 CHECK CIRCUIT BETWEEN BACKREST AND CUSHION HEATER MAT | |||||||||
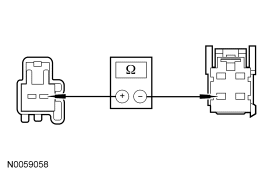
|
Yes GO to U11. No INSTALL a new seat cushion heater mat. TEST the system for normal operation. DISCONNECT the battery ground cable. CONNECT passenger safety belt buckle pretensioner C3202. CONNECT passenger seat side air bag module C327. CONNECT driver safety belt buckle pretensioner C3201. CONNECT driver seat side air bag module C328. REPOWER the SRS. REFER to Section 501-20B. | ||||||||
| U11 CHECK THE HEATED SEAT TEMPERATURE SENSOR AND CIRCUITS FOR AN OPEN OR SHORT TO GROUND | |||||||||
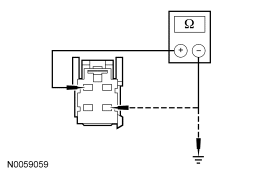
|
Yes GO to U12. No INSTALL a new seat cushion heater mat. TEST the system for normal operation. DISCONNECT the battery ground cable. CONNECT passenger safety belt buckle pretensioner C3202. CONNECT passenger seat side air bag module C327. CONNECT driver safety belt buckle pretensioner C3201. CONNECT driver seat side air bag module C328. REPOWER the SRS. REFER to Section 501-20B. | ||||||||
| U12 CHECK CIRCUIT CHS29 (WH/BU) FOR A SHORT TO VOLTAGE | |||||||||
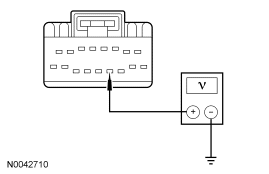
|
Yes GO to U13. No REPAIR the circuit. TEST the system for normal operation. DISCONNECT the battery ground cable. CONNECT passenger safety belt buckle pretensioner C3202. CONNECT passenger seat side air bag module C327. CONNECT driver safety belt buckle pretensioner C3201. CONNECT driver seat side air bag module C328. REPOWER the SRS. REFER to Section 501-20B. | ||||||||
| U13 CHECK CIRCUIT CHS29 (WH/BU) FOR A SHORT TO GROUND | |||||||||
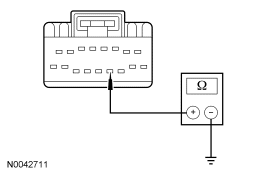
|
Yes GO to U14. No REPAIR the circuit. TEST the system for normal operation. DISCONNECT the battery ground cable. CONNECT passenger safety belt buckle pretensioner C3202. CONNECT passenger seat side air bag module C327. CONNECT driver safety belt buckle pretensioner C3201. CONNECT driver seat side air bag module C328. REPOWER the SRS. REFER to Section 501-20B. | ||||||||
| U14 CHECK CIRCUIT CHS29 (WH/BU) FOR AN OPEN | |||||||||
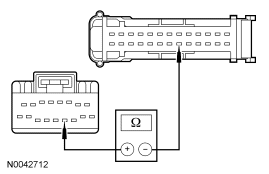
|
Yes GO to U15. No REPAIR the circuit. TEST the system for normal operation. DISCONNECT the battery ground cable. CONNECT passenger safety belt buckle pretensioner C3202. CONNECT passenger seat side air bag module C327. CONNECT driver safety belt buckle pretensioner C3201. CONNECT driver seat side air bag module C328. REPOWER the SRS. REFER to Section 501-20B. | ||||||||
| U15 CHECK THE EATC MODULE OUTPUT | |||||||||
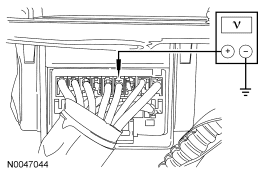
|
Yes INSTALL a new heated seat module. REFER to Heated Seat Module — Front in this section. TEST the system for normal operation. DISCONNECT the battery ground cable. CONNECT passenger safety belt buckle pretensioner C3202. CONNECT passenger seat side air bag module C327. CONNECT driver safety belt buckle pretensioner C3201. CONNECT driver seat side air bag module C328. REPOWER the SRS. REFER to Section 501-20B. No If the voltage is greater than 10 volts but did not drop when the driver heated seat button was pressed, INSTALL a new EATC module. REFER to Section 412-01. TEST the system for normal operation. If the voltage is less than 10 volts, INSTALL a new heated seat module. REFER to Heated Seat Module — Front in this section. TEST the system for normal operation. DISCONNECT the battery ground cable. CONNECT passenger safety belt buckle pretensioner C3202. CONNECT passenger seat side air bag module C327. CONNECT driver safety belt buckle pretensioner C3201. CONNECT driver seat side air bag module C328. REPOWER the SRS. REFER to Section 501-20B. |
Pinpoint Test V: The Heated Seat is Inoperative/Does Not Operate Correctly — Front Passenger
Refer to Wiring Diagrams Cell 119, Climate Controlled Seats for schematic and connector information.
Normal Operation
The heated seat module receives ignition voltage feed on circuit CBP35 (YE/GY), battery voltage feed on circuit SBB16 (VT/RD) and is supplied ground on circuit GD133 (BK). When ignition switched power is supplied and the driver heated seat button on the electronic automatic temperature control (EATC) module is pressed, a momentary ground signal is sent to the heated seat module on circuit CHS30 (GY/YE) to command the system ON or OFF. Upon receiving a signal, the heated seat module will decrease one setting (the sequence is hi, lo, OFF, hi, etc.). The heated seat module supplies voltage to the cushion and backrest heater mats on circuit CHS07 (GY/BU). Ground to the heater mats is provided on circuit GD145 (BK/BU). The cushion and backrest heater mats are connected in series and operate together. Temperature is maintained by the heated seat module using a sensor contained within the cushion heater mat. The heated seat module supplies a reference voltage to the temperature sensor on circuit RHS05 (YE/VT) and monitors the signal from the temperature sensor on circuit VHS27 (WH/OG) for controlling current flow to the heater mats. The heated seat module is designed to remain ON, heating the seat and maintaining temperature until switched OFF from the EATC module or the ignition switch is turned OFF.
Possible Causes
An inoperative passenger heated seat can be caused by:
- an open fuse.
- faulty wiring, terminals or connectors.
- a faulty heater mat.
- a faulty heated seat module.
- a faulty EATC module.
PINPOINT TEST V: THE HEATED SEAT IS INOPERATIVE/DOES NOT OPERATE CORRECTLY — PASSENGER
NOTE: The air bag warning indicator illuminates when the restraints control module (RCM) fuse is removed and the ignition switch is ON. This is normal operation and does not indicate a supplemental restraint system (SRS) fault.
NOTE: The SRS must be fully operational and free of faults before releasing the vehicle to the customer.
| Test Step | Result / Action to Take | ||||||||
|---|---|---|---|---|---|---|---|---|---|
| V1 CHECK CIRCUIT SBB16 (VT/RD) FOR VOLTAGE TO THE HEATED SEAT MODULE | |||||||||
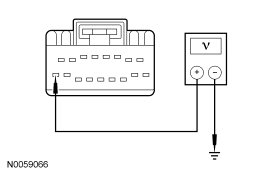
|
Yes GO to V2. No VERIFY battery junction box (BJB) fuse 16 (30A) is OK. If OK, REPAIR the circuit. TEST the system for normal operation. DISCONNECT the battery ground cable. CONNECT passenger safety belt buckle pretensioner C3202. CONNECT passenger seat side air bag module C327. REPOWER the SRS. REFER to Section 501-20B. | ||||||||
| V2 CHECK CIRCUIT CHS07 (GY/BU) FOR AN OPEN OR SHORT TO GROUND | |||||||||
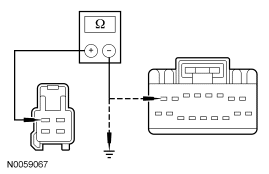
|
Yes GO to V3. No REPAIR the circuit. TEST the system for normal operation. DISCONNECT the battery ground cable. CONNECT passenger safety belt buckle pretensioner C3202. CONNECT passenger seat side air bag module C327. REPOWER the SRS. REFER to Section 501-20B. | ||||||||
| V3 CHECK CIRCUIT VHS27 (WH/OG) FOR AN OPEN OR SHORT TO GROUND | |||||||||
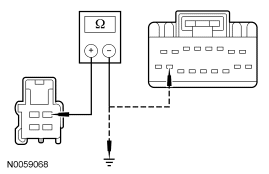
|
Yes GO to V4. No REPAIR the circuit. TEST the system for normal operation. DISCONNECT the battery ground cable. CONNECT passenger safety belt buckle pretensioner C3202. CONNECT passenger seat side air bag module C327. REPOWER the SRS. REFER to Section 501-20B. | ||||||||
| V4 CHECK CIRCUIT RHS05 (YE/VT) FOR AN OPEN OR SHORT TO GROUND | |||||||||
|
Yes GO to V5. No REPAIR the circuit. TEST the system for normal operation. DISCONNECT the battery ground cable. CONNECT passenger safety belt buckle pretensioner C3202. CONNECT passenger seat side air bag module C327. REPOWER the SRS. REFER to Section 501-20B. | ||||||||
| V5 CHECK CIRCUITS CHS07 (GY/BU), VHS27 (WH/OG) AND RHS05 (YE/VT) FOR SHORT TO VOLTAGE | |||||||||
|
Yes GO to V6. No REPAIR the affected circuit. TEST the system for normal operation. DISCONNECT the battery ground cable. CONNECT passenger safety belt buckle pretensioner C3202. CONNECT passenger seat side air bag module C327. REPOWER the SRS. REFER to Section 501-20B. | ||||||||
| V6 CHECK CIRCUIT GD145 (BK/BU) FOR AN OPEN | |||||||||
|
Yes GO to V7. No REPAIR the circuit. TEST the system for normal operation. DISCONNECT the battery ground cable. CONNECT passenger safety belt buckle pretensioner C3202. CONNECT passenger seat side air bag module C327. REPOWER the SRS. REFER to Section 501-20B. | ||||||||
| V7 CHECK CUSHION AND BACKREST HEATER MAT AND SENSOR FOR SHORT TO VOLTAGE | |||||||||
|
Yes GO to V8. No REPAIR the circuit. INSTALL a new affected cushion or backrest heater mat. TEST the system for normal operation. DISCONNECT the battery ground cable. CONNECT passenger safety belt buckle pretensioner C3202. CONNECT passenger seat side air bag module C327. REPOWER the SRS. REFER to Section 501-20B. | ||||||||
| V8 CHECK CUSHION HEATED SEAT MAT FOR AN OPEN OR SHORT TO GROUND | |||||||||
|
Yes GO to V9. No INSTALL a new cushion heater mat. TEST the system for normal operation. DISCONNECT the battery ground cable. CONNECT passenger safety belt buckle pretensioner C3202. CONNECT passenger seat side air bag module C327. REPOWER the SRS. REFER to Section 501-20B. | ||||||||
| V9 CHECK BACKREST HEATED SEAT MAT FOR AN OPEN OR SHORT TO GROUND | |||||||||
|
Yes GO to V10. No INSTALL a new cushion heater mat. TEST the system for normal operation. DISCONNECT the battery ground cable. CONNECT passenger safety belt buckle pretensioner C3202. CONNECT passenger seat side air bag module C327. REPOWER the SRS. REFER to Section 501-20B. | ||||||||
| V10 CHECK CIRCUIT BETWEEN BACKREST AND CUSHION HEATER MAT | |||||||||
|
Yes GO to V11. No INSTALL a new seat cushion heater mat. TEST the system for normal operation. DISCONNECT the battery ground cable. CONNECT passenger safety belt buckle pretensioner C3202. CONNECT passenger seat side air bag module C327. REPOWER the SRS. REFER to Section 501-20B. | ||||||||
| V11 CHECK THE HEATED SEAT TEMPERATURE SENSOR AND CIRCUITS FOR AN OPEN OR SHORT TO GROUND | |||||||||
|
Yes GO to V12. No INSTALL a new seat cushion heater mat. TEST the system for normal operation. DISCONNECT the battery ground cable. CONNECT passenger safety belt buckle pretensioner C3202. CONNECT passenger seat side air bag module C327. REPOWER the SRS. REFER to Section 501-20B. | ||||||||
| V12 CHECK CIRCUIT CHS30 (GY/YE) FOR A SHORT TO VOLTAGE | |||||||||
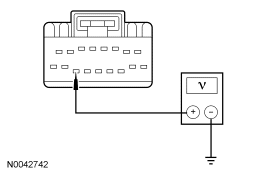
|
Yes GO to V13. No REPAIR the circuit. TEST the system for normal operation. DISCONNECT the battery ground cable. CONNECT passenger safety belt buckle pretensioner C3202. CONNECT passenger seat side air bag module C327. REPOWER the SRS. REFER to Section 501-20B. | ||||||||
| V13 CHECK CIRCUIT CHS30 (GY/YE) FOR A SHORT TO GROUND | |||||||||
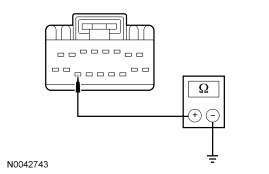
|
Yes GO to V14. No REPAIR the circuit. TEST the system for normal operation. DISCONNECT the battery ground cable. CONNECT passenger safety belt buckle pretensioner C3202. CONNECT passenger seat side air bag module C327. REPOWER the SRS. REFER to Section 501-20B. | ||||||||
| V14 CHECK CIRCUIT CHS30 (GY/YE) FOR AN OPEN | |||||||||
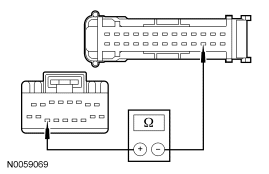
|
Yes GO to V15. No REPAIR the circuit. TEST the system for normal operation. DISCONNECT the battery ground cable. CONNECT passenger safety belt buckle pretensioner C3202. CONNECT passenger seat side air bag module C327. REPOWER the SRS. REFER to Section 501-20B. | ||||||||
| V15 CHECK THE EATC MODULE OUTPUT | |||||||||
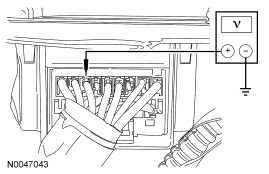
|
Yes INSTALL a new heated seat module. REFER to Heated Seat Module — Front in this section. TEST the system for normal operation. DISCONNECT the battery ground cable. CONNECT passenger safety belt buckle pretensioner C3202. CONNECT passenger seat side air bag module C327. REPOWER the SRS. REFER to Section 501-20B. No If the voltage is greater than 10 volts but did not drop when the passenger heated seat button was pressed, INSTALL a new EATC module. REFER to Section 412-01. TEST the system for normal operation. If the voltage is less than 10 volts, INSTALL a new heated seat module. REFER to Heated Seat Module — Front in this section. TEST the system for normal operation. DISCONNECT the battery ground cable. CONNECT passenger safety belt buckle pretensioner C3202. CONNECT passenger seat side air bag module C327. REPOWER the SRS. REFER to Section 501-20B. |
Pinpoint Test W: The Heated Seat is Inoperative — Driver Seat Does Heat But the Heated Seat Indicator Does Not Illuminate When Pressed
Refer to Wiring Diagrams Cell 119, Climate Controlled Seats for schematic and connector information.
Normal Operation
Upon receiving a signal from the electronic automatic temperature control (EATC) module, the heated seat module will decrease one setting (the sequence is hi, lo, OFF, hi, etc.). When the driver heated seat is set to hi, both LED indicators above the driver heated seat control button will illuminate. When the driver heated seat is set to lo, only the left LED on the driver heated seat indicator will illuminate. When the driver heated seat is set to OFF, neither driver heated seat LED will illuminate.
Possible Causes
An inoperative heated seat indicator can be caused by:
- wiring, terminals or connectors.
- a faulty heated seat module.
- a faulty EATC module.
PINPOINT TEST W: THE HEATED SEAT IS INOPERATIVE — DRIVER SEAT DOES HEAT BUT THE HEATED SEAT INDICATOR DOES NOT ILLUMINATE WHEN PRESSED
NOTE: The air bag warning indicator illuminates when the restraints control module (RCM) fuse is removed and the ignition switch is ON. This is normal operation and does not indicate a supplemental restraint system (SRS) fault.
NOTE: The SRS must be fully operational and free of faults before releasing the vehicle to the customer.
| Test Step | Result / Action to Take |
|---|---|
| W1 CHECK CIRCUITS CHS04 (YE/GY) AND CHS13 (VT/BN) FOR A SHORT TO GROUND | |
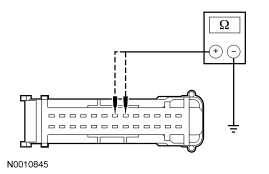
|
Yes GO to W2. No REPAIR the affected circuit. TEST the system for normal operation. DISCONNECT the battery ground cable. CONNECT passenger safety belt buckle pretensioner C3202. CONNECT passenger seat side air bag module C327. REPOWER the SRS. REFER to Section 501-20B. |
| W2 CHECK CIRCUITS CHS04 (YE/GY) AND CHS13 (VT/BN) FOR AN OPEN | |
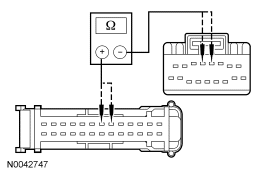
|
Yes GO to W3. No REPAIR the affected circuit. TEST the system for normal operation. DISCONNECT the battery ground cable. CONNECT passenger safety belt buckle pretensioner C3202. CONNECT passenger seat side air bag module C327. REPOWER the SRS. REFER to Section 501-20B. |
| W3 CHECK THE HEATED SEAT MODULE HI INDICATOR ON THE EATC MODULE | |
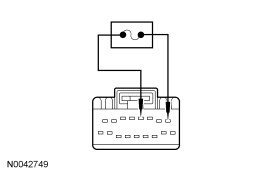
|
Yes GO to W4. No INSTALL a new EATC module. REFER to Section 412-01. TEST the system for normal operation. DISCONNECT the battery ground cable. CONNECT passenger safety belt buckle pretensioner C3202. CONNECT passenger seat side air bag module C327. REPOWER the SRS. REFER to Section 501-20B. |
| W4 CHECK THE HEATED SEAT MODULE LOW INDICATOR ON THE EATC MODULE | |
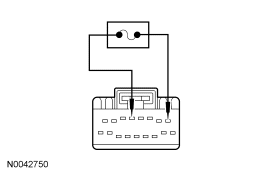
|
Yes INSTALL a new heated seat module. REFER to Heated Seat Module — Front in this section. TEST the system for normal operation. DISCONNECT the battery ground cable. CONNECT passenger safety belt buckle pretensioner C3202. CONNECT passenger seat side air bag module C327. REPOWER the SRS. REFER to Section 501-20B. No INSTALL a new EATC module. REFER to Section 412-01. TEST the system for normal operation. DISCONNECT the battery ground cable. CONNECT passenger safety belt buckle pretensioner C3202. CONNECT passenger seat side air bag module C327. REPOWER the SRS. REFER to Section 501-20B. |
Pinpoint Test X: The Heated Seat is Inoperative — Front Passenger Seat Does Heat But the Heated Seat Indicator Does Not Illuminate When Pressed
Refer to Wiring Diagrams Cell 119, Climate Controlled Seats for schematic and connector information.
Normal Operation
Upon receiving a signal from the electronic automatic temperature control (EATC) module, the heated seat module will decrease one setting (the sequence is hi, lo, OFF, hi, etc.). When the passenger heated seat is set to hi, both LED indicators above the passenger heated seat control button will illuminate. When the passenger heated seat is set to lo, only the left LED on the passenger heated seat indicator will illuminate. When the passenger heated seat is set to OFF, neither passenger heated seat LED will illuminate.
Possible Causes
An inoperative heated seat indicator can be caused by:
- wiring, terminals or connectors.
- a faulty heated seat module.
- a faulty EATC module.
PINPOINT TEST X: THE HEATED SEAT IS INOPERATIVE — FRONT PASSENGER SEAT DOES HEAT BUT THE HEATED SEAT INDICATOR DOES NOT ILLUMINATE WHEN PRESSED
NOTE: The air bag warning indicator illuminates when the restraints control module (RCM) fuse is removed and the ignition switch is ON. This is normal operation and does not indicate a supplemental restraint system (SRS) fault.
NOTE: The SRS must be fully operational and free of faults before releasing the vehicle to the customer.
| Test Step | Result / Action to Take |
|---|---|
| X1 CHECK CIRCUITS CHS09 (GY) AND CHS14 (GN) FOR A SHORT TO GROUND | |
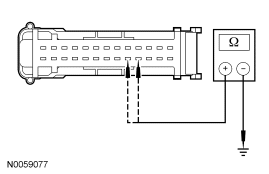
|
Yes GO to X2. No REPAIR the affected circuit. TEST the system for normal operation. DISCONNECT the battery ground cable. CONNECT passenger safety belt buckle pretensioner C3202. CONNECT passenger seat side air bag module C327. REPOWER the SRS. REFER to Section 501-20B. |
| X2 CHECK CIRCUITS CHS09 (GY) AND CHS14 (GN) FOR AN OPEN | |
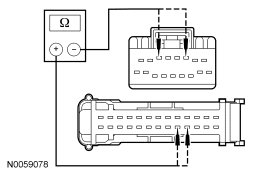
|
Yes GO to X3. No REPAIR the affected circuit. TEST the system for normal operation. DISCONNECT the battery ground cable. CONNECT passenger safety belt buckle pretensioner C3202. CONNECT passenger seat side air bag module C327. REPOWER the SRS. REFER to Section 501-20B. |
| X3 CHECK THE HEATED SEAT MODULE HI INDICATOR ON THE EATC MODULE | |
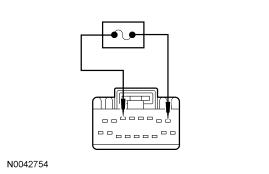
|
Yes GO to X4. No INSTALL a new EATC module. REFER to Section 412-01. TEST the system for normal operation. DISCONNECT the battery ground cable. CONNECT passenger safety belt buckle pretensioner C3202. CONNECT passenger seat side air bag module C327. REPOWER the SRS. REFER to Section 501-20B. |
| X4 CHECK THE HEATED SEAT MODULE LOW INDICATOR ON THE EATC MODULE | |
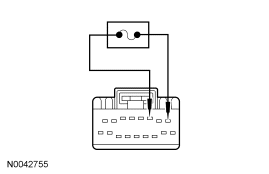
|
Yes INSTALL a new heated seat module. REFER to Heated Seat Module — Front in this section. TEST the system for normal operation. DISCONNECT the battery ground cable. CONNECT passenger safety belt buckle pretensioner C3202. CONNECT passenger seat side air bag module C327. REPOWER the SRS. REFER to Section 501-20B. No INSTALL a new EATC module. REFER to Section 412-01. TEST the system for normal operation. DISCONNECT the battery ground cable. CONNECT passenger safety belt buckle pretensioner C3202. CONNECT passenger seat side air bag module C327. REPOWER the SRS. REFER to Section 501-20B. |
Pinpoint Test Y: The Heated Seats are Inoperative — Rear
Refer to Wiring Diagrams Cell 119, Climate Controlled Seats for schematic and connector information.
Normal Operation
The heated seat module receives battery voltage on circuit SBB07 (WH/RD) and ignition voltage on circuit CBP35 (YE/GY), and is supplied ground on circuit GD133 (BK). When the left rear heated seat control switch is pressed with the ignition switch in RUN or START, a ground is supplied on circuit CHS46 (YE/GN) to command the system ON or OFF in hi heat mode or circuit CHS47 (VT/GN) to command the system ON or OFF in low heat mode. When the right rear heated seat control switch is pressed with the ignition switch in RUN or START, a ground is supplied on circuit CHS50 (BU/GY) to command the system ON or OFF in hi heat mode or circuit CHS51 (YE/GY) to command the system ON or OFF in low heat mode. When commanded ON, voltage is supplied to the heated seat switch from the heated seat module on either circuit CHS48 (YE) (left rear) or CHS52 (BU) (right rear) (hi heat mode); or circuit CHS49 (VT) (left rear) or CHS53 (WH/BN) (right rear) (low heat mode) illuminating the switch indicator. The heated seat module also supplies voltage to the cushion and backrest heater mats on circuit CHS39 (GN/BU) (left rear) or CHS43 (GY/BU) (right rear) and ground to the heater mats on circuit GD126 (BK/WH) (left rear) or GD151 (BK/GN) (right rear). The cushion and backrest heater mats are connected in series and operate together. Temperature is maintained by the heated seat module using a sensor contained within the cushion heater mat. The heated seat module monitors the temperature sensors on circuit VHS42 (GN) (left rear) or VHS45 (GY/BN) (right rear) for adjusting the current flow to the heater mats and uses a ground supplied on circuit RHS41 (GN/BN). The heated seat module is designed to remain ON, heating the seat and maintaining temperature until switched OFF or the ignition power is switched OFF.
Possible Causes
An inoperative heated seat can be caused by:
- an open fuse.
- wiring, terminals or connectors.
- a faulty heated seat module.
PINPOINT TEST Y: THE HEATED SEATS ARE INOPERATIVE — REAR
| Test Step | Result / Action to Take |
|---|---|
| Y1 CHECK THE VOLTAGE TO THE HEATED SEAT MODULE | |
|
Yes GO to Y2. No VERIFY battery junction box (BJB) fuse 7 (30A) and smart power distribution junction box (SPDJB) fuse 35 (10A) are OK. If OK, REPAIR the affected circuit. TEST the system for normal operation. |
| Y2 CHECK THE HEATED SEAT MODULE GROUND | |
|
Yes GO to Y3. No REPAIR the circuit. TEST the system for normal operation. |
| Y3 CHECK THE SENSOR RETURN CIRCUIT FOR SHORT TO VOLTAGE | |
|
Yes REPAIR the circuit. TEST the system for normal operation. No GO to Y4. |
| Y4 CHECK THE SENSOR RETURN CIRCUIT FOR SHORT TO GROUND | |
|
Yes GO to Y5. No REPAIR the circuit. TEST the system for normal operation. |
| Y5 CHECK THE SENSOR RETURN CIRCUIT FOR AN OPEN | |
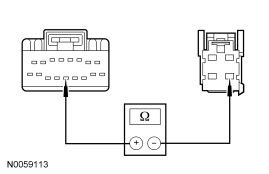
|
Yes INSTALL a new heated seat module. REFER to Heated Seat Module — Rear Seat in this section. TEST the system for normal operation. No REPAIR the circuit. TEST the system for normal operation. |
Pinpoint Test Z: The Heated Seat is Inoperative/Does Not Operate Correctly — Left Rear
Refer to Wiring Diagrams Cell 119, Climate Controlled Seats for schematic and connector information.
Normal Operation
The heated seat module receives battery voltage on circuit CBP35 (YE/GY) and ignition voltage on circuit SBB07 (WH/RD), and is supplied ground on circuit GD133 (BK). When the left rear heated seat control switch is pressed with the ignition switch in RUN or START, a ground is supplied on circuit CHS46 (YE/GN) to command the system ON or OFF in hi heat mode or circuit CHS47 (VT/GN) to command the system ON or OFF in low heat mode. When commanded ON, voltage is supplied to the heated seat switch from the heated seat module on either circuit CHS48 (YE) (hi heat mode) or circuit CHS49 (VT) (low heat mode) illuminating the switch indicator. The heated seat module also supplies voltage to the cushion and backrest heater mats on circuit CHS39 (GN/BU) and ground to the heater mats on circuit GD126 (BK/WH). The cushion and backrest heater mats are connected in series and operate together. Temperature is maintained by the heated seat module using a sensor contained within the cushion heater mat. The heated seat module monitors the temperature sensor on circuit VHS42 (GN) for adjusting the current flow to the heater mats and uses a ground supplied on circuit RHS41 (GN/BN). The heated seat module is designed to remain ON, heating the seat and maintaining temperature until switched OFF or the ignition power is switched OFF.
Possible Causes
An inoperative left rear heated seat can be caused by:
- faulty wiring, terminals or connectors.
- a faulty heater mat.
- a faulty heated seat module.
- a faulty heated seat switch.
PINPOINT TEST Z: THE HEATED SEAT IS INOPERATIVE/DOES NOT OPERATE CORRECTLY — LEFT REAR
| Test Step | Result / Action to Take | ||||||||
|---|---|---|---|---|---|---|---|---|---|
| Z1 CHECK CIRCUIT SBB07 (WH/RD) FOR VOLTAGE TO THE HEATED SEAT MODULE | |||||||||
|
Yes GO to Z2. No REPAIR the circuit. TEST the system for normal operation. | ||||||||
| Z2 CHECK CIRCUIT CHS39 (GN/BU) FOR AN OPEN OR SHORT TO GROUND | |||||||||
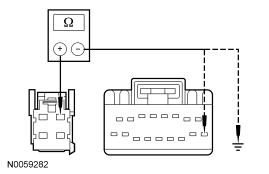
|
Yes GO to Z3. No REPAIR the circuit. TEST the system for normal operation. | ||||||||
| Z3 CHECK CIRCUIT VHS42 (GN) FOR AN OPEN OR SHORT TO GROUND | |||||||||
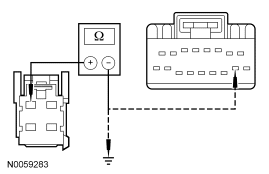
|
Yes GO to Z4. No REPAIR the circuit. TEST the system for normal operation. | ||||||||
| Z4 CHECK CIRCUIT RHS41 (GN/BN) FOR AN OPEN OR SHORT TO GROUND | |||||||||
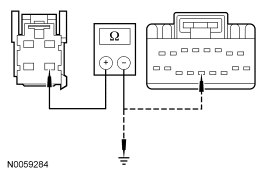
|
Yes GO to Z5. No REPAIR the circuit. TEST the system for normal operation. | ||||||||
| Z5 CHECK CIRCUITS CHS39 (GN/BU), VHS42 (GN) AND RHS41 (GN/BN) FOR SHORT TO VOLTAGE | |||||||||
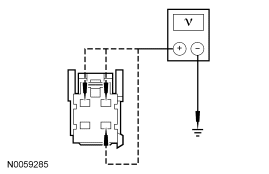
|
Yes GO to Z6. No REPAIR the affected circuit. TEST the system for normal operation. | ||||||||
| Z6 CHECK CIRCUIT GD126 (BK/WH) FOR AN OPEN | |||||||||
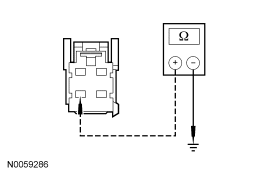
|
Yes GO to Z7. No REPAIR the circuit. TEST the system for normal operation. | ||||||||
| Z7 CHECK CUSHION AND BACKREST HEATER MAT AND SENSOR FOR SHORT TO VOLTAGE | |||||||||
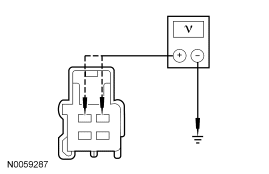
|
Yes GO to Z8. No REPAIR the circuit. INSTALL a new affected cushion or backrest heater mat. TEST the system for normal operation. | ||||||||
| Z8 CHECK CUSHION HEATED SEAT MAT FOR AN OPEN OR SHORT TO GROUND | |||||||||
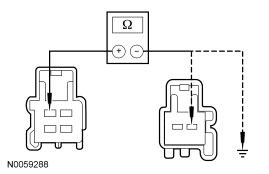
|
Yes GO to Z9. No INSTALL a new cushion heater mat. TEST the system for normal operation. | ||||||||
| Z9 CHECK BACKREST HEATED SEAT MAT FOR AN OPEN OR SHORT TO GROUND | |||||||||
|
Yes GO to Z10. No INSTALL a new cushion heater mat. TEST the system for normal operation. | ||||||||
| Z10 CHECK CIRCUIT BETWEEN BACKREST AND CUSHION HEATER MAT | |||||||||
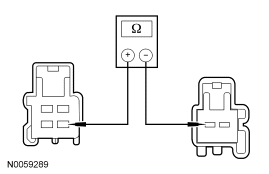
|
Yes GO to Z11. No INSTALL a new cushion heater mat. TEST the system for normal operation. | ||||||||
| Z11 CHECK THE HEATED SEAT TEMPERATURE SENSOR AND CIRCUITS FOR AN OPEN OR SHORT TO GROUND | |||||||||
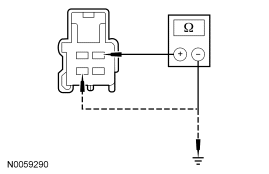
|
Yes GO to Z12. No INSTALL a new cushion heater mat. TEST the system for normal operation. | ||||||||
| Z12 CHECK CIRCUITS CHS46 (YE/GN) AND CHS47 (VT/GN) FOR A SHORT TO VOLTAGE | |||||||||
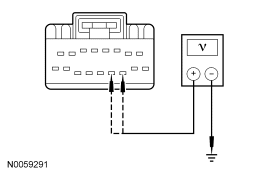
|
Yes GO to Z13. No REPAIR the circuit. TEST the system for normal operation. | ||||||||
| Z13 CHECK CIRCUITS CHS46 (YE/GN) AND CHS47 (VT/GN) FOR A SHORT TO GROUND | |||||||||
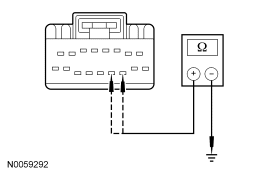
|
Yes GO to Z14. No REPAIR the circuit. TEST the system for normal operation. | ||||||||
| Z14 CHECK BETWEEN CIRCUITS CHS46 (YE/GN) AND CHS47 (VT/GN) FOR A SHORT | |||||||||
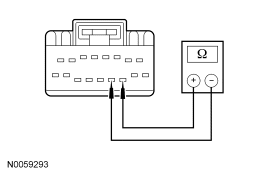
|
Yes GO to Z15. No REPAIR the circuits. TEST the system for normal operation. | ||||||||
| Z15 CHECK CIRCUITS CHS46 (YE/GN) AND CHS47 (VT/GN) FOR AN OPEN | |||||||||
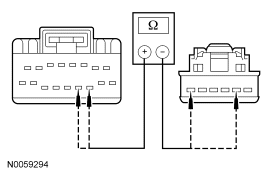
|
Yes GO to Z16. No REPAIR the circuit. TEST the system for normal operation. | ||||||||
| Z16 CHECK HEATED SEAT SWITCH GROUND CIRCUIT GD126 (BK/WH) | |||||||||
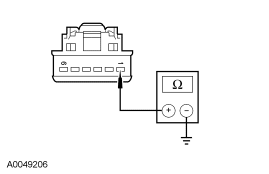
|
Yes GO to Z17. No REPAIR the circuit. TEST the system for normal operation. | ||||||||
| Z17 CHECK THE RIGHT REAR HEATED SEAT SWITCH | |||||||||
|
Yes INSTALL a new heated seat switch. REFER to Heated Seat Switch — Rear Seat in this section. TEST the system for normal operation. No INSTALL a new heated seat module. REFER to Heated Seat Module — Rear Seat in this section. TEST the system for normal operation. |
Pinpoint Test AA: The Heated Seat is Inoperative/Does Not Operate Correctly — Right Rear
Refer to Wiring Diagrams Cell 119, Climate Controlled Seats for schematic and connector information.
Normal Operation
The heated seat module receives battery voltage on circuit CBP35 (YE/GY) and ignition voltage on circuit SBB07 (WH/RD), and is supplied ground on circuit GD133 (BK). When the right rear heated seat control switch is pressed with the ignition switch in RUN or START, a ground is supplied on circuit CHS50 (BU/GY) to command the system ON or OFF in hi heat mode or circuit CHS51 (YE/GY) to command the system ON or OFF in low heat mode. When commanded ON, voltage is supplied to the heated seat switch from the heated seat module on either circuit CHS52 (BU) (hi heat mode) or circuit CHS53 (WH/BN) (low heat mode) illuminating the switch indicator. The heated seat module also supplies voltage to the cushion and backrest heater mats on circuit CHS43 (GY/BU) and ground to the heater mats on circuit GD151 (BK/GN). The cushion and backrest heater mats are connected in series and operate together. Temperature is maintained by the heated seat module using a sensor contained within the cushion heater mat. The heated seat module monitors the temperature sensor on circuit VHS45 (GY/BN) for adjusting the current flow to the heater mats and uses a ground supplied on circuit RHS41 (GN/BN). The heated seat module is designed to remain ON, heating the seat and maintaining temperature until switched OFF or the ignition power is switched OFF.
Possible Causes
An inoperative right rear heated seat can be caused by:
- faulty wiring, terminals or connectors.
- a faulty heater mat.
- a faulty heated seat module.
- a faulty heated seat switch.
PINPOINT TEST AA: THE HEATED SEAT IS INOPERATIVE/DOES NOT OPERATE CORRECTLY — RIGHT REAR
| Test Step | Result / Action to Take | ||||||||
|---|---|---|---|---|---|---|---|---|---|
| AA1 CHECK CIRCUIT SBB07 (WH/RD) FOR VOLTAGE TO THE HEATED SEAT MODULE | |||||||||
|
Yes GO to AA2. No REPAIR the circuit. TEST the system for normal operation. | ||||||||
| AA2 CHECK CIRCUIT CHS43 (GY/BU) FOR AN OPEN OR SHORT TO GROUND | |||||||||
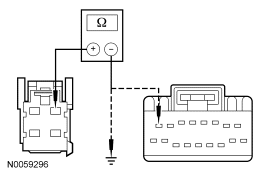
|
Yes GO to AA3. No REPAIR the circuit. TEST the system for normal operation. | ||||||||
| AA3 CHECK CIRCUIT VHS45 (GY/BN) FOR AN OPEN OR SHORT TO GROUND | |||||||||
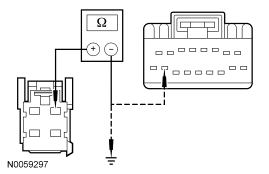
|
Yes GO to AA4. No REPAIR the circuit. TEST the system for normal operation. | ||||||||
| AA4 CHECK CIRCUIT RHS41 (GN/BN) FOR AN OPEN OR SHORT TO GROUND | |||||||||
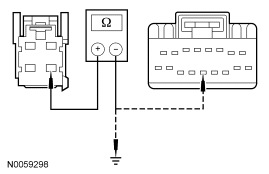
|
Yes GO to AA5. No REPAIR the circuit. TEST the system for normal operation. | ||||||||
| AA5 CHECK CIRCUITS CHS43 (GY/BU), VHS45 (GY/BN) AND RHS41 (GN/BN) FOR SHORT TO VOLTAGE | |||||||||
|
Yes GO to AA6. No REPAIR the affected circuit. TEST the system for normal operation. | ||||||||
| AA6 CHECK CIRCUIT GD151 (BK/GN) FOR AN OPEN | |||||||||
|
Yes GO to AA7. No REPAIR the circuit. TEST the system for normal operation. | ||||||||
| AA7 CHECK CUSHION AND BACKREST HEATER MAT AND SENSOR FOR SHORT TO VOLTAGE | |||||||||
|
Yes GO to AA8. No REPAIR the circuit. INSTALL a new affected cushion or backrest heater mat. TEST the system for normal operation. | ||||||||
| AA8 CHECK CUSHION HEATED SEAT MAT FOR AN OPEN OR SHORT TO GROUND | |||||||||
|
Yes GO to AA9. No INSTALL a new cushion heater mat. TEST the system for normal operation. | ||||||||
| AA9 CHECK BACKREST HEATED SEAT MAT FOR AN OPEN OR SHORT TO GROUND | |||||||||
|
Yes GO to AA10. No INSTALL a new cushion heater mat. TEST the system for normal operation. | ||||||||
| AA10 CHECK CIRCUIT BETWEEN BACKREST AND CUSHION HEATER MAT | |||||||||
|
Yes GO to AA11. No INSTALL a new cushion heater mat. TEST the system for normal operation. | ||||||||
| AA11 CHECK THE HEATED SEAT TEMPERATURE SENSOR AND CIRCUITS FOR AN OPEN OR SHORT TO GROUND | |||||||||
|
Yes GO to AA12. No INSTALL a new cushion heater mat. TEST the system for normal operation. | ||||||||
| AA12 CHECK CIRCUITS CHS50 (BU/GY) AND CHS51 (YE/GY) FOR A SHORT TO VOLTAGE | |||||||||
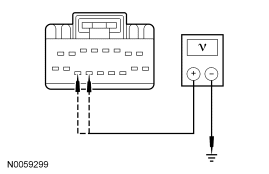
|
Yes GO to AA13. No REPAIR the circuit. TEST the system for normal operation. | ||||||||
| AA13 CHECK CIRCUITS CHS50 (BU/GY) AND CHS51 (YE/GY) FOR A SHORT TO GROUND | |||||||||
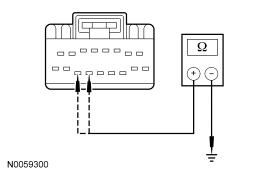
|
Yes GO to AA14. No REPAIR the circuit. TEST the system for normal operation. | ||||||||
| AA14 CHECK BETWEEN CIRCUITS CHS50 (BU/GY) AND CHS51 (YE/GY) FOR A SHORT | |||||||||
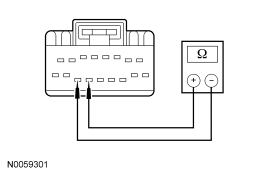
|
Yes GO to AA15. No REPAIR the circuits. TEST the system for normal operation. | ||||||||
| AA15 CHECK CIRCUITS CHS50 (BU/GY) AND CHS51 (YE/GY) FOR AN OPEN | |||||||||
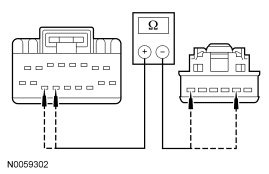
|
Yes GO to AA16. No REPAIR the circuit. TEST the system for normal operation. | ||||||||
| AA16 CHECK HEATED SEAT SWITCH GROUND CIRCUIT GD145 (BK/BU) | |||||||||
|
Yes GO to AA17. No REPAIR the circuit. TEST the system for normal operation. | ||||||||
| AA17 CHECK THE RIGHT REAR HEATED SEAT SWITCH | |||||||||
|
Yes INSTALL a new heated seat switch. TEST the system for normal operation. No INSTALL a new heated seat module. REFER to Heated Seat Module — Rear Seat in this section. TEST the system for normal operation. |
Pinpoint Test AB: The Heated Seat is Inoperative — Left Rear Seat Does Heat But the Heated Seat Indicator Does Not Illuminate When Pressed
Refer to Wiring Diagrams Cell 119, Climate Controlled Seats for schematic and connector information.
Normal Operation
Pressing the left rear heated seat switch once in either the hi or low mode will commanded ON the left rear heated seat. Voltage is then supplied to the left rear heated seat switch from the heated seat module on either circuit CHS48 (YE) (hi heat mode) or circuit CHS49 (VT) (low heat mode) illuminating the switch indicator. Pressing the left rear heated seat switch again in the mode that is currently on will set the left rear heated seat to OFF and also turn that LED OFF.
Possible Causes
An inoperative heated seat indicator can be caused by:
- wiring, terminals or connectors.
- a faulty heated seat module.
- a faulty heated seat switch.
PINPOINT TEST AB: THE HEATED SEAT IS INOPERATIVE — LEFT REAR SEAT DOES HEAT BUT THE HEATED SEAT INDICATOR DOES NOT ILLUMINATE WHEN PRESSED
| Test Step | Result / Action to Take |
|---|---|
| AB1 CHECK CIRCUITS CHS49 (VT) AND CHS48 (YE) FOR A SHORT TO GROUND | |
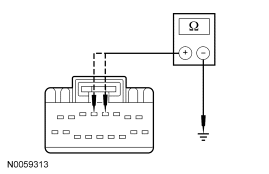
|
Yes GO to AB2. No REPAIR the affected circuit. TEST the system for normal operation. |
| AB2 CHECK CIRCUITS CHS49 (VT) AND CHS48 (YE) FOR AN OPEN | |
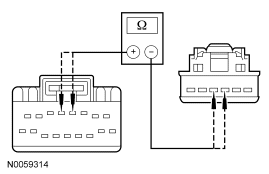
|
Yes GO to AB3. No REPAIR the affected circuit. TEST the system for normal operation. |
| AB3 CHECK THE HEATED SEAT HI INDICATOR | |
|
Yes GO to AB4. No INSTALL a new rear heated seat switch. REFER to Heated Seat Switch — Rear Seat in this section. TEST the system for normal operation. |
| AB4 CHECK THE HEATED SEAT LOW INDICATOR | |
|
Yes INSTALL a new heated seat module. REFER to Heated Seat Module — Rear Seat in this section. TEST the system for normal operation. No INSTALL a new rear heated seat switch. REFER to Heated Seat Switch — Rear Seat in this section. TEST the system for normal operation. |
Pinpoint Test AC: The Heated Seat is Inoperative — Left Rear Seat Does Heat But the Heated Seat Indicator is On All the Time
Refer to Wiring Diagrams Cell 119, Climate Controlled Seats for schematic and connector information.
Normal Operation
Pressing the left rear heated seat switch once in either the hi or low mode will commanded ON the left rear heated seat. Voltage is then supplied to the left rear heated seat switch from the heated seat module on either circuit CHS48 (YE) (hi heat mode) or circuit CHS49 (VT) (low heat mode) illuminating the switch indicator. Pressing the left rear heated seat switch again in the mode that is currently on will set the left rear heated seat to OFF and also turn that LED OFF.
Possible Causes
An inoperative heated seat indicator can be caused by:
- wiring, terminals or connectors.
- a faulty heated seat module.
PINPOINT TEST AC: THE HEATED SEAT IS INOPERATIVE — LEFT REAR SEAT DOES HEAT BUT THE HEATED SEAT INDICATOR DOES NOT ILLUMINATE WHEN PRESSED
| Test Step | Result / Action to Take |
|---|---|
| AC1 CHECK CIRCUITS CHS49 (VT) AND CHS48 (YE) FOR A SHORT TO VOLTAGE | |
|
Yes INSTALL a new heated seat module. REFER to Heated Seat Module — Rear Seat in this section. TEST the system for normal operation. No REPAIR the affected circuit. TEST the system for normal operation. |
Pinpoint Test AD: The Heated Seat is Inoperative — Right Rear Seat Does Heat But the Heated Seat Indicator Does Not Illuminate When Pressed
Refer to Wiring Diagrams Cell 119, Climate Controlled Seats for schematic and connector information.
Normal Operation
Pressing the right rear heated seat switch once in either the hi or low mode will commanded ON the left rear heated seat. Voltage is then supplied to the left rear heated seat switch from the heated seat module on either circuit CHS52 (BU) (hi heat mode) or circuit CHS53 (WH/BN) (low heat mode) illuminating the switch indicator. Pressing the right rear heated seat switch again in the mode that is currently on will set the right rear heated seat to OFF and also turn that LED OFF.
Possible Causes
An inoperative heated seat indicator can be caused by:
- wiring, terminals or connectors.
- a faulty heated seat module.
- a faulty heated seat switch.
PINPOINT TEST AD: THE HEATED SEAT IS INOPERATIVE — RIGHT REAR SEAT DOES HEAT BUT THE HEATED SEAT INDICATOR DOES NOT ILLUMINATE WHEN PRESSED
| Test Step | Result / Action to Take |
|---|---|
| AD1 CHECK CIRCUITS CHS53 (WH/BN) AND CHS52 (BU) FOR A SHORT TO GROUND | |
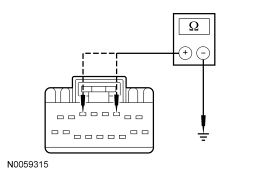
|
Yes GO to AD2. No REPAIR the affected circuit. TEST the system for normal operation. |
| AD2 CHECK CIRCUITS CHS53 (WH/BN) AND CHS52 (BU) FOR AN OPEN | |
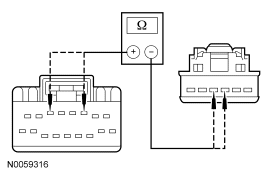
|
Yes GO to AD3. No REPAIR the affected circuit. TEST the system for normal operation. |
| AD3 CHECK THE HEATED SEAT HI INDICATOR | |
|
Yes GO to AD4. No INSTALL a new rear heated seat switch. REFER to Heated Seat Switch — Rear Seat in this section. TEST the system for normal operation. |
| AD4 CHECK THE HEATED SEAT LOW INDICATOR | |
|
Yes INSTALL a new heated seat module. REFER to Heated Seat Module — Rear Seat in this section. TEST the system for normal operation. No INSTALL a new rear heated seat switch. REFER to Heated Seat Switch — Rear Seat in this section. TEST the system for normal operation. |
Pinpoint Test AE: The Heated Seat is Inoperative — Right Rear Seat Does Heat But the Heated Seat Indicator is On All the Time
Refer to Wiring Diagrams Cell 119, Climate Controlled Seats for schematic and connector information.
Normal Operation
Pressing the right rear heated seat switch once in either the hi or low mode will commanded ON the left rear heated seat. Voltage is then supplied to the left rear heated seat switch from the heated seat module on either circuit CHS52 (BU) (hi heat mode) or circuit CHS53 (WH/BN) (low heat mode) illuminating the switch indicator. Pressing the right rear heated seat switch again in the mode that is currently on will set the right rear heated seat to OFF and also turn that LED OFF.
Possible Causes
An inoperative heated seat indicator can be caused by:
- wiring, terminals or connectors.
- a faulty heated seat module.
PINPOINT TEST AE: THE HEATED SEAT IS INOPERATIVE — RIGHT REAR SEAT DOES HEAT BUT THE HEATED SEAT INDICATOR IS ON ALL THE TIME
| Test Step | Result / Action to Take |
|---|---|
| AE1 CHECK CIRCUITS CHS53 (WH/BN) AND CHS52 (BU) FOR A SHORT TO VOLTAGE | |
|
Yes INSTALL a new heated seat module. REFER to Heated Seat Module — Rear Seat in this section. TEST the system for normal operation. No REPAIR the affected circuit. TEST the system for normal operation. |
Pinpoint Test AF: A Single Climate Controlled Seat is Inoperative/Does Not Operate Correctly
Refer to Wiring Diagrams Cell 119, Climate Controlled Seats for schematic and connector information.
Normal Operation
Both the driver and front passenger climate controlled seats are independently controlled electronically by the climate controlled seat module (CCSM) mounted to the bottom of the passenger seat. The climate controlled seat system only operates with the engine running, however, if using a scan tool to command the CCSM, diagnostic testing can be carried out with the ignition switch key on engine off (KOEO). The system receives power from battery junction box (BJB) fuse 16 (30A) feeding battery voltage on circuit SBB16 (VT/RD) into CCSM C3036a pins E and F. If power is disconnected from either pin E or F of CCSM C3036a with the power connection remaining on the other circuit, both seats will remain operational because the power feed circuits are connected internally in the CCSM. However, if a fault occurs setting a diagnostic trouble code (DTC) specific to either climate controlled seat, only the affected seat will be disabled by the module and the other will remain operational.
Each driver and front passenger seat cushion is equipped with a thermo-electric device (TED) assembly that includes a seat blower (fan motor, serviced as an assembly with the TED). Similarly, each driver and front passenger seat backrest is also equipped with its own TED assembly with blower. Cabin air is drawn through the blower and distributed to each of the TED modules located in the seat cushion and backrest. The TEDs then heat or cool the air. The air is then directed into the foam pad and manifold where it is distributed along the surface of the cushion and backrest of the seat. Once the system is activated, the CCSM uses a set of flexible algorithms to control the heating/cooling modes and the blower speed dependant on the electronic automatic temperature control (EATC) seat switch settings.
Possible Causes
A single climate controlled seat that does not operate can be caused by:
- wiring, terminals or connectors.
- an MS-CAN fault.
- a faulted EATC module.
- a faulted CCSM.
PINPOINT TEST AF: A SINGLE CLIMATE CONTROLLED SEAT IS INOPERATIVE/DOES NOT OPERATE CORRECTLY
NOTE: The air bag warning indicator illuminates when the restraints control module (RCM) fuse is removed and the ignition switch is ON. This is normal operation and does not indicate a supplemental restraint system (SRS) fault.
NOTE: The SRS must be fully operational and free of faults before releasing the vehicle to the customer.
| Test Step | Result / Action to Take |
|---|---|
| AF1 CHECK CLIMATE CONTROLLED SEAT OPERATION | |
|
Yes GO to AF2. No GO to Symptom Chart. |
| AF2 CHECK FOR CCSM AND EATC DTCS | |
|
Yes For CCSM DTCs, GO to the Climate Controlled Seat Module (CCSM) Diagnostic Trouble Code (DTC) Chart. For EATC DTCs, REFER to Section 412-00 to diagnose the EATC module fault. No GO to AF3. |
| AF3 CHECK OPERATION OF THE CCSM USING THE SCAN TOOL | |
|
Yes GO to AF5. No GO to AF4. |
| AF4 CHECK FOR VOLTAGE TO THE CCSM | |
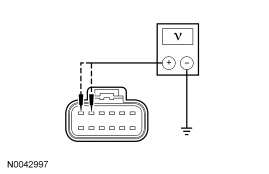
|
Yes INSTALL a new CCSM and CARRY OUT programmable module installation (PMI). REFER to Climate Controlled Seat Module in this section. REPEAT the self-test. CLEAR the DTCs. DISCONNECT the battery ground cable. CONNECT passenger safety belt buckle pretensioner C3202. CONNECT passenger seat side air bag module C327. REPOWER the SRS. REFER to Section 501-20B. No VERIFY battery junction box (BJB) fuse 16 (30A) is OK. If OK, REPAIR the circuit. REPEAT the self-test. CLEAR the DTCs. DISCONNECT the battery ground cable. CONNECT passenger safety belt buckle pretensioner C3202. CONNECT passenger seat side air bag module C327. REPOWER the SRS. REFER to Section 501-20B. |
| AF5 MONITOR THE CCSM PIDS | |
|
Yes If the fault is intermittent, CHECK for causes of the intermittent fault. INSPECT the connectors, terminals and wiring. ATTEMPT to recreate the fault by flexing the wire harness and operating the system. CHECK the electrical connectors for corrosion or pushed-out pins. REPAIR any intermittent concerns found. REPEAT the self-test. CLEAR the DTCs. No INSTALL a new EATC module. REFER to Section 412-01. REPEAT the self-test. CLEAR the DTCs. |
Pinpoint Test AG: DTC B103B/B1111 — Thermoelectric Driver Overcurrent Low/Driver Thermoelectric Device Control Overtemperature Fault
Refer to Wiring Diagrams Cell 119, Climate Controlled Seats for schematic and connector information.
Normal Operation
Both the driver and front passenger climate controlled seats are independently controlled electronically by the climate controlled seat module (CCSM) mounted to the bottom of the passenger seat cushion. The climate controlled seat system only operates with the engine running, however, if using a scan tool to command the CCSM, diagnostic testing can be carried out with the ignition switch key on engine off (KOEO). The system receives power from battery junction box (BJB) fuse 16 (30A) feeding battery voltage on circuit SBB16 (VT/RD) into CCSM C3036a pins E and F. If power is disconnected from either pin E or F of CCSM C3036a with the power connection remaining on the other circuit, both seats will remain operational because the power feed circuits are connected internally in the CCSM. However, if a fault occurs setting a diagnostic trouble code (DTC) specific to either climate controlled seat, only the affected seat will be disabled by the module and the other will remain operational.
Each driver and front passenger seat cushion is equipped with a thermo-electric device (TED) assembly that includes a seat blower (fan motor, serviced as an assembly with the TED). Similarly, each driver and front passenger seat backrest is also equipped with its own TED assembly with blower. Cabin air is drawn through the blower and distributed to each of the TED modules located in the seat cushion and backrest. The TEDs then heat or cool the air. The air is then directed into the foam pad and manifold where it is distributed along the surface of the cushion and backrest of the seat. Once the system is activated, the CCSM uses a set of flexible algorithms to control the heating/cooling modes and the blower speed dependant on the electronic automatic temperature control (EATC) seat switch settings.
Possible Causes
A TED driver overcurrent low or device control overtemperature fault can be caused by:
- wiring, terminals or connectors.
- a faulted TED assembly.
- a faulted CCSM.
PINPOINT TEST AG: DTC B103B/B1111 — THERMOELECTRIC DRIVER OVERCURRENT LOW/DRIVER THERMOELECTRIC DEVICE CONTROL OVERTEMPERATURE FAULT
NOTE: The air bag warning indicator illuminates when the restraints control module (RCM) fuse is removed and the ignition switch is ON. This is normal operation and does not indicate a supplemental restraint system (SRS) fault.
NOTE: The SRS must be fully operational and free of faults before releasing the vehicle to the customer.
| Test Step | Result / Action to Take | ||||||||||
|---|---|---|---|---|---|---|---|---|---|---|---|
| AG1 CHECK THE TED CIRCUITS FOR SHORT TO GROUND | |||||||||||
|
Yes GO to AG2. No If the resistances of C3036a-G, circuit CHS02 (YE/BU) and/or C3036a-H, circuit RHS02 (BU/OG) to ground were not greater than 10,000 ohms to ground, GO to AG6 . If resistances of C3036a-J, circuit CHS01 (GY/VT) and/or C3036a-K, circuit RHS01 (WH/VT) to ground were not greater than 10,000 ohms to ground, GO to AG7 . | ||||||||||
| AG2 CHECK THE TED CIRCUITS FOR SHORT TO VOLTAGE | |||||||||||
|
Yes GO to AG3. No If the voltages measured at C3036a-G and/or C3036a-H were not less than 1 volt, GO to AG8 . If voltages measured at C3036a-J and/or C3036a-K were not less than 1 volt, GO to AG9. | ||||||||||
| AG3 CHECK THE TED RESISTANCE | |||||||||||
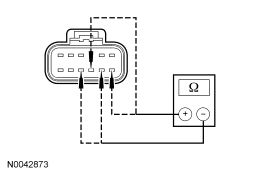
|
Yes INSTALL a new CCSM and CARRY OUT programmable module installation (PMI). REFER to Climate Controlled Seat Module in this section. REPEAT the self-test. CLEAR the DTCs. DISCONNECT the battery ground cable. CONNECT passenger safety belt buckle pretensioner C3202. CONNECT passenger seat side air bag module C327. CONNECT driver safety belt buckle pretensioner C3201. CONNECT driver seat side air bag module C328. REPOWER the SRS. REFER to Section 501-20B. No If the resistance between CCSM C3036a-G and C3036a-H was not between 0.9 and 10 ohms, GO to AG5 . If the resistance between CCSM C3036a-J and C3036a-K was not between 0.9 and 10 ohms, GO to AG4 . | ||||||||||
| AG4 CHECK THE RESISTANCE OF THE BACKREST TED | |||||||||||
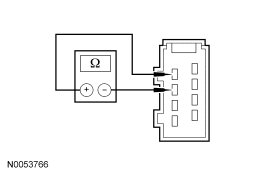
|
Yes REPAIR the affected circuit. REPEAT the self-test. CLEAR the DTCs. DISCONNECT the battery ground cable. CONNECT passenger safety belt buckle pretensioner C3202. CONNECT passenger seat side air bag module C327. CONNECT driver safety belt buckle pretensioner C3201. CONNECT driver seat side air bag module C328. REPOWER the SRS. REFER to Section 501-20B. No INSTALL a new backrest TED. REFER to Seat Backrest Thermo-Electric Device in this section. REPEAT the self-test. CLEAR the DTCs. DISCONNECT the battery ground cable. CONNECT passenger safety belt buckle pretensioner C3202. CONNECT passenger seat side air bag module C327. CONNECT driver safety belt buckle pretensioner C3201. CONNECT driver seat side air bag module C328. REPOWER the SRS. REFER to Section 501-20B. | ||||||||||
| AG5 CHECK THE RESISTANCE OF THE CUSHION TED | |||||||||||
|
Yes REPAIR the affected circuit. REPEAT the self-test. CLEAR the DTCs. DISCONNECT the battery ground cable. CONNECT passenger safety belt buckle pretensioner C3202. CONNECT passenger seat side air bag module C327. CONNECT driver safety belt buckle pretensioner C3201. CONNECT driver seat side air bag module C328. REPOWER the SRS. REFER to Section 501-20B. No INSTALL a new cushion TED. REFER to Seat Cushion Thermo-Electric Device in this section. REPEAT the self-test. CLEAR the DTCs. DISCONNECT the battery ground cable. CONNECT passenger safety belt buckle pretensioner C3202. CONNECT passenger seat side air bag module C327. CONNECT driver safety belt buckle pretensioner C3201. CONNECT driver seat side air bag module C328. REPOWER the SRS. REFER to Section 501-20B. | ||||||||||
| AG6 CHECK THE CUSHION TED CIRCUITS FOR SHORT TO GROUND | |||||||||||
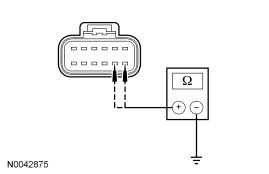
|
Yes INSTALL a new cushion TED. REFER to Seat Cushion Thermo-Electric Device in this section. REPEAT the self-test. CLEAR the DTCs. DISCONNECT the battery ground cable. CONNECT passenger safety belt buckle pretensioner C3202. CONNECT passenger seat side air bag module C327. CONNECT driver safety belt buckle pretensioner C3201. CONNECT driver seat side air bag module C328. REPOWER the SRS. REFER to Section 501-20B. No REPAIR the affected circuit. REPEAT the self-test. CLEAR the DTCs. DISCONNECT the battery ground cable. CONNECT passenger safety belt buckle pretensioner C3202. CONNECT passenger seat side air bag module C327. CONNECT driver safety belt buckle pretensioner C3201. CONNECT driver seat side air bag module C328. REPOWER the SRS. REFER to Section 501-20B. | ||||||||||
| AG7 CHECK THE BACKREST TED CIRCUITS FOR SHORT TO GROUND | |||||||||||
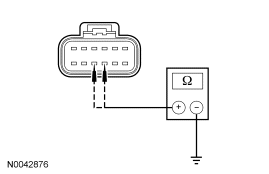
|
Yes INSTALL a new backrest TED. REFER to Seat Backrest Thermo-Electric Device in this section. REPEAT the self-test. CLEAR the DTCs. DISCONNECT the battery ground cable. CONNECT passenger safety belt buckle pretensioner C3202. CONNECT passenger seat side air bag module C327. CONNECT driver safety belt buckle pretensioner C3201. CONNECT driver seat side air bag module C328. REPOWER the SRS. REFER to Section 501-20B. No REPAIR the affected circuit. REPEAT the self-test. CLEAR the DTCs. DISCONNECT the battery ground cable. CONNECT passenger safety belt buckle pretensioner C3202. CONNECT passenger seat side air bag module C327. CONNECT driver safety belt buckle pretensioner C3201. CONNECT driver seat side air bag module C328. REPOWER the SRS. REFER to Section 501-20B. | ||||||||||
| AG8 CHECK THE CUSHION TED CIRCUITS FOR SHORT TO VOLTAGE | |||||||||||
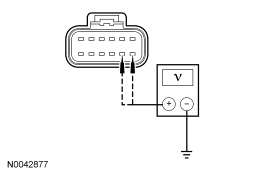
|
Yes INSTALL a new cushion TED. REFER to Seat Cushion Thermo-Electric Device in this section. REPEAT the self-test. CLEAR the DTCs. DISCONNECT the battery ground cable. CONNECT passenger safety belt buckle pretensioner C3202. CONNECT passenger seat side air bag module C327. CONNECT driver safety belt buckle pretensioner C3201. CONNECT driver seat side air bag module C328. REPOWER the SRS. REFER to Section 501-20B. No REPAIR the affected circuit. REPEAT the self-test. CLEAR the DTCs. DISCONNECT the battery ground cable. CONNECT passenger safety belt buckle pretensioner C3202. CONNECT passenger seat side air bag module C327. CONNECT driver safety belt buckle pretensioner C3201. CONNECT driver seat side air bag module C328. REPOWER the SRS. REFER to Section 501-20B. | ||||||||||
| AG9 CHECK THE BACKREST TED CIRCUITS FOR SHORT TO VOLTAGE | |||||||||||
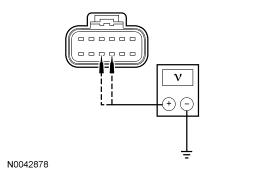
|
Yes INSTALL a new backrest TED. REFER to Seat Backrest Thermo-Electric Device in this section. REPEAT the self-test. CLEAR the DTCs. DISCONNECT the battery ground cable. CONNECT passenger safety belt buckle pretensioner C3202. CONNECT passenger seat side air bag module C327. CONNECT driver safety belt buckle pretensioner C3201. CONNECT driver seat side air bag module C328. REPOWER the SRS. REFER to Section 501-20B. No REPAIR the affected circuit. REPEAT the self-test. CLEAR the DTCs. DISCONNECT the battery ground cable. CONNECT passenger safety belt buckle pretensioner C3202. CONNECT passenger seat side air bag module C327. CONNECT driver safety belt buckle pretensioner C3201. CONNECT driver seat side air bag module C328. REPOWER the SRS. REFER to Section 501-20B. |
Pinpoint Test AH: DTC B103C — Thermoelectric Driver Open Load
Refer to Wiring Diagrams Cell 119, Climate Controlled Seats for schematic and connector information.
Normal Operation
Both the driver and front passenger climate controlled seats are independently controlled electronically by the climate controlled seat module (CCSM) mounted to the bottom of the passenger seat cushion. The climate controlled seat system only operates with the engine running, however, if using a scan tool to command the CCSM, diagnostic testing can be carried out with the ignition switch key on engine off (KOEO). The system receives power from battery junction box (BJB) fuse 16 (30A) feeding battery voltage on circuit SBB16 (VT/RD) into CCSM C3036a pins E and F. If power is disconnected from either pin E or F of CCSM C3036a with the power connection remaining on the other circuit, both seats will remain operational because the power feed circuits are connected internally in the CCSM. However, if a fault occurs setting a diagnostic trouble code (DTC) specific to either climate controlled seat, only the affected seat will be disabled by the module and the other will remain operational.
Each driver and front passenger seat cushion is equipped with a thermo-electric device (TED) assembly that includes a seat blower (fan motor, serviced as an assembly with the TED). Similarly, each driver and front passenger seat backrest is also equipped with its own TED assembly with blower. Cabin air is drawn through the blower and distributed to each of the TED modules located in the seat cushion and backrest. The TEDs then heat or cool the air. The air is then directed into the foam pad and manifold where it is distributed along the surface of the cushion and backrest of the seat. Once the system is activated, the CCSM uses a set of flexible algorithms to control the heating/cooling modes and the blower speed dependant on the electronic automatic temperature control (EATC) seat switch settings.
Possible Causes
A TED driver open load fault can be caused by:
- wiring, terminals or connectors.
- a faulted TED assembly.
- a faulted CCSM.
PINPOINT TEST AH: DTC B103C — THERMOELECTRIC DRIVER OPEN LOAD
NOTE: The air bag warning indicator illuminates when the restraints control module (RCM) fuse is removed and the ignition switch is ON. This is normal operation and does not indicate a supplemental restraint system (SRS) fault.
NOTE: The SRS must be fully operational and free of faults before releasing the vehicle to the customer.
| Test Step | Result / Action to Take | |||||||||||||||
|---|---|---|---|---|---|---|---|---|---|---|---|---|---|---|---|---|
| AH1 CHECK THE CCSM FOR RESISTANCE | ||||||||||||||||
|
Yes CONNECT CCSM C3036a. CLEAR the DTCs. REPEAT the self-test. If DTC B103C is still present on demand, GO to AH3. No GO to AH2. | |||||||||||||||
| AH2 CHECK THE TED CIRCUITS FOR AN OPEN | ||||||||||||||||
|
Yes GO to AH3. No REPAIR the affected circuit. REPEAT the self-test. CLEAR the DTCs. DISCONNECT the battery ground cable. CONNECT passenger safety belt buckle pretensioner C3202. CONNECT passenger seat side air bag module C327. CONNECT driver safety belt buckle pretensioner C3201. CONNECT driver seat side air bag module C328. REPOWER the SRS. REFER to Section 501-20B. | |||||||||||||||
| AH3 CHECK THE TED CIRCUITS FOR SHORT TO VOLTAGE | ||||||||||||||||
|
Yes REPAIR the affected circuit. REPEAT the self-test. CLEAR the DTCs. DISCONNECT the battery ground cable. CONNECT passenger safety belt buckle pretensioner C3202. CONNECT passenger seat side air bag module C327. CONNECT driver safety belt buckle pretensioner C3201. CONNECT driver seat side air bag module C328. REPOWER the SRS. REFER to Section 501-20B. No GO to AH4. | |||||||||||||||
| AH4 CHECK RESISTANCE OF THE TEDS | ||||||||||||||||
|
Yes INSTALL a new CCSM and CARRY OUT programmable module installation (PMI). REFER to Climate Controlled Seat Module in this section. REPEAT the self-test. CLEAR the DTCs. DISCONNECT the battery ground cable. CONNECT passenger safety belt buckle pretensioner C3202. CONNECT passenger seat side air bag module C327. CONNECT driver safety belt buckle pretensioner C3201. CONNECT driver seat side air bag module C328. REPOWER the SRS. REFER to Section 501-20B. No If the resistance of the backrest TED was not between 0.9 and 10 ohms, INSTALL a new backrest TED. REFER to Seat Backrest Thermo-Electric Device in this section. REPEAT the self-test. CLEAR the DTCs. If the resistance of the cushion TED was not between 0.9 and 10 ohms, INSTALL a new cushion TED. REFER to Seat Cushion Thermo-Electric Device in this section. REPEAT the self-test. CLEAR the DTCs. DISCONNECT the battery ground cable. CONNECT passenger safety belt buckle pretensioner C3202. CONNECT passenger seat side air bag module C327. CONNECT driver safety belt buckle pretensioner C3201. CONNECT driver seat side air bag module C328. REPOWER the SRS. REFER to Section 501-20B. |
Pinpoint Test AI: DTC B103D — Blower Driver Overtemperature
Refer to Wiring Diagrams Cell 119, Climate Controlled Seats for schematic and connector information.
Normal Operation
Both the driver and front passenger climate controlled seats are independently controlled electronically by the climate controlled seat module (CCSM) mounted to the bottom of the passenger seat cushion. The climate controlled seat system only operates with the engine running, however, if using a scan tool to command the CCSM, diagnostic testing can be carried out with the ignition switch key on engine off (KOEO). The system receives power from battery junction box (BJB) fuse 16 (30A) feeding battery voltage on circuit SBB16 (VT/RD) into CCSM C3036a pins E and F. If power is disconnected from either pin E or F of CCSM C3036a with the power connection remaining on the other circuit, both seats will remain operational because the power feed circuits are connected internally in the CCSM. However, if a fault occurs setting a diagnostic trouble code (DTC) specific to either climate controlled seat, only the affected seat will be disabled by the module and the other will remain operational.
Each driver and front passenger seat cushion is equipped with a thermo-electric device (TED) assembly that includes a seat blower (fan motor, serviced as an assembly with the TED). Similarly, each driver and front passenger seat backrest is also equipped with its own TED assembly with blower. Cabin air is drawn through the blower and distributed to each of the TED modules located in the seat cushion and backrest. The TEDs then heat or cool the air. The air is then directed into the foam pad and manifold where it is distributed along the surface of the cushion and backrest of the seat. Once the system is activated, the CCSM uses a set of flexible algorithms to control the heating/cooling modes and the blower speed dependant on the electronic automatic temperature control (EATC) seat switch settings.
Possible Causes
A blower overtemperature fault can be caused by:
- wiring, terminals or connectors.
- a faulted TED assembly.
- a faulted CCSM.
PINPOINT TEST AI: DTC B103D — BLOWER DRIVER OVERTEMPERATURE
NOTE: The air bag warning indicator illuminates when the restraints control module (RCM) fuse is removed and the ignition switch is ON. This is normal operation and does not indicate a supplemental restraint system (SRS) fault.
NOTE: The SRS must be fully operational and free of faults before releasing the vehicle to the customer.
| Test Step | Result / Action to Take |
|---|---|
| AI1 CHECK THE BLOWER CIRCUIT FOR AN OPEN | |
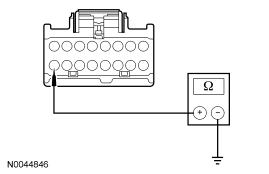
|
Yes GO to AI2. No REPAIR the affected circuit. REPEAT the self-test. DISCONNECT the battery ground cable. CONNECT passenger safety belt buckle pretensioner C3202. CONNECT passenger seat side air bag module C327. CONNECT driver safety belt buckle pretensioner C3201. CONNECT driver seat side air bag module C328. REPOWER the SRS. REFER to Section 501-20B. |
| AI2 CHECK THE BLOWER CIRCUITS FOR A SHORT | |
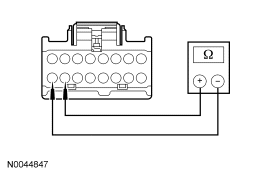
|
Yes GO to AI3. No REPAIR the affected circuits. REPEAT the self-test. CLEAR the DTCs. DISCONNECT the battery ground cable. CONNECT passenger safety belt buckle pretensioner C3202. CONNECT passenger seat side air bag module C327. CONNECT driver safety belt buckle pretensioner C3201. CONNECT driver seat side air bag module C328. REPOWER the SRS. REFER to Section 501-20B. |
| AI3 CHECK THE BLOWER RESISTANCE | |
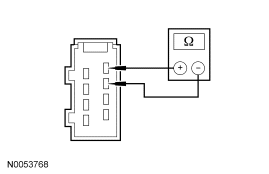
|
Yes INSTALL a new CCSM and CARRY OUT programmable module installation (PMI). REFER to Climate Controlled Seat Module in this section. REPEAT the self-test. CLEAR the DTCs. DISCONNECT the battery ground cable. CONNECT passenger safety belt buckle pretensioner C3202. CONNECT passenger seat side air bag module C327. CONNECT driver safety belt buckle pretensioner C3201. CONNECT driver seat side air bag module C328. REPOWER the SRS. REFER to Section 501-20B. No If the resistance of the cushion TED was not between 6,000 and 9,000 ohms, INSTALL a new cushion TED. REFER to Seat Cushion Thermo-Electric Device in this section. REPEAT the self-test. CLEAR the DTCs. If the resistance of the backrest TED was not between 6,000 and 9,000 ohms, INSTALL a new backrest TED. REFER to Seat Backrest Thermo-Electric Device in this section. REPEAT the self-test. CLEAR the DTCs. DISCONNECT the battery ground cable. CONNECT passenger safety belt buckle pretensioner C3202. CONNECT passenger seat side air bag module C327. CONNECT driver safety belt buckle pretensioner C3201. CONNECT driver seat side air bag module C328. REPOWER the SRS. REFER to Section 501-20B. |
Pinpoint Test AJ: DTC B1113/B111B — Passenger Thermoelectric Device Control Overtemperature Fault/Passenger Thermoelectric Driver Overcurrent Low
Refer to Wiring Diagrams Cell 119, Climate Controlled Seats for schematic and connector information.
Normal Operation
Both the driver and front passenger climate controlled seats are independently controlled electronically by the climate controlled seat module (CCSM) mounted to the bottom of the passenger seat cushion. The climate controlled seat system only operates with the engine running, however, if using a scan tool to command the CCSM, diagnostic testing can be carried out with the ignition switch key on engine off (KOEO). The system receives power from battery junction box (BJB) fuse 16 (30A) feeding battery voltage on circuit SBB16 (VT/RD) into CCSM C3036a pins E and F. If power is disconnected from either pin E or F of CCSM C3036a with the power connection remaining on the other circuit, both seats will remain operational because the power feed circuits are connected internally in the CCSM. However, if a fault occurs setting a diagnostic trouble code (DTC) specific to either climate controlled seat, only the affected seat will be disabled by the module and the other will remain operational.
Each driver and front passenger seat cushion is equipped with a thermo-electric device (TED) assembly that includes a seat blower (fan motor, serviced as an assembly with the TED). Similarly, each driver and front passenger seat backrest is also equipped with its own TED assembly with blower. Cabin air is drawn through the blower and distributed to each of the TED modules located in the seat cushion and backrest. The TEDs then heat or cool the air. The air is then directed into the foam pad and manifold where it is distributed along the surface of the cushion and backrest of the seat. Once the system is activated, the CCSM uses a set of flexible algorithms to control the heating/cooling modes and the blower speed dependant on the electronic automatic temperature control (EATC) seat switch settings.
Possible Causes
A TED device control overtemperature or overcurrent low fault can be caused by:
- wiring, terminals or connectors.
- a faulted TED assembly.
- a faulted CCSM.
PINPOINT TEST AJ: DTC B1113/B111B — PASSENGER THERMOELECTRIC DEVICE CONTROL OVERTEMPERATURE FAULT/PASSENGER THERMOELECTRIC DRIVER OVERCURRENT LOW
NOTE: The air bag warning indicator illuminates when the restraints control module (RCM) fuse is removed and the ignition switch is ON. This is normal operation and does not indicate a supplemental restraint system (SRS) fault.
NOTE: The SRS must be fully operational and free of faults before releasing the vehicle to the customer.
| Test Step | Result / Action to Take | ||||||||||
|---|---|---|---|---|---|---|---|---|---|---|---|
| AJ1 CHECK THE TED CIRCUITS FOR SHORT TO GROUND | |||||||||||
|
Yes GO to AJ2. No If the resistances of C3036a-A and/or C3036a-B to ground were not greater than 10,000 ohms to ground, GO to AJ6 . If resistances of C3036a-C and/or C3036a-D to ground were not greater than 10,000 ohms to ground, GO to AJ7 . | ||||||||||
| AJ2 CHECK THE TED CIRCUITS FOR SHORT TO VOLTAGE | |||||||||||
|
No GO to AJ3. No If the voltages measured at C3036a-A and/or C3036a-B were not less than 1 volt, GO to AJ8 . If voltages measured at C3036a-C and/or C3036a-D were not less than 1 volt, GO to AJ9 . | ||||||||||
| AJ3 CHECK THE TED RESISTANCE | |||||||||||
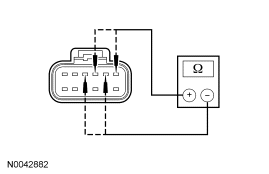
|
Yes INSTALL a new CCSM and CARRY OUT programmable module installation (PMI). REFER to Climate Controlled Seat Module in this section. REPEAT the self-test. CLEAR the DTCs. DISCONNECT the battery ground cable. CONNECT passenger safety belt buckle pretensioner C3202. CONNECT passenger seat side air bag module C327. REPOWER the SRS. REFER to Section 501-20B. No If the resistance between CCSM C3036a-A and C3036a-B was not between 0.9 and 10 ohms, GO to AJ5 . If the resistance between CCSM C3036a-C and C3036a-D was not between 0.9 and 10 ohms, GO to AJ4 . | ||||||||||
| AJ4 CHECK THE RESISTANCE OF THE BACKREST TED | |||||||||||
|
Yes REPAIR the affected circuit. REPEAT the self-test. CLEAR the DTCs. DISCONNECT the battery ground cable. CONNECT passenger safety belt buckle pretensioner C3202. CONNECT passenger seat side air bag module C327. REPOWER the SRS. REFER to Section 501-20B. No INSTALL a new backrest TED. REFER to Seat Backrest Thermo-Electric Device in this section. REPEAT the self-test. CLEAR the DTCs. DISCONNECT the battery ground cable. CONNECT passenger safety belt buckle pretensioner C3202. CONNECT passenger seat side air bag module C327. REPOWER the SRS. REFER to Section 501-20B. | ||||||||||
| AJ5 CHECK THE RESISTANCE OF THE CUSHION TED | |||||||||||
|
Yes REPAIR the affected circuit. REPEAT the self-test. CLEAR the DTCs. DISCONNECT the battery ground cable. CONNECT passenger safety belt buckle pretensioner C3202. CONNECT passenger seat side air bag module C327. REPOWER the SRS. REFER to Section 501-20B. No INSTALL a new cushion TED. REFER to Seat Cushion Thermo-Electric Device in this section. REPEAT the self-test. CLEAR the DTCs. DISCONNECT the battery ground cable. CONNECT passenger safety belt buckle pretensioner C3202. CONNECT passenger seat side air bag module C327. REPOWER the SRS. REFER to Section 501-20B. | ||||||||||
| AJ6 CHECK THE CUSHION TED CIRCUITS FOR SHORT TO GROUND | |||||||||||
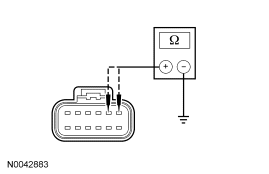
|
Yes INSTALL a new cushion TED. REFER to Seat Cushion Thermo-Electric Device in this section. REPEAT the self-test. CLEAR the DTCs. DISCONNECT the battery ground cable. CONNECT passenger safety belt buckle pretensioner C3202. CONNECT passenger seat side air bag module C327. REPOWER the SRS. REFER to Section 501-20B. No REPAIR the affected circuit. REPEAT the self-test. CLEAR the DTCs. DISCONNECT the battery ground cable. CONNECT passenger safety belt buckle pretensioner C3202. CONNECT passenger seat side air bag module C327. REPOWER the SRS. REFER to Section 501-20B. | ||||||||||
| AJ7 CHECK THE BACKREST TED CIRCUITS FOR SHORT TO GROUND | |||||||||||
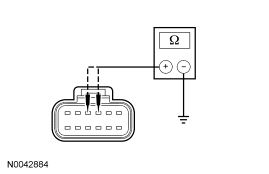
|
Yes INSTALL a new backrest TED. REFER to Seat Backrest Thermo-Electric Device in this section. REPEAT the self-test. CLEAR the DTCs. DISCONNECT the battery ground cable. CONNECT passenger safety belt buckle pretensioner C3202. CONNECT passenger seat side air bag module C327. REPOWER the SRS. REFER to Section 501-20B. No REPAIR the affected circuit. REPEAT the self-test. CLEAR the DTCs. DISCONNECT the battery ground cable. CONNECT passenger safety belt buckle pretensioner C3202. CONNECT passenger seat side air bag module C327. REPOWER the SRS. REFER to Section 501-20B. | ||||||||||
| AJ8 CHECK THE CUSHION TED CIRCUITS FOR SHORT TO VOLTAGE | |||||||||||
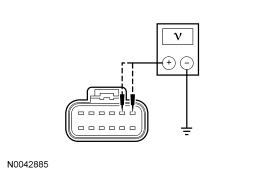
|
Yes INSTALL a new cushion TED. REFER to Seat Cushion Thermo-Electric Device in this section. REPEAT the self-test. CLEAR the DTCs. DISCONNECT the battery ground cable. CONNECT passenger safety belt buckle pretensioner C3202. CONNECT passenger seat side air bag module C327. REPOWER the SRS. REFER to Section 501-20B. No REPAIR the affected circuit. REPEAT the self-test. CLEAR the DTCs. DISCONNECT the battery ground cable. CONNECT passenger safety belt buckle pretensioner C3202. CONNECT passenger seat side air bag module C327. REPOWER the SRS. REFER to Section 501-20B. | ||||||||||
| AJ9 CHECK THE BACKREST TED CIRCUITS FOR SHORT TO VOLTAGE | |||||||||||
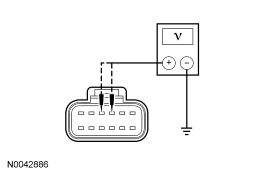
|
Yes INSTALL a new backrest TED. REFER to Seat Backrest Thermo-Electric Device in this section. REPEAT the self-test. CLEAR the DTCs. DISCONNECT the battery ground cable. CONNECT passenger safety belt buckle pretensioner C3202. CONNECT passenger seat side air bag module C327. REPOWER the SRS. REFER to Section 501-20B. No REPAIR the affected circuit. REPEAT the self-test. CLEAR the DTCs. DISCONNECT the battery ground cable. CONNECT passenger safety belt buckle pretensioner C3202. CONNECT passenger seat side air bag module C327. REPOWER the SRS. REFER to Section 501-20B. |
Pinpoint Test AK: DTC B111C — Passenger Thermoelectric Driver Open Load
Refer to Wiring Diagrams Cell 119, Climate Controlled Seats for schematic and connector information.
Normal Operation
Both the driver and front passenger climate controlled seats are independently controlled electronically by the climate controlled seat module (CCSM) mounted to the bottom of the passenger seat cushion. The climate controlled seat system only operates with the engine running, however, if using a scan tool to command the CCSM, diagnostic testing can be carried out with the ignition switch key on engine off (KOEO). The system receives power from battery junction box (BJB) fuse 16 (30A) feeding battery voltage on circuit SBB16 (VT/RD) into CCSM C3036a pins E and F. If power is disconnected from either pin E or F of CCSM C3036a with the power connection remaining on the other circuit, both seats will remain operational because the power feed circuits are connected internally in the CCSM. However, if a fault occurs setting a diagnostic trouble code (DTC) specific to either climate controlled seat, only the affected seat will be disabled by the module and the other will remain operational.
Each driver and front passenger seat cushion is equipped with a thermo-electric device (TED) assembly that includes a seat blower (fan motor, serviced as an assembly with the TED). Similarly, each driver and front passenger seat backrest is also equipped with its own TED assembly with blower. Cabin air is drawn through the blower and distributed to each of the TED modules located in the seat cushion and backrest. The TEDs then heat or cool the air. The air is then directed into the foam pad and manifold where it is distributed along the surface of the cushion and backrest of the seat. Once the system is activated, the CCSM uses a set of flexible algorithms to control the heating/cooling modes and the blower speed dependant on the electronic automatic temperature control (EATC) seat switch settings.
Possible Causes
A TED driver open load fault can be caused by:
- wiring, terminals or connectors.
- a faulted TED assembly.
- a faulted CCSM.
PINPOINT TEST AK: DTC B111C — PASSENGER THERMOELECTRIC DRIVER OPEN LOAD
NOTE: The air bag warning indicator illuminates when the restraints control module (RCM) fuse is removed and the ignition switch is ON. This is normal operation and does not indicate a supplemental restraint system (SRS) fault.
NOTE: The SRS must be fully operational and free of faults before releasing the vehicle to the customer.
| Test Step | Result / Action to Take | |||||||||||||||
|---|---|---|---|---|---|---|---|---|---|---|---|---|---|---|---|---|
| AK1 CHECK THE CCSM FOR RESISTANCE | ||||||||||||||||
|
Yes CONNECT CCSM C3036a. CLEAR the DTCs. REPEAT the self-test. If DTC B111C is still present on demand, GO to AK3. No GO to AK2. | |||||||||||||||
| AK2 CHECK THE TED CIRCUITS FOR AN OPEN | ||||||||||||||||
|
Yes GO to AK3. No REPAIR the affected circuit. REPEAT the self-test. CLEAR the DTCs. DISCONNECT the battery ground cable. CONNECT passenger safety belt buckle pretensioner C3202. CONNECT passenger seat side air bag module C327. REPOWER the SRS. REFER to Section 501-20B. | |||||||||||||||
| AK3 CHECK THE TED CIRCUITS FOR SHORT TO VOLTAGE | ||||||||||||||||
|
Yes REPAIR the affected circuit. REPEAT the self-test. CLEAR the DTCs. DISCONNECT the battery ground cable. CONNECT passenger safety belt buckle pretensioner C3202. CONNECT passenger seat side air bag module C327. REPOWER the SRS. REFER to Section 501-20B. No GO to AK4. | |||||||||||||||
| AK4 CHECK RESISTANCE OF THE TEDS | ||||||||||||||||
|
Yes INSTALL a new CCSM and CARRY OUT programmable module installation (PMI). REFER to Climate Controlled Seat Module in this section. REPEAT the self-test. CLEAR the DTCs. DISCONNECT the battery ground cable. CONNECT passenger safety belt buckle pretensioner C3202. CONNECT passenger seat side air bag module C327. REPOWER the SRS. REFER to Section 501-20B. No If the resistance of the backrest TED was not between 0.9 and 10 ohms, INSTALL a new backrest TED. REFER to Seat Backrest Thermo-Electric Device in this section. REPEAT the self-test. CLEAR the DTCs. If the resistance of the cushion TED was not between 0.9 and 10 ohms, INSTALL a new cushion TED. REFER to Seat Cushion Thermo-Electric Device in this section. REPEAT the self-test. CLEAR the DTCs. DISCONNECT the battery ground cable. CONNECT passenger safety belt buckle pretensioner C3202. CONNECT passenger seat side air bag module C327. REPOWER the SRS. REFER to Section 501-20B. |
Pinpoint Test AL: DTC B111D — Passenger Blower Driver Overtemperature
Refer to Wiring Diagrams Cell 119, Climate Controlled Seats for schematic and connector information.
Normal Operation
Both the driver and front passenger climate controlled seats are independently controlled electronically by the climate controlled seat module (CCSM) mounted to the bottom of the passenger seat cushion. The climate controlled seat system only operates with the engine running, however, if using a scan tool to command the CCSM, diagnostic testing can be carried out with the ignition switch key on engine off (KOEO). The system receives power from battery junction box (BJB) fuse 16 (30A) feeding battery voltage on circuit SBB16 (VT/RD) into CCSM C3036a pins E and F. If power is disconnected from either pin E or F of CCSM C3036a with the power connection remaining on the other circuit, both seats will remain operational because the power feed circuits are connected internally in the CCSM. However, if a fault occurs setting a diagnostic trouble code (DTC) specific to either climate controlled seat, only the affected seat will be disabled by the module and the other will remain operational.
Each driver and front passenger seat cushion is equipped with a thermo-electric device (TED) assembly that includes a seat blower (fan motor, serviced as an assembly with the TED). Similarly, each driver and front passenger seat backrest is also equipped with its own TED assembly with blower. Cabin air is drawn through the blower and distributed to each of the TED modules located in the seat cushion and backrest. The TEDs then heat or cool the air. The air is then directed into the foam pad and manifold where it is distributed along the surface of the cushion and backrest of the seat. Once the system is activated, the CCSM uses a set of flexible algorithms to control the heating/cooling modes and the blower speed dependant on the electronic automatic temperature control (EATC) seat switch settings.
Possible Causes
A blower overtemperature fault can be caused by:
- wiring, terminals or connectors.
- a faulted TED assembly.
- a faulted CCSM.
PINPOINT TEST AL: DTC B111D — PASSENGER BLOWER DRIVER OVERTEMPERATURE
NOTE: The air bag warning indicator illuminates when the restraints control module (RCM) fuse is removed and the ignition switch is ON. This is normal operation and does not indicate a supplemental restraint system (SRS) fault.
NOTE: The SRS must be fully operational and free of faults before releasing the vehicle to the customer.
| Test Step | Result / Action to Take |
|---|---|
| AL1 CHECK THE BLOWER CIRCUIT FOR AN OPEN | |
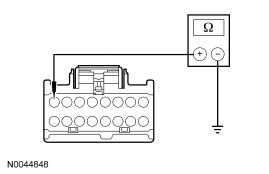
|
Yes GO to AL2. No REPAIR the affected circuit. REPEAT the self-test. CLEAR the DTCs. DISCONNECT the battery ground cable. CONNECT passenger safety belt buckle pretensioner C3202. CONNECT passenger seat side air bag module C327. REPOWER the SRS. REFER to Section 501-20B. |
| AL2 CHECK THE BLOWER CIRCUITS FOR A SHORT | |
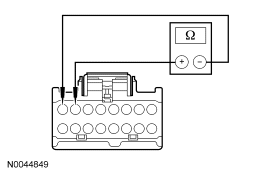
|
Yes GO to AL3. No REPAIR the affected circuits. REPEAT the self-test. CLEAR the DTCs. DISCONNECT the battery ground cable. CONNECT passenger safety belt buckle pretensioner C3202. CONNECT passenger seat side air bag module C327. REPOWER the SRS. REFER to Section 501-20B. |
| AL3 CHECK THE BLOWER RESISTANCE | |
|
Yes INSTALL a new CCSM and CARRY OUT programmable module installation (PMI). REFER to Climate Controlled Seat Module in this section. REPEAT the self-test. CLEAR the DTCs. DISCONNECT the battery ground cable. CONNECT passenger safety belt buckle pretensioner C3202. CONNECT passenger seat side air bag module C327. REPOWER the SRS. REFER to Section 501-20B. No If the resistance of the cushion TED was not between 6,000 and 9,000 ohms, INSTALL a new cushion TED. REFER to Seat Cushion Thermo-Electric Device in this section. REPEAT the self-test. CLEAR the DTCs. If the resistance of the backrest TED was not between 6,000 and 9,000 ohms, INSTALL a new backrest TED. REFER to Seat Backrest Thermo-Electric Device in this section. REPEAT the self-test. CLEAR the DTCs. DISCONNECT the battery ground cable. CONNECT passenger seat safety belt buckle pretensioner C3202. If equipped, CONNECT passenger seat side air bag module C327. REPOWER the SRS. REFER to Section 501-20B. |
Pinpoint Test AM: DTC B2729 — Driver Cushion Over-Temp Detected
Refer to Wiring Diagrams Cell 119, Climate Controlled Seats for schematic and connector information.
Normal Operation
Both the driver and front passenger climate controlled seats are independently controlled electronically by the climate controlled seat module (CCSM) mounted to the bottom of the passenger seat cushion. The climate controlled seat system only operates with the engine running, however, if using a scan tool to command the CCSM, diagnostic testing can be carried out with the ignition switch key on engine off (KOEO). The system receives power from battery junction box (BJB) fuse 16 (30A) feeding battery voltage on circuit SBB16 (VT/RD) into CCSM C3036a pins E and F. If power is disconnected from either pin E or F of CCSM C3036a with the power connection remaining on the other circuit, both seats will remain operational because the power feed circuits are connected internally in the CCSM. However, if a fault occurs setting a diagnostic trouble code (DTC) specific to either climate controlled seat, only the affected seat will be disabled by the module and the other will remain operational.
Each driver and front passenger seat cushion is equipped with a thermo-electric device (TED) assembly that includes a seat blower (fan motor, serviced as an assembly with the TED). Similarly, each driver and front passenger seat backrest is also equipped with its own TED assembly with blower. Cabin air is drawn through the blower and distributed to each of the TED modules located in the seat cushion and backrest. The TEDs then heat or cool the air. The air is then directed into the foam pad and manifold where it is distributed along the surface of the cushion and backrest of the seat. Once the system is activated, the CCSM uses a set of flexible algorithms to control the heating/cooling modes and the blower speed dependant on the electronic automatic temperature control (EATC) seat switch settings.
Possible Causes
A driver seat cushion over-temp fault can be caused by:
- wiring, terminals or connectors.
- restricted cushion TED filter.
- crushed or restricted cushion foam pad.
- crushed or restricted climate controlled seat manifold.
- a faulted cushion TED assembly.
- a faulted CCSM.
PINPOINT TEST AM: DTC B2729 — DRIVER CUSHION OVER-TEMP DETECTED
NOTE: The air bag warning indicator illuminates when the restraints control module (RCM) fuse is removed and the ignition switch is ON. This is normal operation and does not indicate a supplemental restraint system (SRS) fault.
NOTE: The SRS must be fully operational and free of faults before releasing the vehicle to the customer.
| Test Step | Result / Action to Take | ||||||||||||
|---|---|---|---|---|---|---|---|---|---|---|---|---|---|
| AM1 CHECK THE CCSM FOR DTCS | |||||||||||||
|
Yes GO to AM2. No GO to AM4. | ||||||||||||
| AM2 CHECK THE TED THERMISTOR CIRCUITS FOR A SHORT TO GROUND | |||||||||||||
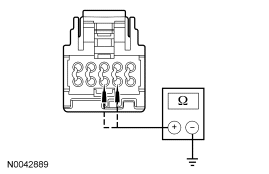
|
Yes GO to AM3. No REPAIR the affected circuit. REPEAT the self-test. CLEAR the DTCs. DISCONNECT the battery ground cable. CONNECT passenger safety belt buckle pretensioner C3202. CONNECT passenger seat side air bag module C327. CONNECT driver safety belt buckle pretensioner C3201. CONNECT driver seat side air bag module C328. REPOWER the SRS. REFER to Section 501-20B. | ||||||||||||
| AM3 CHECK THE TED THERMISTOR | |||||||||||||
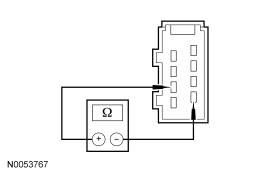
|
Yes REPAIR the affected open circuit. REPEAT the self-test. CLEAR the DTCs. DISCONNECT the battery ground cable. CONNECT passenger safety belt buckle pretensioner C3202. CONNECT passenger seat side air bag module C327. CONNECT driver safety belt buckle pretensioner C3201. CONNECT driver seat side air bag module C328. REPOWER the SRS. REFER to Section 501-20B. No INSTALL a new cushion TED. REFER to Seat Cushion Thermo-Electric Device in this section. REPEAT the self-test. CLEAR the DTCs. DISCONNECT the battery ground cable. CONNECT passenger safety belt buckle pretensioner C3202. CONNECT passenger seat side air bag module C327. CONNECT driver safety belt buckle pretensioner C3201. CONNECT driver seat side air bag module C328. REPOWER the SRS. REFER to Section 501-20B. | ||||||||||||
| AM4 CONFIRM THE FAULT | |||||||||||||
|
Yes GO to AM5. No Fault not present. Fault may have been set due to a past failure or incorrect use of the climate controlled seat system by repeated switching between heat and cool modes. REPEAT the self-test. CLEAR the DTCs. | ||||||||||||
| AM5 CHECK OPERATION OF THE SEAT | |||||||||||||
|
Yes GO to AM14. No GO to AM6. | ||||||||||||
| AM6 CHECK THE CUSHION BLOWER FOR AN OBSTRUCTION OR RESTRICTED FILTER | |||||||||||||
|
Yes REMOVE the obstruction or INSTALL a new filter. REPEAT the self-test. CLEAR the DTCs. No GO to AM7. | ||||||||||||
| AM7 CHECK THE CUSHION FAN OPERATION | |||||||||||||
|
Yes GO to AM14. No GO to AM8. | ||||||||||||
| AM8 CHECK THE BLOWER SPEED CONTROL CIRCUIT FOR AN OPEN | |||||||||||||
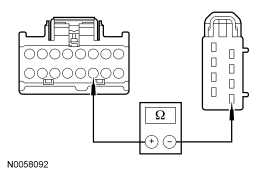
|
Yes GO to AM9. No REPAIR the circuit. REPEAT the self-test. CLEAR the DTCs. DISCONNECT the battery ground cable. CONNECT passenger safety belt buckle pretensioner C3202. CONNECT passenger seat side air bag module C327. CONNECT driver safety belt buckle pretensioner C3201. CONNECT driver seat side air bag module C328. REPOWER the SRS. REFER to Section 501-20B. | ||||||||||||
| AM9 CHECK THE BLOWER CIRCUIT RHS03 (GY/OG) FOR A SHORT TO VOLTAGE | |||||||||||||
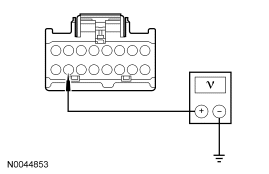
|
Yes REPAIR the circuit. REPEAT the self-test. CLEAR the DTCs. DISCONNECT the battery ground cable. CONNECT passenger safety belt buckle pretensioner C3202. CONNECT passenger seat side air bag module C327. CONNECT driver safety belt buckle pretensioner C3201. CONNECT driver seat side air bag module C328. REPOWER the SRS. REFER to Section 501-20B. No GO to AM10. | ||||||||||||
| AM10 CHECK THE BLOWER CIRCUIT CHS03 (GN/BN) FOR A SHORT TO GROUND | |||||||||||||
|
Yes GO to AM11. No REPAIR the circuit. REPEAT the self-test. CLEAR the DTCs. DISCONNECT the battery ground cable. CONNECT passenger safety belt buckle pretensioner C3202. CONNECT passenger seat side air bag module C327. CONNECT driver safety belt buckle pretensioner C3201. CONNECT driver seat side air bag module C328. REPOWER the SRS. REFER to Section 501-20B. | ||||||||||||
| AM11 CHECK THE BLOWER CIRCUITS RHS03 (GY/OG) AND CHS03 (GN/BN) FOR AN OPEN | |||||||||||||
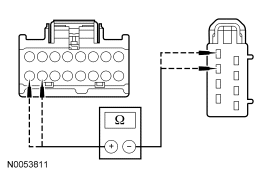
|
Yes GO to AM12. No REPAIR the affected circuit. REPEAT the self-test. CLEAR the DTCs. DISCONNECT the battery ground cable. CONNECT passenger safety belt buckle pretensioner C3202. CONNECT passenger seat side air bag module C327. CONNECT driver safety belt buckle pretensioner C3201. CONNECT driver seat side air bag module C328. REPOWER the SRS. REFER to Section 501-20B. | ||||||||||||
| AM12 CHECK THE BLOWER RESISTANCE | |||||||||||||
|
Yes GO to AM13. No INSTALL a new cushion TED. REFER to Seat Cushion Thermo-Electric Device in this section. REPEAT the self-test. CLEAR the DTCs. DISCONNECT the battery ground cable. CONNECT passenger safety belt buckle pretensioner C3202. CONNECT passenger seat side air bag module C327. CONNECT driver safety belt buckle pretensioner C3201. CONNECT driver seat side air bag module C328. REPOWER the SRS. REFER to Section 501-20B. | ||||||||||||
| AM13 CHECK THE BLOWER SPEED CONTROL RESISTANCE | |||||||||||||
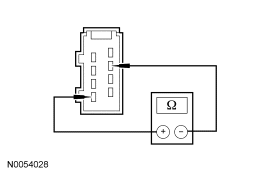
|
Yes GO to AM14. No INSTALL a new cushion TED. REFER to Seat Cushion Thermo-Electric Device in this section. REPEAT the self-test. CLEAR the DTCs. DISCONNECT the battery ground cable. CONNECT passenger safety belt buckle pretensioner C3202. CONNECT passenger seat side air bag module C327. CONNECT driver safety belt buckle pretensioner C3201. CONNECT driver seat side air bag module C328. REPOWER the SRS. REFER to Section 501-20B. | ||||||||||||
| AM14 CHECK THE TED INSTALLATION AND FOR CRUSHED SEAT CUSHION | |||||||||||||
|
Yes DISCONNECT the battery ground cable. CONNECT passenger safety belt buckle pretensioner C3202. CONNECT passenger seat side air bag module C327. CONNECT driver safety belt buckle pretensioner C3201. CONNECT driver seat side air bag module C328. ASSEMBLE the driver seat. INSTALL the driver seat into the vehicle. Do not REPOWER or PROVE OUT the SRS at this time INSTALL a new CCSM and CARRY OUT programmable module installation (PMI). REFER to Climate Controlled Seat Module in this section. REPEAT the self-test. CLEAR the DTCs. REPOWER the SRS. REFER to Section 501-20B. No CORRECTLY install the cushion TED or INSTALL a new seat cushion foam pad and/or climate controlled seat manifold. CONNECT the battery ground cable. REPEAT the self-test. CLEAR the DTCs. DISCONNECT the battery ground cable. CONNECT passenger safety belt buckle pretensioner C3202. CONNECT passenger seat side air bag module C327. CONNECT driver safety belt buckle pretensioner C3201. CONNECT driver seat side air bag module C328. REPOWER the SRS. REFER to Section 501-20B. |
Pinpoint Test AN: DTC B272A — Passenger Cushion Over-Temp Detected
Refer to Wiring Diagrams Cell 119, Climate Controlled Seats for schematic and connector information.
Normal Operation
Both the driver and front passenger climate controlled seats are independently controlled electronically by the climate controlled seat module (CCSM) mounted to the bottom of the passenger seat cushion. The climate controlled seat system only operates with the engine running, however, if using a scan tool to command the CCSM, diagnostic testing can be carried out with the ignition switch key on engine off (KOEO). The system receives power from battery junction box (BJB) fuse 16 (30A) feeding battery voltage on circuit SBB16 (VT/RD) into CCSM C3036a pins E and F. If power is disconnected from either pin E or F of CCSM C3036a with the power connection remaining on the other circuit, both seats will remain operational because the power feed circuits are connected internally in the CCSM. However, if a fault occurs setting a diagnostic trouble code (DTC) specific to either climate controlled seat, only the affected seat will be disabled by the module and the other will remain operational.
Each driver and front passenger seat cushion is equipped with a thermo-electric device (TED) assembly that includes a seat blower (fan motor, serviced as an assembly with the TED). Similarly, each driver and front passenger seat backrest is also equipped with its own TED assembly with blower. Cabin air is drawn through the blower and distributed to each of the TED modules located in the seat cushion and backrest. The TEDs then heat or cool the air. The air is then directed into the foam pad and manifold where it is distributed along the surface of the cushion and backrest of the seat. Once the system is activated, the CCSM uses a set of flexible algorithms to control the heating/cooling modes and the blower speed dependant on the electronic automatic temperature control (EATC) seat switch settings.
Possible Causes
A passenger seat cushion over-temp fault can be caused by:
- wiring, terminals or connectors.
- restricted cushion TED filter.
- crushed or restricted cushion foam pad.
- crushed or restricted climate controlled seat manifold.
- a faulted cushion TED assembly.
- a faulted CCSM.
PINPOINT TEST AN: DTC B272A — PASSENGER CUSHION OVER-TEMP DETECTED
NOTE: The air bag warning indicator illuminates when the restraints control module (RCM) fuse is removed and the ignition switch is ON. This is normal operation and does not indicate a supplemental restraint system (SRS) fault.
NOTE: The SRS must be fully operational and free of faults before releasing the vehicle to the customer.
| Test Step | Result / Action to Take | ||||||||||||
|---|---|---|---|---|---|---|---|---|---|---|---|---|---|
| AN1 CHECK THE CCSM FOR DTCS | |||||||||||||
|
Yes GO to AN2. No GO to AN4. | ||||||||||||
| AN2 CHECK THE TED THERMISTOR CIRCUITS FOR A SHORT TO GROUND | |||||||||||||
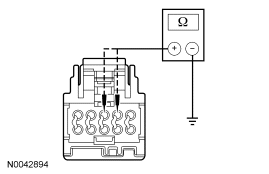
|
Yes GO to AN3. No REPAIR the affected circuit. REPEAT the self-test. CLEAR the DTCs. DISCONNECT the battery ground cable. CONNECT passenger safety belt buckle pretensioner C3202. CONNECT passenger seat side air bag module C327. REPOWER the SRS. REFER to Section 501-20B. | ||||||||||||
| AN3 CHECK THE TED THERMISTOR | |||||||||||||
|
Yes REPAIR the affected open circuit. REPEAT the self-test. CLEAR the DTCs. DISCONNECT the battery ground cable. CONNECT passenger safety belt buckle pretensioner C3202. CONNECT passenger seat side air bag module C327. REPOWER the SRS. REFER to Section 501-20B. No INSTALL a new cushion TED. REFER to Seat Cushion Thermo-Electric Device in this section. REPEAT the self-test. CLEAR the DTCs. DISCONNECT the battery ground cable. CONNECT passenger safety belt buckle pretensioner C3202. CONNECT passenger seat side air bag module C327. REPOWER the SRS. REFER to Section 501-20B. | ||||||||||||
| AN4 CONFIRM THE FAULT | |||||||||||||
|
Yes GO to AN5. No Fault not present. Fault may have been set due to a past failure or incorrect use of the climate controlled seat system by repeated switching between heat and cool modes. REPEAT the self-test. CLEAR the DTCs. | ||||||||||||
| AN5 CHECK OPERATION OF THE SEAT | |||||||||||||
|
Yes GO to AN14. No GO to AN6. | ||||||||||||
| AN6 CHECK THE CUSHION BLOWER FOR AN OBSTRUCTION OR RESTRICTED FILTER | |||||||||||||
|
Yes REMOVE the obstruction or INSTALL a new filter. REPEAT the self-test. CLEAR the DTCs. No GO to AN7. | ||||||||||||
| AN7 CHECK THE CUSHION FAN OPERATION | |||||||||||||
|
Yes GO to AN14. No GO to AN8. | ||||||||||||
| AN8 CHECK THE BLOWER SPEED CONTROL CIRCUIT FOR AN OPEN | |||||||||||||
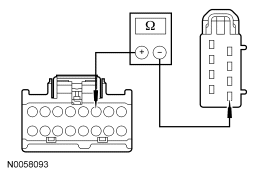
|
Yes GO to AN9. No REPAIR the circuit. REPEAT the self-test. CLEAR the DTCs. DISCONNECT the battery ground cable. CONNECT passenger safety belt buckle pretensioner C3202. CONNECT passenger seat side air bag module C327. REPOWER the SRS. REFER to Section 501-20B. | ||||||||||||
| AN9 CHECK THE BLOWER CIRCUIT RHS08 (VT/WH) FOR A SHORT TO VOLTAGE | |||||||||||||
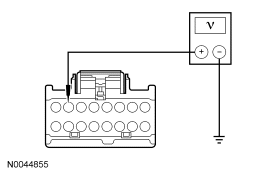
|
Yes REPAIR the circuit. REPEAT the self-test. CLEAR the DTCs. DISCONNECT the battery ground cable. CONNECT passenger safety belt buckle pretensioner C3202. CONNECT passenger seat side air bag module C327. REPOWER the SRS. REFER to Section 501-20B. No GO to AN10. | ||||||||||||
| AN10 CHECK THE BLOWER CIRCUIT CHS08 (BN/YE) FOR A SHORT TO GROUND | |||||||||||||
|
Yes GO to AN11. No REPAIR the circuit. REPEAT the self-test. CLEAR the DTCs. DISCONNECT the battery ground cable. CONNECT passenger safety belt buckle pretensioner C3202. CONNECT passenger seat side air bag module C327. REPOWER the SRS. REFER to Section 501-20B. | ||||||||||||
| AN11 CHECK THE BLOWER CIRCUITS CHS08 (BN/YE) AND RHS08 (VT/WH) FOR AN OPEN | |||||||||||||
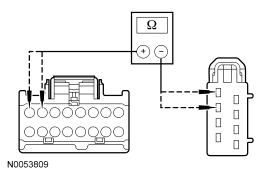
|
Yes GO to AN12. No REPAIR the affected circuit. REPEAT the self-test. CLEAR the DTCs. DISCONNECT the battery ground cable. CONNECT passenger safety belt buckle pretensioner C3202. CONNECT passenger seat side air bag module C327. REPOWER the SRS. REFER to Section 501-20B. | ||||||||||||
| AN12 CHECK THE BLOWER RESISTANCE | |||||||||||||
|
Yes GO to AN13. No INSTALL a new cushion TED. REFER to Seat Cushion Thermo-Electric Device in this section. REPEAT the self-test. CLEAR the DTCs. DISCONNECT the battery ground cable. CONNECT passenger safety belt buckle pretensioner C3202. CONNECT passenger seat side air bag module C327. REPOWER the SRS. REFER to Section 501-20B. | ||||||||||||
| AN13 CHECK THE BLOWER SPEED CONTROL RESISTANCE | |||||||||||||
|
Yes GO to AN14. No INSTALL a new cushion TED. REFER to Seat Cushion Thermo-Electric Device in this section. REPEAT the self-test. CLEAR the DTCs. DISCONNECT the battery ground cable. CONNECT passenger safety belt buckle pretensioner C3202. CONNECT passenger seat side air bag module C327. REPOWER the SRS. REFER to Section 501-20B. | ||||||||||||
| AN14 CHECK THE TED INSTALLATION AND FOR CRUSHED SEAT CUSHION | |||||||||||||
|
Yes CONNECT the battery ground cable. CARRY OUT programmable module installation (PMI) and INSTALL a new CCSM. REFER to Climate Controlled Seat Module in this section. REPEAT the self-test. CLEAR the DTCs. DISCONNECT the battery ground cable. CONNECT passenger safety belt buckle pretensioner C3202. CONNECT passenger seat side air bag module C327. REPOWER the SRS. REFER to Section 501-20B. No CORRECTLY install the cushion TED or INSTALL a new seat cushion foam pad and/or climate controlled seat manifold. CONNECT the battery ground cable. REPEAT the self-test. CLEAR the DTCs. DISCONNECT the battery ground cable. CONNECT passenger safety belt buckle pretensioner C3202. CONNECT passenger seat side air bag module C327. REPOWER the SRS. REFER to Section 501-20B. |
Pinpoint Test AO: DTC B272B — Passenger Back Over-Temp Detected
Refer to Wiring Diagrams Cell 119, Climate Controlled Seats for schematic and connector information.
Normal Operation
Both the driver and front passenger climate controlled seats are independently controlled electronically by the climate controlled seat module (CCSM) mounted to the bottom of the passenger seat cushion. The climate controlled seat system only operates with the engine running, however, if using a scan tool to command the CCSM, diagnostic testing can be carried out with the ignition switch key on engine off (KOEO). The system receives power from battery junction box (BJB) fuse 16 (30A) feeding battery voltage on circuit SBB16 (VT/RD) into CCSM C3036a pins E and F. If power is disconnected from either pin E or F of CCSM C3036a with the power connection remaining on the other circuit, both seats will remain operational because the power feed circuits are connected internally in the CCSM. However, if a fault occurs setting a diagnostic trouble code (DTC) specific to either climate controlled seat, only the affected seat will be disabled by the module and the other will remain operational.
Each driver and front passenger seat cushion is equipped with a thermo-electric device (TED) assembly that includes a seat blower (fan motor, serviced as an assembly with the TED). Similarly, each driver and front passenger seat backrest is also equipped with its own TED assembly with blower. Cabin air is drawn through the blower and distributed to each of the TED modules located in the seat cushion and backrest. The TEDs then heat or cool the air. The air is then directed into the foam pad and manifold where it is distributed along the surface of the cushion and backrest of the seat. Once the system is activated, the CCSM uses a set of flexible algorithms to control the heating/cooling modes and the blower speed dependant on the electronic automatic temperature control (EATC) seat switch settings.
Possible Causes
A driver seat backrest over-temp fault can be caused by:
- wiring, terminals or connectors.
- restricted backrest TED filter.
- crushed or restricted backrest foam pad.
- crushed or restricted climate controlled seat manifold.
- a faulted backrest TED assembly.
- a faulted CCSM.
PINPOINT TEST AO: DTC B272B — PASSENGER BACK OVER-TEMP DETECTED
NOTE: The air bag warning indicator illuminates when the restraints control module (RCM) fuse is removed and the ignition switch is ON. This is normal operation and does not indicate a supplemental restraint system (SRS) fault.
NOTE: The SRS must be fully operational and free of faults before releasing the vehicle to the customer.
| Test Step | Result / Action to Take | ||||||||||||
|---|---|---|---|---|---|---|---|---|---|---|---|---|---|
| AO1 CHECK THE CCSM FOR DTCS | |||||||||||||
|
Yes GO to AO2. No GO to AO4. | ||||||||||||
| AO2 CHECK THE TED THERMISTOR CIRCUITS FOR A SHORT TO GROUND | |||||||||||||
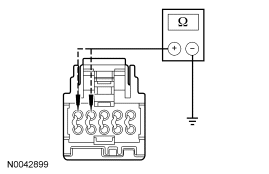
|
Yes GO to AO3. No REPAIR the affected circuit. REPEAT the self-test. CLEAR the DTCs. DISCONNECT the battery ground cable. CONNECT passenger safety belt buckle pretensioner C3202. CONNECT passenger seat side air bag module C327. REPOWER the SRS. REFER to Section 501-20B. | ||||||||||||
| AO3 CHECK THE TED THERMISTOR | |||||||||||||
|
Yes REPAIR the affected open circuit. REPEAT the self-test. CLEAR the DTCs. DISCONNECT the battery ground cable. CONNECT passenger safety belt buckle pretensioner C3202. CONNECT passenger seat side air bag module C327. REPOWER the SRS. REFER to Section 501-20B. No INSTALL a new backrest TED. REFER to Seat Backrest Thermo-Electric Device in this section. REPEAT the self-test. CLEAR the DTCs. DISCONNECT the battery ground cable. CONNECT passenger safety belt buckle pretensioner C3202. CONNECT passenger seat side air bag module C327. REPOWER the SRS. REFER to Section 501-20B. | ||||||||||||
| AO4 CONFIRM THE FAULT | |||||||||||||
|
Yes GO to AO5. No Fault not present. Fault may have been set due to a past failure or incorrect use of the climate controlled seat system by repeated switching between heat and cool modes. REPEAT the self-test. CLEAR the DTCs. | ||||||||||||
| AO5 CHECK OPERATION OF THE SEAT | |||||||||||||
|
Yes GO to AO14. No GO to AO6. | ||||||||||||
| AO6 CHECK THE BACKREST BLOWER FOR AN OBSTRUCTION OR RESTRICTED FILTER | |||||||||||||
|
Yes REMOVE the obstruction or INSTALL a new filter. REPEAT the self-test. CLEAR the DTCs. No GO to AO7. | ||||||||||||
| AO7 CHECK THE BACKREST FAN OPERATION | |||||||||||||
|
Yes GO to AO14. No GO to AO8. | ||||||||||||
| AO8 CHECK THE BLOWER SPEED CONTROL CIRCUIT FOR AN OPEN | |||||||||||||
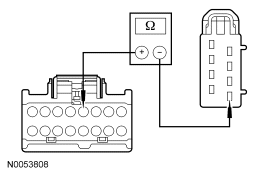
|
Yes GO to AO9. No REPAIR the circuit. REPEAT the self-test. CLEAR the DTCs. DISCONNECT the battery ground cable. CONNECT passenger safety belt buckle pretensioner C3202. CONNECT passenger seat side air bag module C327. REPOWER the SRS. REFER to Section 501-20B. | ||||||||||||
| AO9 CHECK THE BLOWER CIRCUIT RHS08 (VT/WH) FOR A SHORT TO VOLTAGE | |||||||||||||
|
Yes REPAIR the circuit. REPEAT the self-test. CLEAR the DTCs. DISCONNECT the battery ground cable. CONNECT passenger safety belt buckle pretensioner C3202. CONNECT passenger seat side air bag module C327. REPOWER the SRS. REFER to Section 501-20B. No GO to AO10. | ||||||||||||
| AO10 CHECK THE BLOWER CIRCUIT CHS08 (BN/YE) FOR A SHORT TO GROUND | |||||||||||||
|
Yes GO to AO11. No REPAIR the circuit. REPEAT the self-test. CLEAR the DTCs. DISCONNECT the battery ground cable. CONNECT passenger safety belt buckle pretensioner C3202. CONNECT passenger seat side air bag module C327. REPOWER the SRS. REFER to Section 501-20B. | ||||||||||||
| AO11 CHECK THE BLOWER CIRCUITS RHS08 (VT/WH) AND CHS08 (BN/YE) FOR AN OPEN | |||||||||||||
|
Yes GO to AO12. No REPAIR the affected circuit. REPEAT the self-test. CLEAR the DTCs. DISCONNECT the battery ground cable. CONNECT passenger safety belt buckle pretensioner C3202. CONNECT passenger seat side air bag module C327. REPOWER the SRS. REFER to Section 501-20B. | ||||||||||||
| AO12 CHECK THE BLOWER RESISTANCE | |||||||||||||
|
Yes GO to AO13. No INSTALL a new backrest TED. REFER to Seat Backrest Thermo-Electric Device in this section. REPEAT the self-test. CLEAR the DTCs. DISCONNECT the battery ground cable. CONNECT passenger safety belt buckle pretensioner C3202. CONNECT passenger seat side air bag module C327. REPOWER the SRS. REFER to Section 501-20B. | ||||||||||||
| AO13 CHECK THE BLOWER SPEED CONTROL RESISTANCE | |||||||||||||
|
Yes GO to AO14. No INSTALL a new backrest TED. REFER to Seat Backrest Thermo-Electric Device in this section. REPEAT the self-test. CLEAR the DTCs. DISCONNECT the battery ground cable. CONNECT passenger safety belt buckle pretensioner C3202. CONNECT passenger seat side air bag module C327. REPOWER the SRS. REFER to Section 501-20B. | ||||||||||||
| AO14 CHECK THE TED INSTALLATION AND FOR CRUSHED SEAT BACKREST | |||||||||||||
|
Yes CONNECT the battery ground cable. CARRY OUT programmable module installation (PMI) and INSTALL a new CCSM. REFER to Climate Controlled Seat Module in this section. REPEAT the self-test. CLEAR the DTCs. DISCONNECT the battery ground cable. CONNECT passenger safety belt buckle pretensioner C3202. CONNECT passenger seat side air bag module C327. REPOWER the SRS. REFER to Section 501-20B. No CORRECTLY install the backrest TED or INSTALL a new seat backrest foam pad and/or climate controlled seat manifold. CONNECT the battery ground cable. REPEAT the self-test. CLEAR the DTCs. DISCONNECT the battery ground cable. CONNECT passenger safety belt buckle pretensioner C3202. CONNECT passenger seat side air bag module C327. REPOWER the SRS. REFER to Section 501-20B. |
Pinpoint Test AP: DTC B272C — Driver Differential Temperature Fault
Refer to Wiring Diagrams Cell 119, Climate Controlled Seats for schematic and connector information.
Normal Operation
Both the driver and front passenger climate controlled seats are independently controlled electronically by the climate controlled seat module (CCSM) mounted to the bottom of the passenger seat cushion. The climate controlled seat system only operates with the engine running, however, if using a scan tool to command the CCSM, diagnostic testing can be carried out with the ignition switch key on engine off (KOEO). The system receives power from battery junction box (BJB) fuse 16 (30A) feeding battery voltage on circuit SBB16 (VT/RD) into CCSM C3036a pins E and F. If power is disconnected from either pin E or F of CCSM C3036a with the power connection remaining on the other circuit, both seats will remain operational because the power feed circuits are connected internally in the CCSM. However, if a fault occurs setting a diagnostic trouble code (DTC) specific to either climate controlled seat, only the affected seat will be disabled by the module and the other will remain operational.
Each driver and front passenger seat cushion is equipped with a thermo-electric device (TED) assembly that includes a seat blower (fan motor, serviced as an assembly with the TED). Similarly, each driver and front passenger seat backrest is also equipped with its own TED assembly with blower. Cabin air is drawn through the blower and distributed to each of the TED modules located in the seat cushion and backrest. The TEDs then heat or cool the air. The air is then directed into the foam pad and manifold where it is distributed along the surface of the cushion and backrest of the seat. Once the system is activated, the CCSM uses a set of flexible algorithms to control the heating/cooling modes and the blower speed dependant on the electronic automatic temperature control (EATC) seat switch settings.
A differential fault occurs when the cushion and backrest TEDs on the seat are reporting temperatures to the CCSM with a difference between them of 30°C (54°F) or greater. This can result from an air flow restriction or a circuit fault of either TED. If a TED and manifold is clear of obstruction and is operational, the other TED and circuitry on the seat should be checked. It is important to note that a TED with a higher temperature may be operating correctly and not be the area of concern. The other TED may be indicating a much lower temperature, causing the DTC to set.
Possible Causes
A driver differential temperature fault can be caused by:
- wiring, terminals or connectors.
- restricted cushion or backrest TED filter.
- crushed or restricted cushion or backrest foam pad.
- crushed or restricted cushion or backrest climate controlled seat manifold.
- a faulted cushion or backrest TED assembly.
- a faulted CCSM.
PINPOINT TEST AP: DTC B272C — DRIVER DIFFERENTIAL TEMPERATURE FAULT
NOTE: The air bag warning indicator illuminates when the restraints control module (RCM) fuse is removed and the ignition switch is ON. This is normal operation and does not indicate a supplemental restraint system (SRS) fault.
NOTE: The SRS must be fully operational and free of faults before releasing the vehicle to the customer.
| Test Step | Result / Action to Take | ||||||||||||
|---|---|---|---|---|---|---|---|---|---|---|---|---|---|
| AP1 CHECK THE CCSM FOR DTCS | |||||||||||||
|
Yes For DTC B2729, Go To Pinpoint Test AM. For DTC B2730, Go To Pinpoint Test AR. No GO to AP2. | ||||||||||||
| AP2 MONITOR THE CCSM TED TEMPERATURE PIDS | |||||||||||||
|
Yes GO to AP3. No If the driver seat cushion PID varies 10°C (18°F) or more from ambient temperature, GO to AP16. If the driver seat backrest PID varies 10°C (18°F) or more from ambient temperature, GO to AP31. | ||||||||||||
| AP3 CONFIRM THE FAULT IS IN THE SEAT CUSHION OR THE BACKREST | |||||||||||||
|
Yes If the driver seat cushion PID is 30°C (54°F) hotter than the backrest PID, GO to AP5 . If the driver seat backrest PID is 30°C (54°F) hotter than the cushion PID, GO to AP20 . No GO to AP4. | ||||||||||||
| AP4 CHECK THE TEDS COOLING PERFORMANCE | |||||||||||||
|
Yes The DTC may have been set by extreme cabin temperatures or excessive sun-load on the seat causing the system to enter recovery mode. Occupant size and weight characteristics can also be a factor. CLEAR the DTCs. REPEAT the self-test. TEST the system for normal operation. If a concern cannot be found or duplicated, RETURN the vehicle to the customer. No CHECK the affected seat cushion or backrest for correct installation of the climate controlled seat components (TED, manifold, air ducts and foam pad). CHECK for airflow restrictions (TED inlets and outlets, TED-to-manifold connections, filters and ducts) and REPAIR as needed. CHECK for an intermittent wiring fault. REPAIR as needed. REPEAT the self-test. CLEAR the DTCs. | ||||||||||||
| AP5 CHECK THE TED INSTALLATION AND FOR A CRUSHED SEAT CUSHION | |||||||||||||
|
Yes GO to AP6. No CORRECTLY install the cushion TED or INSTALL a new seat cushion foam pad and/or climate controlled seat manifold. CONNECT the battery ground cable. REPEAT the self-test. CLEAR the DTCs. REPOWER the SRS. REFER to Section 501-20B. | ||||||||||||
| AP6 CHECK BACKREST TED CIRCUIT RHS01 (WH/VT) FOR SHORT TO VOLTAGE | |||||||||||||
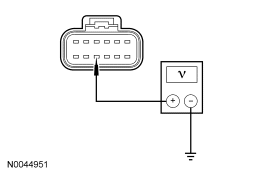
|
Yes GO to AP7. No REPAIR the circuit. REPEAT the self-test. CLEAR the DTCs. DISCONNECT the battery ground cable. CONNECT passenger safety belt buckle pretensioner C3202. CONNECT passenger seat side air bag module C327. CONNECT driver safety belt buckle pretensioner C3201. CONNECT driver seat side air bag module C328. REPOWER the SRS. REFER to Section 501-20B. | ||||||||||||
| AP7 CHECK BACKREST TED CIRCUIT CHS01 (GY/VT) FOR SHORT TO GROUND | |||||||||||||
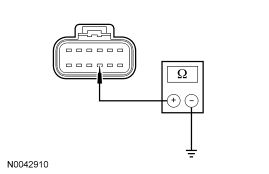
|
Yes GO to AP8. No REPAIR the circuit. REPEAT the self-test. CLEAR the DTCs. DISCONNECT the battery ground cable. CONNECT passenger safety belt buckle pretensioner C3202. CONNECT passenger seat side air bag module C327. CONNECT driver safety belt buckle pretensioner C3201. CONNECT driver seat side air bag module C328. REPOWER the SRS. REFER to Section 501-20B. | ||||||||||||
| AP8 CHECK RESISTANCE OF THE BACKREST TED AND WIRING | |||||||||||||
|
Yes GO to AP10. No GO to AP9. | ||||||||||||
| AP9 CHECK RESISTANCE OF THE BACKREST TED | |||||||||||||
|
Yes REPAIR the affected circuit(s). REPEAT the self-test. CLEAR the DTCs. DISCONNECT the battery ground cable. CONNECT passenger safety belt buckle pretensioner C3202. CONNECT passenger seat side air bag module C327. CONNECT driver safety belt buckle pretensioner C3201. CONNECT driver seat side air bag module C328. REPOWER the SRS. REFER to Section 501-20B. No INSTALL a new backrest TED. REFER to Seat Backrest Thermo-Electric Device in this section. REPEAT the self-test. CLEAR the DTCs. DISCONNECT the battery ground cable. CONNECT passenger safety belt buckle pretensioner C3202. CONNECT passenger seat side air bag module C327. CONNECT driver safety belt buckle pretensioner C3201. CONNECT driver seat side air bag module C328. REPOWER the SRS. REFER to Section 501-20B. | ||||||||||||
| AP10 CHECK THE BLOWER AND SPEED CONTROL CIRCUITS FOR A SHORT TO VOLTAGE | |||||||||||||
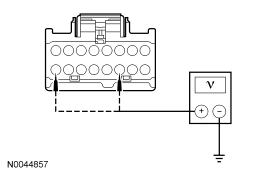
|
Yes GO to AP11. No REPAIR the circuit. REPEAT the self-test. CLEAR the DTCs. DISCONNECT the battery ground cable. CONNECT passenger safety belt buckle pretensioner C3202. CONNECT passenger seat side air bag module C327. CONNECT driver safety belt buckle pretensioner C3201. CONNECT driver seat side air bag module C328. REPOWER the SRS. REFER to Section 501-20B. | ||||||||||||
| AP11 CHECK THE BLOWER AND SPEED CONTROL CIRCUITS FOR A SHORT TO GROUND | |||||||||||||
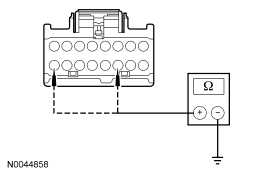
|
Yes GO to AP12. No REPAIR the circuit. REPEAT the self-test. CLEAR the DTCs. DISCONNECT the battery ground cable. CONNECT passenger safety belt buckle pretensioner C3202. CONNECT passenger seat side air bag module C327. CONNECT driver safety belt buckle pretensioner C3201. CONNECT driver seat side air bag module C328. REPOWER the SRS. REFER to Section 501-20B. | ||||||||||||
| AP12 CHECK THE BLOWER AND WIRING | |||||||||||||
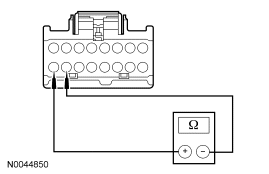
|
Yes GO to AP14. No GO to AP13. | ||||||||||||
| AP13 CHECK THE BLOWER | |||||||||||||
|
Yes REPAIR the affected circuit(s). REPEAT the self-test. CLEAR the DTCs. DISCONNECT the battery ground cable. CONNECT passenger safety belt buckle pretensioner C3202. CONNECT passenger seat side air bag module C327. CONNECT driver safety belt buckle pretensioner C3201. CONNECT driver seat side air bag module C328. REPOWER the SRS. REFER to Section 501-20B. No INSTALL a new cushion TED. REFER to Seat Cushion Thermo-Electric Device in this section. REPEAT the self-test. CLEAR the DTCs. DISCONNECT the battery ground cable. CONNECT passenger safety belt buckle pretensioner C3202. CONNECT passenger seat side air bag module C327. CONNECT driver safety belt buckle pretensioner C3201. CONNECT driver seat side air bag module C328. REPOWER the SRS. REFER to Section 501-20B. | ||||||||||||
| AP14 CHECK BLOWER SPEED CONTROL AND BLOWER GROUND CIRCUIT | |||||||||||||
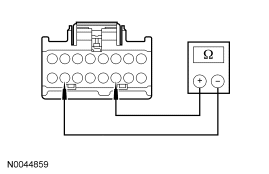
|
Yes GO to AP16. No GO to AP15. | ||||||||||||
| AP15 CHECK THE BLOWER SPEED CONTROL | |||||||||||||
|
Yes REPAIR the affected circuit(s). REPEAT the self-test. CLEAR the DTCs. DISCONNECT the battery ground cable. CONNECT passenger safety belt buckle pretensioner C3202. CONNECT passenger seat side air bag module C327. CONNECT driver safety belt buckle pretensioner C3201. CONNECT driver seat side air bag module C328. REPOWER the SRS. REFER to Section 501-20B. No INSTALL a new cushion TED. REFER to Seat Cushion Thermo-Electric Device in this section. REPEAT the self-test. CLEAR the DTCs. DISCONNECT the battery ground cable. CONNECT passenger safety belt buckle pretensioner C3202. CONNECT passenger seat side air bag module C327. CONNECT driver safety belt buckle pretensioner C3201. CONNECT driver seat side air bag module C328. REPOWER the SRS. REFER to Section 501-20B. | ||||||||||||
| AP16 CHECK THERMISTOR CIRCUIT FOR A SHORT TO VOLTAGE | |||||||||||||
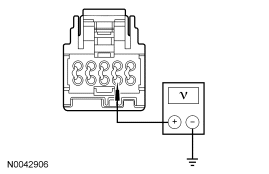
|
Yes GO to AP17. No REPAIR the circuit. REPEAT the self-test. CLEAR the DTCs. DISCONNECT the battery ground cable. CONNECT passenger safety belt buckle pretensioner C3202. CONNECT passenger seat side air bag module C327. CONNECT driver safety belt buckle pretensioner C3201. CONNECT driver seat side air bag module C328. REPOWER the SRS. REFER to Section 501-20B. | ||||||||||||
| AP17 CHECK THERMISTOR CIRCUIT FOR A SHORT TO GROUND | |||||||||||||
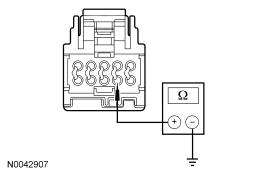
|
Yes GO to AP18. No REPAIR the circuit. REPEAT the self-test. CLEAR the DTCs. DISCONNECT the battery ground cable. CONNECT passenger safety belt buckle pretensioner C3202. CONNECT passenger seat side air bag module C327. CONNECT driver safety belt buckle pretensioner C3201. CONNECT driver seat side air bag module C328. REPOWER the SRS. REFER to Section 501-20B. | ||||||||||||
| AP18 CHECK THE THERMISTOR AND WIRING | |||||||||||||
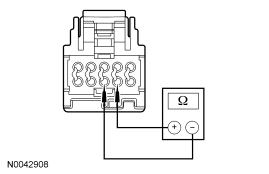
|
Yes INSTALL a new CCSM and CARRY OUT programmable module installation (PMI). REFER to Climate Controlled Seat Module in this section. REPEAT the self-test. CLEAR the DTCs. DISCONNECT the battery ground cable. CONNECT passenger safety belt buckle pretensioner C3202. CONNECT passenger seat side air bag module C327. CONNECT driver safety belt buckle pretensioner C3201. CONNECT driver seat side air bag module C328. REPOWER the SRS. REFER to Section 501-20B. No GO to AP19. | ||||||||||||
| AP19 CHECK THE THERMISTOR | |||||||||||||
|
Yes REPAIR the affected circuit(s). REPEAT the self-test. CLEAR the DTCs. DISCONNECT the battery ground cable. CONNECT passenger safety belt buckle pretensioner C3202. CONNECT passenger seat side air bag module C327. CONNECT driver safety belt buckle pretensioner C3201. CONNECT driver seat side air bag module C328. REPOWER the SRS. REFER to Section 501-20B. No INSTALL a new cushion TED. REFER to Seat Cushion Thermo-Electric Device in this section. REPEAT the self-test. CLEAR the DTCs. DISCONNECT the battery ground cable. CONNECT passenger safety belt buckle pretensioner C3202. CONNECT passenger seat side air bag module C327. CONNECT driver safety belt buckle pretensioner C3201. CONNECT driver seat side air bag module C328. REPOWER the SRS. REFER to Section 501-20B. | ||||||||||||
| AP20 CHECK THE TED INSTALLATION AND FOR A CRUSHED SEAT BACKREST | |||||||||||||
|
Yes GO to AP21. No CORRECTLY install the backrest TED or INSTALL a new seat backrest foam pad and/or climate controlled seat manifold. CONNECT the battery ground cable. REPEAT the self-test. CLEAR the DTCs. REPOWER the SRS. REFER to Section 501-20B. | ||||||||||||
| AP21 CHECK THE CUSHION TED CIRCUIT RHS02 (BU/OG) FOR SHORT TO VOLTAGE | |||||||||||||
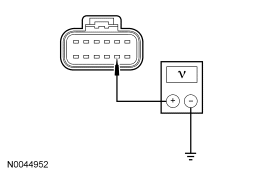
|
Yes GO to AP22. No REPAIR the circuit. REPEAT the self-test. CLEAR the DTCs. DISCONNECT the battery ground cable. CONNECT passenger safety belt buckle pretensioner C3202. CONNECT passenger seat side air bag module C327. CONNECT driver safety belt buckle pretensioner C3201. CONNECT driver seat side air bag module C328. REPOWER the SRS. REFER to Section 501-20B. | ||||||||||||
| AP22 CHECK THE CUSHION TED CIRCUIT CHS02 (YE/BU) FOR SHORT TO GROUND | |||||||||||||
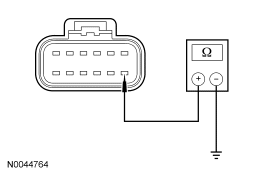
|
Yes GO to AP23. No REPAIR the circuit. REPEAT the self-test. CLEAR the DTCs. DISCONNECT the battery ground cable. CONNECT passenger safety belt buckle pretensioner C3202. CONNECT passenger seat side air bag module C327. CONNECT driver safety belt buckle pretensioner C3201. CONNECT driver seat side air bag module C328. REPOWER the SRS. REFER to Section 501-20B. | ||||||||||||
| AP23 CHECK RESISTANCE OF THE CUSHION TED AND WIRING | |||||||||||||
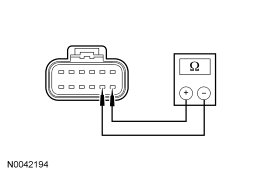
|
Yes GO to AP25. No GO to AP24. | ||||||||||||
| AP24 CHECK RESISTANCE OF THE CUSHION TED | |||||||||||||
|
Yes REPAIR the circuit. REPEAT the self-test. CLEAR the DTCs. DISCONNECT the battery ground cable. CONNECT passenger safety belt buckle pretensioner C3202. CONNECT passenger seat side air bag module C327. CONNECT driver safety belt buckle pretensioner C3201. CONNECT driver seat side air bag module C328. REPOWER the SRS. REFER to Section 501-20B. No INSTALL a new cushion TED. REFER to Seat Cushion Thermo-Electric Device in this section. REPEAT the self-test. CLEAR the DTCs. DISCONNECT the battery ground cable. CONNECT passenger safety belt buckle pretensioner C3202. CONNECT passenger seat side air bag module C327. CONNECT driver safety belt buckle pretensioner C3201. CONNECT driver seat side air bag module C328. REPOWER the SRS. REFER to Section 501-20B. | ||||||||||||
| AP25 CHECK THE BLOWER AND SPEED CONTROL CIRCUITS FOR A SHORT TO VOLTAGE | |||||||||||||
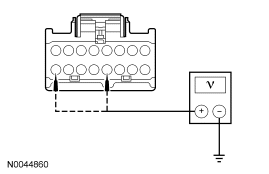
|
Yes GO to AP26. No REPAIR the circuit. REPEAT the self-test. CLEAR the DTCs. DISCONNECT the battery ground cable. CONNECT passenger safety belt buckle pretensioner C3202. CONNECT passenger seat side air bag module C327. CONNECT driver safety belt buckle pretensioner C3201. CONNECT driver seat side air bag module C328. REPOWER the SRS. REFER to Section 501-20B. | ||||||||||||
| AP26 CHECK THE BLOWER AND SPEED CONTROL CIRCUITS FOR A SHORT TO GROUND | |||||||||||||
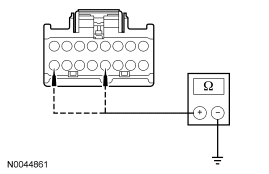
|
Yes GO to AP27. No REPAIR the circuit. REPEAT the self-test. CLEAR the DTCs. DISCONNECT the battery ground cable. CONNECT passenger safety belt buckle pretensioner C3202. CONNECT passenger seat side air bag module C327. CONNECT driver safety belt buckle pretensioner C3201. CONNECT driver seat side air bag module C328. REPOWER the SRS. REFER to Section 501-20B. | ||||||||||||
| AP27 CHECK THE BLOWER AND WIRING | |||||||||||||
|
Yes GO to AP29. No GO to AP28. | ||||||||||||
| AP28 CHECK THE BLOWER | |||||||||||||
|
Yes REPAIR the affected circuit(s). REPEAT the self-test. CLEAR the DTCs. DISCONNECT the battery ground cable. CONNECT passenger safety belt buckle pretensioner C3202. CONNECT passenger seat side air bag module C327. CONNECT driver safety belt buckle pretensioner C3201. CONNECT driver seat side air bag module C328. REPOWER the SRS. REFER to Section 501-20B. No INSTALL a new backrest TED. REFER to Seat Backrest Thermo-Electric Device in this section. REPEAT the self-test. CLEAR the DTCs. DISCONNECT the battery ground cable. CONNECT passenger safety belt buckle pretensioner C3202. CONNECT passenger seat side air bag module C327. CONNECT driver safety belt buckle pretensioner C3201. CONNECT driver seat side air bag module C328. REPOWER the SRS. REFER to Section 501-20B. | ||||||||||||
| AP29 CHECK BLOWER SPEED CONTROL AND CIRCUIT | |||||||||||||
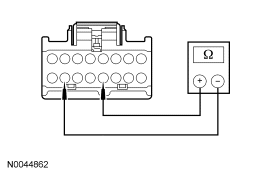
|
Yes GO to AP31. No GO to AP30. | ||||||||||||
| AP30 CHECK THE BLOWER SPEED CONTROL | |||||||||||||
|
Yes REPAIR the affected circuit(s). REPEAT the self-test. CLEAR the DTCs. DISCONNECT the battery ground cable. CONNECT passenger safety belt buckle pretensioner C3202. CONNECT passenger seat side air bag module C327. CONNECT driver safety belt buckle pretensioner C3201. CONNECT driver seat side air bag module C328. REPOWER the SRS. REFER to Section 501-20B. No INSTALL a new backrest TED. REFER to Seat Backrest Thermo-Electric Device in this section. REPEAT the self-test. CLEAR the DTCs. DISCONNECT the battery ground cable. CONNECT passenger safety belt buckle pretensioner C3202. CONNECT passenger seat side air bag module C327. CONNECT driver safety belt buckle pretensioner C3201. CONNECT driver seat side air bag module C328. REPOWER the SRS. REFER to Section 501-20B. | ||||||||||||
| AP31 CHECK THERMISTOR CIRCUIT FOR A SHORT TO VOLTAGE | |||||||||||||
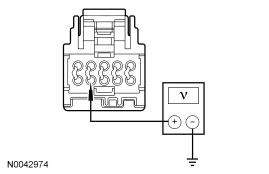
|
Yes GO to AP32. No REPAIR the circuit. REPEAT the self-test. CLEAR the DTCs. DISCONNECT the battery ground cable. CONNECT passenger safety belt buckle pretensioner C3202. CONNECT passenger seat side air bag module C327. CONNECT driver safety belt buckle pretensioner C3201. CONNECT driver seat side air bag module C328. REPOWER the SRS. REFER to Section 501-20B. | ||||||||||||
| AP32 CHECK THERMISTOR CIRCUIT FOR A SHORT TO GROUND | |||||||||||||
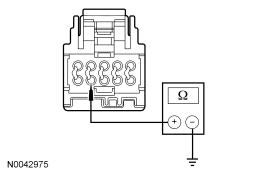
|
Yes GO to AP33. No REPAIR the circuit. REPEAT the self-test. CLEAR the DTCs. DISCONNECT the battery ground cable. CONNECT passenger safety belt buckle pretensioner C3202. CONNECT passenger seat side air bag module C327. CONNECT driver safety belt buckle pretensioner C3201. CONNECT driver seat side air bag module C328. REPOWER the SRS. REFER to Section 501-20B. | ||||||||||||
| AP33 CHECK THE THERMISTOR AND WIRING | |||||||||||||
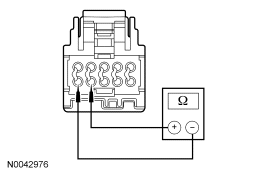
|
Yes INSTALL a new CCSM and CARRY OUT PMI. REFER to Climate Controlled Seat Module in this section. REPEAT the self-test. CLEAR the DTCs. DISCONNECT the battery ground cable. CONNECT passenger safety belt buckle pretensioner C3202. CONNECT passenger seat side air bag module C327. CONNECT driver safety belt buckle pretensioner C3201. CONNECT driver seat side air bag module C328. REPOWER the SRS. REFER to Section 501-20B. No GO to AP34. | ||||||||||||
| AP34 CHECK THE THERMISTOR | |||||||||||||
|
Yes REPAIR the affected circuit(s). REPEAT the self-test. CLEAR the DTCs. DISCONNECT the battery ground cable. CONNECT passenger safety belt buckle pretensioner C3202. CONNECT passenger seat side air bag module C327. CONNECT driver safety belt buckle pretensioner C3201. CONNECT driver seat side air bag module C328. REPOWER the SRS. REFER to Section 501-20B. No INSTALL a new backrest TED. REFER to Seat Backrest Thermo-Electric Device in this section. REPEAT the self-test. CLEAR the DTCs. DISCONNECT the battery ground cable. CONNECT passenger safety belt buckle pretensioner C3202. CONNECT passenger seat side air bag module C327. CONNECT driver safety belt buckle pretensioner C3201. CONNECT driver seat side air bag module C328. REPOWER the SRS. REFER to Section 501-20B. |
Pinpoint Test AQ: DTC B272D — Passenger Differential Temperature Fault
Refer to Wiring Diagrams Cell 119, Climate Controlled Seats for schematic and connector information.
Normal Operation
Both the driver and front passenger climate controlled seats are independently controlled electronically by the climate controlled seat module (CCSM) mounted to the bottom of the passenger seat cushion. The climate controlled seat system only operates with the engine running, however, if using a scan tool to command the CCSM, diagnostic testing can be carried out with the ignition switch key on engine off (KOEO). The system receives power from battery junction box (BJB) fuse 16 (30A) feeding battery voltage on circuit SBB16 (VT/RD) into CCSM C3036a pins E and F. If power is disconnected from either pin E or F of CCSM C3036a with the power connection remaining on the other circuit, both seats will remain operational because the power feed circuits are connected internally in the CCSM. However, if a fault occurs setting a diagnostic trouble code (DTC) specific to either climate controlled seat, only the affected seat will be disabled by the module and the other will remain operational.
Each driver and front passenger seat cushion is equipped with a thermo-electric device (TED) assembly that includes a seat blower (fan motor, serviced as an assembly with the TED). Similarly, each driver and front passenger seat backrest is also equipped with its own TED assembly with blower. Cabin air is drawn through the blower and distributed to each of the TED modules located in the seat cushion and backrest. The TEDs then heat or cool the air. The air is then directed into the foam pad and manifold where it is distributed along the surface of the cushion and backrest of the seat. Once the system is activated, the CCSM uses a set of flexible algorithms to control the heating/cooling modes and the blower speed dependant on the electronic automatic temperature control (EATC) seat switch settings.
A differential fault occurs when the cushion and backrest TEDs on the seat are reporting temperatures to the CCSM with a difference between them of 30°C (54°F) or greater. This can result from an air flow restriction or a circuit fault of either TED. If a TED and manifold is clear of obstruction and is operational, the other TED and circuitry on the seat should be checked. It is important to note that a TED with a higher temperature may be operating correctly and not be the area of concern. The other TED may be indicating a much lower temperature, causing the DTC to set.
Possible Causes
A driver differential temperature fault can be caused by:
- wiring, terminals or connectors.
- restricted cushion or backrest TED filter.
- crushed or restricted cushion or backrest foam pad.
- crushed or restricted cushion or backrest climate controlled seat manifold.
- a faulted cushion or backrest TED assembly.
- a faulted CCSM.
PINPOINT TEST AQ: DTC B272D — PASSENGER DIFFERENTIAL TEMPERATURE FAULT
NOTE: The air bag warning indicator illuminates when the restraints control module (RCM) fuse is removed and the ignition switch is ON. This is normal operation and does not indicate a supplemental restraint system (SRS) fault.
NOTE: The SRS must be fully operational and free of faults before releasing the vehicle to the customer.
| Test Step | Result / Action to Take | ||||||||||||
|---|---|---|---|---|---|---|---|---|---|---|---|---|---|
| AQ1 CHECK THE CCSM FOR DTCS | |||||||||||||
|
Yes For DTC B272A, Go To Pinpoint Test AN. For DTC B272B, Go To Pinpoint Test AO. No GO to AQ2. | ||||||||||||
| AQ2 MONITOR THE CCSM TED TEMPERATURE PIDS | |||||||||||||
|
Yes GO to AQ3. No If the front passenger seat cushion PID varies 10°C (18°F) or more from ambient temperature, GO to AQ16. If the front passenger seat backrest PID varies 10°C (18°F) or more from ambient temperature, GO to AQ31. | ||||||||||||
| AQ3 CONFIRM THE FAULT IS IN THE SEAT CUSHION OR THE BACKREST | |||||||||||||
|
Yes If the front passenger seat cushion PID is 30°C (54°F) hotter than the backrest PID, GO to AQ5. If the front passenger seat backrest PID is 30°C (54°F) hotter than the cushion PID, GO to AQ20. No GO to AQ4. | ||||||||||||
| AQ4 CHECK THE TEDS COOLING PERFORMANCE | |||||||||||||
|
Yes The DTC may have been set by extreme cabin temperatures or excessive sun-load on the seat causing the system to enter recovery mode. Occupant size and weight characteristics can also be a factor. CLEAR the DTCs. REPEAT the self-test. TEST the system for normal operation. If a concern cannot be found or duplicated, RETURN the vehicle to the customer. No CHECK the affected seat cushion or backrest for correct installation of the climate controlled seat components (TED, manifold, air ducts and foam pad). CHECK for airflow restrictions (TED inlets and outlets, TED-to-manifold connections, filters and ducts) and REPAIR as needed. CHECK for an intermittent wiring fault. REPAIR as needed. REPEAT the self-test. CLEAR the DTCs. | ||||||||||||
| AQ5 CHECK THE TED INSTALLATION AND FOR A CRUSHED SEAT CUSHION | |||||||||||||
|
Yes GO to AQ6. No CORRECTLY install the cushion TED or INSTALL a new seat cushion foam pad and/or climate controlled seat manifold. REPEAT the self-test. CLEAR the DTCs. REPOWER the SRS. REFER to Section 501-20B. | ||||||||||||
| AQ6 CHECK THE BACKREST TED CIRCUIT RHS06 (WH) FOR SHORT TO VOLTAGE | |||||||||||||
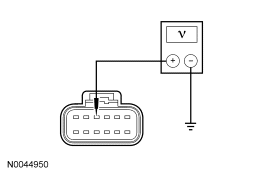
|
Yes GO to AQ7. No REPAIR the circuit. REPEAT the self-test. CLEAR the DTCs. DISCONNECT the battery ground cable. CONNECT passenger safety belt buckle pretensioner C3202. CONNECT passenger seat side air bag module C327. REPOWER the SRS. REFER to Section 501-20B. | ||||||||||||
| AQ7 CHECK THE BACKREST TED CIRCUIT CHS06 (BU/BN) FOR SHORT TO GROUND | |||||||||||||
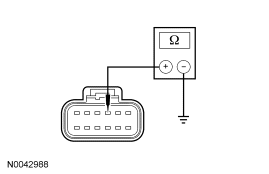
|
Yes GO to AQ8. No REPAIR the circuit. REPEAT the self-test. CLEAR the DTCs. DISCONNECT the battery ground cable. CONNECT passenger safety belt buckle pretensioner C3202. CONNECT passenger seat side air bag module C327. REPOWER the SRS. REFER to Section 501-20B. | ||||||||||||
| AQ8 CHECK RESISTANCE OF THE BACKREST TED AND WIRING | |||||||||||||
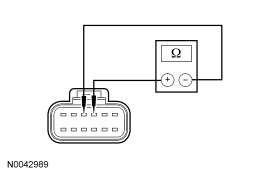
|
Yes GO to AQ10. No GO to AQ9. | ||||||||||||
| AQ9 CHECK RESISTANCE OF THE BACKREST TED | |||||||||||||
|
Yes REPAIR the circuit. REPEAT the self-test. CLEAR the DTCs. DISCONNECT the battery ground cable. CONNECT passenger safety belt buckle pretensioner C3202. CONNECT passenger seat side air bag module C327. REPOWER the SRS. REFER to Section 501-20B. No INSTALL a new backrest TED. REFER to Seat Backrest Thermo-Electric Device in this section. REPEAT the self-test. CLEAR the DTCs. DISCONNECT the battery ground cable. CONNECT passenger safety belt buckle pretensioner C3202. CONNECT passenger seat side air bag module C327. REPOWER the SRS. REFER to Section 501-20B. | ||||||||||||
| AQ10 CHECK THE BLOWER AND SPEED CONTROL CIRCUITS FOR A SHORT TO VOLTAGE | |||||||||||||
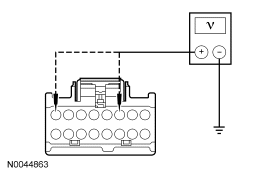
|
Yes GO to AQ11. No REPAIR the circuit. REPEAT the self-test. CLEAR the DTCs. DISCONNECT the battery ground cable. CONNECT passenger safety belt buckle pretensioner C3202. CONNECT passenger seat side air bag module C327. REPOWER the SRS. REFER to Section 501-20B. | ||||||||||||
| AQ11 CHECK THE BLOWER AND SPEED CONTROL CIRCUITS FOR A SHORT TO GROUND | |||||||||||||
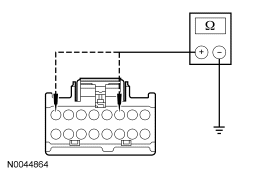
|
Yes GO to AQ12. No REPAIR the circuit. REPEAT the self-test. CLEAR the DTCs. DISCONNECT the battery ground cable. CONNECT passenger safety belt buckle pretensioner C3202. CONNECT passenger seat side air bag module C327. REPOWER the SRS. REFER to Section 501-20B. | ||||||||||||
| AQ12 CHECK THE BLOWER AND WIRING | |||||||||||||
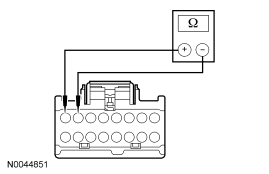
|
Yes GO to AQ14. No GO to AQ13. | ||||||||||||
| AQ13 CHECK THE BLOWER | |||||||||||||
|
Yes REPAIR the affected circuit(s). REPEAT the self-test. CLEAR the DTCs. DISCONNECT the battery ground cable. CONNECT passenger safety belt buckle pretensioner C3202. CONNECT passenger seat side air bag module C327. REPOWER the SRS. REFER to Section 501-20B. No INSTALL a new cushion TED. REFER to Seat Cushion Thermo-Electric Device in this section. REPEAT the self-test. CLEAR the DTCs. DISCONNECT the battery ground cable. CONNECT passenger safety belt buckle pretensioner C3202. CONNECT passenger seat side air bag module C327. REPOWER the SRS. REFER to Section 501-20B. | ||||||||||||
| AQ14 CHECK BLOWER SPEED CONTROL AND CIRCUIT | |||||||||||||
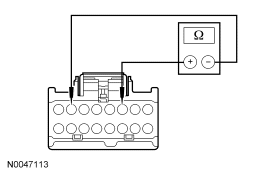
|
Yes GO to AQ16. No GO to AQ15. | ||||||||||||
| AQ15 CHECK THE BLOWER SPEED CONTROL | |||||||||||||
|
Yes REPAIR the affected circuit(s). REPEAT the self-test. CLEAR the DTCs. DISCONNECT the battery ground cable. CONNECT passenger safety belt buckle pretensioner C3202. CONNECT passenger seat side air bag module C327. REPOWER the SRS. REFER to Section 501-20B. No INSTALL a new cushion TED. REFER to Seat Cushion Thermo-Electric Device in this section. REPEAT the self-test. CLEAR the DTCs. DISCONNECT the battery ground cable. CONNECT passenger safety belt buckle pretensioner C3202. CONNECT passenger seat side air bag module C327. REPOWER the SRS. REFER to Section 501-20B. | ||||||||||||
| AQ16 CHECK THERMISTOR CIRCUIT FOR A SHORT TO VOLTAGE | |||||||||||||
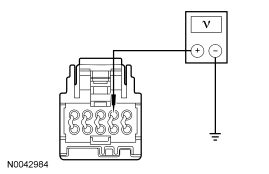
|
Yes GO to AQ17. No REPAIR the circuit. REPEAT the self-test. CLEAR the DTCs. DISCONNECT the battery ground cable. CONNECT passenger safety belt buckle pretensioner C3202. CONNECT passenger seat side air bag module C327. REPOWER the SRS. REFER to Section 501-20B. | ||||||||||||
| AQ17 CHECK THERMISTOR CIRCUIT FOR A SHORT TO GROUND | |||||||||||||
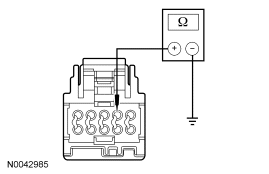
|
Yes GO to AQ18. No REPAIR the circuit. REPEAT the self-test. CLEAR the DTCs. DISCONNECT the battery ground cable. CONNECT passenger safety belt buckle pretensioner C3202. CONNECT passenger seat side air bag module C327. REPOWER the SRS. REFER to Section 501-20B. | ||||||||||||
| AQ18 CHECK THE THERMISTOR AND WIRING | |||||||||||||
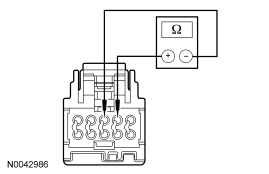
|
Yes INSTALL a new CCSM and CARRY OUT programmable module installation (PMI). REFER to Climate Controlled Seat Module in this section. REPEAT the self-test. CLEAR the DTCs. DISCONNECT the battery ground cable. CONNECT passenger safety belt buckle pretensioner C3202. CONNECT passenger seat side air bag module C327. REPOWER the SRS. REFER to Section 501-20B. No GO to AQ19. | ||||||||||||
| AQ19 CHECK THE THERMISTOR | |||||||||||||
|
Yes REPAIR the affected circuit(s). REPEAT the self-test. CLEAR the DTCs. DISCONNECT the battery ground cable. CONNECT passenger safety belt buckle pretensioner C3202. CONNECT passenger seat side air bag module C327. REPOWER the SRS. REFER to Section 501-20B. No INSTALL a new cushion TED. REFER to Seat Cushion Thermo-Electric Device in this section. REPEAT the self-test. CLEAR the DTCs. DISCONNECT the battery ground cable. CONNECT passenger safety belt buckle pretensioner C3202. CONNECT passenger seat side air bag module C327. REPOWER the SRS. REFER to Section 501-20B. | ||||||||||||
| AQ20 CHECK THE TED INSTALLATION AND FOR A CRUSHED SEAT BACKREST | |||||||||||||
|
Yes GO to AQ21. No CORRECTLY install the backrest TED or INSTALL a new seat backrest foam pad and/or climate controlled seat manifold. CONNECT the battery ground cable. REPEAT the self-test. CLEAR the DTCs. REPOWER the SRS. REFER to Section 501-20B. | ||||||||||||
| AQ21 CHECK CUSHION TED CIRCUIT RHS07 (BU) FOR SHORT TO VOLTAGE | |||||||||||||
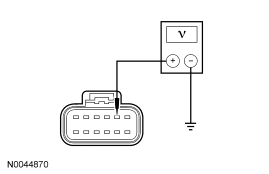
|
Yes GO to AQ22. No REPAIR the circuit. REPEAT the self-test. CLEAR the DTCs. DISCONNECT the battery ground cable. CONNECT passenger safety belt buckle pretensioner C3202. CONNECT passenger seat side air bag module C327. REPOWER the SRS. REFER to Section 501-20B. | ||||||||||||
| AQ22 CHECK THE CUSHION TED CIRCUIT CHS07 (GY/BU) FOR SHORT TO GROUND | |||||||||||||
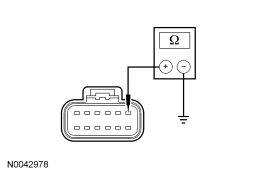
|
Yes GO to AQ23. No REPAIR the circuit. REPEAT the self-test. CLEAR the DTCs. DISCONNECT the battery ground cable. CONNECT passenger safety belt buckle pretensioner C3202. CONNECT passenger seat side air bag module C327. REPOWER the SRS. REFER to Section 501-20B. | ||||||||||||
| AQ23 CHECK RESISTANCE OF THE CUSHION TED AND WIRING | |||||||||||||
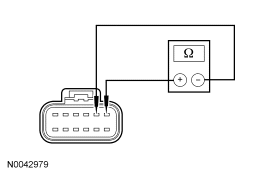
|
Yes GO to AQ25. No GO to AQ24. | ||||||||||||
| AQ24 CHECK RESISTANCE OF THE CUSHION TED | |||||||||||||
|
Yes REPAIR the circuit. REPEAT the self-test. CLEAR the DTCs. DISCONNECT the battery ground cable. CONNECT passenger safety belt buckle pretensioner C3202. CONNECT passenger seat side air bag module C327. REPOWER the SRS. REFER to Section 501-20B. No INSTALL a new cushion TED. REFER to Seat Cushion Thermo-Electric Device in this section. REPEAT the self-test. CLEAR the DTCs. DISCONNECT the battery ground cable. CONNECT passenger safety belt buckle pretensioner C3202. CONNECT passenger seat side air bag module C327. REPOWER the SRS. REFER to Section 501-20B. | ||||||||||||
| AQ25 CHECK THE BLOWER AND SPEED CONTROL CIRCUITS FOR A SHORT TO VOLTAGE | |||||||||||||
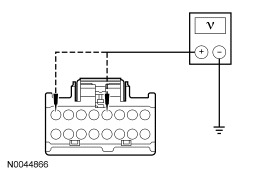
|
Yes GO to AQ26. No REPAIR the circuit. REPEAT the self-test. CLEAR the DTCs. DISCONNECT the battery ground cable. CONNECT passenger safety belt buckle pretensioner C3202. CONNECT passenger seat side air bag module C327. REPOWER the SRS. REFER to Section 501-20B. | ||||||||||||
| AQ26 CHECK THE BLOWER AND SPEED CONTROL CIRCUITS FOR A SHORT TO GROUND | |||||||||||||
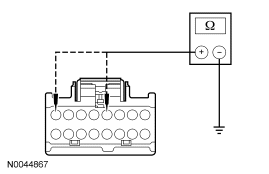
|
Yes GO to AQ27. No REPAIR the circuit. REPEAT the self-test. CLEAR the DTCs. DISCONNECT the battery ground cable. CONNECT passenger safety belt buckle pretensioner C3202. CONNECT passenger seat side air bag module C327. REPOWER the SRS. REFER to Section 501-20B. | ||||||||||||
| AQ27 CHECK THE BLOWER AND WIRING | |||||||||||||
|
Yes GO to AQ29. No GO to AQ28. | ||||||||||||
| AQ28 CHECK THE BLOWER | |||||||||||||
|
Yes REPAIR the affected circuit(s). REPEAT the self-test. CLEAR the DTCs. DISCONNECT the battery ground cable. CONNECT passenger safety belt buckle pretensioner C3202. CONNECT passenger seat side air bag module C327. REPOWER the SRS. REFER to Section 501-20B. No INSTALL a new backrest TED. REFER to Seat Backrest Thermo-Electric Device in this section. REPEAT the self-test. CLEAR the DTCs. DISCONNECT the battery ground cable. CONNECT passenger safety belt buckle pretensioner C3202. CONNECT passenger seat side air bag module C327. REPOWER the SRS. REFER to Section 501-20B. | ||||||||||||
| AQ29 CHECK BLOWER SPEED CONTROL AND CIRCUIT | |||||||||||||
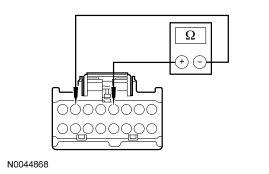
|
Yes GO to AQ31. No GO to AQ30. | ||||||||||||
| AQ30 CHECK THE BLOWER SPEED CONTROL | |||||||||||||
|
Yes REPAIR the affected circuit(s). REPEAT the self-test. CLEAR the DTCs. DISCONNECT the battery ground cable. CONNECT passenger safety belt buckle pretensioner C3202. CONNECT passenger seat side air bag module C327. REPOWER the SRS. REFER to Section 501-20B. No INSTALL a new backrest TED. REFER to Seat Backrest Thermo-Electric Device in this section. REPEAT the self-test. CLEAR the DTCs. DISCONNECT the battery ground cable. CONNECT passenger safety belt buckle pretensioner C3202. CONNECT passenger seat side air bag module C327. REPOWER the SRS. REFER to Section 501-20B. | ||||||||||||
| AQ31 CHECK THERMISTOR CIRCUIT FOR A SHORT TO VOLTAGE | |||||||||||||
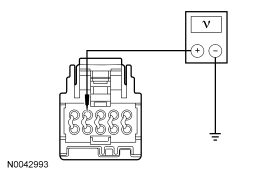
|
Yes GO to AQ32. No REPAIR the circuit. REPEAT the self-test. CLEAR the DTCs. DISCONNECT the battery ground cable. CONNECT passenger safety belt buckle pretensioner C3202. CONNECT passenger seat side air bag module C327. REPOWER the SRS. REFER to Section 501-20B. | ||||||||||||
| AQ32 CHECK THERMISTOR CIRCUIT FOR A SHORT TO GROUND | |||||||||||||
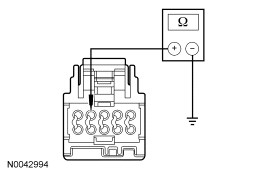
|
Yes GO to AQ33. No REPAIR the circuit. REPEAT the self-test. CLEAR the DTCs. DISCONNECT the battery ground cable. CONNECT passenger safety belt buckle pretensioner C3202. CONNECT passenger seat side air bag module C327. REPOWER the SRS. REFER to Section 501-20B. | ||||||||||||
| AQ33 CHECK THE THERMISTOR AND WIRING | |||||||||||||
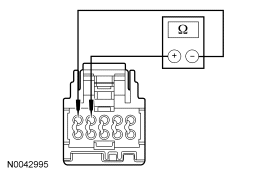
|
Yes INSTALL a new CCSM and CARRY OUT PMI. REFER to Climate Controlled Seat Module in this section. REPEAT the self-test. CLEAR the DTCs. DISCONNECT the battery ground cable. CONNECT passenger safety belt buckle pretensioner C3202. CONNECT passenger seat side air bag module C327. REPOWER the SRS. REFER to Section 501-20B. No GO to AQ34. | ||||||||||||
| AQ34 CHECK THE THERMISTOR | |||||||||||||
|
Yes REPAIR the affected circuit(s). REPEAT the self-test. CLEAR the DTCs. DISCONNECT the battery ground cable. CONNECT passenger safety belt buckle pretensioner C3202. CONNECT passenger seat side air bag module C327. REPOWER the SRS. REFER to Section 501-20B. No INSTALL a new backrest TED. REFER to Seat Backrest Thermo-Electric Device in this section. REPEAT the self-test. CLEAR the DTCs. DISCONNECT the battery ground cable. CONNECT passenger safety belt buckle pretensioner C3202. CONNECT passenger seat side air bag module C327. REPOWER the SRS. REFER to Section 501-20B. |
Pinpoint Test AR: DTC B2730 — Back Over-Temp Detected (Driver)
Refer to Wiring Diagrams Cell 119, Climate Controlled Seats for schematic and connector information.
Normal Operation
Both the driver and front passenger climate controlled seats are independently controlled electronically by the climate controlled seat module (CCSM) mounted to the bottom of the passenger seat cushion. The climate controlled seat system only operates with the engine running, however, if using a scan tool to command the CCSM, diagnostic testing can be carried out with the ignition switch key on engine off (KOEO). The system receives power from battery junction box (BJB) fuse 16 (30A) feeding battery voltage on circuit SBB16 (VT/RD) into CCSM C3036a pins E and F. If power is disconnected from either pin E or F of CCSM C3036a with the power connection remaining on the other circuit, both seats will remain operational because the power feed circuits are connected internally in the CCSM. However, if a fault occurs setting a diagnostic trouble code (DTC) specific to either climate controlled seat, only the affected seat will be disabled by the module and the other will remain operational.
Each driver and front passenger seat cushion is equipped with a thermo-electric device (TED) assembly that includes a seat blower (fan motor, serviced as an assembly with the TED). Similarly, each driver and front passenger seat backrest is also equipped with its own TED assembly with blower. Cabin air is drawn through the blower and distributed to each of the TED modules located in the seat cushion and backrest. The TEDs then heat or cool the air. The air is then directed into the foam pad and manifold where it is distributed along the surface of the cushion and backrest of the seat. Once the system is activated, the CCSM uses a set of flexible algorithms to control the heating/cooling modes and the blower speed dependant on the electronic automatic temperature control (EATC) seat switch settings.
Possible Causes
A driver seat backrest over-temp fault can be caused by:
- wiring, terminals or connectors.
- restricted backrest TED filter.
- crushed or restricted backrest foam pad.
- crushed or restricted climate controlled seat manifold.
- a faulted backrest TED assembly.
- a faulted CCSM.
PINPOINT TEST AR: DTC B2730 — BACK OVER-TEMP DETECTED (DRIVER)
NOTE: The air bag warning indicator illuminates when the restraints control module (RCM) fuse is removed and the ignition switch is ON. This is normal operation and does not indicate a supplemental restraint system (SRS) fault.
NOTE: The SRS must be fully operational and free of faults before releasing the vehicle to the customer.
| Test Step | Result / Action to Take | ||||||||||||
|---|---|---|---|---|---|---|---|---|---|---|---|---|---|
| AR1 CHECK THE CCSM FOR DTCS | |||||||||||||
|
Yes GO to AR2. No GO to AR4. | ||||||||||||
| AR2 CHECK THE TED THERMISTOR CIRCUITS FOR A SHORT TO GROUND | |||||||||||||
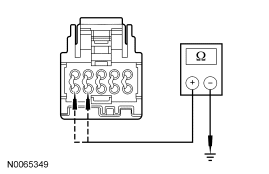
|
Yes GO to AR3. No REPAIR the affected circuit. REPEAT the self-test. CLEAR the DTCs. DISCONNECT the battery ground cable. CONNECT passenger safety belt buckle pretensioner C3202. CONNECT passenger seat side air bag module C327. CONNECT driver safety belt buckle pretensioner C3201. CONNECT driver seat side air bag module C328. REPOWER the SRS. REFER to Section 501-20B. | ||||||||||||
| AR3 CHECK THE TED THERMISTOR | |||||||||||||
|
Yes REPAIR the affected open circuit. REPEAT the self-test. CLEAR the DTCs. DISCONNECT the battery ground cable. CONNECT passenger safety belt buckle pretensioner C3202. CONNECT passenger seat side air bag module C327. CONNECT driver safety belt buckle pretensioner C3201. CONNECT driver seat side air bag module C328. REPOWER the SRS. REFER to Section 501-20B. No INSTALL a new backrest TED. REFER to Seat Backrest Thermo-Electric Device in this section. REPEAT the self-test. CLEAR the DTCs. DISCONNECT the battery ground cable. CONNECT passenger safety belt buckle pretensioner C3202. CONNECT passenger seat side air bag module C327. CONNECT driver safety belt buckle pretensioner C3201. CONNECT driver seat side air bag module C328. REPOWER the SRS. REFER to Section 501-20B. | ||||||||||||
| AR4 CONFIRM THE FAULT | |||||||||||||
|
Yes GO to AR5. No Fault not present. Fault may have been set due to a past failure or incorrect use of the climate controlled seat system by repeated switching between heat and cool modes. REPEAT the self-test. CLEAR the DTCs. | ||||||||||||
| AR5 CHECK OPERATION OF THE SEAT | |||||||||||||
|
Yes GO to AR14. No GO to AR6. | ||||||||||||
| AR6 CHECK THE BACKREST BLOWER FOR AN OBSTRUCTION OR RESTRICTED FILTER | |||||||||||||
|
Yes REMOVE the obstruction or INSTALL a new filter. REPEAT the self-test. CLEAR the DTCs. No GO to AF7. | ||||||||||||
| AR7 CHECK THE BACKREST FAN OPERATION | |||||||||||||
|
Yes GO to AR14. No GO to AR8. | ||||||||||||
| AR8 CHECK THE BLOWER SPEED CONTROL CIRCUIT FOR AN OPEN | |||||||||||||
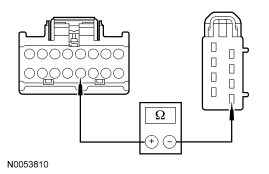
|
Yes GO to AR9. No REPAIR the circuit. REPEAT the self-test. CLEAR the DTCs. DISCONNECT the battery ground cable. CONNECT passenger safety belt buckle pretensioner C3202. CONNECT passenger seat side air bag module C327. CONNECT driver safety belt buckle pretensioner C3201. CONNECT driver seat side air bag module C328. REPOWER the SRS. REFER to Section 501-20B. | ||||||||||||
| AR9 CHECK THE BLOWER CIRCUIT RHS03 (GY/OG) FOR A SHORT TO VOLTAGE | |||||||||||||
|
Yes REPAIR the circuit. REPEAT the self-test. CLEAR the DTCs. DISCONNECT the battery ground cable. CONNECT passenger safety belt buckle pretensioner C3202. CONNECT passenger seat side air bag module C327. CONNECT driver safety belt buckle pretensioner C3201. CONNECT driver seat side air bag module C328. REPOWER the SRS. REFER to Section 501-20B. No GO to AR10. | ||||||||||||
| AR10 CHECK THE BLOWER CIRCUIT CHS03 (GN/BN) FOR A SHORT TO GROUND | |||||||||||||
|
Yes GO to AR11. No REPAIR the circuit. REPEAT the self-test. CLEAR the DTCs. DISCONNECT the battery ground cable. CONNECT passenger safety belt buckle pretensioner C3202. CONNECT passenger seat side air bag module C327. CONNECT driver safety belt buckle pretensioner C3201. CONNECT driver seat side air bag module C328. REPOWER the SRS. REFER to Section 501-20B. | ||||||||||||
| AR11 CHECK THE BLOWER CIRCUITS RHS03 (GY/OG) AND CHS03 (GN/BN) FOR AN OPEN | |||||||||||||
|
Yes GO to AR12. No REPAIR the affected circuit. REPEAT the self-test. CLEAR the DTCs. DISCONNECT the battery ground cable. CONNECT passenger safety belt buckle pretensioner C3202. CONNECT passenger seat side air bag module C327. CONNECT driver safety belt buckle pretensioner C3201. CONNECT driver seat side air bag module C328. REPOWER the SRS. REFER to Section 501-20B. | ||||||||||||
| AR12 CHECK THE BLOWER RESISTANCE | |||||||||||||
|
Yes GO to AR13. No INSTALL a new backrest TED. REFER to Seat Backrest Thermo-Electric Device in this section. REPEAT the self-test. CLEAR the DTCs. DISCONNECT the battery ground cable. CONNECT passenger safety belt buckle pretensioner C3202. CONNECT passenger seat side air bag module C327. CONNECT driver safety belt buckle pretensioner C3201. CONNECT driver seat side air bag module C328. REPOWER the SRS. REFER to Section 501-20B. | ||||||||||||
| AR13 CHECK THE BLOWER SPEED CONTROL RESISTANCE | |||||||||||||
|
Yes GO to AR14. No INSTALL a new backrest TED. REFER to Seat Backrest Thermo-Electric Device in this section. REPEAT the self-test. CLEAR the DTCs. DISCONNECT the battery ground cable. CONNECT passenger safety belt buckle pretensioner C3202. CONNECT passenger seat side air bag module C327. CONNECT driver safety belt buckle pretensioner C3201. CONNECT driver seat side air bag module C328. REPOWER the SRS. REFER to Section 501-20B. | ||||||||||||
| AR14 CHECK THE TED INSTALLATION AND FOR CRUSHED SEAT BACKREST | |||||||||||||
|
Yes CONNECT the battery ground cable. CARRY OUT programmable module installation (PMI) and INSTALL a new CCSM. REFER to Climate Controlled Seat Module in this section. REPEAT the self-test. CLEAR the DTCs. REPOWER the SRS. REFER to Section 501-20B. No CORRECTLY install the backrest TED or INSTALL a new seat backrest foam pad and/or climate controlled seat manifold. CONNECT the battery ground cable. REPEAT the self-test. CLEAR the DTCs. REPOWER the SRS. REFER to Section 501-20B. |
Pinpoint Test AS: The Power Seats are Inoperative — Second Row, Folding
Refer to Wiring Diagrams Cell 120, Power Seats for schematic and connector information.
Normal Operation
The second row power-fold seat relay is provided voltage on the coil side from the smart power distribution box (SPDJB), on pin 85, circuit CPS 48 (BU), for 30 minutes after turning the vehicle off, when the transmission selector is in PARK, and the liftgate, or liftgate glass is open. Ground for the coil side of the relay is on pin 86, circuit GD120 (BK/GN). The second row power-fold seat relay switched side is supplied battery voltage from battery junction box (BJB) fuse 27 (10A) on relay pin 30, is hot at all times. Pushing the double-throw switch to the appropriate rear seat release actuator, left or right, will provide power and allow folding of that seat. If the relay is disabled after 30 minutes, it can be enabled by opening any door, pressing the unlock key on the key fob, pressing any keyless keypad button or turning the ignition key.
Possible Causes
Inoperative second row power-fold seats can be caused by:
- fuse(s).
- wiring, terminals or connectors.
- a faulted smart power distribution junction box (SPDJB).
- a faulted power fold relay.
- a faulted power-fold switch.
PINPOINT TEST AS: THE POWER SEATS ARE INOPERATIVE — SECOND ROW, FOLDING
| Test Step | Result / Action to Take |
|---|---|
| AS1 CHECK DIAGNOSTIC TROUBLE CODES (DTCs) | |
|
Yes If DTC B2077 is present, REFER to Section 417-02. If DTC B2794 is present, GO to AS2. For all other DTCs, GO to the appropriate section for diagnosis. Refer to Section 419-10. No GO to AS7. |
| AS2 CHECK CIRCUIT GD120 (BK/GN) FOR AN OPEN | |
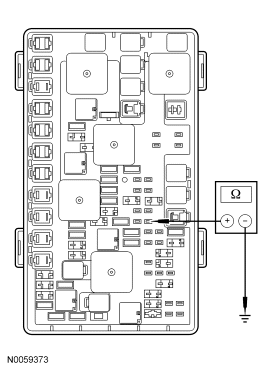
|
Yes GO to AS3. No REPAIR the circuit. REPEAT the self-test. CLEAR the DTCs. TEST the system for normal operation. |
| AS3 CHECK CIRCUIT CPS48 (BU) FOR A SHORT TO VOLTAGE | |
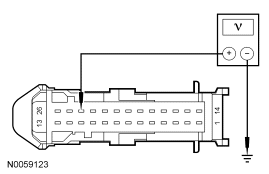
|
Yes GO to AS4. No REPAIR the circuit. REPEAT the self-test. CLEAR the DTCs. TEST the system for normal operation. |
| AS4 CHECK CIRCUIT CPS48 (BU) FOR A SHORT TO GROUND | |
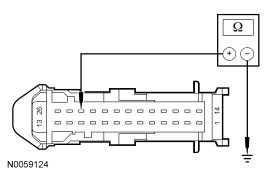
|
Yes GO to AS5. No REPAIR the circuit. REPEAT the self-test. CLEAR the DTCs. TEST the system for normal operation. |
| AS5 CHECK CIRCUIT CPS48 (BU) FOR AN OPEN | |
|
Yes GO to AS6. No REPAIR the circuit. REPEAT the self-test. CLEAR the DTCs. TEST the system for normal operation. |
| AS6 CHECK THE POWER FOLD RELAY FOR AN OPEN | |
|
Yes INSTALL a new SPDJB. REFER to Section 419-10. REPEAT the self-test. CLEAR the DTCs. TEST the system for normal operation. No INSTALL a new power fold relay. REPEAT the self-test. CLEAR the DTCs. TEST the system for normal operation. |
| AS7 CHECK CIRCUIT PDS58 (WH/BN) FOR AN OPEN | |
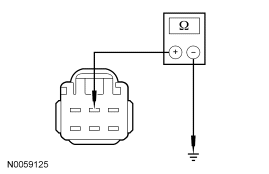
|
Yes GO to AS8. No REPAIR the circuit. TEST the system for normal operation. |
| AS8 CHECK THE POWER FOLD RELAY | |
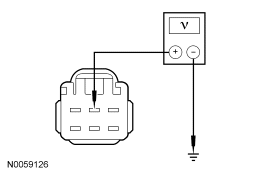
|
Yes INSTALL a new power-fold switch. REFER to Seat Control Switch — Rear Seat in this section. TEST the system for normal operation. No VERIFY battery junction box (BJB) fuse 27 (10A) is OK. If OK, INSTALL a new power-fold relay. TEST the system for normal operation. |
Pinpoint Test AT: The Power Seat is Inoperative/Does Not Operate Correctly — Second Row, Left, Folding
Refer to Wiring Diagrams Cell 120, Power Seats for schematic and connector information.
Normal Operation
The second row power-fold seat relay is provided voltage on the coil side from the smart power distribution box (SPDJB), on pin 85, circuit CPS 48 (BU), for 30 minutes after turning the vehicle off, when the transmission selector is in PARK, and the liftgate, or liftgate glass is open. Ground for the coil side of the relay is on pin 86, circuit GD120 (BK/GN). The second row power-fold seat relay switched side is supplied battery voltage from battery junction box (BJB) fuse 27 (10A) on relay pin 30, is hot at all times. Pushing the double-throw switch to the appropriate rear seat release actuator, left or right, will provide power and allow folding of that seat. If the relay is disabled after 30 minutes, it can be enabled by opening any door, pressing the unlock key on the key fob, pressing any keyless keypad button or turning the ignition key.
Possible Causes
An inoperative power-fold seat can be caused by:
- wiring, terminals or connectors.
- a faulted power-fold seat switch.
- a faulted left power-fold seat actuator.
- a faulted power-fold relay.
PINPOINT TEST AT: THE SECOND IS INOPERATIVE/DOES NOT OPERATE CORRECTLY — SECOND ROW, LEFT, FOLDING
| Test Step | Result / Action to Take |
|---|---|
| AT1 CHECK LH SEAT OPERATION | |
|
Yes GO to AT2. No GO to AT3. |
| AT2 CHECK CIRCUIT CPS58 (WH/BN) FOR A SHORT TO VOLTAGE | |
|
Yes REPAIR the circuit. TEST the system for normal operation. No INSTALL a new power fold relay. TEST the system for normal operation. |
| AT3 CHECK THE POWER FOLD SWITCH | |
|
Yes GO to AT4. No INSTALL a new power fold switch. REFER to Seat Control Switch — Rear Seat in this section. TEST the system for normal operation. |
| AT4 CHECK CIRCUIT CPS56 (GN/BN) FOR AN OPEN | |
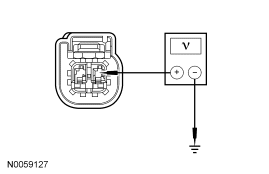
|
Yes GO to AT5. No REPAIR the circuit. TEST the system for normal operation. |
| AT5 CHECK CIRCUIT GD126 (BK/WH) FOR AN OPEN | |
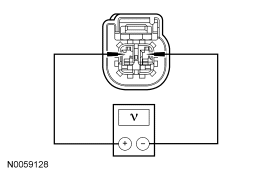
|
Yes INSTALL a new left power fold actuator. TEST the system for normal operation. No REPAIR the circuit. TEST the system for normal operation. |
Pinpoint Test AU: The Power Seat is Inoperative/Does Not Operate Correctly — Second Row, Right, Folding
Refer to Wiring Diagrams Cell 120, Power Seats for schematic and connector information.
Normal Operation
The second row power-fold seat relay is provided voltage on the coil side from the smart power distribution box (SPDJB), on pin 85, circuit CPS 48 (BU), for 30 minutes after turning the vehicle off, when the transmission selector is in PARK, and the liftgate, or liftgate glass is open. Ground for the coil side of the relay is on pin 86, circuit GD120 (BK/GN). The second row power-fold seat relay switched side is supplied battery voltage from battery junction box (BJB) fuse 27 (10A) on relay pin 30, is hot at all times. Pushing the double-throw switch to the appropriate rear seat release actuator, left or right, will provide power and allow folding of that seat. If the relay is disabled after 30 minutes, it can be enabled by opening any door, pressing the unlock key on the key fob, pressing any keyless keypad button or turning the ignition key.
Possible Causes
An inoperative second row power-fold seat can be caused by:
- wiring, terminals or connectors.
- a faulted power-fold seat switch.
- a faulted right power-fold seat actuator.
- a faulted power-fold relay.
PINPOINT TEST AU: THE POWER SEAT IS INOPERATIVE/DOES NOT OPERATE CORRECTLY — SECOND ROW, RIGHT, FOLDING
| Test Step | Result / Action to Take |
|---|---|
| AU1 CHECK RH SEAT OPERATION | |
|
Yes GO to AU2. No GO to AU3. |
| AU2 CHECK CIRCUIT CPS58 (WH/BN) FOR A SHORT TO VOLTAGE | |
|
Yes REPAIR circuit CPS58 (WH/BN). TEST the system for normal operation. No INSTALL a new power fold relay. TEST the system for normal operation. |
| AU3 CHECK THE POWER FOLD SWITCH | |
|
Yes GO to AU4. No INSTALL a new power fold switch. TEST the system for normal operation. |
| AU4 CHECK CIRCUIT CPS57 (GY/BN) FOR AN OPEN | |
|
Yes GO to AU5. No REPAIR circuit CPS57 (GY/BN). TEST the system for normal operation. |
| AU5 CHECK CIRCUIT GD151 (BK/GN) FOR AN OPEN | |
|
Yes INSTALL a new right power fold actuator. TEST the system for normal operation. No REPAIR the circuit GD151 (BK/GN). TEST the system for normal operation. |
Component Test
Component Testing — Thermo-Electric Device (TED) Cooling Performance
NOTE: This test is intended to check the cooling mode performance of an operational climate controlled seat backrest or cushion thermo-electric device (TED) and verify it is cooling inlet air at the TED (ambient cabin air) between 6 - 8°C (10 - 14°F).
NOTE: Make sure the vehicle is out of direct sunlight and is in an area with a stable air temperature when testing the climate controlled seat system.
NOTE: For correct temperature measurements, the seat being tested should be occupied.
- Enter Datalogger and monitor the following CCSM PIDs:
- CSHTEMP (Cushion Thermal Electric Device [TED] (Temperature)
- BK_TEMP (Back Thermal Electric Device [TED] Temperature)
- PCSHTMP (Passenger Cushion Thermal Electric Device [TED] Temperature)
- PBKTMP (Passenger Back Thermal Electric Device [TED] Temperature)
- DCCSMOD (Driver Climate Controlled System State)
- PCCSMOD (Passenger Climate Controlled System State)
- Any initial PID value of greater than 205°C (401°F) or less than 2°C (36°F) indicates a system hardware failure. Do not proceed with this test. GO to Symptom Chart or CCSM DTC Chart for diagnosis.
-
NOTE: Typical backrest and cushion thermo-electric device (TED) shown, others similar.
Gain access to the seat backrest and cushion TEDs and use a suitable thermo-couple temperature measuring device to monitor the air inlet temperature.- Access the backrest TED.
- Release the backrest trim cover J-clips at the sides and bottom.
- Pull out at the bottom and detach the 2 lower hard back panel pin-type retainers.
- Position the backrest trim cover out of the way.
- Place the temperature probe near each TEDs air filter.
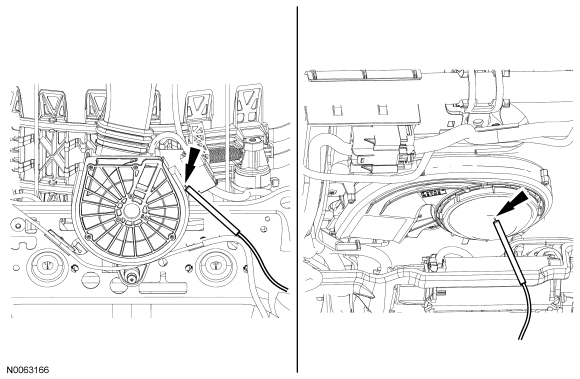
- Access the backrest TED.
-
NOTE: The engine must be running to operate the climate controlled seat system and carry out this test.
Operate system in high cool mode and measure the temperature at the cushion TED filter using the thermo-couple device.- Obtain and record the air inlet temperature at the TED.
- Use a scan tool to measure the cushion TED PID temperature and record the value.
- Monitor the MODE PID and verify the system is operating. If during testing the PID value changes to Blower Only state, the system has entered into recovery mode and power to the TEDs is disabled. If this occurs, the seat has failed the test. Do not continue. Return to the diagnostic routine.
- Subtract the cushion TED PID temperature from the cushion air inlet temperature and record the temperature difference value.
- Continue to operate the system in high cool mode and use the thermo-couple device to measure the temperature at the backrest TED filter.
- Obtain and record the air inlet temperature at the TED.
- Secure the temperature probe at the backrest TED air filter and close the backrest trim cover before measuring.
- Obtain and record the air inlet temperature at the TED.
- Use a scan tool to measure the backrest TED PID temperature and record the value.
- Monitor the MODE PID and verify the system is operating. If during testing the PID value changes to Blower Only state, the system has entered into recovery mode and power to the TEDs is disabled. If this occurs, the seat has failed the test. Do not continue. Return to the diagnostic routine.
- Subtract the backrest TED PID temperature from the backrest air inlet temperature and record the value.
- Compare the cushion and backrest calculated temperature values. Both values should be between 6° - 8°C (10.8° - 14.4°F) and approximately equal (±1°C [±1.8°F]).
- If the calculated temperature values are not within these specifications, check the climate controlled seat components for air duct or filter restrictions, blockages, duct or electrical disconnections and for incorrect assembly. Repair as needed. If OK, carry out the CCSM self-test and if any DTC is retrieved, go to Climate Controlled Seat Module (CCSM) Diagnostic Trouble Code (DTC) Chart for diagnostic direction. Return to the diagnostic routine.
Parts & tools for this job For 2007 Ford Edge
- TOOLTrim removal tool kitSearch: trim removal tool kit
- PARTTouch-up paintSearch: Ford touch up paint
- PARTPanel clip assortmentSearch: Ford panel clips assortment
Links open Amazon search results in a new tab. As an Amazon Associate I earn from qualifying purchases.
Help keep workshop manuals free
workshop-manuals.com provides free online workshop manuals. If they helped you fix your car, please consider sharing or making a small donation to keep the servers running.
Or make a donation:
Support on Ko-fi