
Edge FWD V6-3.5L (2007)
-
Lubricate the urethane adhesive with water to aid the special tool when cutting the urethane adhesive. Using the special tool, place the flat side
of the knife against the rear glass.
-
Using the special tool 164-R2459 (or equivalent), distance the roof opening panel fixed glass from the roof module as needed.
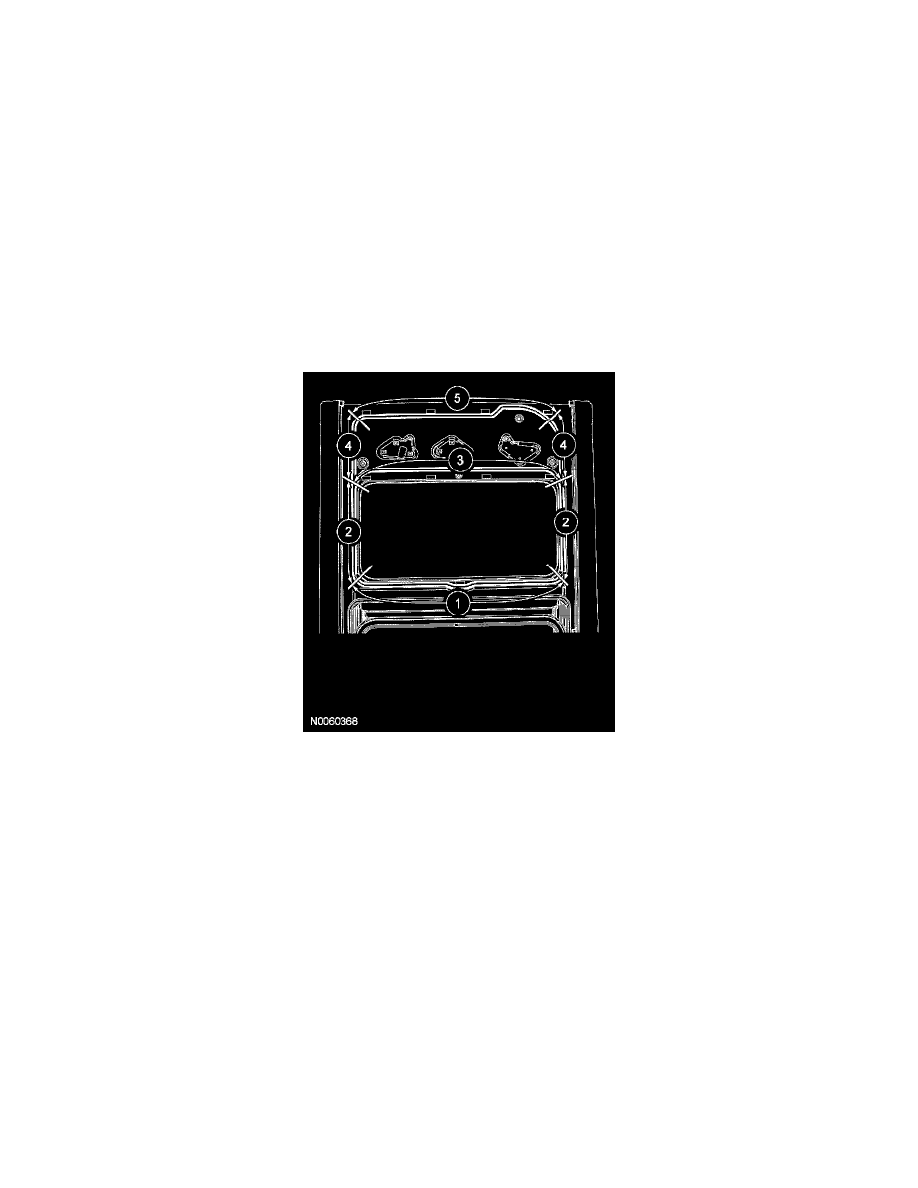
Refer to the adhesive path illustration and cut as follows:
1. CAUTION: Use caution when cutting to prevent damage to the fixed glass front trim seal.
From the inside of the vehicle, start at the front and work towards the front corners.
2. CAUTION: Use caution when cutting to prevent damage to the side trim seals.
Continue working along the side and towards the rear corners.
3. Continue around the inside rear adhesive path.
4. CAUTION: Use caution when cutting along the side to prevent damage to the side trim seals.
From the inside of the vehicle, work along the side of the glass.
5. From the inside of the vehicle, work from the center towards the rear corners.
5. Remove the fixed glass panel assembly.
6. NOTE: Make sure the water channel is free from any foreign material.
Using a soft brush or vacuum, remove any dirt or foreign material from the roof opening panel module.
Installation
CAUTION: When installing urethane-installed glass parts, the vehicle must not be driven until the urethane has cured. Adequate cure time is
specified on the drive away chart for each urethane product as the temperatures and humidity vary. Inadequate or incorrect curing can
adversely affect the retention of the glass panel.
NOTE: For additional material guidelines, refer to the manufacturer's installation information.