
Flex FWD V6-3.5L (2010)
2. Position the inner safety belt guide into the backrest frame slot.
3. Hand start the inner safety belt guide bolts and safety belt retractor bolt.
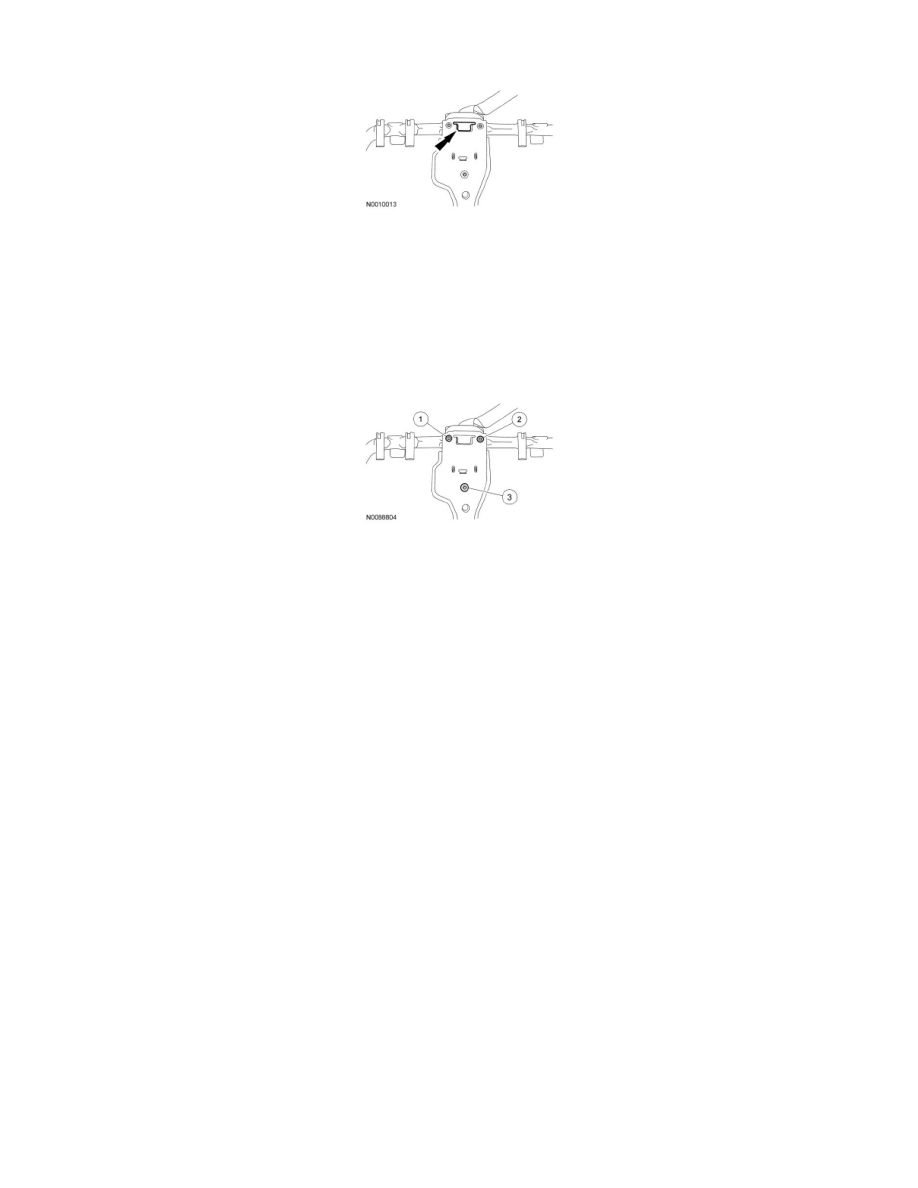
4. Install the 3 bolts in the following sequence.
1. Tighten the RH inner safety belt guide bolt to 23 Nm (17 lb-ft).
2. Tighten the LH inner safety belt guide bolt to 23 Nm (17 lb-ft).
3. Tighten the safety belt retractor bolt to 40 Nm (30 lb-ft).
5. Align the backrest panel to the backrest frame and install 5 screws.
6. Feed the safety belt through the backrest trim cover and backrest foam pad.
7. Align the holes in the backrest trim cover to those in the backrest frame and foam pad.
8. Roll the backrest trim cover down to where the top row of hog rings attaches and stop.
-
Attach the hook-and-loop strips.
9. Install the 2 rows of hog rings, roll the backrest trim cover down and attach the hook-and-loop strips.
10. Install the outer safety belt trim guide.
11. NOTE: The head restraint guides are not interchangeable.
Install the 4 head restraint guides.
12. Install the head restraints.
13. Install the 60 percent seat backrest. For additional information, refer to Seat Backrest - Second Row, 60 Percent See: Removal and
Replacement/Rear Seat/Seat Backrest - Second Row, 60 Percent.
14. Install the 60 percent seat from the vehicle. For additional information, refer to Seat - Second Row See: Service and Repair/Rear Seat/Seat -
Second Row.
-
Make sure the safety belts and buckles are accessible to the occupants after installation.
-
Verify the safety belt retractor operates without excessive effort or binding.
Seat Backrest - Third Row
Seat Backrest - Third Row
Disassembly and Assembly
NOTE: LH shown, RH similar.