
Focus L4-2.0L (2009)
-
With the backrest fully forward in the dump position, attach the cable to the upper clamp on the backrest recliner mechanism.
-
Attach the cable jacket to the lower clamp.
3. Position the cushion cover flaps and fasten the elastic straps to the recliner mechanism and backrest pivot.
4. If equipped, route the wire harness and connect the backrest heater mat electrical connector.
-
Make sure the heater mat wiring harness exits the backrest trim cover opening on the inboard side of the driver seat or outboard side of the
passenger seat.
5. Install the side air bag wiring harness to the seat cushion as noted in removal and connect the seat side air bag module electrical connector.
-
Make sure the side air bag wire harness exits the backrest cover lower outboard opening.
6. Fasten the 2 backrest cover elastic straps to the rear of the cushion frame.
7. Install the seat cushion side shield.
-
Return any detached retainer clips to the cushion side shield and any U-nuts to the seat track.
-
Install the side shield and 2 screws.
8. If equipped, install the seat height adjust handle.
-
Install the seat height adjust handle screw.
-
Tighten to 13 Nm (115 lb-in).
-
Install the screw cover.
9. Install the recliner lever cover.
10. Install the seat. For additional information, refer to Seat - Front See: Service and Repair/Front Seats/Seat - Front.
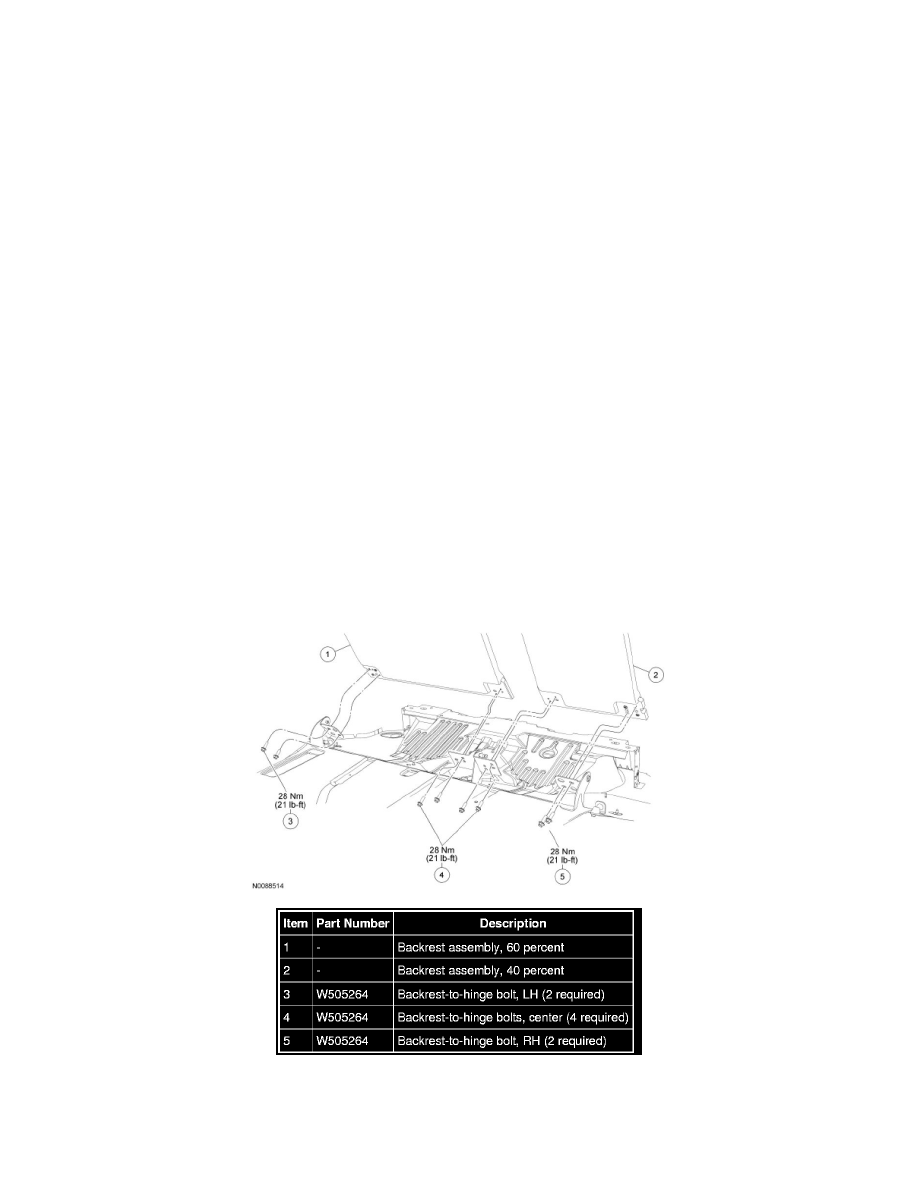
Rear Seats
Seat Backrest - Rear
Seat Backrest Hinges - Rear