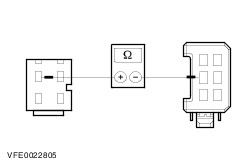
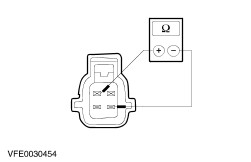
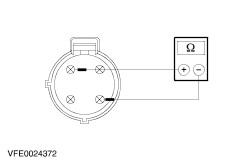
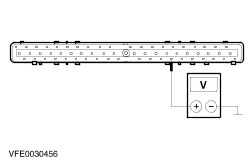
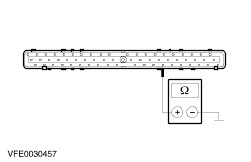
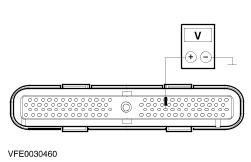
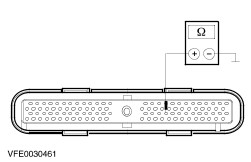
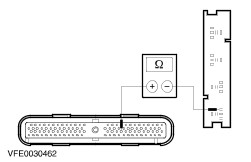
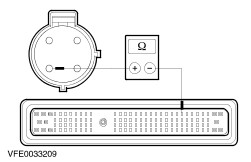
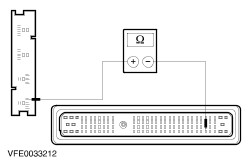
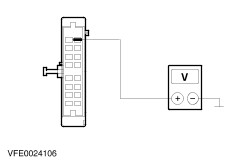
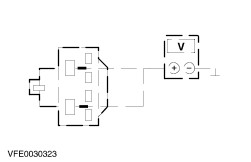
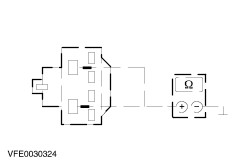
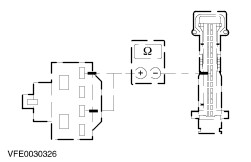
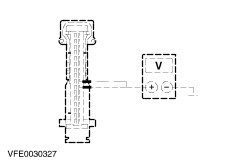
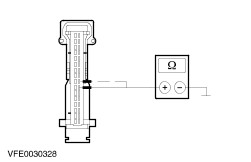
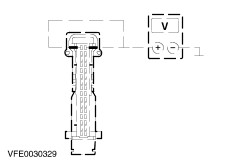
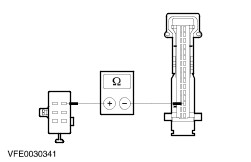
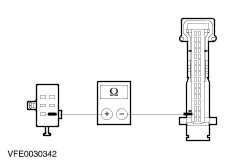
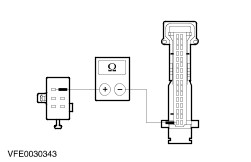
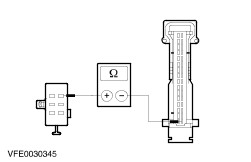
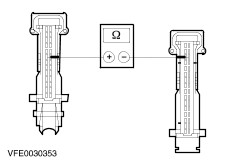
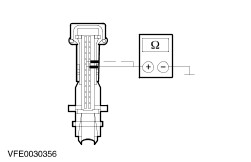
| Diagnosis and Testing Refer to Wiring Diagrams Section 412-00, for schematic and connector information. Inspection and Checking - Visually CHECK for any obvious mechanical or electrical damage.
Visual Inspection | Mechanical | Electrical | - Drive belt
- Refrigerant lines
- Condenser
| - Fuses
- Wiring harness
- Connectors
| - RECTIFY any obvious causes for a concern found during the visual inspection before performing any further tests. CHECK the operation of the system.
- If the concern persists after the visual inspection, for vehicles with EATC system, PERFORM a fault diagnosis with WDS and RECTIFY any displayed faults in accordance with the fault description. CHECK the operation of the system.
- In the case of vehicles with manual heater or heater/air conditioning system and vehicles with EATC system without stored faults, PROCEED in accordance with the Symptom Chart according to the fault symptom.
Fault Memory Interrogation without WDS (EATC System) In contrast to the manual heater or heater/air conditioning system, the air conditioning system with automatic temperature control (EATC) features a self-diagnosis function, which can detect and store both current permanent and intermittent faults that have occurred during normal operation of the vehicle. It is also possible to read out these faults via the display of the EATC module. Read-out of current faults On the EATC module, briefly PRESS the "OFF" and "FOOTWELL" buttons simultaneously, then PRESS "AUTO" within 2 seconds. The self-diagnosis which then starts lasts a few seconds. An animated display appears in the EATC display during this time. Any faults detected are displayed in the form of trouble codes. Example: First of all, "12" flashes for 2 seconds, then "51" flashes for 2 seconds - DTC B1251. If no faults are stored, then all of the segments in the display are actuated. The following table gives information on the possible DTCs and their corresponding meanings. Diagnosis mode can be stopped at any time by PRESSING any button on the EATC module. Read-out of intermittent faults On the EATC module, briefly PRESS the "OFF" and "FOOTWELL" buttons simultaneously, then PRESS "HEADROOM" within 2 seconds. Any stored intermittent faults are output on the EATC display and should be noted for safety reasons. By PRESSING the "DEFROST" button, the fault memory is cleared and diagnosis mode is ended. To end diagnosis mode without clearing the DTCs, PRESS any other button on the EATC module. Read-out of EATC software version On the EATC module, briefly PRESS the "OFF" and "FOOTWELL" buttons simultaneously, then PRESS "A/C" within 2 seconds. The SW version is output on the EATC display. The output mode is ended by PRESSING any button. Trouble Code Table (EATC system) NOTE:As trouble code output is limited to the last 4 digits when reading out via the EATC display, the DTCs B 1262 and U 1262 are identical. Consequently, when "1262" is displayed, the fault must be identified exactly using the WDS. | DTC: | Description | Action | | B 1200 | Internal control module fault | CLEAR fault memory. If the fault reoccurs after a function test of at least 5 minutes, RENEW the EATC module. | | B 1242 | Recirculated air flap servo motor circuit faulty | GO to Pinpoint Test G. | | B 1251 | Internal control module fault | CLEAR fault memory. If the fault occurs again after a functional test, RENEW the EATC module. | | B 1253 | Internal control module fault | CLEAR fault memory. If the fault occurs again after a functional test, RENEW the EATC module. | | B 1254 (only vehicles without Duratec-ST engine) | Circuit between EATC module and trip computer module faulty | GO to Pinpoint Test N. | | B 1261 | Short in sun load sensor circuit (short to ground) | GO to Pinpoint Test M. | | B 1262 | Defrost flap servo motor circuit faulty | GO to Pinpoint Test H. | | U 1262 | SCP bus connection faulty | REFER to Section 418-00 Module Communications Network. | | B 1263 | Circuit of dashboard/footwell servo motor faulty | GO to Pinpoint Test I. | | B 1342 | Internal control module fault | CLEAR fault memory. If the fault occurs again after a functional test, RENEW the EATC module. | | B 1676 | Voltage supply outside tolerance (less than 9 V or more than 16 V) | CHECK charging system. For further information REFER to Section 414-00 Charging System - General Information. If the charging system is OK, GO to Pinpoint Test E. | | B 2266 | Air temperature flap servo motor circuit faulty | GO to Pinpoint Test J. | | B 2297 | Open circuit in the dashboard outlet temperature sensor circuit | GO to Pinpoint Test L. | | B 2298 | Short in the dashboard outlet temperature sensor circuit (short to ground) | GO to Pinpoint Test L. | | B 2299 | Open circuit in the footwell outlet temperature sensor circuit | GO to Pinpoint Test K. | | B 2307 | Short in the footwell outlet temperature sensor circuit (short to ground) | GO to Pinpoint Test K. | | B 2308 | Blower interior temperature sensor circuit faulty | CLEAR fault memory. If the fault occurs again after a functional test, RENEW the blower interior temperature sensor. | | B 2516 | Heater blower control module circuit faulty | GO to Pinpoint Test F. | | B 2175 | Short in air conditioning request circuit (short to earth) | GO to Pinpoint Test D. | | B 2818 | Short in air conditioning request circuit (short to positive) | GO to Pinpoint Test D. | Symptom Chart Symptom Chart | Symptom | Possible Sources | Action | | Heater blower motor inoperative/partially inoperative (vehicles without EATC system only) | * Fuse(s). * Circuit(s). * Heater blower motor. * Heater blower switch. * Heater blower variable resistor. | * | | Heater blower motor running continuously (vehicles without EATC system only) | * Circuit(s). * Heater blower switch. | * | | Air recirculation flap malfunctioning (vehicles without EATC system only) | * Circuit(s). * Air recirculation flap. * Air recirculation flap servo motor. * Heater control module. | * | | Air conditioning inoperative (heater blower function OK) | * Fuse(s). * Circuit(s). * A/C compressor clutch diode. * A/C compressor clutch. * A/C wide open throttle (WOT) relay. * Refrigerant quantity. * Dual pressure switch. * A/C compressor switch. * Powertrain control module (PCM). * Heater control module or EATC module. | * | | Inadequate cooling power from the air conditioning (A/C compressor clutch function OK) | * Cooling fan not operating properly * Refrigerant quantity * Refrigerant circuit | * CHECK the engine management with WDS. * CHECK the refrigerant quantity/circuit with the R-134a refrigerant centre and REPAIR the system as required. | | EATC module inoperative (no display on the control panel) | * Fuse(s). * Circuit(s). * EATC module. | * | System Checks | PINPOINT TEST A : HEATER BLOWER MOTOR INOPERATIVE/PARTIALLY INOPERATIVE (VEHICLES WITHOUT EATC SYSTEM ONLY) | | TEST CONDITIONS | DETAILS/RESULTS/ACTIONS | | A1: DETERMINE THE FAULT CONDITION | | | 1 Ignition switch in position II. | | | 2 Switch the heater blower switch through all settings. | | | Is the heater blower motor inoperative in all switch positions? Yes No | | A2: CHECK FUSE F64 | | | 1 Ignition switch in position 0. | | | 2 CHECK fuse F64 (BJB). | | | Is the fuse OK? Yes No RENEW fuse F64 (30 A). CHECK the operation of the system. If the fuse blows again, LOCATE and REPAIR the short to ground using the Wiring Diagrams. | | A3: CHECK THE VOLTAGE AT FUSE F64 | | | 1 Connect fuse F64 (BJB). | | | 2 Ignition switch in position II. | | | 3 Measure the voltage between fuse F64 (30 A) and ground. | | | Does the meter display battery voltage? Yes No REPAIR the voltage supply to fuse F64 using the Wiring Diagrams. CHECK the operation of the system. | | A4: CHECK THE VOLTAGE AT THE HEATER BLOWER MOTOR | | | 1 Ignition switch in position 0. | | | 2 Disconnect heater blower motor C789. | | | 3 Ignition switch in position II. | | | 4 Measure the voltage between the heater blower motor, connector C789, pin 1, circuit 15-FA18 (GN/OG), wiring harness side and ground. | | | Does the meter display battery voltage? Yes No LOCATE and REPAIR the open circuit between the heater blower motor and fuse F64 using the Wiring Diagrams. CHECK the operation of the system. | | A5: CHECK THE GROUND CONNECTION OF THE HEATER BLOWER MOTOR | | | 1 Ignition switch in position 0. | | | 2 Set the heater blower switch to "maximum". | | | 3 Measure the resistance between the heater blower motor, connector C789, pin 2, circuit 31S-FA18 (BK/RD), wiring harness side and ground. | | | Is a resistance of less than 2 Ohms registered? Yes RENEW the heater blower motor. CHECK the operation of the system. No | | A6: CHECK THE CIRCUIT BETWEEN THE HEATER BLOWER MOTOR AND THE HEATER BLOWER SWITCH | | | 1 Disconnect heater blower switch C469. | | | 2 Measure the resistance between the heater blower motor, connector C789, pin 2, circuit 31S-FA18 (BK/RD), wiring harness side and the heater blower switch, connector C469, pin 6, circuit 31S-FA33 (BK/OG), wiring harness side. | | | Is a resistance of less than 2 Ohms registered? Yes No LOCATE and REPAIR the break in circuit 31S-FA18 (BK/RD) between the heater blower motor and soldered connection S24 using the Wiring Diagrams. CHECK the operation of the system. | | A7: CHECK THE GROUND CONNECTION OF THE HEATER BLOWER SWITCH | | | 1 Measure the resistance between the heater blower switch, connector C469, pin 2, circuit 31-FA25 (BK), wiring harness side and ground. | | | Is a resistance of less than 2 Ohms registered? Yes RENEW the heater blower switch. CHECK the operation of the system. No LOCATE and REPAIR the open circuit between the heater blower switch and ground connection G14 using the Wiring Diagrams. CHECK the operation of the system. | | A8: DETERMINE THE FAULT CONDITION | | | 1 Set the heater blower switch to "maximum". | | | Is the heater blower motor inoperative? Yes No | | A9: CHECK THE CIRCUIT BETWEEN THE HEATER BLOWER MOTOR AND THE HEATER BLOWER SWITCH | | | 1 Ignition switch in position 0. | | | 2 Disconnect heater blower switch C469. | | | 3 Disconnect heater blower motor C789. | | | 4 Measure the resistance between the heater blower motor, connector C789, pin 2, circuit 31S-FA18 (BK/RD), wiring harness side and the heater blower switch, connector C469, pin 6, circuit 31S-FA33 (BK/OG), wiring harness side. | | | Is a resistance of less than 2 Ohms registered? Yes RENEW the heater blower switch. CHECK the operation of the system. No LOCATE and REPAIR the break in circuit 31S-FA33 (BK/OG) between soldered connection S24 and the heater blower switch using the Wiring Diagrams. CHECK the operation of the system. | | A10: CHECK THE HEATER BLOWER SWITCH | | | 1 Ignition switch in position 0. | | | 2 Disconnect heater blower switch C469. | | | 3 Ignition switch in position II. | | | 4 Measure the voltage between the heater blower switch, connector C469, pin 5, circuit 31S-FA32 (BK/BU), wiring harness side and ground. | | | 5 Measure the voltage between the heater blower switch, connector C469, pin 3, circuit 31S-FA31 (BK/YE), wiring harness side and ground. | | | 6 Measure the voltage between the heater blower switch, connector C469, pin 1, circuit 31S-FA30 (BK/WH), wiring harness side and ground. | | | Is battery voltage measured in all cases? Yes RENEW the heater blower switch. CHECK the operation of the system. No | | A11: CHECK THE CIRCUIT BETWEEN THE HEATER BLOWER MOTOR AND THE HEATER BLOWER VARIABLE RESISTOR. | | | 1 Ignition switch in position 0. | | | 2 Disconnect heater blower variable resistor C470. | | | 3 Ignition switch in position II. | | | 4 Measure the voltage between the heater blower variable resistor, connector C470, pin 1, circuit 31S-FA33 (BK/OG), wiring harness side and ground. | | | Does the meter display battery voltage? Yes No LOCATE and REPAIR the break in the circuit between soldered connection S24 and the heater blower variable resistor using the Wiring Diagrams. CHECK the operation of the system. | | A12: CHECK THE CIRCUIT BETWEEN THE HEATER BLOWER VARIABLE RESISTOR AND THE HEATER BLOWER SWITCH | | | 1 Ignition switch in position 0. | | | 2 Measure the resistance between the heater blower variable resistor, connector C470, pin 4, circuit 31S-FA32 (BK/BU), wiring harness side and the heater blower switch, connector C469, pin 5, circuit 31S-FA32 (BK/BU), wiring harness side. | | | Is a resistance of less than 2 Ohms registered? Yes No LOCATE and REPAIR the break in circuit 31S-FA32 (BK/BU) between the heater blower variable resistor and the heater blower switch using the Wiring Diagrams. CHECK the operation of the system. | | A13: CHECK THE CIRCUIT BETWEEN THE HEATER BLOWER VARIABLE RESISTOR AND THE HEATER BLOWER SWITCH | | | 1 Measure the resistance between the heater blower variable resistor, connector C470, pin 2, circuit 31S-FA31 (BK/YE), wiring harness side and the heater blower switch, connector C469, pin 3, circuit 31S-FA31 (BK/YE), wiring harness side. | | | Is a resistance of less than 2 Ohms registered? Yes No LOCATE and REPAIR the break in circuit 31S-FA31 (BK/YE) between the heater blower variable resistor and the heater blower switch using the Wiring Diagrams. CHECK the operation of the system. | | A14: CHECK THE CIRCUIT BETWEEN THE HEATER BLOWER VARIABLE RESISTOR AND THE HEATER BLOWER SWITCH | | | 1 Measure the resistance between the heater blower variable resistor, connector C470, pin 3, circuit 31S-FA30 (BK/WH), wiring harness side and the heater blower switch, connector C469, pin 1, circuit 31S-FA30 (BK/WH), wiring harness side. | | | Is a resistance of less than 2 Ohms registered? Yes RENEW the heater blower variable resistor. CHECK the operation of the system. No LOCATE and REPAIR the break in circuit 31S-FA30 (BK/WH) between the heater blower variable resistor and the heater blower switch using the Wiring Diagrams. CHECK the operation of the system. | | PINPOINT TEST B : HEATER BLOWER MOTOR RUNNING CONTINUOUSLY (VEHICLES WITHOUT EATC SYSTEM ONLY) | | TEST CONDITIONS | DETAILS/RESULTS/ACTIONS | | B1: CHECK THE HEATER BLOWER SWITCH | | | 1 Ignition switch in position 0. | | | 2 Disconnect heater blower switch C469. | | | 3 Ignition switch in position II. | | | Does the heater blower motor run continuously? Yes No RENEW the heater blower switch. CHECK the operation of the system. | | B2: CHECK THE CIRCUITS AT THE HEATER BLOWER VARIABLE RESISTOR | | | 1 Ignition switch in position 0. | | | 2 Disconnect heater blower variable resistor C470. | | | 3 Ignition switch in position II. | | | Does the heater blower motor run continuously? Yes CHECK all circuits connected to soldered connection S24 for short to ground using the Wiring Diagrams and REPAIR any short circuit(s) found. CHECK the operation of the system. No CHECK all circuits between the heater blower variable resistor and the heater blower switch for short to ground using the Wiring Diagrams and REPAIR any short circuit(s) found. CHECK the operation of the system. | | PINPOINT TEST C : AIR RECIRCULATION FLAP MALFUNCTIONING (VEHICLES WITHOUT EATC SYSTEM ONLY) | NOTE:The air recirculation flap is actuated by means of a DC motor. This is activated for a maximum of 7 seconds by the heater control module following actuation of the recirculated air button. Opening and closing of the air recirculation flap is performed by reversing the polarity of the applied voltage. | NOTE:Recirculated air mode is not available if the air distribution control is set to "Defrost/demist windshield". | | TEST CONDITIONS | DETAILS/RESULTS/ACTIONS | | C1: CHECK VOLTAGE AT AIR RECIRCULATION FLAP SERVO MOTOR | | | 1 Ignition switch in position 0. | | | 2 Disconnect recirculated air flap servo motor C538. | | | 3 Ignition switch in position II. | | | 4 Measure the voltage at the recirculated air flap servo motor, connector C538, between pin 2 and pin 4, wiring harness side. | | | 5 Actuate the recirculated air switch several times during the measurement. | | | Is a voltage of approx. 11 V measured with alternating polarity? Yes CHECK the air recirculation flap for ease of movement and correct operation. If the air recirculation flap is mechanically OK, RENEW the air recirculation flap servo motor. CHECK the operation of the system. No | | C2: CHECK THE CIRCUIT BETWEEN THE HEATER CONTROL MODULE AND THE AIR RECIRCULATION FLAP SERVO MOTOR | | | 1 Ignition switch in position 0. | | | 2 Disconnect heater control module C380. | | | 3 Measure the resistance between the heater control module, connector C380, pin 16, circuit 33-FA76 (YE/BU), wiring harness side and the air recirculation flap servo motor, connector C538, pin 2, circuit 33-FA76 (YE/BU) (right-hand drive vehicles: circuit 32-FA76 (WH/BU)), wiring harness side. | | | Is a resistance of less than 2 Ohms registered? Yes No LOCATE and REPAIR the break in circuit 33-FA76 (YE/BU), (right-hand drive vehicles: circuit 32-FA76 (WH/BU)) between the heater control module and the recirculated air flap servo motor using the Wiring Diagrams. CHECK the operation of the system. | | C3: CHECK THE CIRCUIT BETWEEN THE HEATER CONTROL MODULE AND THE AIR RECIRCULATION FLAP SERVO MOTOR | | | 1 Measure the resistance between the heater control module, connector C380, pin 14, circuit 32-FA76 (WH/BU), wiring harness side and the air recirculation flap servo motor, connector C538, pin 4, circuit 32-FA76 (WH/BU) (right-hand drive vehicles: circuit 33-FA76 (YE/BU)), wiring harness side. | | | Is a resistance of less than 2 Ohms registered? Yes No LOCATE and REPAIR the break in circuit 32-FA76 (WH/BU), (right-hand drive vehicles: circuit 33-FA76 (YE/BU)) between the heater control module and the recirculated air flap servo motor using the Wiring Diagrams. CHECK the operation of the system. | | C4: CHECK THE CIRCUIT BETWEEN THE HEATER CONTROL MODULE AND THE AIR RECIRCULATION FLAP SERVO MOTOR FOR SHORT TO VOLTAGE SUPPLY | | | 1 Ignition switch in position II. | | | 2 Measure the voltage between the heater control module, connector C380, pin 14, circuit 32-FA76 (WH/BU), wiring harness side and ground. | | | 3 Measure the voltage between the heater control module, connector C380, pin 16, circuit 33-FA76 (YE/BU), wiring harness side and ground. | | | Is a voltage measured? Yes LOCATE and REPAIR the short to voltage in circuit 32-FA76 (WH/BU) or 33-FA76 (YE/BU) between the heater control module and the air recirculation flap servo motor using the Wiring Diagrams. CHECK the operation of the system. No | | C5: CHECK THE CIRCUIT BETWEEN THE HEATER CONTROL MODULE AND THE AIR RECIRCULATION FLAP SERVO MOTOR FOR SHORT TO GROUND | | | 1 Ignition switch in position 0. | | | 2 Measure the resistance between the heater control module, connector C380, pin 14, circuit 32-FA76 (WH/BU), wiring harness side and ground. | | | 3 Measure the resistance between the heater control module, connector C380, pin 16, circuit 33-FA76 (YE/BU), wiring harness side and ground. | | | Is a resistance greater than 10 kOhm measured in both cases? Yes CHECK the heater control module and RENEW as necessary. CHECK the operation of the system. No LOCATE and REPAIR the short to ground in circuit 32-FA76 (WH/BU) or 33-FA76 (YE/BU) between the heater control module and the air recirculation flap servo motor using the Wiring Diagrams. CHECK the operation of the system. | | PINPOINT TEST D : AIR CONDITIONING INOPERATIVE (HEATER BLOWER FUNCTION OK) | | TEST CONDITIONS | DETAILS/RESULTS/ACTIONS | | D1: WDS TROUBLE CODE INTERROGATION | | | 1 Ignition switch in position 0. | | | 2 Connect the diagnostic tool. | | | 3 Ignition switch in position III. | | | 4 Perform trouble code interrogation using WDS engine management diagnosis program. | | | Is a trouble code displayed? Yes RECTIFY the faults according to the WDS instructions. CHECK the operation of the system. No | | D2: CHECK FUSE F15 | | | 1 Ignition switch in position 0. | | | 2 CHECK fuse F15 (BJB). | | | Is the fuse OK? Yes No RENEW fuse F15 (10 A). If the fuse blows again after switching on the air conditioning, CHECK the A/C compressor clutch diode and RENEW as necessary. If the diode is OK, LOCATE and REPAIR the short to ground using the Wiring Diagrams. CHECK the operation of the system. | | D3: CHECK THE VOLTAGE AT FUSE F15 | | | 1 Connect fuse F15 (BJB). | | | 2 Measure the voltage between fuse F15 (10 A) and ground. | | | Does the meter display battery voltage? Yes No REPAIR the voltage supply to fuse F15 using the Wiring Diagrams. CHECK the operation of the system. | | D4: CHECK FUSE F36 | | | 1 CHECK fuse F36 (CJB). | | | Is the fuse OK? Yes No RENEW fuse F36 (7.5 A). If the fuse blows again, LOCATE and REPAIR the short to ground using the Wiring Diagrams. CHECK the operation of the system. | | D5: CHECK THE VOLTAGE AT FUSE F36 | | | 1 Connect fuse F36 (CJB). | | | 2 Measure the voltage between fuse F36 (7.5 A) and ground. | | | Does the meter display battery voltage? Yes No REPAIR the voltage supply to fuse F36 using the Wiring Diagrams. CHECK the operation of the system. | | D6: CHECK FUSE F45 | | | 1 CHECK fuse F45 (CJB). | | | Is the fuse OK? Yes No RENEW fuse F45 (7.5 A). If the fuse blows again, LOCATE and REPAIR the short to ground using the Wiring Diagrams. CHECK the operation of the system. | | D7: CHECK THE VOLTAGE AT FUSE F45 | | | 1 Connect fuse F45 (CJB). | | | 2 Ignition switch in position II. | | | 3 Measure the voltage between fuse F45 (7.5 A) and ground. | | | Does the meter display battery voltage? Yes No REPAIR the voltage supply to fuse F45 using the Wiring Diagrams. CHECK the operation of the system. | | D8: CHECK THE VOLTAGE SUPPLY AT THE A/C SYSTEM WIDE OPEN THROTTLE RELAY (WOT) | | | 1 Ignition switch in position 0. | | | 2 Disconnect A/C WOT relay C1011 (BJB). | | | 3 Measure the voltage between the A/C WOT relay, socket C1011, pin 3, circuit 15-FA38 (GN/RD), wiring harness side and ground. | | | Does the meter display battery voltage? Yes No LOCATE and REPAIR the break in circuit 15-FA38 (GN/RD) between fuse F15 and the A/C WOT relay using the Wiring Diagrams. CHECK the operation of the system. | | D9: CHECK THE CONTROL VOLTAGE AT THE A/C WOT RELAY | | | 1 Ignition switch in position III. | | | 2 Measure the voltage between the A/C WOT relay, socket C1011, pin 1, circuit 15-FA11 (GN/YE), wiring harness side and ground. | | | Does the meter display battery voltage? Yes No LOCATE and REPAIR the break in circuit 15-FA11 (GN/YE) between soldered connection S117 and the A/C WOT relay using the Wiring Diagrams. CHECK the operation of the system. | | D10: CHECK THE A/C COMPRESSOR CLUTCH CIRCUIT | | | 1 Ignition switch in position 0. | | | 2 Use a fused test cable (10 A) to bridge the A/C WOT relay, socket C1011, pins 3 and 5, wiring harness side. | | | 3 Ignition switch in position III. | | | 4 Check the operation of the A/C compressor clutch. | | | Is the A/C compressor operative? Yes No | | D11: CHECK FOR OPEN CIRCUIT BETWEEN THE A/C WOT RELAY AND THE A/C COMPRESSOR CLUTCH | | | 1 Ignition switch in position 0. | | | 2 Disconnect A/C compressor clutch C952. | | | 3 Measure the resistance between the A/C WOT relay, socket C1011, pin 5, wiring harness side and the A/C compressor clutch, connector C952, pin 1, circuit 15S-FA6 (GN/YE), wiring harness side. | | | Is a resistance of less than 2 Ohms registered? Yes No LOCATE and REPAIR the open circuit between the A/C WOT relay and the A/C compressor clutch using the Wiring Diagrams. CHECK the operation of the system. | | D12: CHECK THE GROUND CONNECTION OF THE A/C COMPRESSOR CLUTCH | | | 1 Measure the resistance between the A/C compressor clutch, connector C952, pin 2, circuit 31-FA6 (BK), wiring harness side and ground. | | | Is a resistance of less than 2 Ohms registered? Yes RENEW the A/C compressor clutch. CHECK the operation of the system. No LOCATE and REPAIR the break in the circuit between the A/C compressor clutch and ground connection G56 using the Wiring Diagrams. CHECK the operation of the system. | | D13: CHECK THE GROUND CONNECTION OF THE A/C WOT RELAY | | | 1 Switch on the heater blower. | | | 2 Switch on the air-conditioning system. | | | CAUTION:It is imperative that a test lamp with a nominal voltage of 12 V and a nominal power rating of 1.2 W is used during the following test. Otherwise the PCM could be damaged, or the test results could be incorrect. 3 Use a test lamp (12 V, 1.2 W) to check the voltage at the A/C WOT relay, socket C1011, between pin 1 and pin 2, wiring harness side. | | | Does the test lamp illuminate? Yes RENEW the A/C WOT relay. CHECK the operation of the system. No | | D14: CHECK THE REFRIGERANT QUANTITY | | | 1 Ignition switch in position 0. | | | 2 Check the quantity of refrigerant in the system. REFER TO 346202 in this section. | | | Is the refrigerant quantity in accordance with manufacturer's specifications? Yes No FILL the system with the correct quantity of refrigerant. CHECK the system for leaks and CHECK the operation of the system. | | D15: CHECK CIRCUIT BETWEEN HEATER CONTROL MODULE OR EATC MODULE AND PCM FOR SHORT TO VOLTAGE SUPPLY | | | 1 Disconnect heater control module or EATC module C380. | | | 2 Disconnect PCM C416 (or C415 with EEC V 104-pin, or C414 with EEC V 121-pin). | | | 3 Ignition switch in position II. | | | 4 Measure the voltage between the heater control module or EATC module, connector C380, pin 9, circuit 15S-FA38 (GN/RD), wiring harness side and ground. | | | Is a voltage measured? Yes LOCATE and REPAIR short to voltage supply in circuit 15S-FA38 (GN/RD), 15S-FA17 (GN/OG) or 15S-RE8 (GE/YE) between heater control module and PCM using the Wiring Diagrams. CHECK the operation of the system. No | | D16: CHECK CIRCUIT BETWEEN HEATER CONTROL MODULE OR EATC MODULE AND PCM FOR SHORT TO GROUND | | | 1 Ignition switch in position 0. | | | 2 Measure the resistance between the heater control module or EATC module, connector C380, pin 9, circuit 15S-FA38 (GN/RD), wiring harness side and ground. | | | Is a resistance of less than 10 kOhm measured? Yes LOCATE and REPAIR short to voltage supply in circuit 15S-FA38 (GN/RD), 15S-FA17 (GN/OG) or 15S-RE8 (GE/YE) between heater control module and PCM using the Wiring Diagrams. CHECK the operation of the system. No | | D17: CHECK THE VOLTAGE AT THE DUAL PRESSURE SWITCH | | | 1 Connect heater control module or EATC module C380. | | | 2 Connect PCM C416 (or C415 with EEC V 104-pin, or C414 with EEC V 121-pin). | | | 3 Disconnect dual pressure switch C882. | | | 4 Ignition switch in position III. | | | 5 Switch on the heater blower. | | | 6 Switch on the air-conditioning system. | | | 7 Measure the voltage between the dual pressure switch, connector C882, pin 1, circuit 15S-FA38 (GN/RD), wiring harness side and ground. | | | Does the meter display battery voltage? Yes No | | D18: CHECK THE DUAL PRESSURE SWITCH | | | 1 Ignition switch in position 0. | | | 2 Measure the resistance at the dual pressure switch, connector C882, between pin 1 and pin 4, component side. | | | Is a resistance of less than 2 Ohms registered? Yes No RENEW the dual pressure switch. CHECK the operation of the system. | | D19: CHECK THE VOLTAGE AT THE A/C COMPRESSOR SWITCH | | | 1 Connect dual pressure switch C882. | | | 2 Disconnect A/C compressor switch C692. | | | 3 Ignition switch in position III. | | | 4 Switch on the heater blower. | | | 5 Switch on the air-conditioning system. | | | 6 Measure the voltage between the A/C compressor switch, connector C692, pin 1, circuit 15-FA17 (GN/OG), wiring harness side and ground. | | | Does the meter display battery voltage? Yes No LOCATE and REPAIR the break in circuit 15S-FA17 (GN/OG) between the dual pressure switch and the A/C compressor switch using the Wiring Diagrams. CHECK the operation of the system. | | D20: CHECK THE A/C COMPRESSOR SWITCH | | | 1 Ignition switch in position 0. | | | 2 Measure the resistance at the A/C compressor switch, connector C692 between pin 1 and pin 4, component side. | | | Is a resistance of less than 2 Ohms registered? Yes No RENEW the A/C compressor switch. CHECK the operation of the system. | | D21: CHECK FOR OPEN CIRCUIT BETWEEN THE A/C COMPRESSOR SWITCH AND THE POWER TRAIN CONTROL MODULE (PCM) | | | 1 Disconnect PCM C416. | | | 2 Measure the resistance between PCM, connector C416, pin 10, circuit 15S-RE8 (GN/YE), wiring harness side and A/C compressor switch, connector C692, pin 4, circuit 15S-RE8 (GN/YE), wiring harness side. | | | Is a resistance of less than 2 Ohms registered? Yes No LOCATE and REPAIR the break in circuit 15S-RE8 (GN/YE) between the A/C compressor switch and the PCM using the Wiring Diagrams. CHECK the operation of the system. | | D22: CHECK THE CIRCUIT BETWEEN THE A/C WOT RELAY AND THE PCM FOR SHORT TO VOLTAGE SUPPLY | | | 1 Ignition switch in position II. | | | 2 Measure the voltage between the PCM, connector C416, pin 54, circuit 31S-FA11 (BK/YE), wiring harness side and ground. | | | Is a voltage measured? Yes LOCATE and REPAIR the short to voltage supply in circuit 31S-FA11 (BK/YE) between the A/C WOT relay and the PCM using the Wiring Diagrams. CHECK the operation of the system. No | | D23: CHECK THE CIRCUIT BETWEEN THE A/C WOT RELAY AND THE PCM FOR SHORT TO GROUND | | | 1 Ignition switch in position 0. | | | 2 Measure the resistance between the PCM, connector C416, pin 54, circuit 31S-FA11 (BK/YE), wiring harness side and ground. | | | Is a resistance of less than 10 kOhm measured? Yes LOCATE and REPAIR the short to ground in circuit 31S-FA11 (BK/YE) between the A/C WOT relay and the PCM using the Wiring Diagrams. CHECK the operation of the system. No | | D24: CHECK FOR OPEN CIRCUIT BETWEEN THE A/C WOT RELAY AND THE PCM | | | 1 Measure the resistance between the PCM, connector C416, pin 54, circuit 31S-FA11 (BK/YE), wiring harness side and the A/C WOT relay, socket C1011, pin 2, wiring harness side. | | | Is a resistance of less than 2 Ohms registered? Yes CHECK the PCM and RENEW if necessary. CHECK the operation of the system. No LOCATE and REPAIR the break in the circuit between the PCM and the A/C WOT relay using the Wiring Diagrams. CHECK the operation of the system. | | D25: CHECK FOR OPEN CIRCUIT BETWEEN THE A/C COMPRESSOR SWITCH AND THE POWER TRAIN CONTROL MODULE (PCM) | | | 1 Disconnect PCM C415. | | | 2 Measure the resistance between PCM, connector C415, pin 41, circuit 15S-RE8 (GN/YE), wiring harness side and A/C compressor switch, connector C692, pin 4, circuit 15S-RE8 (GN/YE), wiring harness side. | | | Is a resistance of less than 2 Ohms registered? Yes No LOCATE and REPAIR the break in circuit 15S-RE8 (GN/YE) between the A/C compressor switch and the PCM using the Wiring Diagrams. CHECK the operation of the system. | | D26: CHECK THE CIRCUIT BETWEEN THE A/C WOT RELAY AND THE PCM FOR SHORT TO VOLTAGE SUPPLY | | | 1 Ignition switch in position II. | | | 2 Measure the voltage between the PCM, connector C415, pin 69, circuit 31S-FA11 (BK/YE), wiring harness side and ground. | | | Is a voltage measured? Yes LOCATE and REPAIR the short to voltage supply in circuit 31S-FA11 (BK/YE) between the A/C WOT relay and the PCM using the Wiring Diagrams. CHECK the operation of the system. No | | D27: CHECK THE CIRCUIT BETWEEN THE A/C WOT RELAY AND THE PCM FOR SHORT TO GROUND | | | 1 Ignition switch in position 0. | | | 2 Measure the resistance between the PCM, connector C415, pin 69, circuit 31S-FA11 (BK/YE), wiring harness side and ground. | | | Is a resistance of less than 10 kOhm measured? Yes LOCATE and REPAIR the short to ground in circuit 31S-FA11 (BK/YE) between the A/C WOT relay and the PCM using the Wiring Diagrams. CHECK the operation of the system. No | | D28: CHECK FOR OPEN CIRCUIT BETWEEN THE A/C WOT RELAY AND THE PCM | | | 1 Measure the resistance between the PCM, connector C415, pin 69, circuit 31S-FA11 (BK/YE), wiring harness side and the A/C WOT relay, socket C1011, pin 2, wiring harness side. | | | Is a resistance of less than 2 Ohms registered? Yes CHECK the PCM and RENEW if necessary. CHECK the operation of the system. No LOCATE and REPAIR the break in the circuit between the PCM and the A/C WOT relay using the Wiring Diagrams. CHECK the operation of the system. | | D29: TEST THE CIRCUIT BETWEEN THE A/C COMPRESSOR SWITCH AND THE POWERTRAIN CONTROL MODULE (PCM) | | | 1 Disconnect PCM C414. | | | 2 Measure the resistance between PCM, connector C414, pin 19, circuit 15S-RE8 (GN/YE), wiring harness side and A/C compressor switch, connector C692, pin 4, circuit 15S-RE8 (GN/YE), wiring harness side. | | | Is a resistance of less than 2 Ohms registered? Yes No LOCATE and REPAIR the break in circuit 15S-RE8 (GN/YE) between the A/C compressor switch and the PCM using the Wiring Diagrams. CHECK the operation of the system. | | D30: CHECK THE CIRCUIT BETWEEN THE A/C WOT RELAY AND THE PCM FOR SHORT TO VOLTAGE SUPPLY | | | 1 Ignition switch in position II. | | | 2 Measure the voltage between the PCM, connector C414, pin 79, circuit 31S-FA11 (BK/YE), wiring harness side and ground. | | | Is a voltage measured? Yes LOCATE and REPAIR the short to voltage supply in circuit 31S-FA11 (BK/YE) between the A/C WOT relay and the PCM using the Wiring Diagrams. CHECK the operation of the system. No | | D31: CHECK THE CIRCUIT BETWEEN THE A/C WOT RELAY AND THE PCM FOR SHORT TO GROUND | | | 1 Ignition switch in position 0. | | | 2 Measure the resistance between the PCM, connector C414, pin 79, circuit 31S-FA11 (BK/YE), wiring harness side and ground. | | | Is a resistance of less than 10 kOhm measured? Yes LOCATE and REPAIR the short to ground in circuit 31S-FA11 (BK/YE) between the A/C WOT relay and the PCM using the Wiring Diagrams. CHECK the operation of the system. No | | D32: CHECK FOR OPEN CIRCUIT BETWEEN THE A/C WOT RELAY AND THE PCM | | | 1 Measure the resistance between the PCM, connector C414, pin 79, circuit 31S-FA11 (BK/YE), wiring harness side and the A/C WOT relay, socket C1011, pin 2, wiring harness side. | | | Is a resistance of less than 2 Ohms registered? Yes CHECK the PCM and RENEW if necessary. CHECK the operation of the system. No LOCATE and REPAIR the break in the circuit between the PCM and the A/C WOT relay using the Wiring Diagrams. CHECK the operation of the system. | | D33: CHECK FOR OPEN CIRCUIT BETWEEN DUAL PRESSURE SWITCH AND HEATER CONTROL MODULE OR EATC MODULE | | | 1 Ignition switch in position 0. | | | 2 Disconnect heater control module or EATC module C380. | | | 3 Measure the resistance between the dual pressure switch, connector C882, pin 1, circuit 15S-FA38 (GN/RD), wiring harness side and the heater control module or EATC module, connector C380, pin 9, circuit 15S-FA38 (GN/RD), wiring harness side. | | | Is a resistance of less than 2 Ohms registered? Yes Vehicles with EATC system: CHECK and if necessary RENEW the EATC module. CHECK the operation of the system. No LOCATE and REPAIR the break in circuit in 15S-FA38 (GN/RD) between the dual pressure switch and the heater control module or EATC module using the Wiring Diagrams. CHECK the operation of the system. | | D34: CHECK THE GROUND CONNECTION OF THE HEATER CONTROL MODULE | | | 1 Measure the resistance between the heater control module, connector C380, pin 12, circuit 91-FA13 (BK/OG), wiring harness side and ground. | | | Is a resistance of less than 2 Ohms registered? Yes No LOCATE and REPAIR the break in the circuit between the heater control module and ground connection G41 using the Wiring Diagrams. CHECK the operation of the system. | | D35: CHECK THE VOLTAGE AT THE HEATER CONTROL MODULE | | | 1 Measure the voltage between heater control module, connector C380, pin 8, wiring harness side and ground. | | | Does the meter display battery voltage? Yes No LOCATE and REPAIR the break in the circuit between the heater control module and fuse F36 using the Wiring Diagrams. CHECK the operation of the system. | | D36: CHECK THE VOLTAGE AT THE HEATER CONTROL MODULE | | | 1 Ignition switch in position II. | | | 2 Measure the voltage between heater control module, connector C380, pin 10, wiring harness side and ground. | | | Does the meter display battery voltage? Yes No LOCATE and REPAIR the break in the circuit between the heater control module and fuse F45 using the Wiring Diagrams. CHECK the operation of the system. | | D37: CHECK THE CONTROL VOLTAGE AT THE HEATER CONTROL MODULE | | | 1 Set the heater blower switch to "Off". | | | 2 Measure the voltage between the heater control module, connector C380, pin 6, circuit 31S-FA26 (BK/RD), wiring harness side and ground. | | | Does the meter display battery voltage? Yes No LOCATE and REPAIR the break in circuit 31S-FA26 (BK/RD) between the heater control module and the heater blower switch using the Wiring Diagrams. CHECK the operation of the system. | | D38: CHECK THE VOLTAGE AT THE HEATER CONTROL MODULE | | | 1 Ignition switch in position III. | | | 2 Measure the voltage between heater control module, connector C380, pin 11, wiring harness side and ground. | | | Does the meter display battery voltage? Yes CHECK the heater control module and RENEW as necessary. CHECK the operation of the system. No LOCATE and REPAIR the break in the circuit between the heater control module and the engine run relay using the Wiring Diagrams. CHECK the operation of the system. | | PINPOINT TEST E : EATC MODULE INOPERATIVE (NO DISPLAY ON THE CONTROL PANEL) | | TEST CONDITIONS | DETAILS/RESULTS/ACTIONS | | E1: CHECK FUSE F36 | | | 1 Ignition switch in position 0. | | | 2 CHECK fuse F36 (CJB). | | | Is the fuse OK? Yes No RENEW fuse F36 (7.5 A). CHECK the operation of the system. If the fuse blows again, LOCATE and REPAIR the short to ground using the Wiring Diagrams. | | E2: CHECK THE VOLTAGE AT FUSE F36 | | | 1 Connect fuse F36 (CJB). | | | 2 Measure the voltage between fuse F36 (7.5 A) and ground. | | | Does the meter display battery voltage? Yes No REPAIR the voltage supply to fuse F36 using the Wiring Diagrams. CHECK the operation of the system. | | E3: CHECK FUSE F45 | | | 1 CHECK fuse F45 (CJB). | | | Is the fuse OK? Yes No RENEW fuse F45 (7.5 A). CHECK the operation of the system. If the fuse blows again, LOCATE and REPAIR the short to ground using the Wiring Diagrams. | | E4: CHECK THE VOLTAGE AT FUSE F45 | | | 1 Connect fuse F45 (CJB). | | | 2 Ignition switch in position II. | | | 3 Measure the voltage between fuse F45 (7.5 A) and ground. | | | Does the meter display battery voltage? Yes No REPAIR the voltage supply to fuse F45 using the Wiring Diagrams. CHECK the operation of the system. | | E5: CHECK THE VOLTAGE AT THE EATC MODULE | | | 1 Ignition switch in position 0. | | | 2 Disconnect EATC module C380. | | | 3 Measure the voltage between the EATC module, connector C380, pin 8, circuit 29-FA13 (OG), wiring harness side and ground. | | | Does the meter display battery voltage? Yes No LOCATE and REPAIR the open circuit between fuse F36 and the EATC module using the Wiring Diagrams. CHECK the operation of the system. | | E6: CHECK THE VOLTAGE AT THE EATC MODULE | | | 1 Ignition switch in position II. | | | 2 Measure the voltage between the EATC module, connector C380, pin 10, circuit 15-FA13 (GN/RD), wiring harness side and ground. | | | Does the meter display battery voltage? Yes No LOCATE and REPAIR the open circuit between fuse F45 and the EATC module using the Wiring Diagrams. CHECK the operation of the system. | | E7: CHECK THE GROUND CONNECTION OF THE EATC MODULE | | | 1 Ignition switch in position 0. | | | 2 Measure the resistance between the EATC module, connector C380, pin 12, circuit 91-FA13 (BK/OG), wiring harness side and ground. | | | Is a resistance of less than 2 Ohms registered? Yes CHECK and if necessary RENEW the EATC module. CHECK the operation of the system. No LOCATE and REPAIR the break in the circuit between the EATC module and ground connection G41 using the Wiring Diagrams. CHECK the operation of the system. | | PINPOINT TEST F : HEATER BLOWER MALFUNCTION (VEHICLES WITH EATC SYSTEM ONLY) | | TEST CONDITIONS | DETAILS/RESULTS/ACTIONS | | F1: CHECK FUSE F64 | | | 1 Ignition switch in position 0. | | | 2 CHECK fuse F64 (BJB). | | | Is the fuse OK? Yes No RENEW fuse F64 (30 A). CHECK the operation of the system. If the fuse blows again, LOCATE and REPAIR the short to ground using the Wiring Diagrams. | | F2: CHECK THE VOLTAGE AT FUSE F64 | | | 1 Connect fuse F64 (BJB). | | | 2 Ignition switch in position II. | | | 3 Measure the voltage between fuse F64 (30 A) and ground. | | | Does the meter display battery voltage? Yes No REPAIR the voltage supply to fuse F64 using the Wiring Diagrams. CHECK the operation of the system. | | F3: CHECK THE VOLTAGE AT THE HEATER BLOWER MOTOR | | | 1 Ignition switch in position 0. | | | 2 Disconnect heater blower motor C537. | | | 3 Ignition switch in position II. | | | 4 Measure the voltage between the heater blower motor, connector C537, pin 2 (right-hand drive vehicles: pin 1), circuit 15S-FA18 (GN/OG), wiring harness side and ground. | | | Does the meter display battery voltage? Yes No LOCATE and REPAIR the open circuit between the heater blower motor and fuse F64 using the Wiring Diagrams. CHECK the operation of the system. | | F4: CHECK THE GROUND CONNECTION OF THE HEATER BLOWER MOTOR | | | 1 Ignition switch in position 0. | | | 2 Measure the resistance between the heater blower motor, connector C537, pin 1 (right-hand drive vehicles: pin 2), circuit 31-FA45 (BK), wiring harness side and ground. | | | Is a resistance of less than 2 Ohms registered? Yes No LOCATE and REPAIR the open circuit between the heater blower motor and ground connection G14 using the Wiring Diagrams. CHECK the operation of the system. | | F5: CHECK THE CIRCUITS BETWEEN THE HEATER BLOWER MOTOR AND THE EATC MODULE | | | 1 Disconnect EATC module C539. | | | 2 Measure the resistance between the heater blower motor, connector C537, pin 3 (right-hand drive vehicles: pin 5), circuit 9-FA45 (BN/BU), wiring harness side and the EATC module, connector C539, pin 26, circuit 9-FA45 (BN/BU), wiring harness side. | | | 3 Measure the resistance between the heater blower motor, connector C537, pin 6 (right-hand drive vehicles: pin 4), circuit 49S-FA45 (BU/WH), wiring harness side and the EATC module, connector C539, pin 25, circuit 49S-FA45 (BU/WH), wiring harness side. | | | Is a resistance of less than 2 Ohms measured in both cases? Yes No LOCATE and REPAIR the open circuit in 9-FA45 (BN/BU) or 49S-FA45 (BU/WH) between the heater blower motor and the EATC module using the Wiring Diagrams. CHECK the operation of the system. | | F6: CHECK THE CIRCUITS BETWEEN THE EATC MODULE AND THE HEATER BLOWER MOTOR FOR SHORT TO VOLTAGE | | | 1 Ignition switch in position II. | | | 2 Measure the voltage between the EATC module, connector C539, pin 26, circuit 9-FA45 (BN/BU), wiring harness side and ground. | | | 3 Measure the voltage between the EATC module, connector C539, pin 25, circuit 49S-FA45 (BU/WH), wiring harness side and ground. | | | Is a voltage measured during any of these measurements? Yes No LOCATE and REPAIR the short to voltage supply in circuit 9-FA45 (BN/BU) or 49S-FA45 (BU/WH) between the EATC module and the heater blower motor using the Wiring Diagrams. CHECK the operation of the system. | | F7: CHECK THE CIRCUITS BETWEEN THE EATC MODULE AND THE HEATER BLOWER MOTOR FOR SHORT TO GROUND | | | 1 Ignition switch in position 0. | | | 2 Measure the resistance between the EATC module, connector C539, pin 26, circuit 9-FA45 (BN/BU), wiring harness side and ground. | | | 3 Measure the resistance between the EATC module, connector C539, pin 25, circuit 49S-FA45 (BU/WH), wiring harness side and ground. | | | Is a resistance greater than 10 kOhm measured in both cases? Yes No LOCATE and REPAIR the short to ground in circuit 9-FA45 (BN/BU) or 49S-FA45 (BU/WH) between the EATC module and the heater blower motor using the Wiring Diagrams. CHECK the operation of the system. | | F8: CHECK HEATER BLOWER MOTOR | | | 1 Connect heater blower motor C537. | | | 2 Ignition switch in position II. | | | Is the heater blower motor running at approximately 50 % power? Yes CHECK and if necessary RENEW the EATC module. CHECK the operation of the system. No RENEW the heater blower motor. CHECK the operation of the system. | | PINPOINT TEST G : AIR RECIRCULATION FLAP MALFUNCTIONING (VEHICLES WITH EATC SYSTEM ONLY) | NOTE:The air recirculation flap is actuated by means of a DC motor. This is activated for a maximum of 7 seconds by the EATC module following actuation of the recirculated air button. Opening and closing of the air recirculation flap is performed by reversing the polarity of the applied voltage. | NOTE:Air recirculation mode is not available when the "Defrost/demist windshield" button is actuated. | | TEST CONDITIONS | DETAILS/RESULTS/ACTIONS | | G1: CHECK VOLTAGE AT AIR RECIRCULATION FLAP SERVO MOTOR | | | 1 Ignition switch in position 0. | | | 2 Disconnect recirculated air flap servo motor C538. | | | 3 Ignition switch in position II. | | | 4 Measure the voltage at the recirculated air flap servo motor, connector C538, between pin 2 and pin 4, wiring harness side. | | | 5 Actuate the recirculated air switch several times during the measurement. | | | Is a voltage of approx. 11 V measured with alternating polarity? Yes CHECK the air recirculation flap for ease of movement and correct operation. If the air recirculation flap is OK, RENEW the air recirculation flap servo motor. CHECK the operation of the system. No | | G2: CHECK FOR OPEN CIRCUIT BETWEEN THE AIR RECIRCULATION FLAP SERVO MOTOR AND THE EATC MODULE | | | 1 Ignition switch in position 0. | | | 2 Disconnect EATC module C539. | | | 3 Measure the resistance between the air recirculation flap servo motor, connector C538, pin 2, circuit 33-FA76 (YE/BU) (right-hand drive vehicles: circuit 32-FA76 (WH/BU)), wiring harness side and the EATC module, connector C539, pin 17, circuit 33-FA76 (YE/BU), wiring harness side. | | | 4 Measure the resistance between the air recirculation flap servo motor, connector C538, pin 4, circuit 32-FA76 (WH/BU) (right-hand drive vehicles: circuit 33-FA76 (YE/BU)), wiring harness side and the EATC module, connector C539, pin 1, circuit 32-FA76 (WH/BU), wiring harness side. | | | Is a resistance of less than 2 Ohms measured in both cases? Yes No LOCATE and REPAIR the break in circuit 32-FA76 (WH/BU) or 33-FA76 (YE/BU) between the air recirculation flap servo motor and the EATC module using the Wiring Diagrams. CHECK the operation of the system. | | G3: CHECK THE CIRCUIT BETWEEN THE AIR RECIRCULATION FLAP SERVO MOTOR AND THE EATC MODULE FOR SHORT TO VOLTAGE SUPPLY | | | 1 Ignition switch in position II. | | | 2 Measure the voltage between the EATC module, connector C539, pin 17, circuit 33-FA76 (YE/BU), wiring harness side and ground. | | | 3 Measure the voltage between the EATC module, connector C539, pin 1, circuit 32-FA76 (WH/BU), wiring harness side and ground. | | | Is a voltage measured during any of these measurements? Yes LOCATE and REPAIR the short to voltage supply in circuit 32-FA76 (WH/BU) or 33-FA76 (YE/BU) between the air recirculation flap servo motor and the EATC module using the Wiring Diagrams. CHECK the operation of the system. No | | G4: CHECK THE CIRCUIT BETWEEN THE AIR RECIRCULATION FLAP SERVO MOTOR AND THE EATC MODULE FOR SHORT TO GROUND | | | 1 Ignition switch in position 0. | | | 2 Measure the resistance between the EATC module, connector C539, pin 17, circuit 33-FA76 (YE/BU), wiring harness side and ground. | | | 3 Measure the resistance between the EATC module, connector C539, pin 1, circuit 32-FA76 (WH/BU), wiring harness side and ground. | | | Is a resistance greater than 10 kOhm measured in both cases? Yes CHECK and if necessary RENEW the EATC module. CHECK the operation of the system. No LOCATE and REPAIR the short to ground in circuit 32-FA76 (WH/BU) or 33-FA76 (YE/BU) between the air recirculation flap servo motor and the EATC module using the Wiring Diagrams. CHECK the operation of the system. | | PINPOINT TEST H : DEFROST FLAP MALFUNCTIONING (VEHICLES WITH EATC SYSTEM ONLY) | | TEST CONDITIONS | DETAILS/RESULTS/ACTIONS | | H1: CHECK FOR BREAK IN CIRCUITS BETWEEN THE DEFROST FLAP SERVO MOTOR AND THE EATC MODULE | | | 1 Ignition switch in position 0. | | | 2 Disconnect EATC module C539. | | | 3 Disconnect defrost flap servo motor C532. | | | 4 Measure the resistance between the defrost flap servo motor, connector C532, pin 2, circuit 15S-FB14 (GN/BU), wiring harness side and the EATC module, connector C539, pin 10, circuit 15S-FB1 (GN/YE), wiring harness side. | | | 5 Measure the resistance between the defrost flap servo motor, connector C532, pin 1, circuit 31S-FB15 (BK/OG), wiring harness side and the EATC module, connector C539, pin 11, circuit 31S-FB15 (BK/BU), wiring harness side. | | | 6 Measure the resistance between the defrost flap servo motor, connector C532, pin 3, circuit 31S-FB16 (BK/GN), wiring harness side and the EATC module, connector C539, pin 12, circuit 31S-FB16 (BK/GN), wiring harness side. | | | 7 Measure the resistance between the defrost flap servo motor, connector C532, pin 4, circuit 31S-FB17 (BK/RD), wiring harness side and the EATC module, connector C539, pin 27, circuit 31S-FB17 (BK/RD), wiring harness side. | | | 8 Measure the resistance between the defrost flap servo motor, connector C532, pin 6, circuit 31S-FB18 (BK/WH), wiring harness side and the EATC module, connector C539, pin 28, circuit 31S-FB18 (BK/WH), wiring harness side. | | | Is a resistance of less than 2 Ohms measured in all of the cases? Yes No LOCATE and REPAIR the break in the relevant circuit between the defrost flap servo motor and the EATC module using the Wiring Diagrams. CHECK the operation of the system. | | H2: CHECK THE CIRCUITS BETWEEN THE DEFROST FLAP SERVO MOTOR AND THE EATC MODULE FOR SHORT TO VOLTAGE SUPPLY | | | 1 Ignition switch in position II. | | | 2 Measure the voltage between the defrost flap servo motor, connector C532, pin 2, circuit 15S-FB14 (GN/BU), wiring harness side and ground. | | | 3 Measure the voltage between the defrost flap servo motor, connector C532, pin 1, circuit 31S-FB15 (BK/OG), wiring harness side and ground. | | | 4 Measure the voltage between the defrost flap servo motor, connector C532, pin 3, circuit 31S-FB16 (BK/GN), wiring harness side and ground. | | | 5 Measure the voltage between the defrost flap servo motor, connector C532, pin 4, circuit 31S-FB17 (BK/RD), wiring harness side and ground. | | | 6 Measure the voltage between the defrost flap servo motor, connector C532, pin 6, circuit 31S-FB18 (BK/WH), wiring harness side and ground. | | | Is a voltage measured during any of these measurements? Yes LOCATE and REPAIR the short to voltage supply in the relevant circuit between the defrost flap servo motor and the EATC module using the Wiring Diagrams. CHECK the operation of the system. No | | H3: CHECK THE CIRCUITS BETWEEN THE DEFROST FLAP SERVO MOTOR AND THE EATC MODULE FOR SHORT TO GROUND | | | 1 Ignition switch in position 0. | | | 2 Measure the resistance between the defrost flap servo motor, connector C532, pin 2, circuit 15S-FB14 (GN/BU), wiring harness side and ground. | | | 3 Measure the resistance between the defrost flap servo motor, connector C532, pin 1, circuit 31S-FB15 (BK/OG), wiring harness side and ground. | | | 4 Measure the resistance between the defrost flap servo motor, connector C532, pin 3, circuit 31S-FB16 (BK/GN), wiring harness side and ground. | | | 5 Measure the resistance between the defrost flap servo motor, connector C532, pin 4, circuit 31S-FB17 (BK/RD), wiring harness side and ground. | | | 6 Measure the resistance between the defrost flap servo motor, connector C532, pin 6, circuit 31S-FB18 (BK/WH), wiring harness side and ground. | | | Is a resistance of more than 10 kOhms measured in all of the measurements? Yes CHECK the defrost flap for ease of movement and proper function. If the defrost flap is mechanically OK, RENEW the defrost flap servo motor. CHECK the operation of the system. No LOCATE and REPAIR the short to ground in the relevant circuit between the defrost flap servo motor and the EATC module using the Wiring Diagrams. CHECK the operation of the system. | | PINPOINT TEST I : AIR DISTRIBUTION FLAP MALFUNCTIONING (VEHICLES WITH EATC SYSTEM ONLY) | | TEST CONDITIONS | DETAILS/RESULTS/ACTIONS | | I1: CHECK FOR BREAK IN CIRCUITS BETWEEN THE DASHBOARD/FOOTWELL FLAP SERVO MOTOR AND THE EATC MODULE | | | 1 Ignition switch in position 0. | | | 2 Disconnect EATC module C539. | | | 3 Disconnect dashboard/footwell flap servo motor C533. | | | 4 Measure the resistance between the dashboard/footwell flap servo motor, connector C533, pin 2, circuit 15S-FB19 (GN/YE), wiring harness side and the EATC module, connector C539, pin 10, circuit 15S-FB1 (GN/YE), wiring harness side. | | | 5 Measure the resistance between the dashboard/footwell flap servo motor, connector C533, pin 1, circuit 31S-FB20 (BK/BU), wiring harness side and the EATC module, connector C539, pin 13, circuit 31S-FB20 (BK/BU), wiring harness side. | | | 6 Measure the resistance between the dashboard/footwell flap servo motor, connector C533, pin 3, circuit 31S-FB21 (BK/OG), wiring harness side and the EATC module, connector C539, pin 14, circuit 31S-FB21 (BK/OG), wiring harness side. | | | 7 Measure the resistance between the dashboard/footwell flap servo motor, connector C533, pin 4, circuit 31S-FB22 (BK/GN), wiring harness side and the EATC module, connector C539, pin 29, circuit 31S-FB22 (BK/GN), wiring harness side. | | | 8 Measure the resistance between the dashboard/footwell flap servo motor, connector C533, pin 6, circuit 31S-FB23 (BK/RD), wiring harness side and the EATC module, connector C539, pin 30, circuit 31S-FB23 (BK/RD), wiring harness side. | | | Is a resistance of less than 2 Ohms measured in all of the cases? Yes No LOCATE and REPAIR the break in the relevant circuit between the dashboard/footwell flap servo motor and the EATC module using the Wiring Diagrams. CHECK the operation of the system. | | I2: CHECK THE CIRCUITS BETWEEN THE DASHBOARD/FOOTWELL FLAP SERVO MOTOR AND THE EATC MODULE FOR SHORT TO VOLTAGE SUPPLY | | | 1 Ignition switch in position II. | | | 2 Measure the voltage between the dashboard/footwell flap servo motor, connector C533, pin 2, circuit 15S-FB19 (GN/YE), wiring harness side and ground. | | | 3 Measure the voltage between the dashboard/footwell flap servo motor, connector C533, pin 1, circuit 31S-FB20 (BK/BU), wiring harness side and ground. | | | 4 Measure the voltage between the dashboard/footwell flap servo motor, connector C533, pin 3, circuit 31S-FB21 (BK/OG), wiring harness side and ground. | | | 5 Measure the voltage between the dashboard/footwell flap servo motor, connector C533, pin 4, circuit 31S-FB22 (BK/GN), wiring harness side and ground. | | | 6 Measure the voltage between the dashboard/footwell flap servo motor, connector C533, pin 6, circuit 31S-FB23 (BK/RD), wiring harness side and ground. | | | Is a voltage measured during any of these measurements? Yes LOCATE and REPAIR the short to voltage supply in the relevant circuit between the dashboard/footwell flap servo motor and the EATC module using the Wiring Diagrams. CHECK the operation of the system. No | | I3: CHECK THE CIRCUITS BETWEEN THE DASHBOARD/FOOTWELL FLAP SERVO MOTOR AND THE EATC MODULE FOR SHORT TO GROUND | | | 1 Ignition switch in position 0. | | | 2 Measure the resistance between the dashboard/footwell flap servo motor, connector C533, pin 2, circuit 15S-FB19 (GN/YE), wiring harness side and ground. | | | 3 Measure the resistance between the dashboard/footwell flap servo motor, connector C533, pin 1, circuit 31S-FB20 (BK/BU), wiring harness side and ground. | | | 4 Measure the resistance between the dashboard/footwell flap servo motor, connector C533, pin 3, circuit 31S-FB21 (BK/OG), wiring harness side and ground. | | | 5 Measure the resistance between the dashboard/footwell flap servo motor, connector C533, pin 4, circuit 31S-FB22 (BK/GN), wiring harness side and ground. | | | 6 Measure the resistance between the dashboard/footwell flap servo motor, connector C533, pin 6, circuit 31S-FB23 (BK/RD), wiring harness side and ground. | | | Is a resistance of more than 10 kOhms measured in all of the measurements? Yes CHECK the air distribution flap for ease of movement and proper function. If the air distribution flap is mechanically OK, RENEW the dashboard/footwell flap servo motor. CHECK the operation of the system. No LOCATE and REPAIR the short to ground in the relevant circuit between the dashboard/footwell flap servo motor and the EATC module using the Wiring Diagrams. CHECK the operation of the system. | | PINPOINT TEST J : AIR TEMPERATURE FLAP MALFUNCTIONING (VEHICLES WITH EATC SYSTEM ONLY) | | TEST CONDITIONS | DETAILS/RESULTS/ACTIONS | | J1: CHECK FOR OPEN CIRCUIT BETWEEN THE AIR TEMPERATURE FLAP SERVO MOTOR AND THE EATC MODULE | | | 1 Ignition switch in position 0. | | | 2 Disconnect EATC module C539. | | | 3 Disconnect air temperature flap servo motor C534. | | | 4 Measure the resistance between the air temperature flap servo motor, connector C534, pin 2, circuit 15S-FB9 (GN/RD), wiring harness side and the EATC module, connector C539, pin 10, circuit 15S-FB1 (GN/YE), wiring harness side. | | | 5 Measure the resistance between the air temperature flap servo motor, connector C534, pin 1, circuit 31S-FB10 (BK/GN), wiring harness side and the EATC module, connector C539, pin 15, circuit 31S-FB10 (BK/GN), wiring harness side. | | | 6 Measure the resistance between the air temperature flap servo motor, connector C534, pin 3, circuit 31S-FB11 (BK/RD), wiring harness side and the EATC module, connector C539, pin 16, circuit 31S-FB11 (BK/RD), wiring harness side. | | | 7 Measure the resistance between the air temperature flap servo motor, connector C534, pin 4, circuit 31S-FB12 (BK/WH), wiring harness side and the EATC module, connector C539, pin 31, circuit 31S-FB12 (BK/WH), wiring harness side. | | | 8 Measure the resistance between the air temperature flap servo motor, connector C534, pin 6, circuit 31S-FB13 (BK/YE), wiring harness side and the EATC module, connector C539, pin 32, circuit 31S-FB13 (BK/YE), wiring harness side. | | | Is a resistance of less than 2 Ohms measured in all of the cases? Yes No LOCATE and REPAIR the break in the relevant circuit between the air temperature flap servo motor and the EATC module using the Wiring Diagrams. CHECK the operation of the system. | | J2: CHECK THE CIRCUITS BETWEEN THE AIR TEMPERATURE FLAP SERVO MOTOR AND THE EATC MODULE FOR SHORT TO VOLTAGE SUPPLY | | | 1 Ignition switch in position II. | | | 2 Measure the voltage between the air temperature flap servo motor, connector C534, pin 2, circuit 15S-FB9 (GN/RD), wiring harness side and ground. | | | 3 Measure the voltage between the air temperature flap servo motor, connector C534, pin 1, circuit 31S-FB10 (BK/GN), wiring harness side and ground. | | | 4 Measure the voltage between the air temperature flap servo motor, connector C534, pin 3, circuit 31S-FB11 (BK/RD), wiring harness side and ground. | | | 5 Measure the voltage between the air temperature flap servo motor, connector C534, pin 4, circuit 31S-FB12 (BK/WH), wiring harness side and ground. | | | 6 Measure the voltage between the air temperature flap servo motor, connector C534, pin 6, circuit 31S-FB13 (BK/YE), wiring harness side and ground. | | | Is a voltage measured during any of these measurements? Yes LOCATE and REPAIR the short to voltage supply in the relevant circuit between the air temperature flap servo motor and the EATC module using the Wiring Diagrams. CHECK the operation of the system. No | | J3: CHECK THE CIRCUITS BETWEEN THE AIR TEMPERATURE FLAP SERVO MOTOR AND THE EATC MODULE FOR SHORT TO GROUND | | | 1 Ignition switch in position 0. | | | 2 Measure the resistance between the air temperature flap servo motor, connector C534, pin 2, circuit 15S-FB9 (GN/RD), wiring harness side and ground. | | | 3 Measure the resistance between the air temperature flap servo motor, connector C534, pin 1, circuit 31S-FB10 (BK/GN), wiring harness side and ground. | | | 4 Measure the resistance between the air temperature flap servo motor, connector C534, pin 3, circuit 31S-FB11 (BK/RD), wiring harness side and ground. | | | 5 Measure the resistance between the air temperature flap servo motor, connector C534, pin 4, circuit 31S-FB12 (BK/WH), wiring harness side and ground. | | | 6 Measure the resistance between the air temperature flap servo motor, connector C534, pin 6, circuit 31S-FB13 (BK/YE), wiring harness side and ground. | | | Is a resistance of more than 10 kOhms measured in all of the measurements? Yes CHECK the air temperature flap for ease of movement and proper function. If the air temperature flap is mechanically OK, RENEW the air temperature flap servo motor. CHECK the operation of the system. No LOCATE and REPAIR the short to ground in the relevant circuit between the air temperature flap servo motor and the EATC module using the Wiring Diagrams. CHECK the operation of the system. | | PINPOINT TEST K : FAULT IN THE CIRCUIT OF THE FOOTWELL OUTLET TEMPERATURE SENSOR (VEHICLES WITH EATC SYSTEM ONLY) | | TEST CONDITIONS | DETAILS/RESULTS/ACTIONS | | K1: CHECK FOR OPEN CIRCUIT BETWEEN THE FOOTWELL OUTLET TEMPERATURE SENSOR AND THE EATC MODULE | | | 1 Ignition switch in position 0. | | | 2 Disconnect EATC module C539. | | | 3 Disconnect footwell outlet temperature sensor C536. | | | 4 Measure the resistance between the footwell outlet temperature sensor, connector C536, pin 1, circuit 8-FA51 (WH/BK), wiring harness side and the EATC module connector C539, pin 8, circuit 8-FA51 (WH/BK), wiring harness side. | | | 5 Measure the resistance between the footwell outlet temperature sensor, connector C536, pin 2, circuit 9-FA51 (BN/YE), wiring harness side and the EATC module connector C539, pin 7, circuit 9-FA3 (BN/RD), wiring harness side. | | | Is a resistance of less than 2 Ohms measured in both cases? Yes No LOCATE and REPAIR the break in the relevant circuit between the footwell outlet temperature sensor and the EATC module using the Wiring Diagrams. CHECK the operation of the system. | | K2: CHECK THE CIRCUIT BETWEEN THE FOOTWELL OUTLET TEMPERATURE SENSOR AND THE EATC MODULE FOR SHORT TO VOLTAGE SUPPLY | | | 1 Ignition switch in position II. | | | 2 Measure the voltage between the footwell outlet temperature sensor, connector C536, pin 1, circuit 8-FA51 (WH/BK), wiring harness side and ground. | | | 3 Measure the voltage between the footwell outlet temperature sensor, connector C536, pin 2, circuit 9-FA51 (BN/YE), wiring harness side and ground. | | | Is a voltage measured during any of these measurements? Yes LOCATE and REPAIR the short to voltage supply in the relevant circuit between the footwell outlet temperature sensor and the EATC module using the Wiring Diagrams. CHECK the operation of the system. No | | K3: CHECK THE CIRCUIT BETWEEN THE FOOTWELL OUTLET TEMPERATURE SENSOR AND THE EATC MODULE FOR SHORT TO GROUND | | | 1 Ignition switch in position 0. | | | 2 Measure the resistance between the footwell outlet temperature sensor, connector C536, pin 1, circuit 8-FA51 (WH/BK), wiring harness side and ground. | | | 3 Measure the resistance between the footwell outlet temperature sensor, connector C536, pin 2, circuit 9-FA51 (BN/YE), wiring harness side and ground. | | | Is a resistance greater than 10 kOhm measured in both cases? Yes RENEW the footwell outlet temperature sensor. CHECK the operation of the system. No LOCATE and REPAIR the short to ground in the relevant circuit between the footwell outlet temperature sensor and the EATC module using the Wiring Diagrams. CHECK the operation of the system. | | PINPOINT TEST L : FAULT IN THE CIRCUIT OF THE DASHBOARD OUTLET TEMPERATURE SENSOR (VEHICLES WITH EATC SYSTEM ONLY) | | TEST CONDITIONS | DETAILS/RESULTS/ACTIONS | | L1: CHECK FOR OPEN CIRCUIT BETWEEN THE DASHBOARD OUTLET TEMPERATURE SENSOR AND THE EATC MODULE | | | 1 Ignition switch in position 0. | | | 2 Disconnect EATC module C539. | | | 3 Disconnect dashboard outlet temperature sensor C535. | | | 4 Measure the resistance between the dashboard outlet temperature sensor, connector C535, pin 1, circuit 8-FA47 (WH/GN), wiring harness side and the EATC module connector C539, pin 9, circuit 8-FA47 (WH/GN), wiring harness side. | | | 5 Measure the resistance between the dashboard outlet temperature sensor, connector C535, pin 2, circuit 9-FA47 (BN/GN), wiring harness side and the EATC module connector C539, pin 7, circuit 9-FA3 (BN/RD), wiring harness side. | | | Is a resistance of less than 2 Ohms measured in both cases? Yes No LOCATE and REPAIR the break in the relevant circuit between the dashboard outlet temperature sensor and the EATC module using the Wiring Diagrams. CHECK the operation of the system. | | L2: CHECK THE CIRCUIT BETWEEN THE DASHBOARD OUTLET TEMPERATURE SENSOR AND THE EATC MODULE FOR SHORT TO VOLTAGE SUPPLY | | | 1 Ignition switch in position II. | | | 2 Measure the voltage between the dashboard outlet temperature sensor, connector C535, pin 1, circuit 8-FA47 (WH/GN), wiring harness side and ground. | | | 3 Measure the voltage between the dashboard outlet temperature sensor, connector C535, pin 2, circuit 9-FA47 (BN/GN), wiring harness side and ground. | | | Is a voltage measured during any of these measurements? Yes LOCATE and REPAIR the short to voltage supply in the relevant circuit between the dashboard outlet temperature sensor and the EATC module using the Wiring Diagrams. CHECK the operation of the system. No | | L3: CHECK THE CIRCUIT BETWEEN THE DASHBOARD OUTLET TEMPERATURE SENSOR AND THE EATC MODULE FOR SHORT TO GROUND | | | 1 Ignition switch in position 0. | | | 2 Measure the resistance between the dashboard outlet temperature sensor, connector C535, pin 1, circuit 8-FA47 (WH/GN), wiring harness side and ground. | | | 3 Measure the resistance between the dashboard outlet temperature sensor, connector C535, pin 2, circuit 9-FA47 (BN/GN), wiring harness side and ground. | | | Is a resistance greater than 10 kOhm measured in both cases? Yes RENEW the dashboard outlet temperature sensor. CHECK the operation of the system. No LOCATE and REPAIR the short to ground in the relevant circuit between the dashboard outlet temperature sensor and the EATC module using the Wiring Diagrams. CHECK the operation of the system. | | PINPOINT TEST M : FAULT IN THE CIRCUIT OF THE SUN LOAD SENSOR (VEHICLES WITH EATC SYSTEM ONLY) | | TEST CONDITIONS | DETAILS/RESULTS/ACTIONS | | M1: CHECK FOR OPEN CIRCUIT BETWEEN THE SUN LOAD SENSOR AND THE EATC MODULE | | | 1 Ignition switch in position 0. | | | 2 Disconnect EATC module C539. | | | 3 Disconnect trip computer module C467. | | | 4 Disconnect sun load sensor C531. | | | 5 Measure the resistance between the sun load sensor, connector C531, pin 1, circuit 8-FA53 (WH/BU), wiring harness side and the EATC module, connector C539, pin 24, circuit 8-FA53 (WH/BU), wiring harness side. | | | 6 Measure the resistance between the sun load sensor, connector C531, pin 2, circuit 9-FA53 (BN/BU), wiring harness side and the EATC module, connector C539, pin 19, circuit 9-FA1 (BN/RD), wiring harness side. | | | Is a resistance of less than 2 Ohms measured in both cases? Yes No LOCATE and REPAIR the break in the relevant circuit between the sun load sensor and the EATC module using the Wiring Diagrams. CHECK the operation of the system. | | M2: CHECK THE CIRCUIT BETWEEN THE SUN LOAD SENSOR AND THE EATC MODULE FOR SHORT TO VOLTAGE SUPPLY | | | 1 Ignition switch in position II. | | | 2 Measure the voltage between the sun load sensor, connector C531, pin 1, circuit 8-FA53 (WH/BU), wiring harness side and ground. | | | 3 Measure the voltage between the sun load sensor, connector C531, pin 2, circuit 9-FA53 (BN/BU), wiring harness side and ground. | | | Is a voltage measured during any of these measurements? Yes LOCATE and REPAIR the short to voltage supply in the affected circuit between the sun load sensor and the EATC module using the Wiring Diagrams. CHECK the operation of the system. No | | M3: CHECK THE CIRCUIT BETWEEN THE SUN LOAD SENSOR AND THE EATC MODULE FOR SHORT TO GROUND | | | 1 Ignition switch in position 0. | | | 2 Measure the resistance between the sun load sensor, connector C531, pin 1, circuit 8-FA53 (WH/BU), wiring harness side and ground. | | | 3 Measure the resistance between the sun load sensor, connector C531, pin 2, circuit 9-FA53 (BN/BU), wiring harness side and ground. | | | Is a resistance greater than 10 kOhm measured in both cases? Yes RENEW the sun load sensor. CHECK the operation of the system. No LOCATE and REPAIR the short to ground in the affected circuit between the sun load sensor and the EATC module using the Wiring Diagrams. CHECK the operation of the system. | | PINPOINT TEST N : FAULT IN THE CIRCUIT BETWEEN EATC MODULE AND TRIP COMPUTER MODULE (VEHICLES WITHOUT DURATEC-ST ENGINE ONLY) | | TEST CONDITIONS | DETAILS/RESULTS/ACTIONS | | N1: CHECK FOR OPEN CIRCUIT BETWEEN THE TRIP COMPUTER MODULE AND THE EATC MODULE | | | 1 Ignition switch in position 0. | | | 2 Disconnect EATC module C539. | | | 3 Disconnect trip computer module C467. | | | 4 Measure the resistance between the trip computer module, connector C467, pin 8, circuit 9-FA48 (BN/GN), wiring harness side and the EATC module, connector C539, pin 19, circuit 9-FA1 (BN/RD), wiring harness side. | | | 5 Measure the resistance between the trip computer module, connector C467, pin 9, circuit 8-FA48 (WH/GN), wiring harness side and the EATC module, connector C539, pin 18, circuit 8-FA48 (WH/GN), wiring harness side. | | | Is a resistance of less than 2 Ohms measured in both cases? Yes No LOCATE and REPAIR the break in the relevant circuit between the trip computer module and the EATC module using the Wiring Diagrams. CHECK the operation of the system. | | N2: CHECK THE CIRCUIT BETWEEN THE TRIP COMPUTER MODULE AND THE EATC MODULE FOR SHORT TO VOLTAGE SUPPLY | | | 1 Ignition switch in position II. | | | 2 Measure the voltage between the trip computer module, connector C467, pin 8, circuit 9-FA48 (BN/GN), wiring harness side and ground. | | | 3 Measure the voltage between the trip computer module, connector C467, pin 9, circuit 8-FA48 (WH/GN), wiring harness side and ground. | | | Is a voltage measured during any of these measurements? Yes LOCATE and REPAIR the short to voltage supply in the relevant circuit between the trip computer module and the EATC module using the Wiring Diagrams. CHECK the operation of the system. No | | N3: CHECK THE CIRCUIT BETWEEN THE TRIP COMPUTER MODULE AND THE EATC MODULE FOR SHORT TO GROUND | | | 1 Ignition switch in position 0. | | | 2 Measure the resistance between the trip computer module, connector C467, pin 8, circuit 9-FA48 (BN/GN), wiring harness side and ground. | | | 3 Measure the resistance between the trip computer module, connector C467, pin 9, circuit 8-FA48 (WH/GN), wiring harness side and ground. | | | Is a resistance greater than 10 kOhm measured in both cases? Yes CHECK trip computer module and RENEW if necessary. CHECK the operation of the system. No LOCATE and REPAIR the short to ground in the relevant circuit between the trip computer module and the EATC module using the Wiring Diagrams. CHECK the operation of the system. | |