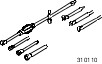
| Removal and Installation Special Tool(s) | | Hand Pressure Pump with Adaptor Kit 310-110 | General Equipment WARNING:Do not smoke or carry lighted tobacco or open flame of any type when working on or near any fuel related components. Highly flammable mixtures are always present and may ignite. Failure to follow these instructions may result in personal injury. WARNING:This procedure involves fuel handling. Be prepared for fuel spillage at all times and always observe fuel handling precautions. Failure to follow these instructions may result in personal injury. CAUTION:Diesel fuel injection equipment is manufactured to very precise tolerances and fine clearances. It is therefore essential that absolute cleanliness is observed when working with these components. Always install blanking plugs to any open orifices or lines. CAUTION:Always carry out the cleaning process before carrying out any repairs to the fuel injection system components to prevent foreign matter ingress to the components. | | -
Remove the engine upper cover. | 3. Remove the components in the order indicated in the following illustration(s) and table(s). 1 - Fuel filter heater electrical connector 3 - Fuel filter crash protection shield 4. To install, reverse the removal procedure. NOTE:Do not install the engine upper cover at this stage. | | -
Remove and discard the fuel filter and fuel filter supply line blanking plugs. | | | -
NOTE:Make sure the hand pressure pump arrow indicating the direction of fuel flow is pointing towards the fuel filter. Install the special tool between the fuel filter fuel supply line quick release coupling and the fuel filter union. | | | -
Operate the hand pressure pump at least 30 times. | | | -
Remove the lint-free material. | | | -
CAUTION:Do not operate the starter motor for longer than 10 seconds at a time. After 10 seconds, turn the ignition to position 0 and allow the starter motor to cool for 30 seconds before attempting to start the engine again. Start the engine and allow to idle until it reaches normal operating temperature. | | | -
Protect the generator with lint-free material to prevent contamination. | | | -
Remove the hand pressure pump. | | | -
Remove the lint-free material. | | | -
Install the engine upper cover. | Removal Details Item 2 : Engine wiring harness retaining clip | | -
Detach the engine harness retaining clip from the fuel filter. | Item 5 : Fuel pump fuel return line retaining clip | | -
Detach the fuel pump fuel return pipe from the fuel line retaining clip. | Item 6 : Fuel filter fuel supply line quick release coupling
Item 7 : Fuel filter to fuel pump fuel supply line quick release coupling CAUTION:The generator must be protected from contamination. Failure to follow this instruction may cause premature failure of the generator. | | -
Protect the generator with lint-free material to prevent contamination. | | | -
Using a suitable length of fuel resistant tube, drain the fuel filter into a suitable container. | | | -
Install new blanking plugs to the open unions of the fuel filter and fuel supply lines. | Item 8 : Fuel filter Installation Details Item 7 : Fuel filter to fuel pump fuel supply line quick release coupling | | -
Remove and discard the blanking plug. | Item 6 : Fuel filter fuel supply line quick release coupling | | -
Do not connect the fuel filter fuel supply line at this stage. | Item 4 : Fuel filter splash shield NOTE:Do not trap the lint-free material with the fuel filter splash shield. |