
Fusion FWD L4-2.5L Hybrid (2010)
3. Remove the RH rear seat bolster. For additional information, refer to Seats.
4. Disconnect the cooling fan jumper harness electrical connector, then remove the wiring connector pushpin from the HVTB handle bracket.
5. Remove the HVTB cooling inlet duct. For additional information, refer to High-Voltage Traction Battery Cooling Inlet Duct See: Battery Cooling
Fan/Battery Cooling Duct/Service and Repair/High-Voltage Traction Battery Cooling Inlet Duct.
6. Disconnect the 50-pin connector at the Battery Energy Control Module (BECM).
7. Remove the ground strap-to-chassis bolt and position the ground strap aside.
-
To install, tighten to 12 Nm (106 lb-in).
8. Remove the 2 plastic bumpers from the back of the rear seat back by releasing the 2 pushpins.
9. NOTE: The attaching bolts have a conductive coating on them and are serrated under the head flange. These features ground the HVTB to the
vehicle, which is required for electro-magnetic compatibility. If a bolt(s) is lost or damaged, a new identical bolt(s) must be installed.
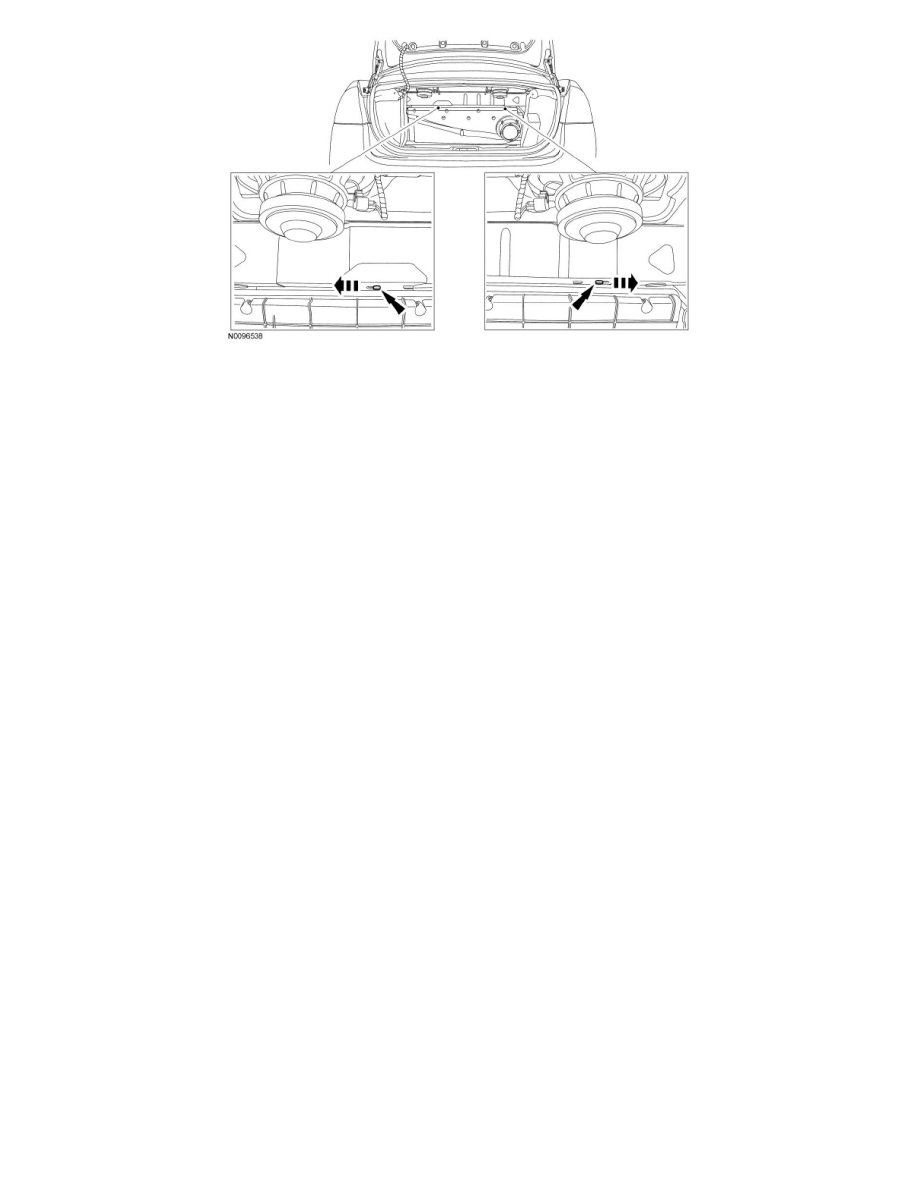
Remove the 4 HVTB mounting bolts from the trunk area that secure the HVTB to the brackets.
-
To install, tighten to 20 Nm (177 lb-in).
10. NOTE: The attaching bolts have a conductive coating on them and are serrated under the head flange. These features ground the HVTB to the
vehicle, which is required for electro-magnetic compatibility. If a bolt(s) is lost or damaged, a new identical bolt(s) must be installed.
From each rear door opening, remove the 2 HVTB mounting bolts (total of 4 bolts) that secure the HVTB to the brackets.
-
To install, tighten to 20 Nm (177 lb-in).
11. NOTICE: Lay a fender cover or other protective material over the seat backs to reduce the possibility of damage when removing the
battery.
NOTICE: Make certain the High Voltage Traction Battery (HVTB) does not mar or damage the interior panels or seating during
removal. There is very little clearance on each side.
With the help of an assistant inside the vehicle, grasp the handles on each side of the battery and slide the battery forward and out of the vehicle.
12. To install, reverse the removal procedure.