| Removal and Installation Removal WARNING:To avoid accidental deployment, the air bag control module backup power supply must be depleted. Wait at least one minute after disconnecting the battery ground cable(s) before commencing any repair or adjustment to the supplemental restraint system (SRS), or any component(s) adjacent to the SRS sensors. Failure to follow these instructions may result in personal injury. WARNING:Always wear safety glasses when working on an air bag equipped vehicle and when handling an air bag module. Failure to follow this instruction may result in personal injury. WARNING:To minimize the possibility of premature deployment, do not use radio key code savers when working on the supplemental restraint system. Failure to follow this instruction may result in personal injury. WARNING:To minimize the possibility of injury in the event of premature deployment, always carry a live air bag module with the bag and trim cover pointed away from the body. Failure to follow this instruction may result in personal injury. WARNING:To minimize the possibility of premature deployment, live air bag modules must only be placed on work benches which have been ground bonded and with the trim cover facing up. Failure to follow these instructions may result in personal injury. WARNING:Never probe the electrical connectors of air bag modules or any other supplemental restraint system component. Failure to follow this instruction may result in personal injury. All vehicles | | -
Detach the front and rear door opening weatherstrips from around the upper part of the door openings. | | | -
Detach the headliner wiring harness from the left-hand A-pillar or the rear window washer tube from the right-hand A-pillar as necessary (left-hand A-pillar shown). | | | -
Lever open the covers to expose the screws and remove the passenger assist handles. | | | -
Move the front safety belt shoulder height adjuster to its lowest position. | | | -
Detach the B-pillar upper trim panel from the B-pillar and position it to one side. - Detach the locating tangs from the B-pillar lower trim panel.
- Remove the screw cover.
- Remove the screw.
| | | -
Lever open the cover to expose the screw and remove the sun visor retaining clip. | | | -
Detach the rear interior lamp from the headliner (if equipped). | | | -
Disconnect the electrical connectors and remove the rear interior lamp (if equipped). | | | -
Pull down on the rear interior lamp opening to detach the headliner spacer adhesive fixing from the roof panel. | Vehicles with roof opening panel | | -
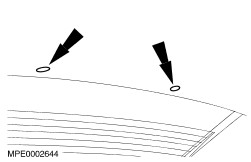
Remove the roof opening panel weatherstrip. | All vehicles | | -
Detach the liftgate opening weatherstrip from the D-pillar. | | | -
Remove the D-pillar trim panel retaining screw and remove the D-pillar trim panel. - Detach the D-pillar trim panel retaining clips and disconnect the rear window washer tube from the right-hand D-pillar trim panel as necessary.
| | | -
Remove the load space upper trim panel. - Remove the load space upper trim panel retaining screws.
| | | -
CAUTION:The bolt securing the safety belt anchor is held captive by a paper washer. The bolt, spacer and paper washer must remain on the safety belt anchor at all times when the safety belt is detached or removed. Detach the safety belt upper anchor from the C-pillar. - Detach the bolt cover.
- Remove the bolt.
| | | -
Remove the C-pillar trim panel. | | | -
Remove the headliner retaining clips. | | | -
Lower the headliner and rest it on the front seat backrest head restraint. | | | -
Disconnect the side air curtain module electrical connector. | | | -
NOTE:Note the routing of the retaining cord to aid installation. Remove the side air curtain module rear retaining bolts. | | | -
NOTE:Note the routing of the retaining cord to aid installation. Remove the side air curtain module front retaining bolt (headliner shown removed for clarity). | | | -
NOTE:Note the position of the locating tangs to aid installation. Remove the side air curtain module (headliner shown removed for clarity). | Installation WARNING:Always wear safety glasses when working on an air bag equipped vehicle and when handling an air bag module. Failure to follow this instruction may result in personal injury. WARNING:To minimize the possibility of injury in the event of premature deployment, always carry a live air bag module with the bag and trim cover pointed away from the body. Failure to follow this instruction may result in personal injury. WARNING:To minimize the possibility of premature deployment, live air bag modules must only be placed on work benches which have been ground bonded and with the trim cover facing up. Failure to follow these instructions may result in personal injury. WARNING:Never probe the electrical connectors of air bag modules or any other supplemental restraint system component. Failure to follow this instruction may result in personal injury. NOTE:Make sure the front safety belt shoulder height adjuster locking control is correctly located on the safety belt shoulder height adjuster | | -
To install, reverse the removal procedure. | |