
Tempo L4-122 2.0L DSL (1984)
voltages exist.
NOTE:
All voltage checks MUST be performed under these conditions:
*
Engine running.
*
Headlamps on.
*
A/C set to Maximum with blower on high.
*
Wait five (5) minutes.
a.
No Voltage - Disconnect wire connector from clutch cycling pressure switch at top of accumulator/drier. Connect a jumper wire across harness
connector contacts and recheck for voltage at field coil. If there is still no voltage, remove jumper wire and reconnect harness connector to cycling
pressure switch. Refer to the appropriate Electrical Vacuum Troubleshooting Manual (EVTM) for compressor clutch circuit and cooling fan
controller diagnosis.
b.
Voltage OK (Above 10.5 Volts) - Check clutch air gap using the appropriate Car Shop Manual, Section 36-39-4, Steps 6 and 7.
NOTE:
Compressor and engine must be cooled down prior to check by hand.
If air gap is set correctly, make sure compressor will turn easily by hand. If compressor does not turn easily, replace compressor using the
instructions in the appropriate Car Shop Manual, Section 36-47-37.
c.
Low Voltage (10.5 Volts or Less) - Install a clutch coil jumper assembly and relay using the following procedure.
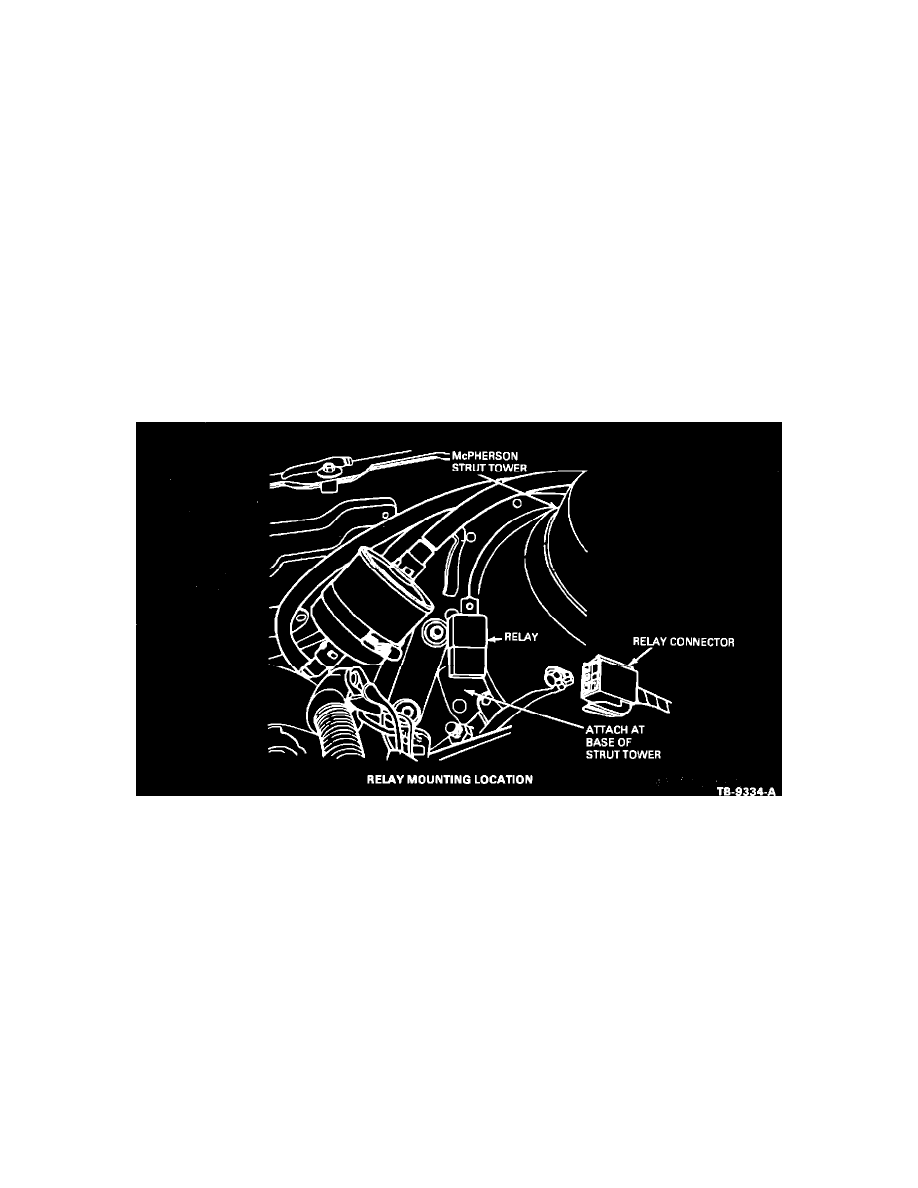
Figure 24
Clutch Coil Jumper Assembly and Relay
Installation - 1984 Models Only
1.
Drill a 1/8 inch hole in right front splash shield near base of strut tower, Figure 24. Install relay (E3TZ-9345-A) with a suitable screw.
NOTE:
Relay connector should be positioned facing inboard.