
K 2500 Truck 4WD V8-379 6.2L DSL VIN C FI (1989)
7.
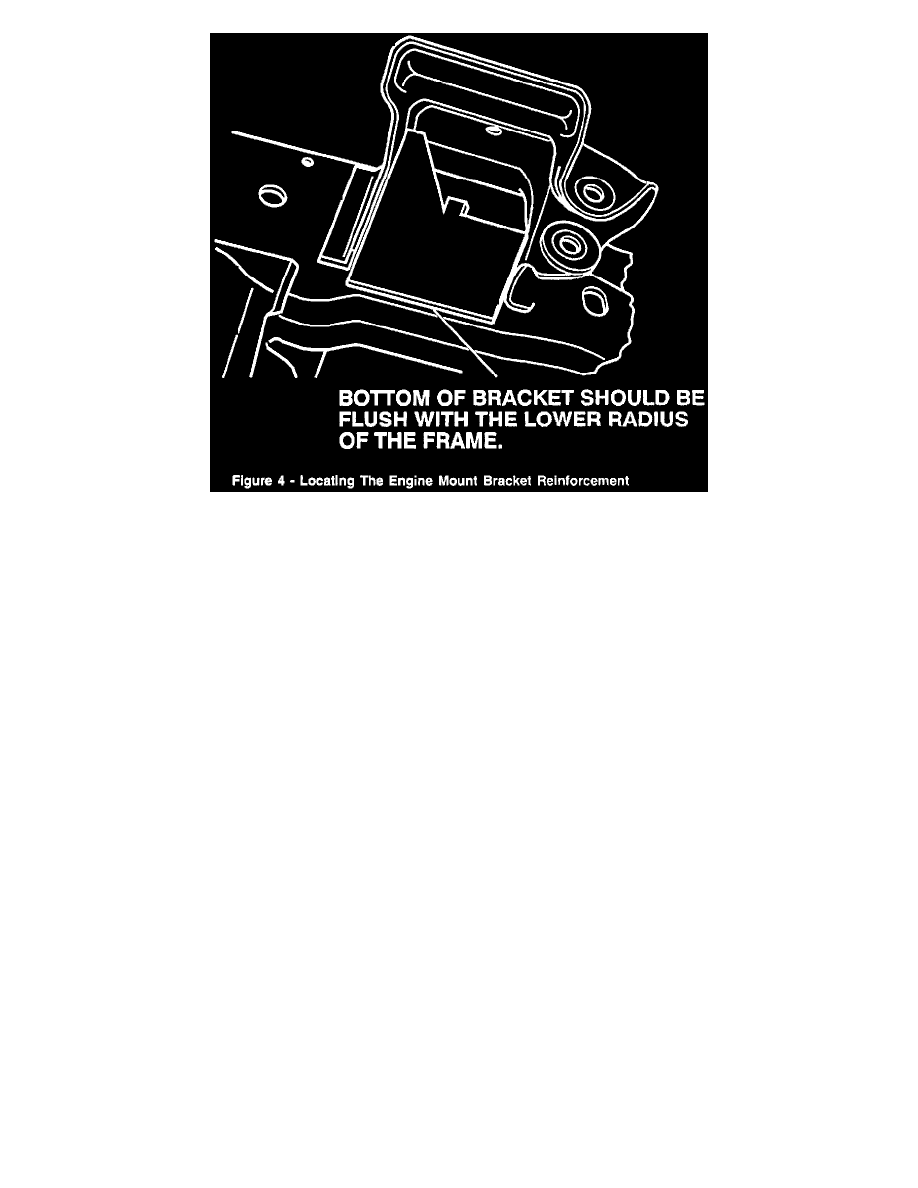
The width of the cardboard or plastic template will need to be adjusted so that it fits between the engine mount bracket legs as shown in Figure 4.
Adjust the width of the template as necessary so that it fits flush between the engine mount bracket legs.
8.
Once the width of the cardboard or plastic template is adjusted to the appropriate size, cut a piece of 4.5 mm (0.18 in.) thick, SAE 1008-1010 mild
steel using the template as a guide. Bend the upper finger of the reinforcement so that it resembles the bend shown in Figure 2.
9.
Clean the engine mount bracket thoroughly in preparation for welding.
10.
Place the reinforcement into the position as shown in Figure 4. Using c-clamps, or vise grips, clamp the bracket into position. It should be noted
that it is very important that the bottom of the reinforcement be flush with the lower radius of the frame rail (Figure 4).
11.
Weld the bracket reinforcement in the positions shown in Figure 2.
12.
Reinstall the differential carrier assembly following the procedure in Section 4C of the appropriate service manual.
Service Procedure - Right Engine Mount Bracket:
1.
Disconnect the negative battery cable.
2.
Raise the vehicle and support with suitable safety stands, 3. Disconnect the right half shaft from the differential carrier following the procedure in
the service manual. Move the half shaft out of the way in order to provide adequate working space at the engine mount bracket.
4.
Clean the engine mount bracket area with a wire brush in order to determine the full extent of the cracks. Following Section 2A of the Service
Manual, repair the cracks around the engine mount.
5.
Grind the welds created in step 4 so the welds are flush with the frame.