
K 2500 Truck 4WD V8-379 6.2L DSL VIN C FI (1989)
Install or Connect
Tools Required:
J 37795 Bearing Remover & Installer/Pulley Installer
J 29886 Driver Handle
J 27796 Shaft Protector
J 37791 Clutch Front Plate Spinner
1. Field coil and snap ring retainer
^
The coil flange protrusions must match the hole in the front housing to prevent coil movement and to correctly place the lead wire.
2. Coil wire to clip.
^
Clamp the compressor in a vise by the mounting ears or support the compressor on the four mounting ears at the rear of the compressor.
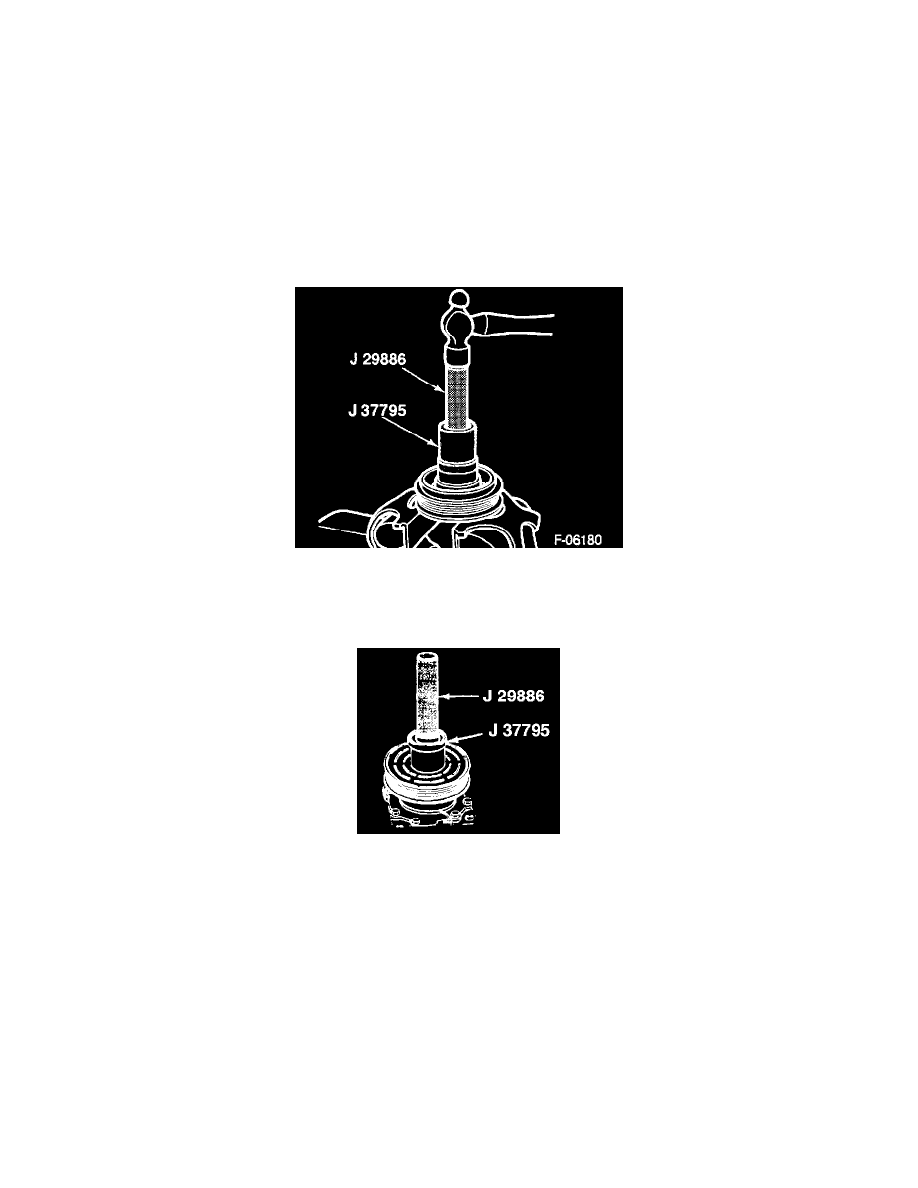
Installing The Rotor Bearing
3. Bearing to the rotor with J 37795 and J 29886.
4. Snap ring to the rotor.
5. Rotor pulley (5) to the front housing hub and align.
^
Place J 37795 into bearing cavity with the outer edge of the rotor bearing outer race.
^
Place J 29886 into the ring.
^
Use a hammer to tap the end of J 29886 to guide the rotor until it bottoms out against the compressor front hub. Listen for a distinct change of
sound during the tapping process.
6. Internal bearing snap ring.
7. Shaft key (27).
8. Front plate assembly.
^
Align the front plate keyway to the compressor shaft key.
9. J 37796 to the compressor shaft.
^
Tap the front plate to the shaft until the plate bottome to the clutch shims.
10. Shaft hex nut.
^
Hold the plate with J 37791.
Tighten
^
Nut to 36 N.m (27 ft.lbs.).
^
Check the air gap with a feeler gauge. It should be 0.49 to 0.79 mm (0.016 to 0.031 inch). If the gap is not consistent all around, pry up