
K 2500 Truck 4WD V8-379 6.2L DSL VIN C FI (1989)
Use the octagon sockets on the straight fittings (J 39037 high side, and J 41256 low side). Torque the new fitting until it seats. The fitting should
seat fully BEFORE reaching 11 N.m (8 lb ft). If 11 N.m (8 lb ft) of torque is reached and the fitting has not seated, it is probable that the threads
have been damaged. In this case, remove the fitting and use the thread restorer listed above. Reinstall the fitting, adding one drop of a thread
locking compound such as Loctite(R) 242.
The fittings (except the two-piece) have a thread locking compound applied to the threads. This compound will set up enough to restrict removal
of the fitting in about 15 minutes. The fittings can now be used to evacuate the system (see Step 5).
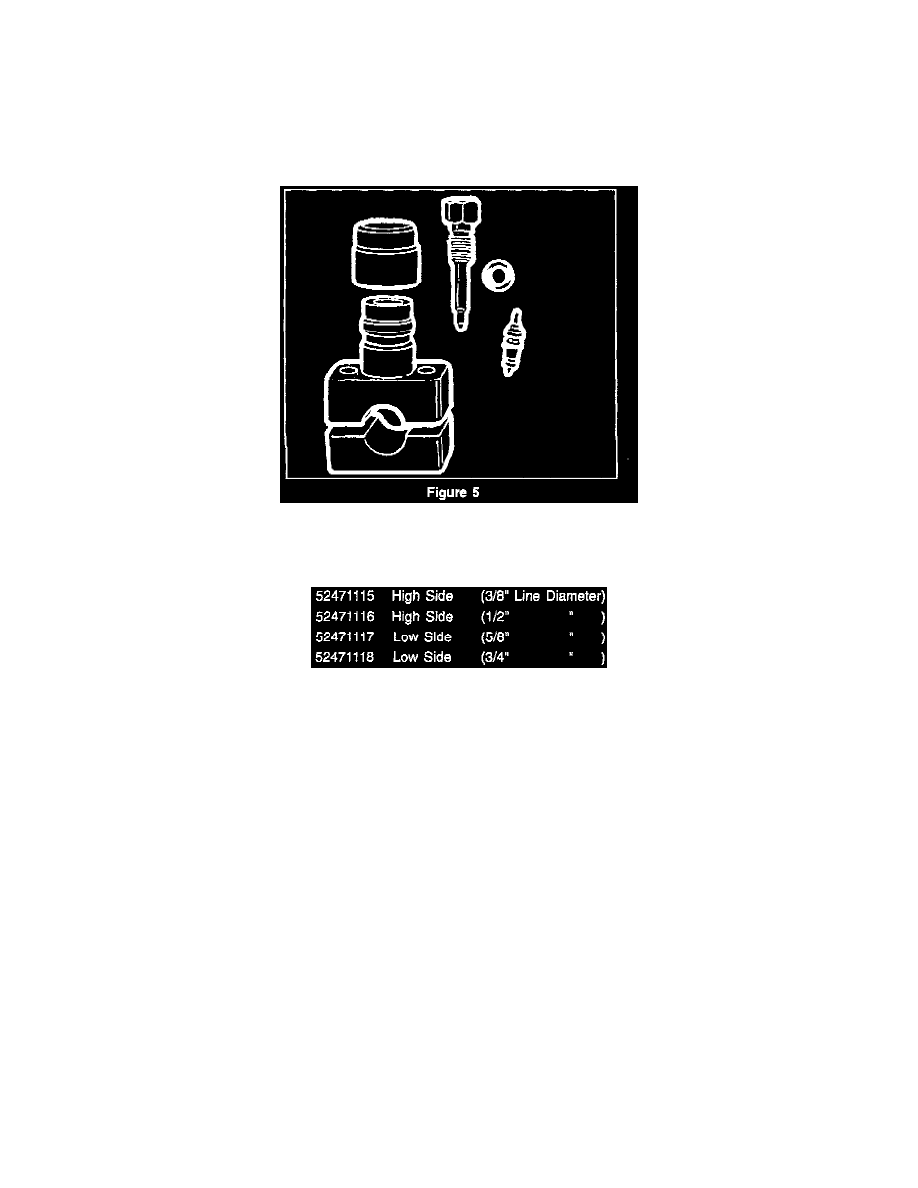
An additional type of conversion port fitting has been developed. This fitting is called a saddle clamp valve (see Figure 5). It can be clamped
directly on a metal refrigerant line, and will be used if the existing fitting is damaged or is inaccessible. A drop of a thread locking compound, such
as Loctite(R) 242, should be used on each bolt to prevent the threads from loosening.
The R134a saddle clamp valve part numbers are:
If an existing R-12 service port is not used, it must be rendered inoperative. Place several drops of a thread locking compound, such as Loctite(R)
243, in the valve core, and onto the cap threads. Secure the cap and let it set for 15 minutes.
4.
Install Any Additional Parts Needed
See "Platform Details" after Step 6. If a vehicle is listed as a "Basic Retrofit", no additional parts are required (except for compressors, see the
Compressor Replacement Chart at the beginning of Platform Details). If no parts are required, PROCEED TO STEP 5.
Compressors
Compressors do not need to be replaced as part of a normal retrofit, unless indicated in the Compressor Replacement Chart. An R-12 compressor that is
operating properly can, in most cases, be left in the vehicle when it is retrofitted to R134a. However, if a compressor failure is the reason the vehicle is in
for service, and the vehicle will be retrofitted, OR if a vehicle has already been retrofitted with R-134a and the compressor fails at some time in the
future, new compressors for use with R-134a are available. See the GMSPO Parts Catalog for specific part numbers. DO NOT use a replacement R-12
compressor for any vehicle retrofitted to R-134a (unless it is the new "oil-less" design). See "Compressor Availability" at the end of the Compressor
Replacement Chart.
Accumulator /Dryer
If the vehicle is more than 5 years old, the Accumulator/Dryer (A/D) should be replaced to ensure that moisture is removed from the system. See the
instructions for proper A/D identification in General Information.
High Pressure Cut-Off Switch (HPCOS)
Most trucks, and some 1984-93 B and D cars, require that a HPCOS be added to protect the refrigerant system during long idles at high temperature. The
HPCOS kit (P/N 15981985) contains the switch, wire harness, heat sealing splice connectors, switch "0" ring, and installation instructions. A saddle
clamp adapter (P/N 15985307), or a special dual fitting, is mounted to the high pressure line, and provides the port to mount the switch. A drop of a