
S15/T15 Jimmy 2WD L4-119 1.9L VIN A 2-BBL (1983)
Ball Joint: Service and Repair
Upper
4 X 2 MODELS
1.
Raise vehicle and support at lower control arm with suitable jacks. Jack must be positioned between coil spring seat and ball joint of lower
control arm to obtain maximum leverage against coil spring pressure.
2.
Remove wheel, then remove cotter pin and stud nut from ball joint.
3.
Break stud loose from steering knuckle using tool J-23742, or equivalent. Support knuckle assembly to avoid damaging brake line.
4.
With control arm in raised position, drill rivets 1/4 inch deep with a 1/8 inch drill, then drill off rivet heads with a 1/2 inch drill.
5.
Punch out rivets, then remove ball joint.
6.
Reverse procedure to install. Replace rivets with attaching bolts and nuts. Torque attaching nuts to 8 ft. lbs. and the stud nut to 65 ft. lbs.
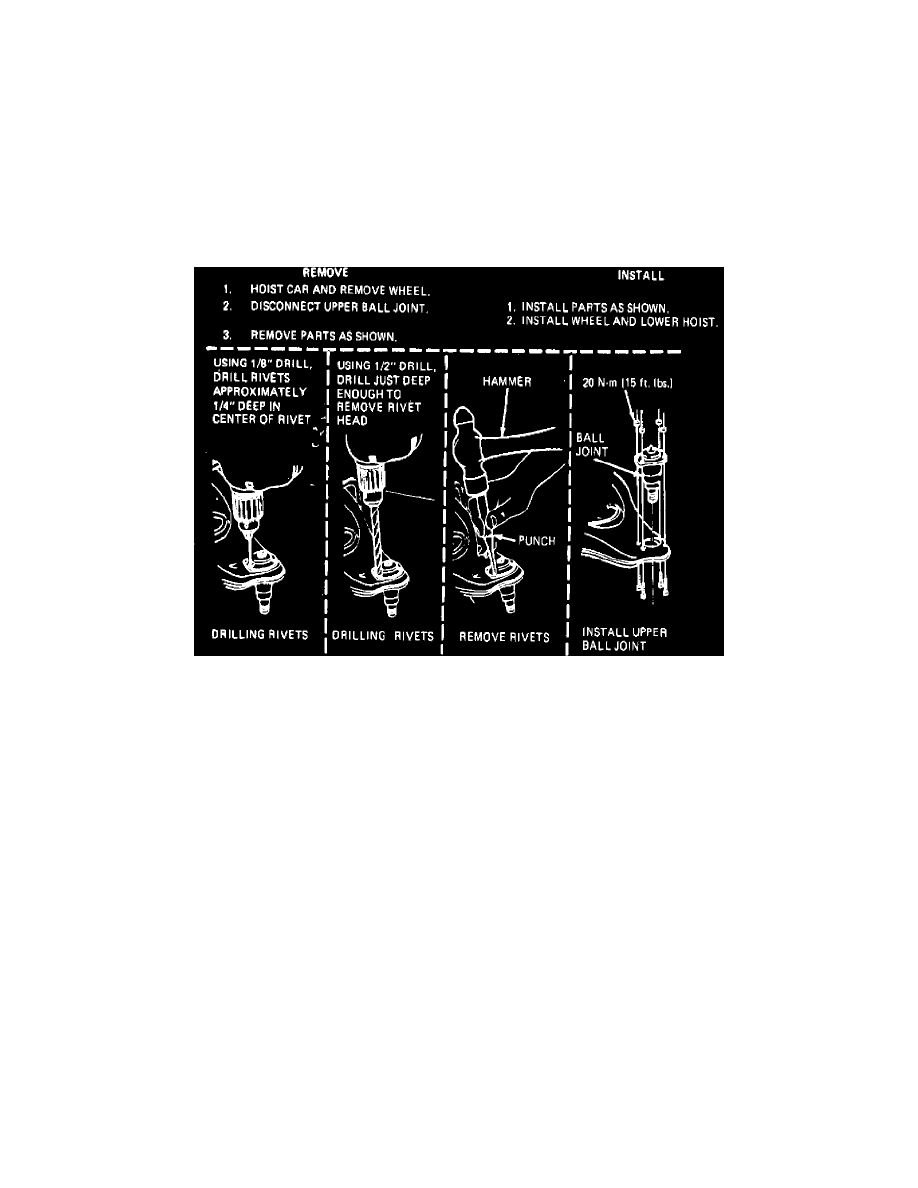
Fig. 16 Ball joint replacement. 4 x 4 models
4 X 4 MODELS
Refer to Fig. 16 for upper ball joint replacement procedure on 4 x 4 vehicles.