
Savana 3500 V8-4.8L (2009)
1. Install auxiliary air conditioning evaporator & heater tube assembly
Caution: Refer to Fastener Caution (See: Service Precautions/Vehicle Damage Warnings/Fastener Caution).
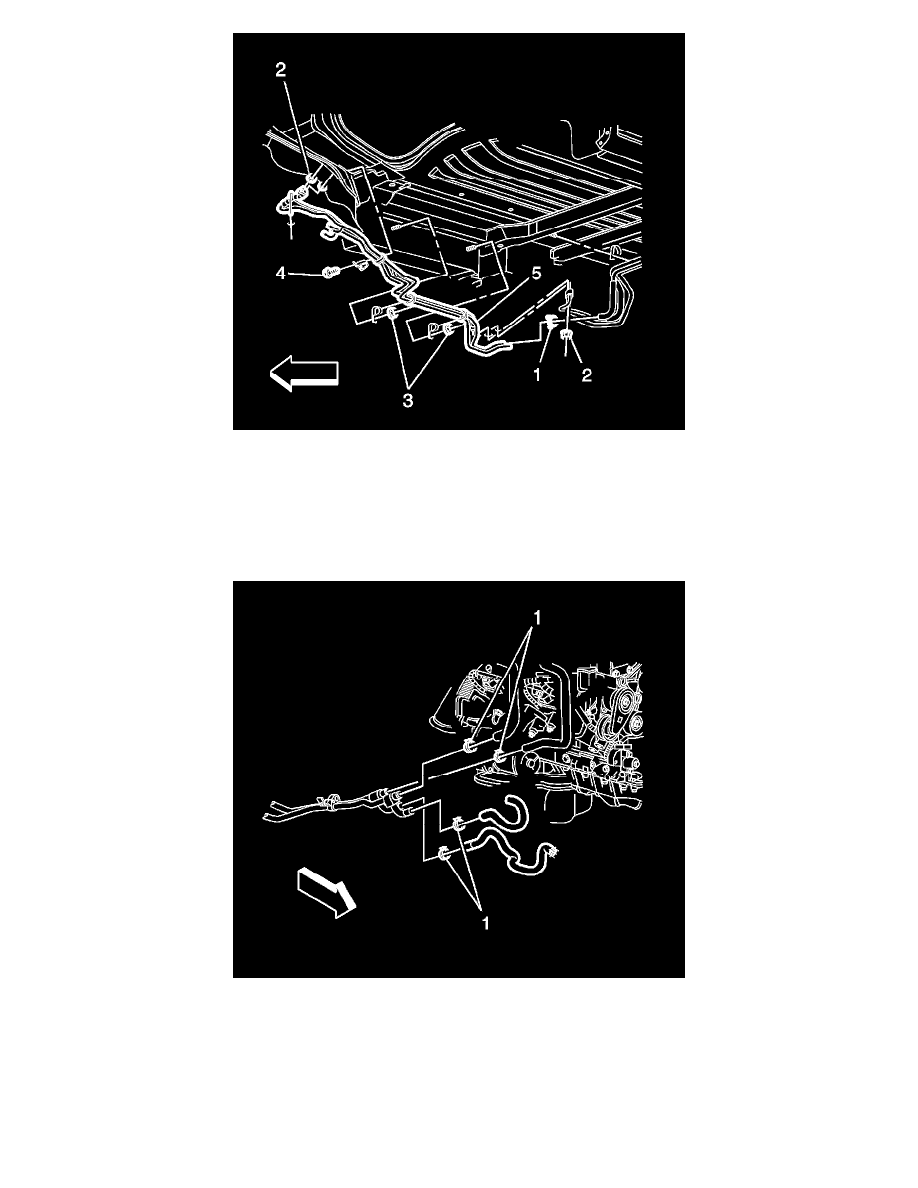
2. Install auxiliary a/c and heater hose bracket bolt (4) and tighten to6 Nm (5 lb in).
3. Install auxiliary a/c and heater hose bracket nuts (3) and tighten to7 Nm (6 lb in).
4. Install auxiliary a/c evaporator nut (2) and tighten to16 Nm (12 lb ft).
5. Install auxiliary heater hose clamps (1).
6. Install rear auxiliary heater hose clamp (1).
7. Slowly and carefully lower the passenger side of the body onto the frame.
8. Install passenger side body mount bolts and tighten to140 Nm (103 lb ft).
9. Tighten driver side body mount bolts and tighten to140 Nm (103 lb ft).
10. Install the passenger side wheel house splash shield. Refer to Wheelhouse Splash Shield Replacement (See: Body and Frame/Fender/Rear
Fender/Rear Fender Liner/Service and Repair)
11. Lower the vehicle. Refer to Lifting and Jacking the Vehicle (See: Vehicle Lifting/Service and Repair)
12. Install the accumulator. Refer to Air Conditioning Accumulator Replacement (See: Heating and Air Conditioning/Accumulator HVAC/Service