
Suburban 3/4 Ton 4WD V8-305 5.0L (1986)
Compressor Clutch Coil: Service and Repair
Installation
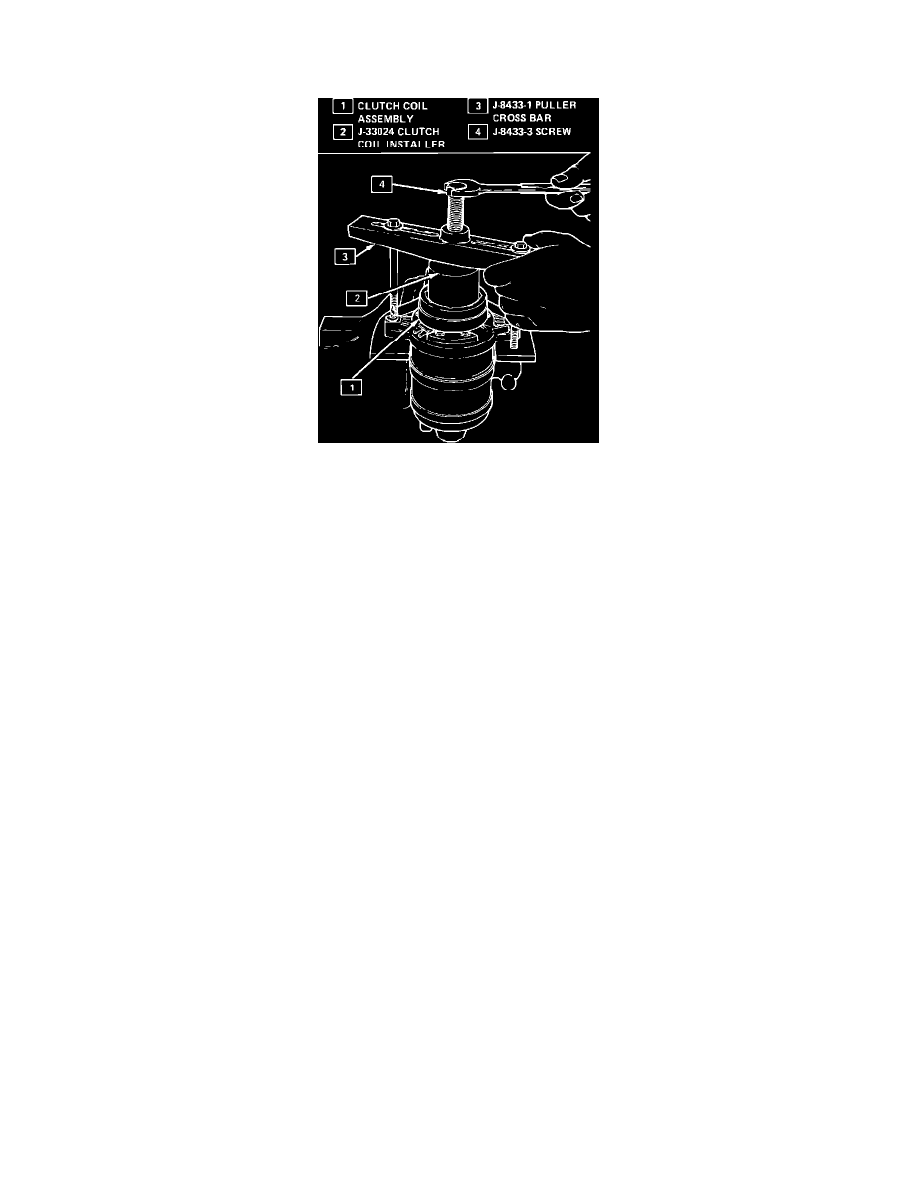
Fig. 4 Installing clutch coil assembly
1.
Position clutch coil assembly on front head with terminals located at mark.
2.
Place clutch coil installer J-33024 over internal opening of clutch coil housing and align installer and clutch coil with compressor front head.
3.
Center puller crossbar J-8433-1 in countersunk center hole of clutch coil installer J-33024. Install through bolts and washers J-33026-2 through
crossbar slots and thread into holding fixture J-33026, Fig. 4.
4.
Turn center screw of crossbar to force clutch coil on to front head, ensuring installer and coil stay in-line.
5.
With coil fully seated on front head, stake front head at 3 places 120° apart using a 1/8 inch drift punch. Stakes should be about .010-.015 inch
deep and half the area of punch tip.
6.
Install rotor and bearing assembly and clutch plate and hub assembly.