
Suburban 3/4 Ton 4WD V8-305 5.0L (1986)
Differential Clutch: Service and Repair
8 7/8 Inch Ring Gear
Cam Gear Clutch
If cam plate or clutch discs must be replaced, the cam gear subassembly must be serviced as follows:
1.
Measure and record overall length of gear assembly (front face of gear to back side of thrust ring, including shim). This dimension will be needed
to reassemble unit if thrust ring is replaced. Do not replace thrust ring unless necessary. If ring is excessively worn or scored, check bore in case
for scoring. If bore is scored, replace entire differential.
2.
With gear hub end up, compress disc pack and install jaws of split ring bearing remover between the thrust ring and the top eared disc. Bevel side
of bearing remover should face up toward thrust ring.
3.
Place cam gear assembly with bearing remover attached in an arbor press supporting the bearing remover on both sides.
4.
Install a 1-1/2 inch to 1-3/4 inch diameter plug on gear hub. Press against plug with ram of press to remove thrust ring. Keep components in proper
order.
5.
Place gear on bench with hub end up.
6.
Assemble cam plate with cam form down to mate with cam form on gear.
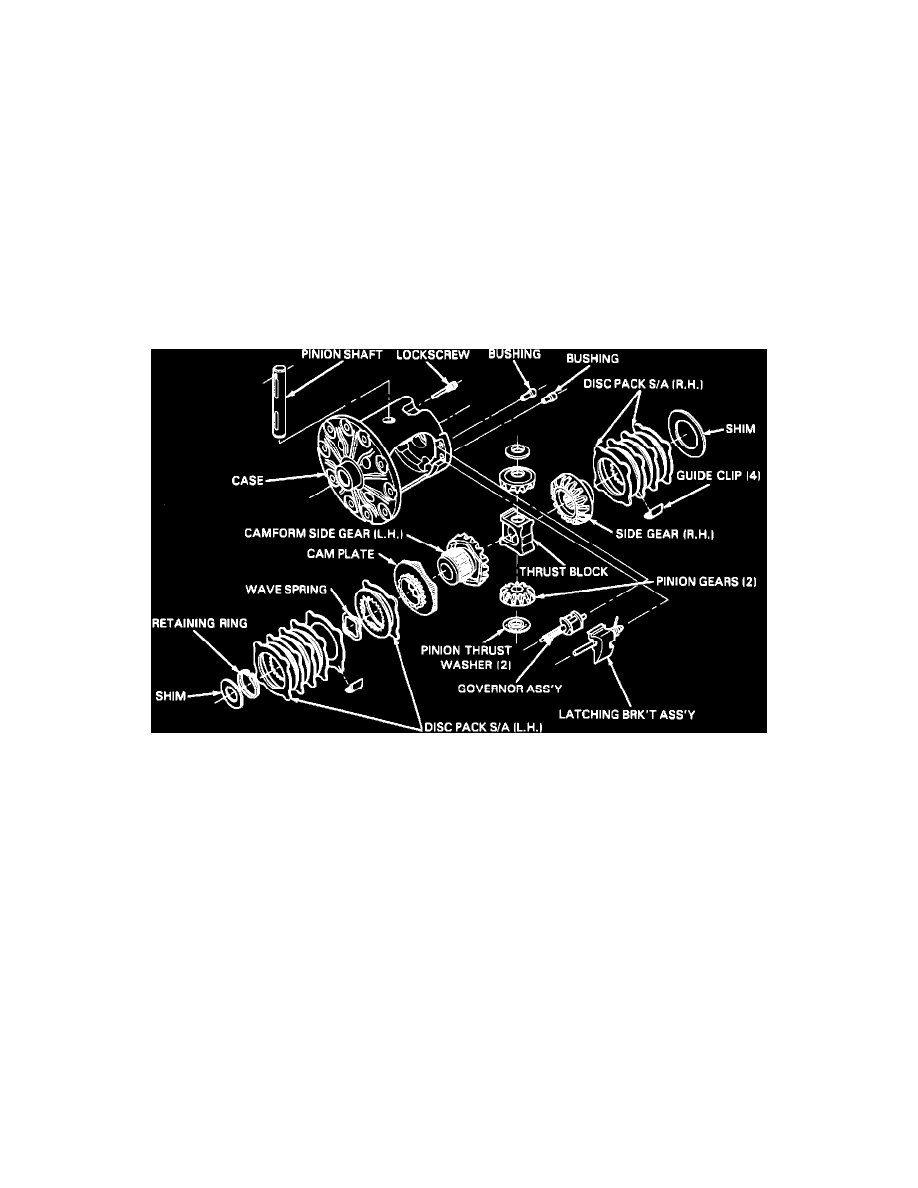
Fig. 8 Exploded View Of Eaton Locking Differential. Models With 8 1/2 Inch Ring Gear
7.
Assemble onto cam plate: 2 eared discs, 1 splined disc, and 1 wave spring alternately, Fig. 8.
8.
Assemble onto gear hub: 2 splined discs and 3 eared discs alternately, Fig. 8.
9.
Locate cam gear assembly in arbor press with hub end up. Place thrust ring on gear hub and press to shoulder making sure that ring is square with
hub. Compress disc pack by pushing down on the discs to keep the splined discs from becoming wedged between the thrust ring and gear shoulder
while pressing the subassembly together.
Side Gear (RH) Clutch