
Yukon Denali AWD V8-6.2L (2007)
Compressor Clutch Hub: Service and Repair
COMPRESSOR CLUTCH PLATE/HUB ASSEMBLY REPLACEMENT
REMOVAL PROCEDURE
1. Raise and suitably support the vehicle. Refer to Vehicle Lifting.
2. Remove the engine protection shield.
3. Install a ratchet into the air conditioning (A/C) belt tensioner adapter opening.
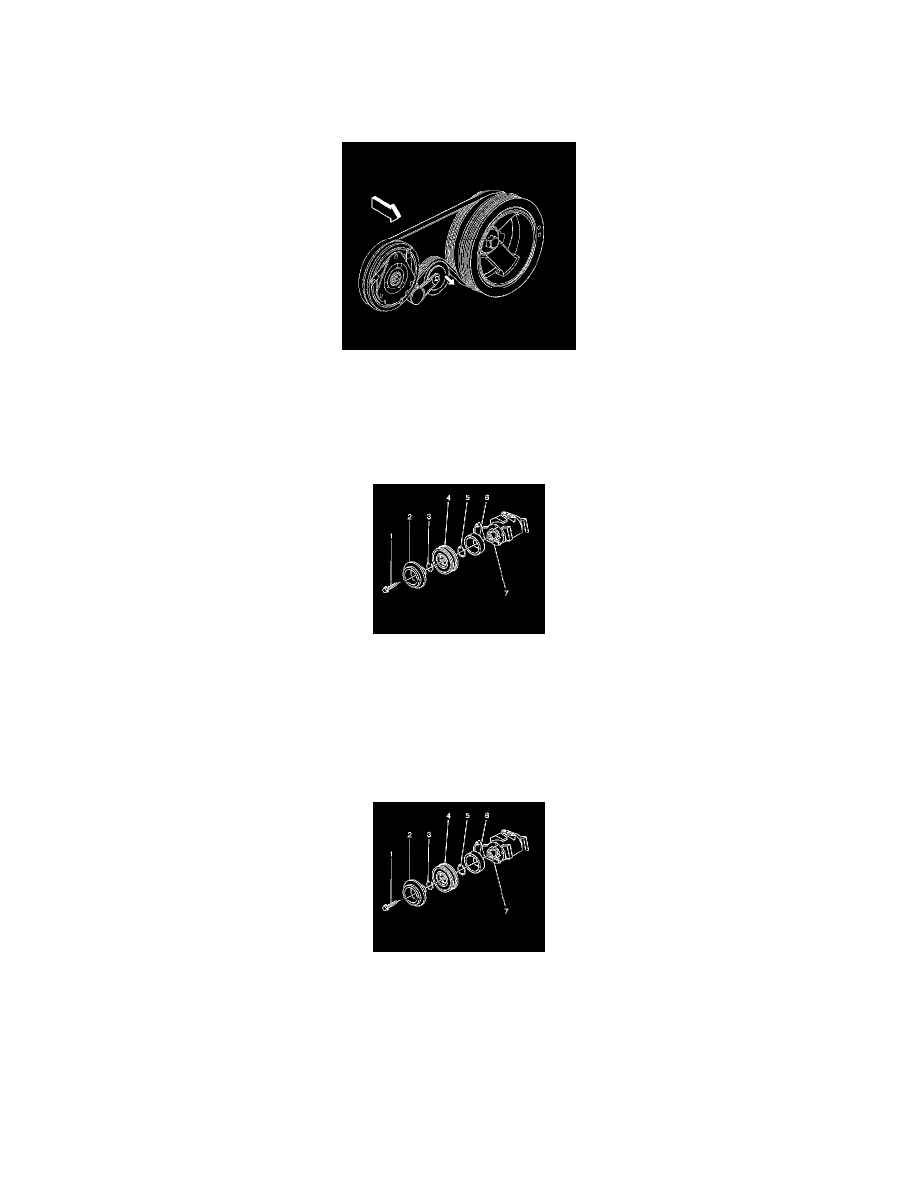
4. Rotate the A/C belt tensioner clockwise in order to relieve the tension on the belt.
5. Remove the A/C belt from the A/C compressor.
6. Slowly release the tension on the A/C belt tensioner.
7. Remove the clutch plate retaining bolt (1).
8. Remove the clutch plate assembly (2).
9. Remove the clutch hub/bearing snap ring (3).
10. Remove the clutch hub/bearing assembly (4).
11. Remove the snap ring (5) from the clutch coil (6).
12. Remove the clutch coil (6) from the A/C compressor (7).
INSTALLATION PROCEDURE
1. Install the clutch coil (6) to the A/C compressor (7).
2. Install the snap ring (5) to the clutch coil (6).
3. Install the clutch hub/bearing assembly (4).
4. Install the clutch hub/bearing snap ring (3).
5. Place a small amount of oil on the thinnest air gap shim and place it inside the clutch plate.