
Accord L4-2.4L (2005)
Oil Pan: Service and Repair
Oil Pan Installation
Oil Pan Installation
1. Remove all of the old liquid gasket from the oil pan mating surfaces, bolts, and bolt holes.
2. Clean and dry the oil pan mating surfaces.
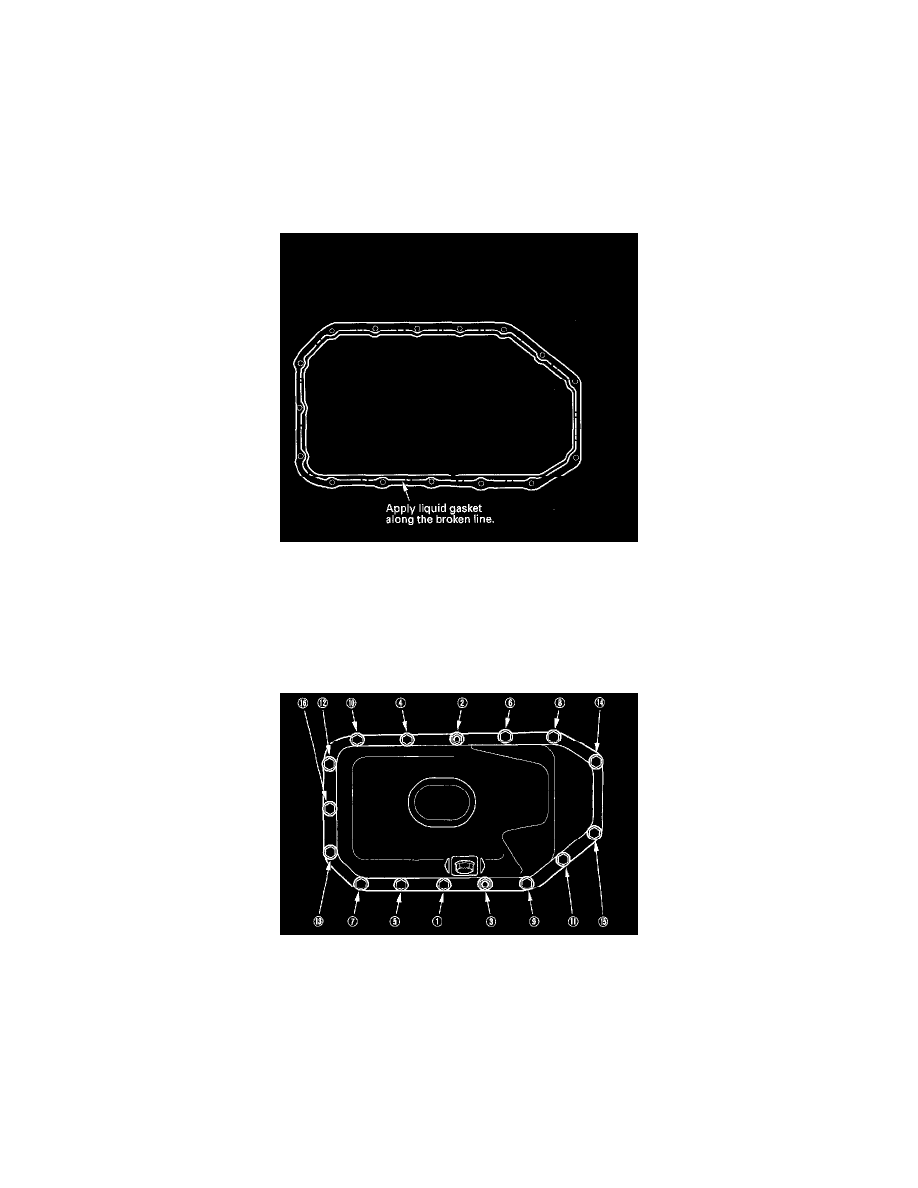
3. Apply liquid gasket, P/N 08718-0001, 08718-0002, 08718-0009, evenly to the engine block mating surface of the oil pan and to the inner threads
of the bolt holes.
NOTE: Do not install components if too much time has passed after applying the liquid gasket (for P/N 08718-0002, no more than 4 minutes,
for all others, no more than 5 minutes). Instead, remove the old residue and reapply the liquid gasket.
4. Install the oil pan.
5. Tighten the bolts in two or three steps. In the final step, tighten all bolts, in sequence, to 12 Nm (1.2 kgf-m, 8.7 ft. lbs.). Wipe off the excess liquid
gasket on the each side of crankshaft pulley and flywheel/drive plate.
NOTE:
^
Wait at least 30 minutes before filling the engine with oil.
^
Do not run the engine for at least 3 hours after installing the oil pan.
6. Install the stiffener.
7. If the engine is still in the vehicle, do the following steps.
8. Tighten the nuts securing the transmission lower front mount and transmission lower rear mount.
9. Install a new set ring on the end of the left side driveshaft, then install the driveshaft. Make sure each ring "clicks" into place in the differential.
10. Connect the left side suspension lower arm ball joint.
11. Install the left side damper fork.
12. Connect the stabilizer links.
13. Lower the hoist.
14. Tighten the front mount bolt, then install the front mount stop.
15. Tighten the rear mount bolt, then install the rear mount stop.
16. Loosen the mount bolt, then install the transmission upper mount/bracket assembly, clutch line clamp bracket and ground cable (M/T).