
Windshield: Diagrams (page 7 of 8)
- Make
- Honda
- Model
- Ridgeline
- Engine
- V6-3.5L
- Year
- 2006
- Section
- Windshield
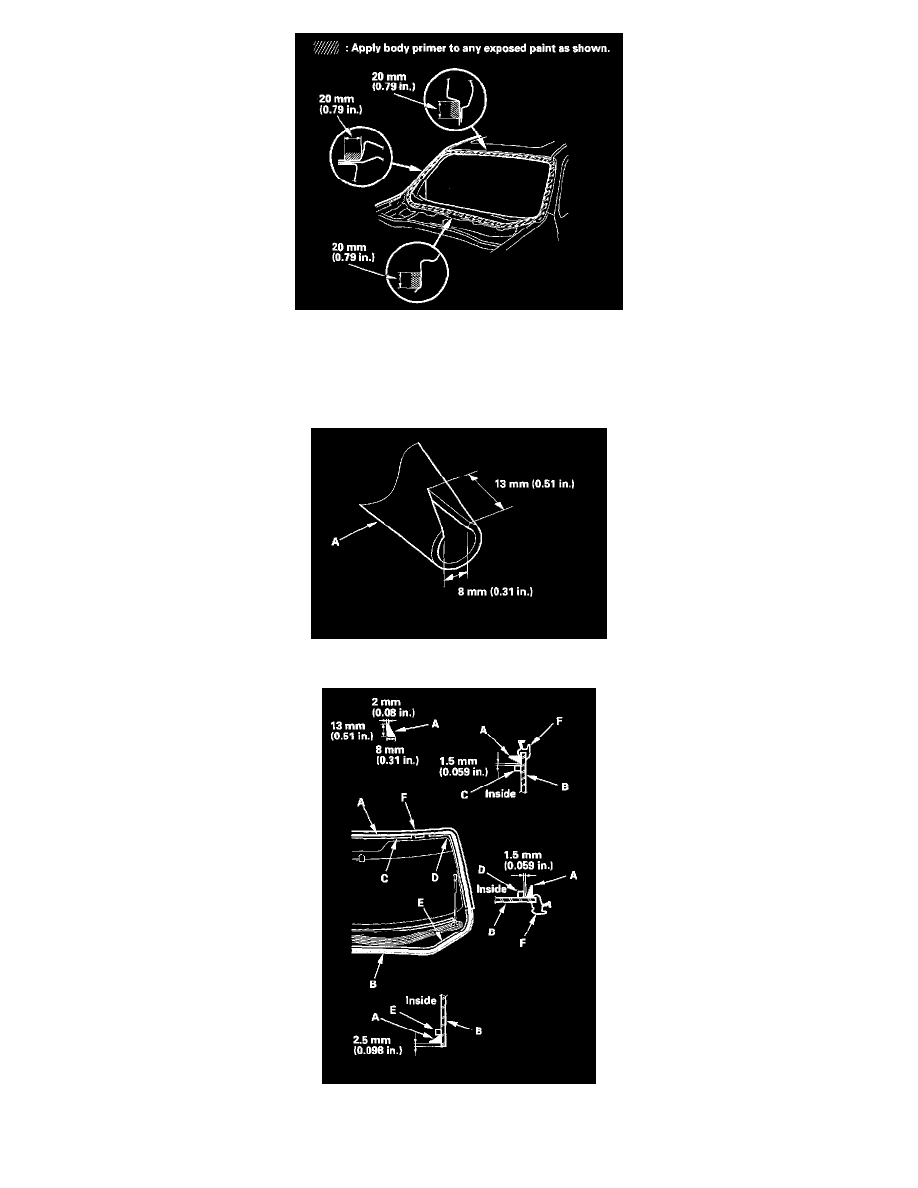
20. With a sponge, carefully apply a light coat of body primer to any exposed paint around the flange where new adhesive will be applied. Let the
primer dry for at least 10 minutes:
-
Do NOT apply body primer to any remaining original adhesive on the flange.
-
Be careful not to mix up the body and glass primer sponges.
-
Never touch the primed surface with your hands.
21. Cut a "V" in the end of the nozzle (A) on the adhesive cartridge as shown.
22. Put the cartridge in a caulking gun, and run a bead of adhesive (A) around the edge of the windshield (B) between the upper rubber dam (C), side
rubber dams (D)lower rubber dam (E), and molding (F) as shown. Apply the adhesive within 30 minutes after applying the glass primer. Make a
Pinch or Ctrl + scroll to zoom. Double-tap to reset.
Parts & tools for this job For 2006 Honda Ridgeline 3.5L
- TOOLTrim removal tool kitSearch: trim removal tool kit
- PARTTouch-up paintSearch: Honda touch up paint
- PARTPanel clip assortmentSearch: Honda panel clips assortment
Links open Amazon search results in a new tab. As an Amazon Associate I earn from qualifying purchases.