
Windshield: Diagrams (page 6 of 8)
- Make
- Honda
- Model
- Ridgeline
- Engine
- V6-3.5L
- Year
- 2006
- Section
- Windshield
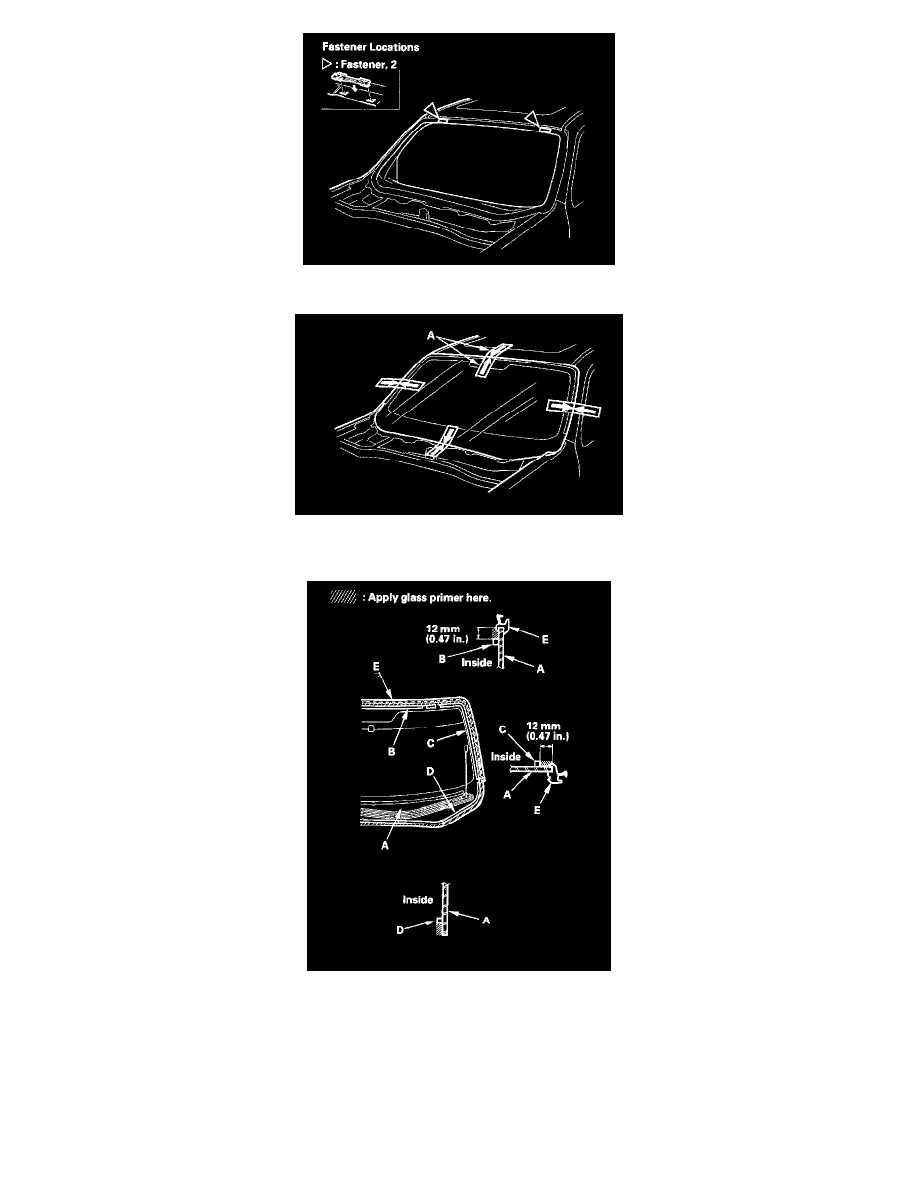
17. Install the fasteners to the body.
18. Set the windshield in the opening, and center it. Make alignment marks (A) across the windshield and body with a grease pencil at the four points
shown. Be careful not to touch the windshield where adhesive will be applied.
19. With a sponge, apply a light coat of glass primer around the edge of the windshield (A) between the upper rubber dam (B), side rubber dams (C),
lower rubber dam (D), and molding (E) as shown, then lightly wipe it off with gauze or cheesecloth:
-
Apply glass primer to the molding.
-
Do not apply body primer to the windshield, and do not get the body and glass primer sponges mixed up.
-
Never touch the primed surfaces with your hands. If you do, the adhesive may not bond to the windshield properly, causing a leak after the
windshield is installed.
-
Keep water, dust, and abrasive materials away from the primed surfaces.
Pinch or Ctrl + scroll to zoom. Double-tap to reset.
Parts & tools for this job For 2006 Honda Ridgeline 3.5L
- TOOLTrim removal tool kitSearch: trim removal tool kit
- PARTTouch-up paintSearch: Honda touch up paint
- PARTPanel clip assortmentSearch: Honda panel clips assortment
Links open Amazon search results in a new tab. As an Amazon Associate I earn from qualifying purchases.