
H2 V8-6.2L (2008)
4. Install new O-rings with replacement auxiliary A/C tubes. Refer to O-Ring Replacement (See: Heating and Air Conditioning/Coupler HVAC/A/C
Coupler O-ring/Service and Repair/O-Ring Replacement) .
Notice: Refer to Fastener Notice (See: Service Precautions/Vehicle Damage Warnings/Fastener Notice) .
Important: Use a adjustable wrench or equivalent holding tool at tube connections to prevent twisting.
Important: Mandatory torque sequence required for proper connections.
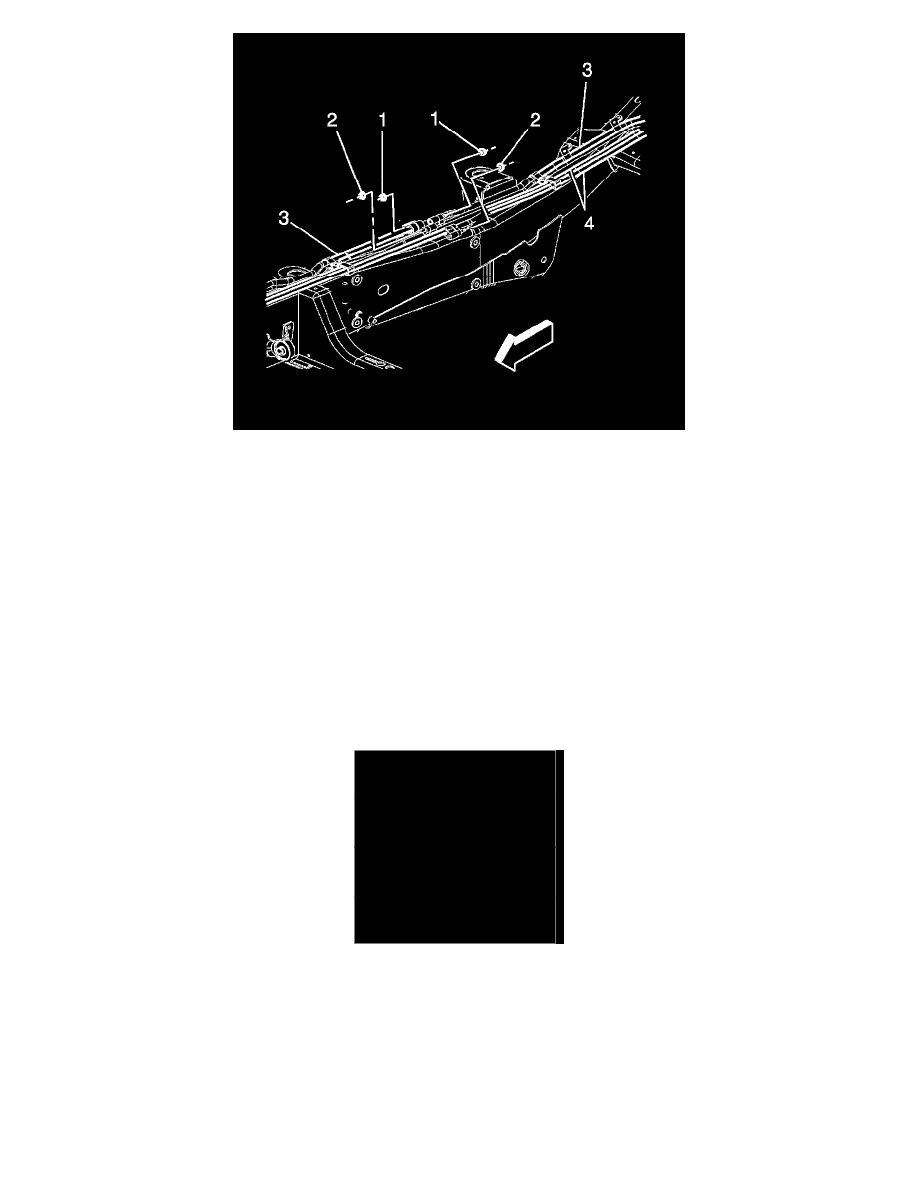
5. Install the auxiliary A/C tube connection nuts (1) to the intermediate connection point.
Tighten the nuts to 16 N.m (12 lb ft).
6. Install the right assist step if necessary. Refer to Assist Step Replacement (w/WS2, BVX) (See: Body and Frame/Auxiliary Step / Running
Board/Service and Repair/Assist Step Replacement (w/WS2, BVX))Assist Step Replacement (Tubular BVE) (See: Body and Frame/Auxiliary
Step / Running Board/Service and Repair/Assist Step Replacement (Tubular BVE)) .
7. Lower the vehicle.
8. Install new O-rings with replacement auxiliary A/C tubes. Refer to O-Ring Replacement (See: Heating and Air Conditioning/Coupler HVAC/A/C
Coupler O-ring/Service and Repair/O-Ring Replacement) .
9. Install the auxiliary evaporator hose nuts (1) to the main evaporative hose connections.
Tighten the nuts to 16 N.m (12 lb ft).
10. Install the air cleaner resonator outlet duct. Refer to Air Cleaner Resonator Outlet Duct Replacement (See: Filters/Air Cleaner Housing/Air
Cleaner Fresh Air Duct/Hose/Service and Repair) .
11. Recharge the refrigerant to the system. Refer to Refrigerant Recovery and Recharging (See: Heating and Air Conditioning/Service and
Repair/Refrigerant Recovery and Recharging) .
12. Leak test the fittings of the component using the J 39400-A .