
H2 V8-6.2L (2008)
Perform the following steps in order to inspect the center seat belts:
1. Verify that the center seat belts are accessible.
2. Verify that the center seat belts have no twists or tears in the webbing.
3. Snap the center seat belt latch plate into the buckle.
4. Sharply tug on the seat belt latch plate and the buckle. Verify that the seat belt latch plate and the buckle remain locked when tugged.
5. Push the button on the buckle:
*
Verify that the seat belt latch plate releases easily from the buckle.
*
Verify that the button returns to its original position.
Repeat the inspection procedure, steps 2-10, from the rear seats. The child restraint feature is located on the outboard position for the rear seat.
Repeat the center seat belt inspection procedure, steps 1-5, from the rear seat.
For information on removal of the rear seats cushions, refer to the following procedures:
*
Rear Seat Replacement (See: Body and Frame/Seats/Service and Repair/Rear Seat Replacement)
*
Rear Number 2 Seat Replacement (See: Body and Frame/Seats/Service and Repair/Rear Number 2 Seat Replacement)
*
Rear Seat Cushion Frame Replacement (See: Body and Frame/Seats/Seat Cushion/Service and Repair/Rear Seat Cushion Frame Replacement)
Emergency Locking Retractors
Caution: Perform this test in an area clear of other vehicles or obstructions. Do not conduct this test on the open road. A large, empty parking lot is
suitable. Failure to observe this precaution may result in damage to the vehicle and possible personal injury.
1. Fasten the seat belts, an assistant is needed when the retractor under test is not part of the driver seat belt.
2. Accelerate the vehicle slowly to 16 km/h (10 mph) and apply the brakes firmly.
3. Verify that the seat belt locks when braking firmly.
4. If the belt does not lock, proceed with the following steps:
1. Remove the seat belt retractor assembly.
2. Tilt the seat belt retractor slowly.
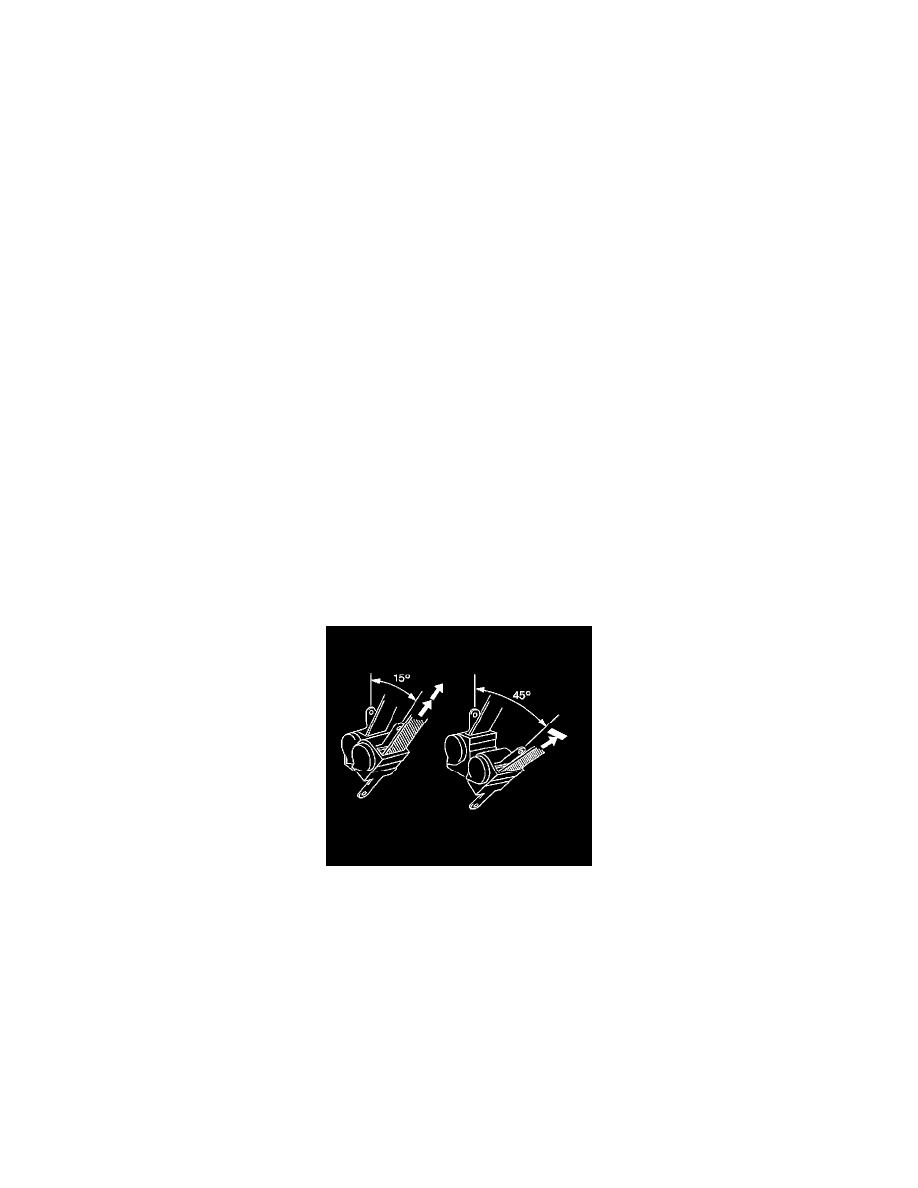
3. Ensure that the seat belt webbing can be pulled from the retractor at an inclination of 15 degrees or less and cannot be pulled from the retractor
at an inclination of 45 degrees or more.
4. If the seat belt retractor does not operate as described, replace the retractor assembly. Refer to the following procedures:
*
Seat Belt Retractor Replacement - No. 1 Rear (See: Seat Belt Systems/Seat Belt Retractor/Service and Repair/Seat Belt Retractor
Replacement - No. 1 Rear)
*
Seat Belt Retractor Replacement - No. 2 Rear (See: Seat Belt Systems/Seat Belt Retractor/Service and Repair/Seat Belt Retractor
Replacement - No. 2 Rear)