Veracruz FWD V6-3.8L (2009)

B. Remove the rubber dam and fasteners from the body.
C. Mask off surrounding surfaces before painting.
2. Clean the bonding surface with a sponge dampened in alcohol. After cleaning, keep oil, grease and water from getting on the clean surface.
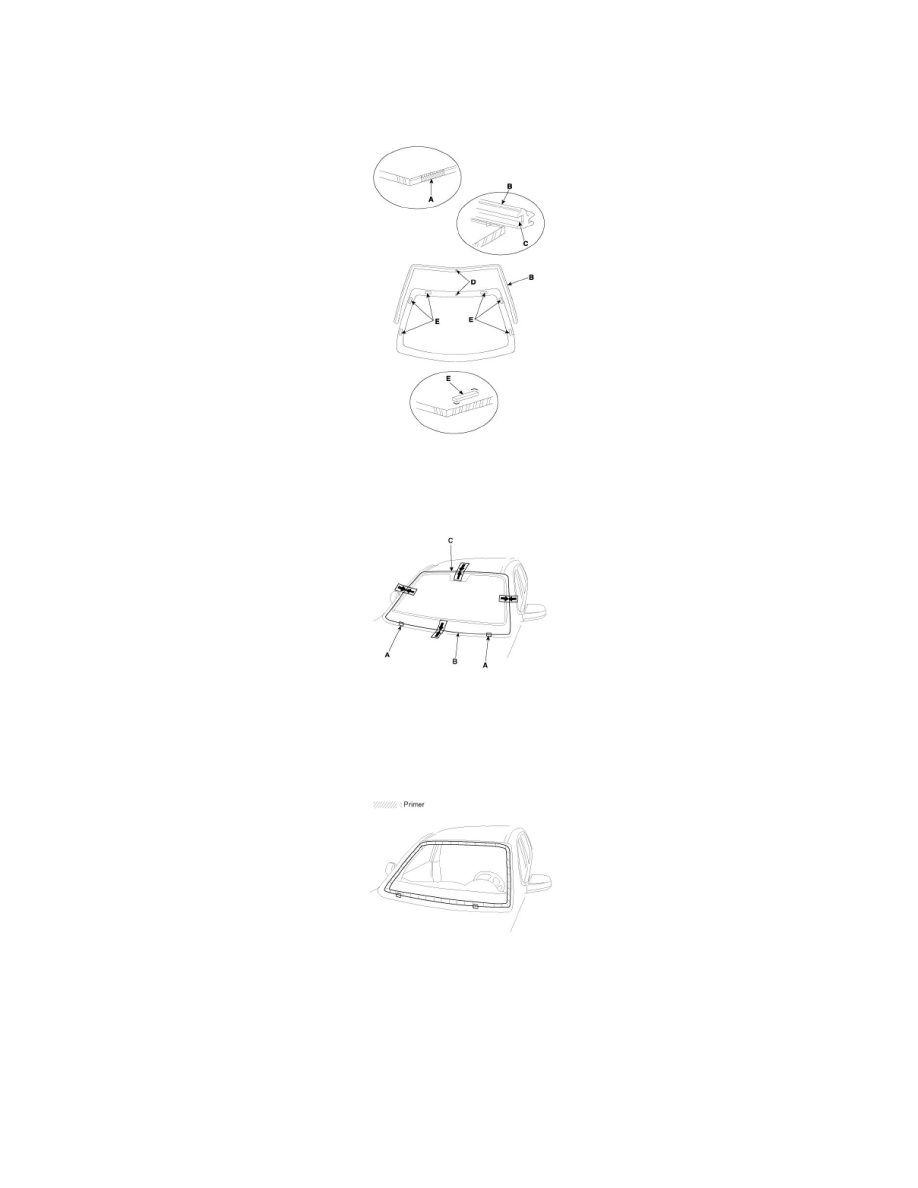
3. Apply the glass primer (A) to the side of the windshield glass edge and stick the both sided adhesive tape (B) on the inside of molding (C).
4. When attaching the molding, make it in line (D) with the windshield glass and attach the windshield glass pad (E) to the designated place.
5. Install the spacer (A) install the windshield glass (B) temporarily with marking sure to position them on the center, and then place the alignment
mark (C).
6. Remove the windshield.
7. With a sponge, apply a light coat of body primer to the original adhesive remaining around the windshield opening flange. Let the body primer dry
for at least 10 minutes.
A. Do not apply glass primer to the body, and be careful not to mix up glass and body primer sponges.
B. Never touch the primed surfaces with your hands.
C. Mask off the dashboard before painting the flange.
8. Apply a light coat of glass primer to the outside of the fasteners.
NOTE:
-
Never touch the primed surface with your hand.
If you do, the adhesive may not bond to the glass properly, causing a leak after the windshield glass is installed.
-
Do not apply body primer to the glass.
-
Keep water, dust, and abrasive materials away from the primer.
