Amigo 2WD V6-3.2L (1999)

Control Arm: Service and Repair
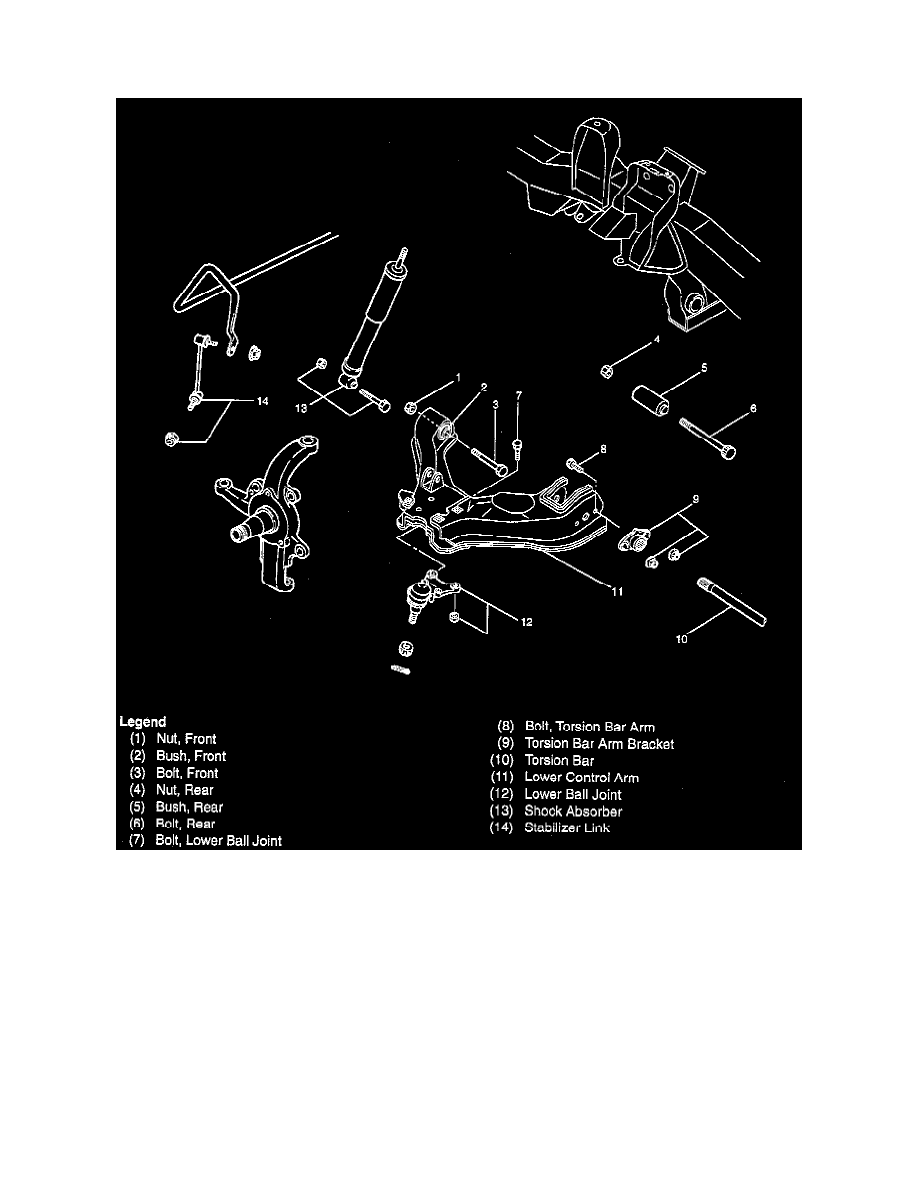
Lower Control Arm
REMOVAL
1. Raise the vehicle and support the frame with suitable safety stands.
2. Remove wheel and tire assembly.
3. Remove the tie-rod end from the knuckle.
4. Support lower control arm with a jack.
5. Remove front nut.
6. Remove rear nut.
7. Remove torsion bar.
8. Remove torsion bar arm bracket.
9. Disconnect the stabilizer link at the lower control arm.
10. Remove the shock absorber lower end from the lower control arm.
11. Remove the lower ball joint from the lower control arm.
12. Remove front bolt.
13. Remove rear bolt.
14. Remove lower control arm.
15. Remove torsion bar arm bolt.
