
Hombre XS Space Cab L4-2.2L CPC (1997)
Pitman Arm: Service and Repair
REMOVAL
NOTE:
^
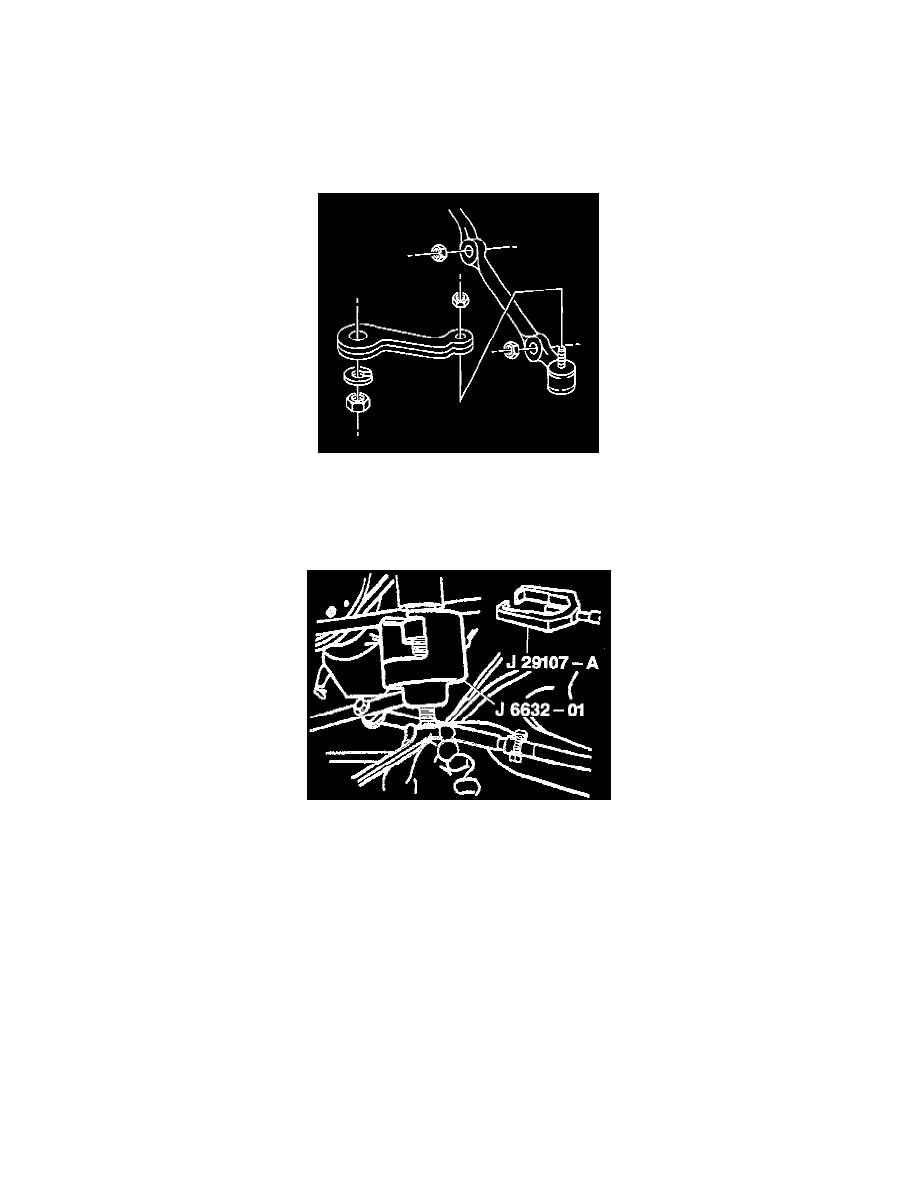
The Special Service Tools (SSTs) required to complete the following procedures are a J 24319-B universal steering linkage puller, a J 29107
universal pitman arm puller, a J 6632-01 pitman arm puller, and a J 29193 steering linkage installer (12 mm).
^
Use the proper tool to separate all ball joints.
1. Raise the vehicle and support it with jack stands then remove the relay rod ball stud nut at pitman arm. Do not reuse the nut.
2. Detach the relay rod ball stud from pitman arm using the Special Service Tool (SST) J 24319-B.
3. Remove the pitman arm nut and washer. Mark the pitman arm and the pitman shaft. This will permit proper alignment at the assembly.
NOTE: Do not hammer on the pitman arm, pitman shaft, or the puller. Damage to the pitman arm or steering gear may result.
4. Remove the pitman arm using either the J 6632-01 or J 29107 tool then inspect the pitman arm for the following.
a. The ball stud threads for damage.
b. The ball stud seals for excessive wear.
5. Clean the threads on the ball stud.
INSTALLATION
1. Attach the pitman arm on the pitman shaft. Line up the marks made at removal.
2. Put the pitman arm washer and nut on the pitman arm and tighten the pitman arm nut to 250 Nm (185 ft. lbs.).
3. Attach the relay rod ball stud to the pitman arm. Make sure the seal is on the stud then tighten either the J 29193 or J 29194 tool to 62 Nm (48 ft.
lbs.) to seat the tapers then remove the tool.
4. Install a new relay rod prevailing torque nut to the pitman arm and tighten the nut to 82 Nm (60 ft. lbs.).
5. Lower the vehicle.