
Hombre XS Space Cab L4-2.2L CPC (1997)
Stabilizer Bar: Service and Repair
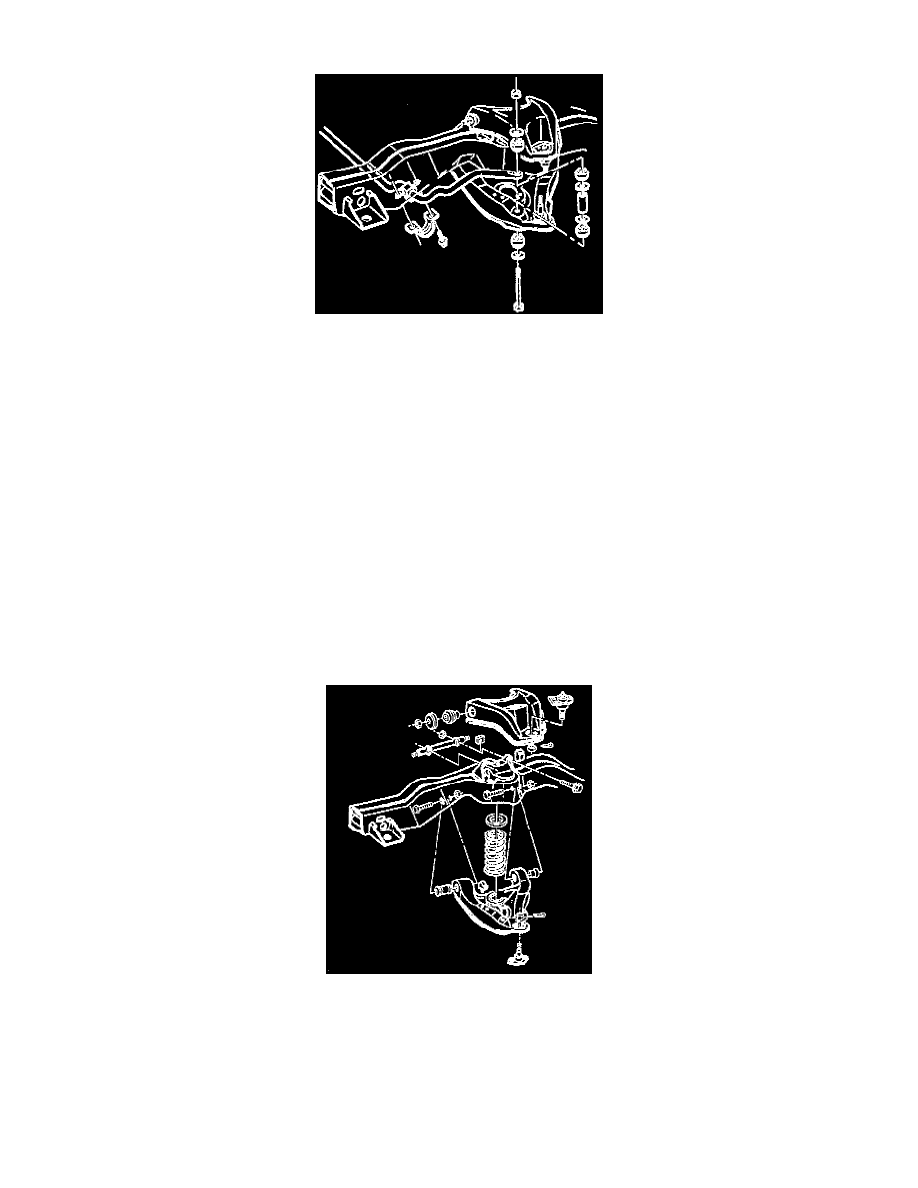
REMOVAL
1. Raise the vehicle and support it with safety stands, then remove the nut from the link bolt.
NOTE: Make sure to remove parts from the right and left side of the vehicle and keep them separated.
2. Remove the following components in this order.
a. The retainer.
b. Remove the grommet.
c. Remove the link bolt kit, removing the following pieces,
^
Grommet.
^
Retainer.
^
Spacer.
^
Retainer.
^
Grommet.
^
Grommet.
^
Retainer.
3. Remove the bracket.
4. Remove the bolts.
5. Remove the stabilizer bar, then remove the rubber bushing.
6. After removing the stabilizer bar, inspect all the parts for wear and damage.
INSTALLATION
1. Place the rubber bushings onto the stabilizer shaft making sure the bushings are placed on the stabilizer shaft with slits facing toward the front of
the vehicle.
2. Install the stabilizer shaft.
3. Place the brackets over the bushings and stabilizer shaft.
4. Insert the bolts onto the brackets and frame tightening the bolts in four places to 36 Nm (26 ft. lbs.).
5. Place the retainers and the grommets onto the link bolts making sure part positioning is correct.
6. Insert the link bolt kits through the lower control arm hole with the parts stacked properly in this order.
a. Grommets.