
Rodeo LS 4WD V6-3.2L (1998)
Battery: Testing and Inspection
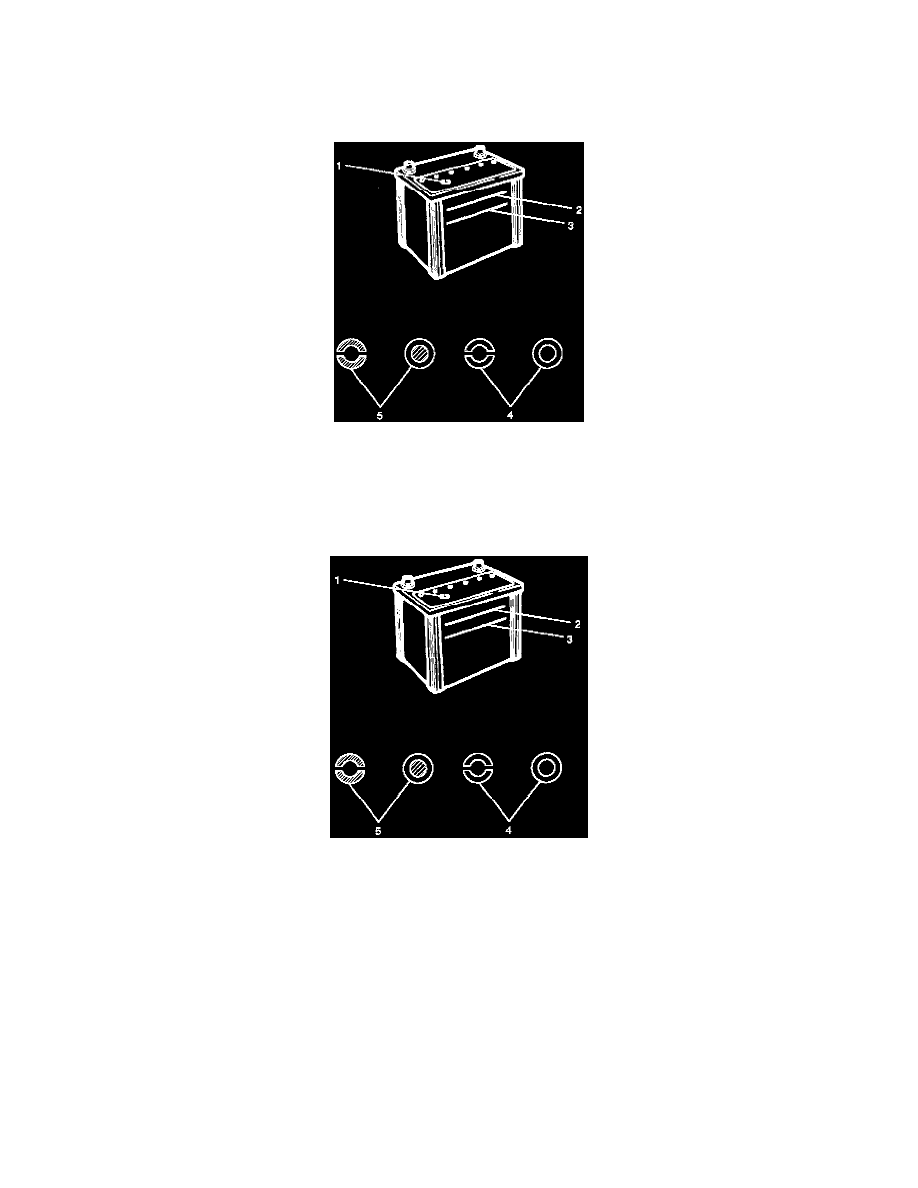
1. Visual Inspection
Inspect the battery for obvious physical damage, such as a cracked or broken case, which would permit electrolyte loss.
Replace the battery if obvious physical damage is discovered during inspection.
Check for any other physical damage and correct it as necessary.
2. Hydrometer Check
There is a built-in hydrometer (Charge test indicator (1)) at the top of the battery. It is designed to be used during diagnostic procedures.
Before trying to read the hydrometer, carefully clean the upper battery surface.
If your work area is poorly lit, additional light may be necessary to read the hydrometer.
a. BLUE RING OR DOT VISIBLE (5) - Go to Step 4.
b. BLUE RING OR DOT NOT VISIBLE (4) - Go to Step
3. Fluid Level Check
The fluid level should be between the upper level line (2) and lower level line (3) on side of battery.
a. CORRECT FLUID LEVEL - Charge the battery.
b. BELOW LOWER LEVEL - Replace battery.
4. Voltage Check
1. Put voltmeter test leads to battery terminals.
a. VOLTAGE IS 12.4V OR ABOVE - Go to Step 5.
b. VOLTAGE IS UNDER 12.4V - Go to procedure (2) below.
2. Determine fast charge amperage from specification.
(See Main Data and Specifications in this section).
Fast charge battery for 30 minutes at amperage rate no higher than specified value.
Take voltage and amperage readings after charge.
a. VOLTAGE IS ABOVE 16V AT BELOW 1/3 OF AMPERAGE RATE - Replace battery.
b. VOLTAGE IS ABOVE 16V AT ABOVE 1/3 OF AMPERAGE RATE - Drop charging voltage to 15V and charge for 10 - 15 hours. Then
go to Step 5.
c. VOLTAGE IS BETWEEN 12V AND 16V - Continue charging at the same rate for an additional 3-1/2 hours. Then go to Step 5.
d. VOLTAGE BELOW 12V - Replace Battery.